Are you looking for an easy way to save a voice message on your iPhone? Look no further savewhere.net is here to help. Saving voice messages on your iPhone can be incredibly useful for preserving important information, cherished memories, or even crucial business communications. With the right steps, you can easily store these audio files for future use. Let’s explore how you can efficiently manage and save your voicemails, ensuring you never lose those valuable messages again.
1. Understanding Visual Voicemail on Your iPhone
Visual Voicemail is a feature on iPhones that allows you to see a list of your voicemails, listen to them in any order, and manage them more efficiently than traditional voicemail. It’s a convenient way to stay organized and ensure you don’t miss any important messages.
1.1. What is Visual Voicemail?
Visual Voicemail transforms your voicemail experience by displaying a list of your messages, complete with the caller’s information, date, and time. This feature lets you pick and choose which messages to listen to, delete, or save.
1.2. Benefits of Using Visual Voicemail
- Convenience: Listen to messages in any order.
- Efficiency: Quickly identify and prioritize important messages.
- Organization: Easily manage and delete old voicemails.
- Accessibility: Share and save voicemails for future reference.
1.3. How to Set Up Visual Voicemail
To set up Visual Voicemail:
- Go to Phone App: Open the Phone app on your iPhone.
- Tap Voicemail: Select the “Voicemail” tab at the bottom right.
- Set Up Now: Tap “Set Up Now” if you haven’t already.
- Create a Password: Enter a password for your voicemail.
- Record a Greeting: Choose between a default greeting or create a custom one.
According to Apple Support, setting up Visual Voicemail ensures you have access to features that allow you to manage your voicemails more effectively.
2. Saving a Voice Message Directly from Visual Voicemail
One of the easiest ways to save a voice message is directly through the Visual Voicemail interface. This method allows you to save the message to various locations, including Voice Memos and Files.
2.1. Step-by-Step Guide to Saving
- Open Phone App: Launch the Phone app on your iPhone.
- Go to Voicemail: Tap the “Voicemail” tab.
- Select the Message: Choose the voicemail you want to save.
- Tap the Share Icon: Look for the share icon (a square with an arrow pointing upwards).
- Choose Save Location:
- Voice Memos: Tap “Voice Memos” to save the message as a voice memo.
- Files: Tap “Files” to save it to a folder on your iPhone or iCloud Drive.
- Save: If saving to Files, choose a location and tap “Save.”
2.2. Saving to Voice Memos
Saving to Voice Memos is a great way to keep all your audio recordings in one place. Voice Memos offers basic editing features, allowing you to trim or adjust the recording as needed.
2.3. Saving to Files
Saving to Files gives you more control over where your voicemail is stored. You can create folders, rename files, and organize your voicemails as you see fit. This method is particularly useful for those who want to back up their voicemails to iCloud Drive or another cloud service.
2.4. Renaming the Saved Voice Message
To rename a saved voice message in either Voice Memos or Files:
- Voice Memos:
- Open the Voice Memos app.
- Tap the voicemail you want to rename.
- Tap the name of the recording.
- Enter a new name and tap “Save.”
- Files:
- Open the Files app.
- Navigate to the location where you saved the voicemail.
- Tap and hold the file.
- Select “Rename.”
- Enter a new name and tap “Done.”
3. Using Third-Party Apps to Save Voice Messages
While the built-in methods are convenient, third-party apps can offer additional features and flexibility for saving and managing your voice messages.
3.1. Overview of Available Apps
Several apps are available on the App Store that can help you save and manage your voicemails. Some popular options include:
- Voicemail to Text: Transcribes voicemails to text and allows you to save the audio file.
- Google Voice: Offers voicemail transcription and saving options.
- iMyFone iTransor: A tool for backing up and restoring data, including voicemails.
3.2. How to Use a Third-Party App to Save Voicemails
The process varies depending on the app, but generally, you’ll need to:
- Download and Install: Download the app from the App Store and install it on your iPhone.
- Grant Permissions: Allow the app to access your voicemail.
- Select Voicemail: Choose the voicemail you want to save.
- Save or Export: Follow the app’s instructions to save or export the voicemail.
3.3. Pros and Cons of Using Third-Party Apps
Pros:
- Additional Features: Transcription, advanced organization, and backup options.
- Flexibility: Save voicemails in various formats.
- Convenience: Some apps offer automatic saving and transcription.
Cons:
- Cost: Some apps require a subscription or one-time purchase.
- Privacy Concerns: Granting access to your voicemail may raise privacy concerns.
- Compatibility: Not all apps may be compatible with your carrier or iPhone model.
4. Alternative Methods for Saving Voice Messages
If you’re looking for other ways to save your voice messages, several alternative methods are available.
4.1. Recording the Voicemail with Another Device
One simple method is to play the voicemail on speakerphone and record it using another device, such as a computer, tablet, or another phone.
4.1.1. Steps to Record with Another Device
- Play Voicemail: Put your iPhone on speakerphone and play the voicemail.
- Record: Use another device to record the voicemail.
- Save the Recording: Save the recording on the second device.
4.1.2. Pros and Cons of This Method
Pros:
- Simple: Requires no special software or apps.
- Accessible: Works with any device that can record audio.
Cons:
- Quality: The audio quality may not be as good as other methods.
- Inconvenient: Requires two devices and manual recording.
4.2. Using a Computer to Record Voicemail
You can also use your computer to record voicemail by connecting your iPhone and using audio recording software.
4.2.1. Connecting Your iPhone to Your Computer
- Connect: Use a Lightning cable to connect your iPhone to your computer.
- Trust This Computer: If prompted, tap “Trust This Computer” on your iPhone.
4.2.2. Using Audio Recording Software
- Install Software: Download and install audio recording software, such as Audacity or GarageBand.
- Configure Audio Input: Set the audio input to your iPhone.
- Record: Play the voicemail on your iPhone and record it using the software.
- Save the Recording: Save the recording on your computer.
4.2.3. Pros and Cons of This Method
Pros:
- Better Quality: Potentially better audio quality than recording with another device.
- Editing Options: Audio recording software offers editing features.
Cons:
- More Complex: Requires a computer and audio recording software.
- Time-Consuming: Takes more time to set up and record.
5. Managing Saved Voice Messages
Once you’ve saved your voice messages, it’s important to manage them effectively to keep your files organized and accessible.
5.1. Organizing Voice Memos
The Voice Memos app offers basic organization features, such as renaming recordings and creating folders.
5.1.1. Creating Folders for Different Categories
- Open Voice Memos: Launch the Voice Memos app.
- Tap Edit: Tap “Edit” in the top left corner.
- New Folder: Tap “New Folder” at the bottom.
- Name the Folder: Enter a name for the folder and tap “Save.”
- Move Recordings: Select the recordings you want to move and tap “Move.”
- Choose Folder: Select the folder you want to move them to.
5.1.2. Tagging Voice Memos for Easy Search
While Voice Memos doesn’t offer a tagging feature, you can use descriptive names to make it easier to search for specific recordings.
5.2. Organizing Files
The Files app offers more advanced organization features, such as creating folders, tagging files, and using iCloud Drive for syncing across devices.
5.2.1. Creating a Folder System
- Open Files: Launch the Files app.
- Browse: Navigate to the location where you want to create a folder.
- New Folder: Tap the “More” icon (three dots) in the top right corner and select “New Folder.”
- Name the Folder: Enter a name for the folder and tap “Done.”
5.2.2. Using iCloud Drive for Syncing
To use iCloud Drive for syncing:
- Enable iCloud Drive: Go to Settings > [Your Name] > iCloud and turn on iCloud Drive.
- Save to iCloud Drive: When saving files, choose iCloud Drive as the location.
5.3. Backing Up Your Voice Messages
To ensure you don’t lose your voice messages, it’s important to back them up regularly.
5.3.1. Backing Up to iCloud
- Go to Settings: Open the Settings app.
- Tap [Your Name]: Tap your name at the top.
- Tap iCloud: Select “iCloud.”
- iCloud Backup: Tap “iCloud Backup.”
- Back Up Now: Tap “Back Up Now.”
5.3.2. Backing Up to a Computer
- Connect to Computer: Connect your iPhone to your computer using a Lightning cable.
- Open Finder (macOS) or iTunes (Windows): Open Finder or iTunes.
- Select Your Device: Select your iPhone.
- Back Up Now: Click “Back Up Now.”
According to the Consumer Financial Protection Bureau (CFPB), regularly backing up your data is a crucial step in protecting your important information.
6. Troubleshooting Common Issues
Sometimes, you may encounter issues when trying to save voice messages on your iPhone. Here are some common problems and how to troubleshoot them.
6.1. Visual Voicemail Not Working
If Visual Voicemail isn’t working, try the following:
- Check Cellular Data: Make sure cellular data is enabled for the Phone app.
- Restart Your iPhone: Restart your iPhone.
- Reset Network Settings: Go to Settings > General > Reset > Reset Network Settings.
- Contact Your Carrier: Contact your carrier to ensure Visual Voicemail is enabled on your account.
6.2. Cannot Save Voice Messages
If you’re unable to save voice messages, try the following:
- Check Storage: Make sure you have enough storage space on your iPhone.
- Update iOS: Update to the latest version of iOS.
- Reset Voicemail Password: Reset your voicemail password.
6.3. Audio Quality Issues
If you’re experiencing audio quality issues, try the following:
- Check Microphone: Make sure your microphone is clean and not obstructed.
- Record in a Quiet Environment: Record in a quiet environment to minimize background noise.
- Use a Different App: Try using a different app to record the voicemail.
7. Tips for Efficiently Saving Voice Messages
Here are some additional tips to help you save voice messages more efficiently:
- Prioritize Messages: Focus on saving important messages first.
- Create a System: Develop a consistent naming and organization system.
- Regularly Back Up: Back up your voice messages regularly to prevent data loss.
- Use Cloud Storage: Utilize cloud storage services like iCloud Drive for easy access and syncing.
8. Why Saving Voice Messages Matters
Saving voice messages isn’t just about preserving audio files; it’s about capturing moments, information, and connections that can be invaluable.
8.1. Preserving Important Information
Voice messages often contain important details, such as instructions, contact information, or confirmations. Saving these messages ensures you have a record of this information for future reference.
8.2. Cherishing Memories
Voice messages from loved ones can be treasured keepsakes. Saving these messages allows you to relive those moments and hear the voices of those who matter most to you.
8.3. Business Communications
In a business context, voice messages can serve as records of important conversations, agreements, or instructions. Saving these messages can be useful for documentation and accountability.
9. Real-Life Examples of Saving Voice Messages
Here are a few real-life examples of how saving voice messages can be beneficial:
- John: Saved a voicemail from his doctor outlining important post-surgery instructions, ensuring he followed the guidelines correctly.
- Emily: Saved a birthday message from her grandmother, who has since passed away, allowing her to cherish her voice and memories.
- David: Saved a voicemail from a client confirming project details, which helped resolve a dispute later on.
10. How Savewhere.Net Can Help You Manage Your Finances
While saving voice messages is about preserving important information, managing your finances is about securing your financial future. Savewhere.net offers a range of resources and tools to help you save money and make informed financial decisions.
10.1. Tips and Strategies for Saving Money
Savewhere.net provides practical tips and strategies for saving money in various areas of your life, from shopping and dining to travel and entertainment.
10.2. Reviews and Comparisons of Financial Tools
Savewhere.net offers reviews and comparisons of financial tools, such as budgeting apps, investment platforms, and credit cards, helping you choose the right tools for your needs.
10.3. Success Stories and Inspiration
Savewhere.net shares success stories and inspiration from people who have achieved their financial goals through saving and smart money management.
10.4. Information on Discounts, Promotions, and Special Offers
Savewhere.net provides up-to-date information on discounts, promotions, and special offers, helping you save money on everyday purchases.
10.5. Budgeting and Expense Tracking Guides
Savewhere.net offers guides on how to create a budget and track your expenses effectively, empowering you to take control of your finances.
Saving a voice message on your iPhone is a simple yet valuable skill. Whether you’re preserving important information, cherishing memories, or documenting business communications, knowing how to save and manage your voice messages can make a big difference. And while you’re taking steps to safeguard your information, remember that savewhere.net is here to help you secure your financial future. Explore our resources, discover new ways to save, and join a community of like-minded individuals who are committed to financial well-being.
Address: 100 Peachtree St NW, Atlanta, GA 30303, United States.
Phone: +1 (404) 656-2000.
Website: savewhere.net.
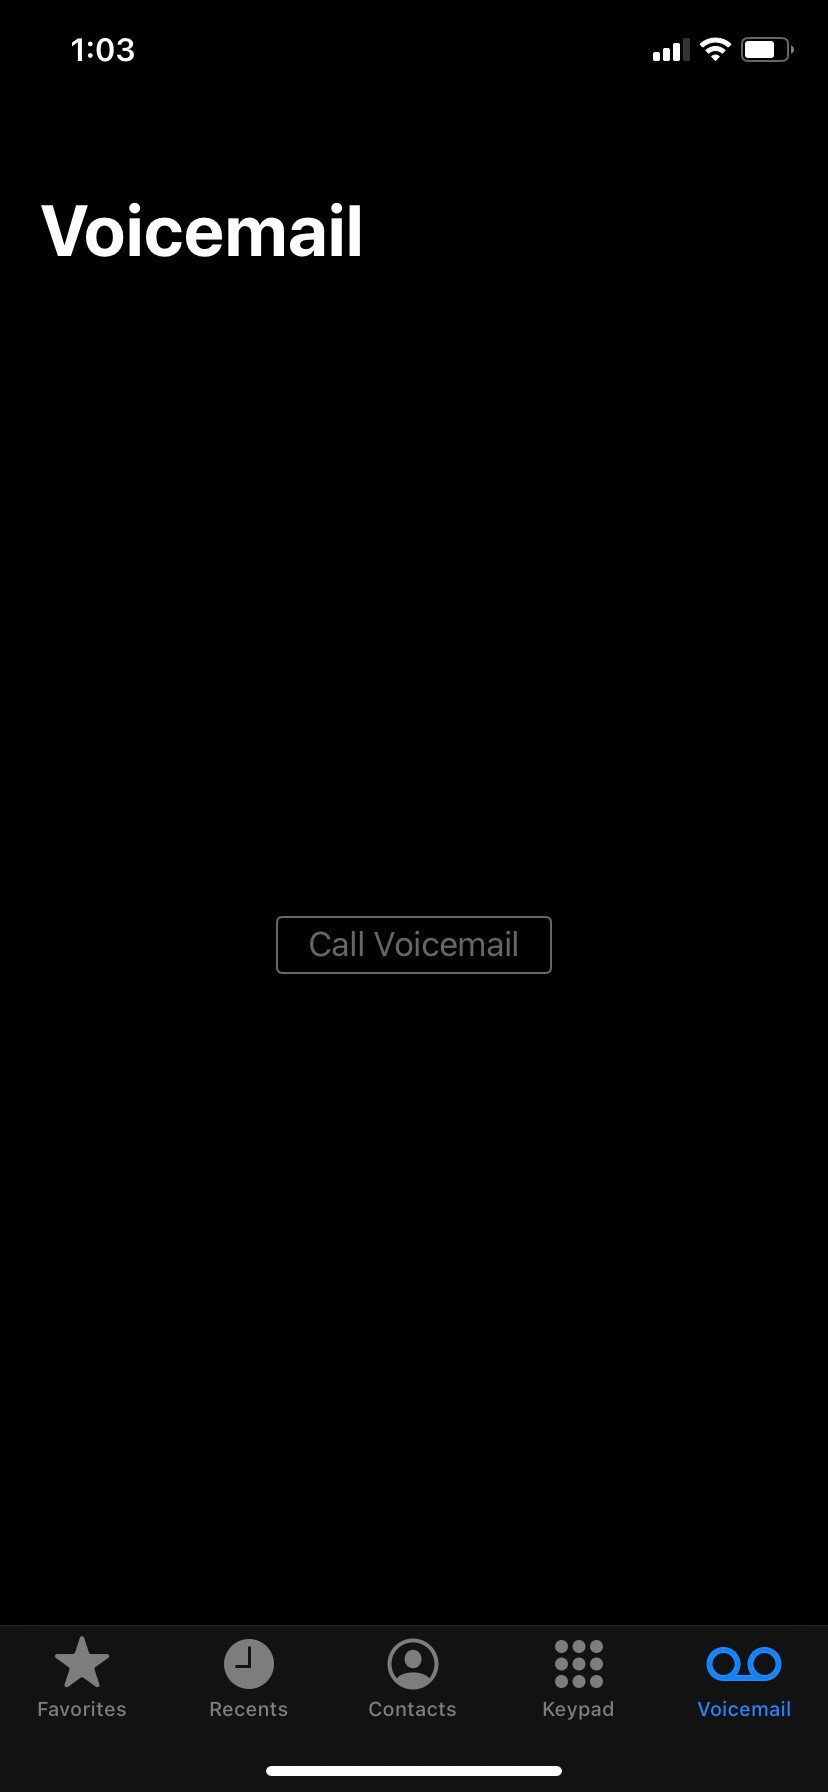 iPhone Visual Voicemail Interface
FAQ: Frequently Asked Questions About Saving Voice Messages on iPhone
1. Is Visual Voicemail free?
Visual Voicemail is typically included as part of your wireless service plan, but it’s always a good idea to check with your carrier to confirm.
2. Can I save voicemails from a landline to my iPhone?
No, you cannot directly save voicemails from a landline to your iPhone. You would need to record the voicemail using another device.
3. How much storage space do voice messages take up?
The amount of storage space voice messages take up depends on their length and audio quality. Generally, they don’t take up much space, but it’s a good idea to manage them regularly to prevent them from accumulating.
4. Can I transcribe voice messages on my iPhone?
Yes, some third-party apps offer voicemail transcription services. Additionally, Google Voice provides voicemail transcription as part of its service.
5. How do I delete voice messages from my iPhone?
To delete voice messages:
- Open the Phone app.
- Go to Voicemail.
- Select the message you want to delete.
- Tap “Delete.”
6. Can I recover deleted voice messages?
Once a voice message is deleted, it’s generally not recoverable unless you have a backup. Check your iCloud or computer backups to see if the message is there.
7. How do I share a voice message with someone else?
To share a voice message:
- Open the Phone app.
- Go to Voicemail.
- Select the message you want to share.
- Tap the share icon.
- Choose a sharing method, such as email or text message.
8. Can I save voice messages to my computer?
Yes, you can save voice messages to your computer by connecting your iPhone and using audio recording software, or by using a third-party app that allows you to export the messages.
9. What should I do if my Visual Voicemail is not showing up?
If your Visual Voicemail is not showing up, try restarting your iPhone, resetting your network settings, or contacting your carrier.
10. Are there any privacy concerns with saving voice messages?
There can be privacy concerns with saving voice messages, especially if they contain sensitive information. Be sure to protect your saved messages and avoid sharing them with unauthorized individuals.
By understanding how to save and manage your voice messages on your iPhone, you can ensure that you never lose those valuable moments and important information. And remember, savewhere.net is here to help you manage your finances and achieve your financial goals.