
Do you want to easily share your Excel spreadsheets without compatibility issues? Learning how to save an Excel file as a PDF ensures everyone can view your data, regardless of their software. At savewhere.net, we’ll guide you through the simple steps to convert your Excel files into universally accessible PDFs, helping you streamline your workflow and enhance collaboration. Discover how to make the most of your spreadsheets and share them with confidence!
1. Understanding the Importance of Saving Excel Files as PDFs
Saving an Excel file as a PDF is a crucial skill for anyone who works with spreadsheets. PDFs (Portable Document Format) offer numerous advantages over Excel files when it comes to sharing and preserving data.
- Universal Compatibility: PDFs can be opened on virtually any device with a PDF reader, ensuring that your recipients can view the file regardless of their operating system or software.
- Preservation of Formatting: Unlike Excel files, PDFs maintain the original formatting, layout, and fonts of your spreadsheet. This ensures that your data is presented exactly as you intended.
- Security: PDFs can be password-protected and restricted from editing, providing an extra layer of security for sensitive information.
- Smaller File Size: In many cases, PDFs can be smaller in size than Excel files, making them easier to email and share online.
For individuals mindful of their budget, understanding how to efficiently manage and share data is paramount. Whether you’re a student managing personal finances, a young professional tracking expenses, or a family budgeting for the future, mastering this skill can save time and ensure your information is accurately conveyed. Savewhere.net is dedicated to providing tips and resources to help you make the most of your financial data, and converting Excel files to PDFs is a key step in that process.
According to research from Adobe, PDFs are the most preferred file format for business documents due to their reliability and security features. Mastering this conversion process ensures your financial data is shared securely and professionally.
2. Determining Your Intended Use: Defining Your PDF Conversion Goal
Before diving into the “how-to,” it’s vital to clarify your objective. What do you hope to achieve by converting your Excel file to PDF? Understanding your goal ensures you choose the most efficient method. Here are five common scenarios:
- Archiving Financial Records: Save completed budget spreadsheets or expense reports as PDFs to maintain a permanent, unalterable record of your financial activities. This is essential for tax purposes and long-term financial planning.
- Sharing Reports With Non-Excel Users: Convert Excel-based financial analysis or investment portfolios into PDFs for easy distribution to clients, family members, or colleagues who may not have Excel installed.
- Printing Financial Documents: Ensure that your budget, balance sheet, or financial statements print accurately without formatting discrepancies by saving them as PDFs before printing.
- Securing Sensitive Data: Protect confidential financial information, like bank statements or investment details, by converting them to password-protected PDFs.
- Presenting Data in Meetings: Create visually appealing charts and graphs in Excel, then convert them to PDFs for seamless integration into presentations, ensuring consistent formatting across different devices.
Understanding these intentions helps users make informed decisions during the conversion process, optimizing their approach for efficiency and clarity.
3. Preparing Your Excel File for PDF Conversion: Optimizing for Best Results
Before saving your Excel file as a PDF, consider these steps to ensure the final product looks exactly as you intend:
- Page Orientation: Determine whether your data looks best in portrait (vertical) or landscape (horizontal) orientation. Go to the “Page Layout” tab, click “Orientation,” and select your preference.
- Print Area: If you only want to save a specific section of your spreadsheet, select the cells you want to include, go to the “Page Layout” tab, click “Print Area,” and select “Set Print Area”.
- Scaling: If your spreadsheet is too wide to fit on a single page, go to the “Page Layout” tab, click “Scale to Fit,” and adjust the scaling percentage until your data fits within the page boundaries.
- Headers and Footers: Add headers and footers to include important information like the date, page number, or file name. Go to the “Insert” tab, click “Header & Footer,” and customize as needed.
- Gridlines: Decide whether you want gridlines to appear in your PDF. Go to the “Page Layout” tab, and under “Gridlines,” check or uncheck the “Print” box.
Taking these steps ensures that your PDF accurately represents your Excel data and is easy to read and understand.
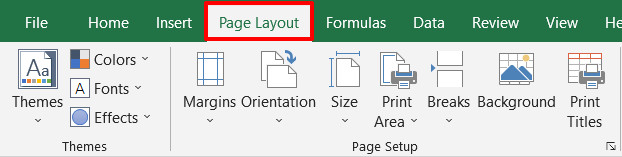 Page Layout tab in Excel with a red box around it.
4. Step-by-Step Guide: Saving an Excel Workbook as a PDF
Here’s the easiest and most common way to save your Excel file as a PDF:
- Open Your Excel File: Launch Microsoft Excel and open the workbook you want to convert.
- Go to the “File” Tab: Click on the “File” tab in the top-left corner of the Excel window.
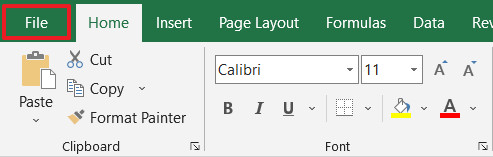 File tab in Excel with a red box around it.
-
Select “Save As”: In the “File” menu, click on “Save As.”
-
Choose a Location: Click “Browse” to choose the folder where you want to save the PDF file.
 Browse button in Excel highlighted.
- Select “PDF” as the File Type: In the “Save As” dialog box, click the dropdown menu next to “Save as type” and select “PDF (*.pdf).”
 PDF selected from dropdown menu in Excel Save As dialog box.
- Open Options: Press the “Options…” button to customize your PDF.
- Entire Workbook: Ensure “Entire workbook” is selected to include all sheets in the PDF.
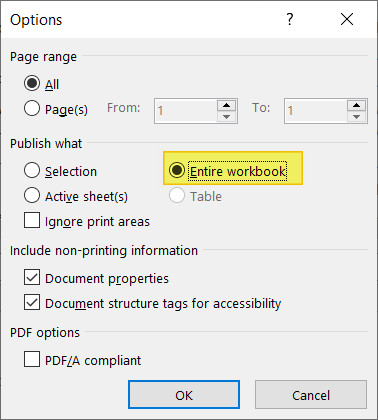 Entire workbook radio button highlighted in Options dialog box.
- Click “Save”: Once you’ve selected your desired options, click the “Save” button to create the PDF file.
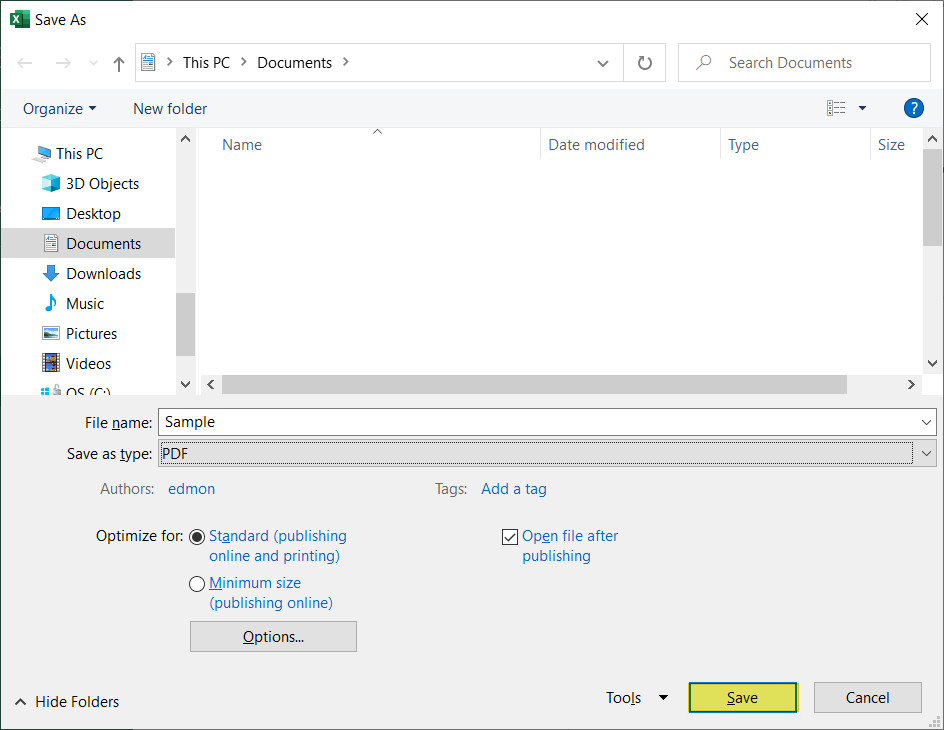 Save button highlighted in Save As dialog box.
By following these steps, you can easily convert your Excel workbook into a PDF that can be shared and viewed on any device.
5. Alternative Method: Exporting Your Excel File as a PDF
Excel offers another method to save your file as a PDF using the “Export” feature:
- Open Your Excel File: Launch Microsoft Excel and open the workbook you want to convert.
- Go to the “File” Tab: Click on the “File” tab in the top-left corner of the Excel window.
File tab in Excel with a red box around it.
-
Select “Export”: In the “File” menu, click on “Export.”
-
Click “Create PDF/XPS Document”: Select the “Create PDF/XPS Document” option.
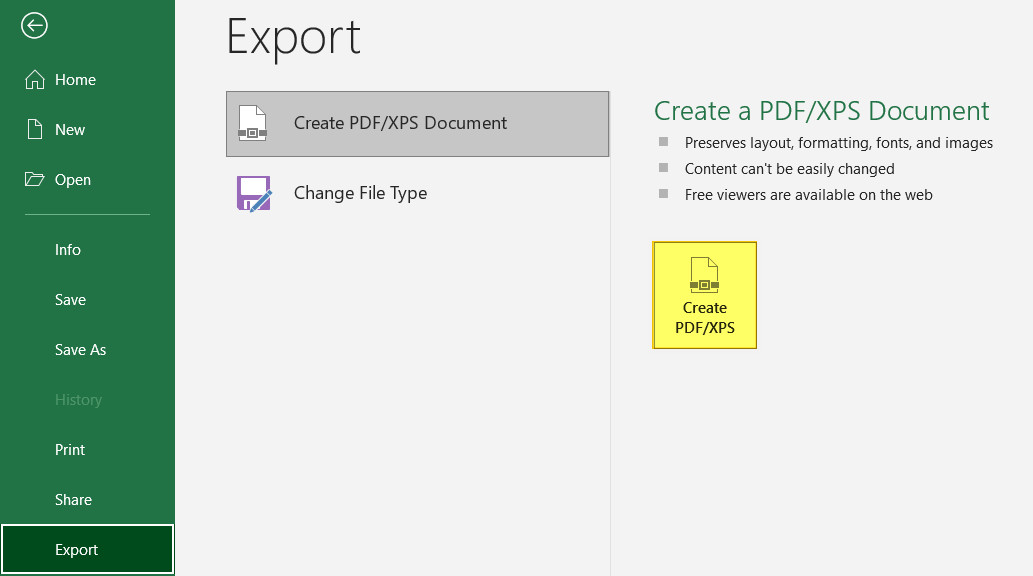 Create PDF XPS button in Microsoft Excel highlighted.
- Open Options: Press the “Options…” button to customize your PDF.
- Entire Workbook: Ensure “Entire workbook” is selected to include all sheets in the PDF.
Entire workbook radio button highlighted in Options dialog box.
- Click “Publish”: After adjusting the settings, click the “Publish” button.
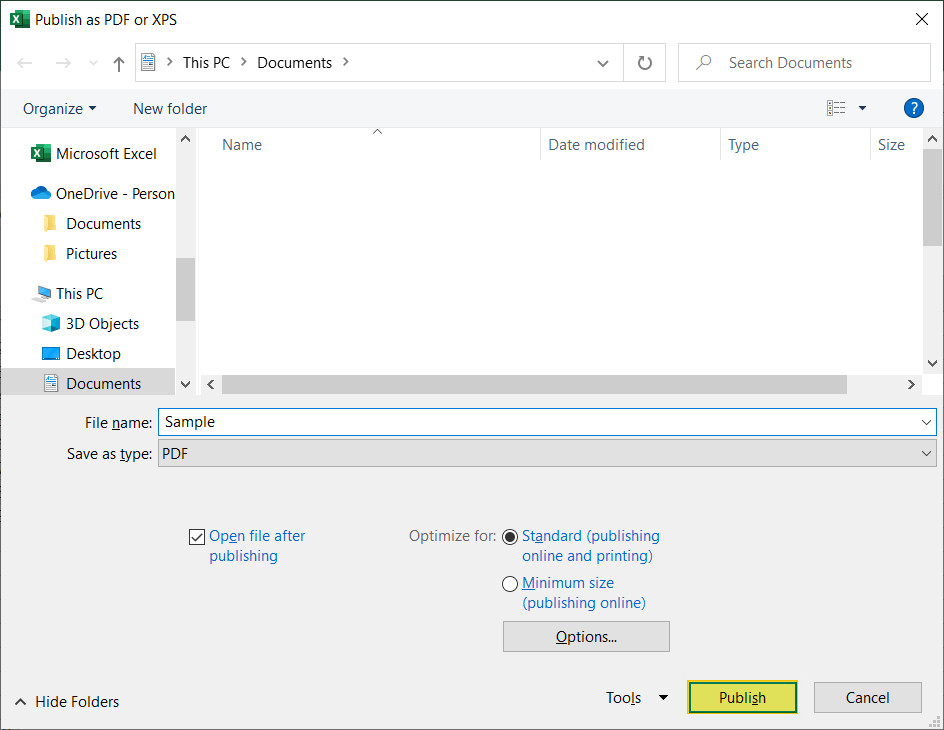 Publish button highlight in Publish as PDF or XPS button dialog box.
Both methods achieve the same outcome—converting your Excel file to a PDF. The choice between “Save As” and “Export” often comes down to personal preference.
6. Save As vs. Export: Understanding the Nuances
While both “Save As” and “Export” convert Excel files to PDF, there are subtle differences:
- Save As: Allows you to save your Excel file into various formats, including PDF.
- Export: Specifically designed for exporting to PDF/XPS formats.
For most users, the distinction is negligible. Both methods effectively convert your Excel data into a PDF. However, “Save As” provides more versatility if you need to convert to other file types in the future.
7. Saving a Single Excel Sheet as a PDF: Focus on What Matters
Sometimes, you only need to save a specific sheet from your Excel workbook as a PDF. Here’s how:
- Open Your Excel File: Launch Microsoft Excel and open the workbook containing the sheet you want to save.
- Select the Sheet: Click on the tab of the sheet you want to save as a PDF.
- Go to the “File” Tab: Click on the “File” tab in the top-left corner of the Excel window.
File tab in Excel with a red box around it.
-
Select “Save As”: In the “File” menu, click on “Save As.”
-
Choose a Location: Click “Browse” to choose the folder where you want to save the PDF file.
Browse button in Excel highlighted.
- Select “PDF” as the File Type: In the “Save As” dialog box, click the dropdown menu next to “Save as type” and select “PDF (*.pdf).”
PDF selected from dropdown menu in Excel Save As dialog box.
- Click “Save”: Once you’ve selected PDF as the file type, click the “Save” button. Excel will automatically save the current sheet as a PDF.
Save button highlighted in Save As dialog box.
This method is ideal when you only need to share a specific part of your Excel workbook, keeping the PDF file concise and focused.
8. Saving Multiple Excel Sheets as One PDF: Combining Your Data
To save multiple Excel sheets into a single PDF, follow these steps:
- Open Your Excel File: Launch Microsoft Excel and open the workbook containing the sheets you want to combine.
- Go to the “File” Tab: Click on the “File” tab in the top-left corner of the Excel window.
File tab in Excel with a red box around it.
-
Select “Save As”: In the “File” menu, click on “Save As.”
-
Choose a Location: Click “Browse” to choose the folder where you want to save the PDF file.
Browse button in Excel highlighted.
- Select “PDF” as the File Type: In the “Save As” dialog box, click the dropdown menu next to “Save as type” and select “PDF (*.pdf).”
PDF selected from dropdown menu in Excel Save As dialog box.
- Open Options: Press the “Options…” button to customize your PDF.
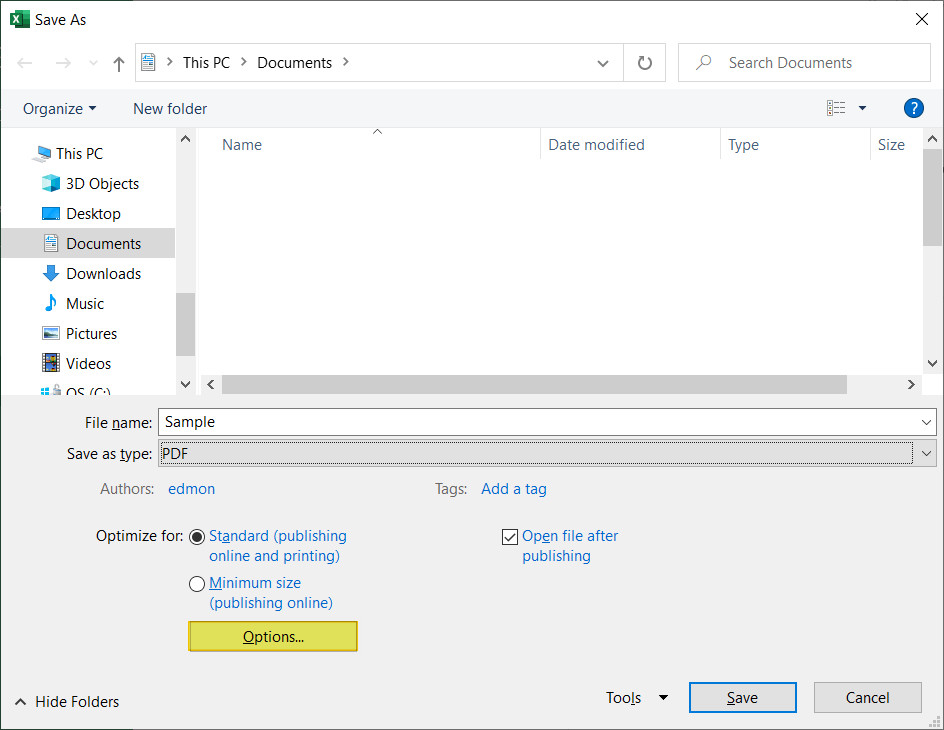 Highlighted options button in Save As dialog box.
- Specify Page Range: Click the “Page(s)” radio button and specify the page range you wish to save. For example, if you want to save pages 1 through 3, enter “1” in the “From” box and “3” in the “To” box.
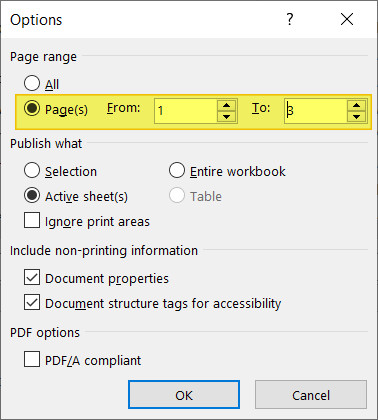 Page range radio button and options in Excel highlighted in Options dialog box.
- Click “Save”: After adjusting the settings, click the “Save” button. Excel will combine the specified sheets into a single PDF.
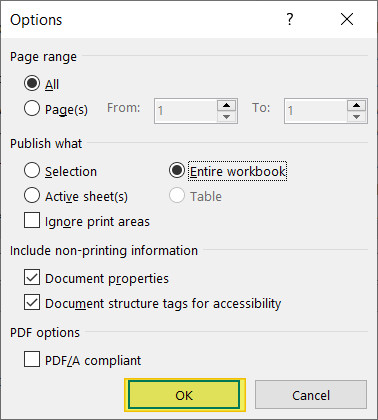 Ok button highlighted in Options dialog box .
This is useful when you want to consolidate related data from multiple sheets into one easily shareable document.
9. Saving Specific Areas or Cells as a PDF: Tailoring Your Output
Sometimes you only need to save a specific area or range of cells as a PDF. Here’s how to do it:
- Open Your Excel File: Launch Microsoft Excel and open the workbook containing the cells you want to save.
- Select the Cells: With your mouse, select the cells that you wish to save as a PDF.
 Mouse selecting cells in Microsoft Excel.
- Go to the “Page Layout” Tab: Click on the “Page Layout” tab.
Page Layout tab in Excel with a red box around it.
- Set Print Area: Press the “Print Area” button. Then, press “Set Print Area”.
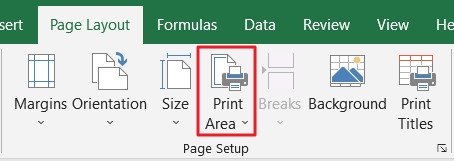 Print Area button in Excel with red box around it.
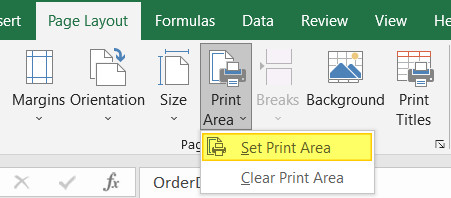 Set Print Area button highlighted.
- Go to the “File” Tab: Click on the “File” tab in the top-left corner of the Excel window.
File tab in Excel with a red box around it.
-
Select “Save As”: In the “File” menu, click on “Save As.”
-
Choose a Location: Click “Browse” to choose the folder where you want to save the PDF file.
Browse button in Excel highlighted.
- Select “PDF” as the File Type: In the “Save As” dialog box, click the dropdown menu next to “Save as type” and select “PDF (*.pdf).”
PDF selected from dropdown menu in Excel Save As dialog box.
- Click “Save”: After adjusting the settings, click the “Save” button. Excel will save the specified areas or cells into a PDF.
Save button highlighted in Save As dialog box.
If you want to select multiple areas, simply repeat steps 2-4 until you have selected everything you need.
10. Enhancing Your PDFs: Exploring Advanced Options
For those who need more control over their PDFs, consider these advanced options:
- Password Protection: To protect sensitive information, you can add a password to your PDF. In the “Save As” dialog box, click “Options” and select “Encrypt with password.”
- Reduce File Size: If your PDF is too large, you can compress it to reduce the file size. In the “Save As” dialog box, click “Options” and select “Minimum size (publishing online).”
- Accessibility: To ensure your PDF is accessible to people with disabilities, go to the “File” tab, click “Info,” and select “Check for Issues” > “Check Accessibility.” Follow the recommendations to improve accessibility.
These options allow you to tailor your PDFs to meet specific security, size, and accessibility requirements.
11. Addressing Common Issues: Troubleshooting Your PDF Conversion
Sometimes, things don’t go as planned. Here are some common issues and how to resolve them:
- Formatting Issues: If your PDF doesn’t look right, double-check your page orientation, print area, and scaling settings.
- Missing Data: Make sure you’ve selected the correct sheets or cells before saving.
- Large File Size: If your PDF is too large, try compressing it or removing unnecessary images.
- Password Problems: If you forget your password, you may not be able to open the PDF. Be sure to store your passwords in a safe place.
By addressing these common issues, you can ensure a smooth and successful PDF conversion.
12. Maximizing Excel to PDF Conversion: Tips and Tricks for Flawless Results
To ensure your Excel to PDF conversions are always top-notch, consider these tips and tricks:
- Use Clear and Concise Formatting: Before converting, ensure your Excel sheet is well-formatted with clear headings, labels, and consistent fonts.
- Check Print Preview: Always use the Print Preview option to see how your sheet will look as a PDF before saving. This helps catch any formatting issues early.
- Adjust Margins: If content is cut off, adjust margins under Page Layout > Margins.
- Test Your PDF: After converting, open the PDF on different devices and PDF readers to ensure compatibility and readability.
- Keep Excel Updated: Ensure you’re using the latest version of Microsoft Excel to take advantage of the newest features and bug fixes.
By following these best practices, you can create professional-looking PDFs from your Excel files every time.
13. Savewhere.net: Your Partner in Financial Efficiency
At savewhere.net, we understand the importance of managing your finances effectively. That’s why we provide resources and tools to help you save time and money. Converting Excel files to PDFs is just one small step towards achieving greater financial efficiency. We encourage you to explore our website for more tips, tricks, and resources to help you take control of your financial future.
We aim to empower you with the knowledge and tools you need to make informed financial decisions, ensuring you can confidently manage your money and achieve your goals.
Address: 100 Peachtree St NW, Atlanta, GA 30303, United States
Phone: +1 (404) 656-2000
Website: savewhere.net
14. Leveraging Financial Tools: Enhance Your Budgeting Skills
In addition to understanding how to save Excel files as PDFs, it’s crucial to explore financial tools and resources that can further enhance your budgeting skills. Here are some strategies:
- Budgeting Apps: Utilize apps like Mint, YNAB (You Need a Budget), or Personal Capital to track expenses, set budgets, and monitor financial goals.
- Spreadsheet Templates: Download free budget templates from websites like Microsoft Office or Google Sheets to simplify budgeting.
- Online Courses: Enroll in online courses on platforms like Coursera or Udemy to learn advanced financial management techniques.
- Financial Advisors: Consider consulting with a certified financial advisor for personalized guidance on investment, retirement planning, and debt management.
These resources can help you take a more proactive approach to managing your finances, ensuring you’re well-equipped to handle various financial situations.
15. Call to Action: Start Saving Today!
Ready to take control of your finances and achieve your financial goals? Visit savewhere.net today to discover a wealth of tips, tricks, and resources to help you save money, manage your budget, and build a secure financial future. Join our community of like-minded individuals and start your journey towards financial freedom now!
Explore the countless ways to save, discover exclusive deals, and connect with others who share your passion for financial well-being. Your path to a brighter financial future starts here.
Frequently Asked Questions (FAQs)
1. How do I save an Excel file as a PDF on a Mac?
The process is similar to Windows. Go to File > Save As, and choose PDF from the File Format dropdown menu.
2. Can I password protect an Excel file before saving it as a PDF?
Yes, in the “Save As” dialog box, click “Options” and select “Encrypt with password.”
3. How do I reduce the file size of an Excel file saved as a PDF?
In the “Save As” dialog box, click “Options” and select “Minimum size (publishing online).”
4. Why is my PDF blurry when I save an Excel file?
This may be due to scaling issues. Ensure your scaling is set to 100% in the “Page Layout” tab.
5. How do I save multiple Excel sheets as one PDF on a Mac?
Follow the same steps as on Windows. In the “Save As” dialog box, click “Options” and select the sheets you want to include.
6. Can I edit a PDF that was created from an Excel file?
Yes, but you’ll need a PDF editor like Adobe Acrobat or PDF Pro. savewhere.net recommends PDF Pro.
7. How do I ensure my Excel file prints correctly as a PDF?
Use the Print Preview option to check the layout before saving. Adjust margins and scaling as needed.
8. What is the difference between PDF/A and standard PDF when saving from Excel?
PDF/A is an archival format that ensures long-term preservation of the document. It may have some limitations compared to standard PDF.
9. How do I save an Excel chart as a PDF?
Select the chart, then go to File > Save As and choose PDF. Only the chart will be saved.
10. Why are some fonts changed when I save my Excel file as a PDF?
This can happen if the fonts are not embedded in the PDF. In the “Save As” options, ensure “Embed fonts in the file” is checked.