
Are you a Minecraft enthusiast eager to share your block-building brilliance with friends? Where are Minecraft screenshots saved, and how can you easily access them to showcase your creations? Savewhere.net provides you with an easy way to locate and manage your Minecraft screenshots, turning your gaming moments into shareable memories. Discover efficient methods to capture, organize, and share your Minecraft adventures.
1. What is Minecraft and Why Share Screenshots?
Minecraft is a global phenomenon, a sandbox game that has captivated players of all ages with its limitless possibilities.
1.1 The Allure of Minecraft
Minecraft isn’t just a game; it’s a digital playground where imagination knows no bounds. In Creative mode, you can build anything you dream up with unlimited resources, from towering castles to intricate redstone contraptions. Survival mode plunges you into a dynamic world where you must gather resources, craft tools, and fend off nocturnal monsters. According to a 2023 report by Statista, Minecraft boasts over 140 million active monthly users, proving its enduring popularity.
1.2 Why Sharing Screenshots Matters
Sharing screenshots allows you to showcase your unique creations, epic adventures, and hilarious moments with friends and the wider Minecraft community. Here’s why it’s so important:
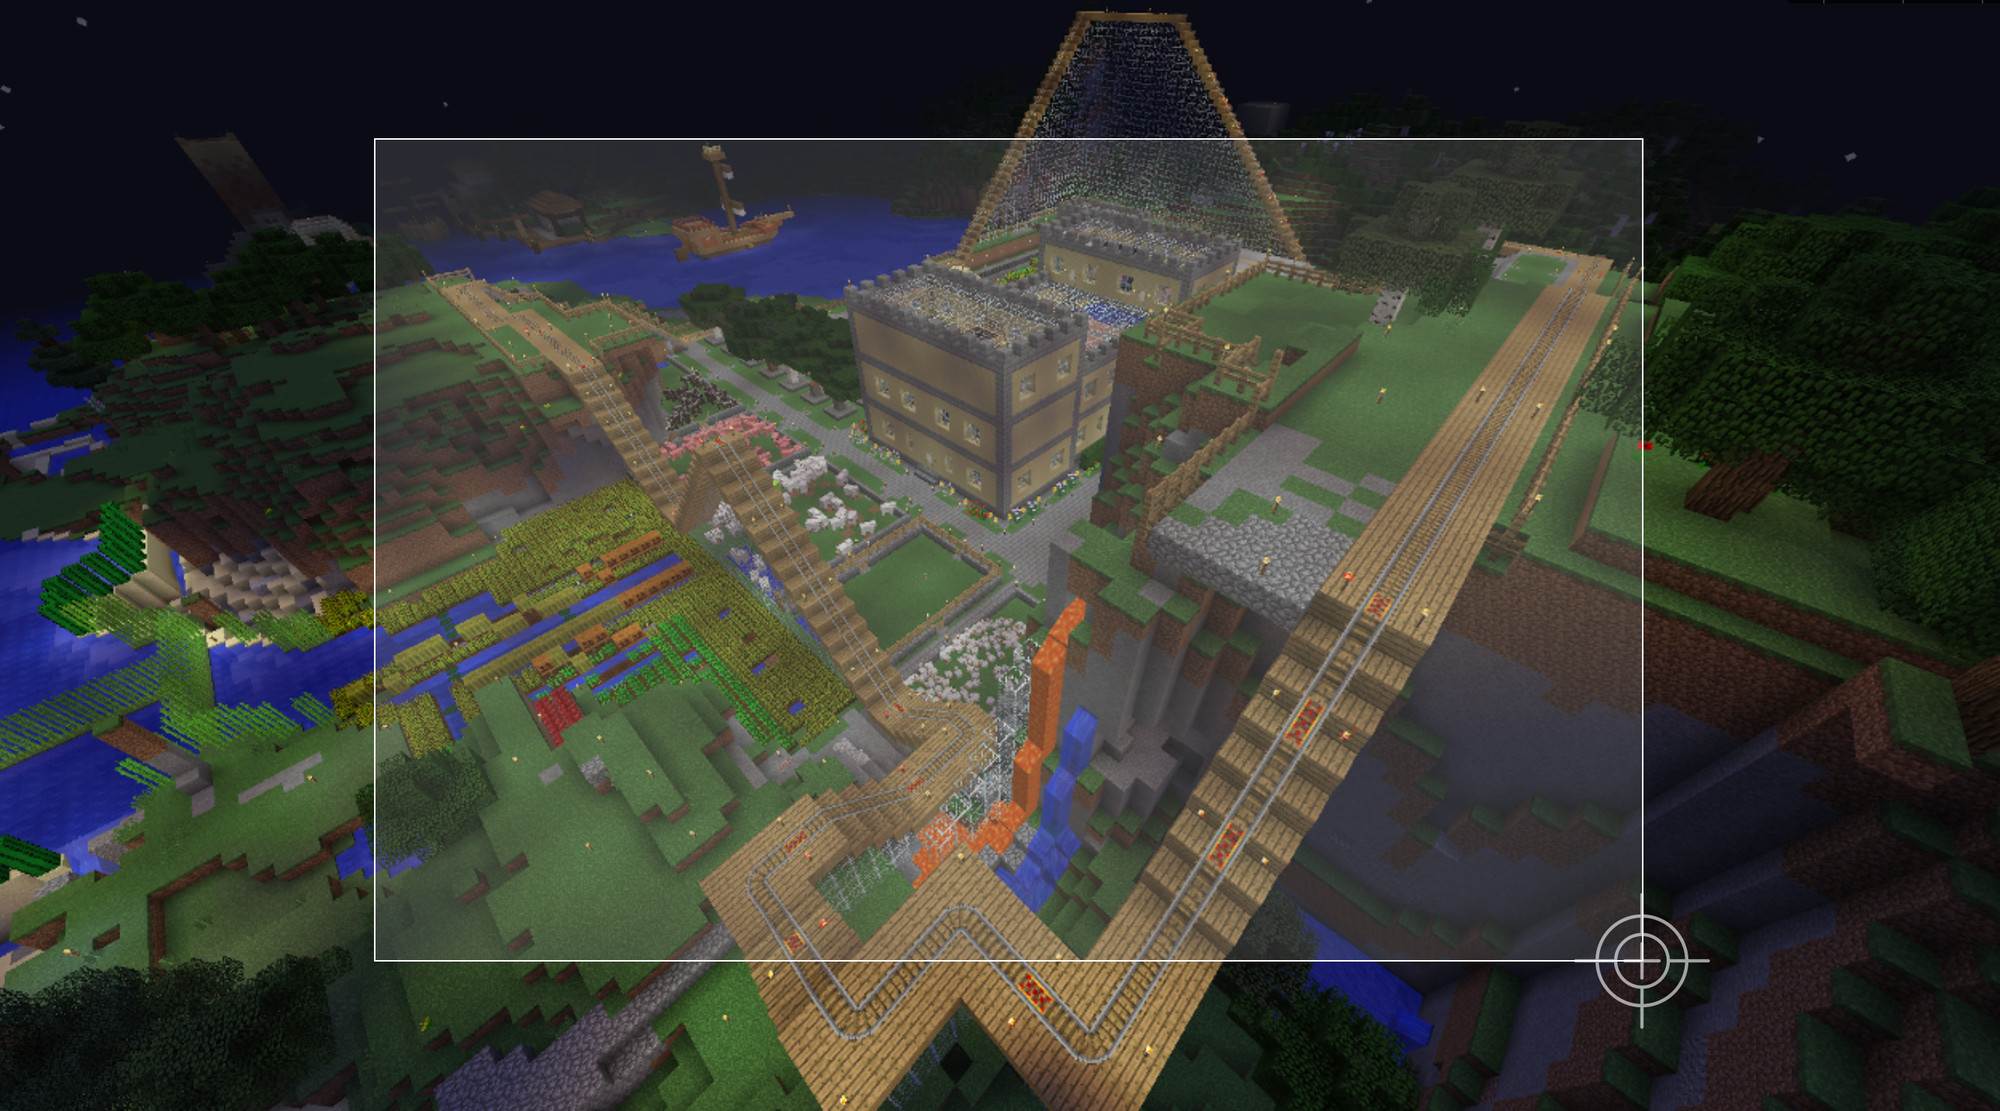
- Showcasing Creativity: Screenshots let you flaunt your architectural masterpieces and innovative designs.
- Sharing Adventures: Capture your thrilling explorations, battles with mobs, and discoveries of rare resources.
- Community Engagement: Share your experiences on social media and Minecraft forums to connect with other players.
- Preserving Memories: Keep a visual record of your Minecraft journey, celebrating your progress and achievements.
2. Finding Your Minecraft Screenshot Folder: A Platform-Specific Guide
The location of your Minecraft screenshot folder varies depending on your operating system. Here’s a detailed guide to help you find it on Windows, macOS, and Linux.
2.1 Locating the Screenshot Folder on Windows
For Windows users, finding your Minecraft screenshots is straightforward. Follow these steps:
- Open File Explorer: Press
Windows Key + Eto open File Explorer. - Access the AppData Folder: Type
%appdata%in the address bar and press Enter. This will take you to the Roaming folder. - Find the .minecraft Folder: Inside the Roaming folder, locate and open the
.minecraftfolder. - Locate the Screenshots Folder: Within the
.minecraftfolder, you’ll find thescreenshotsfolder. This is where all your Minecraft screenshots are stored.
According to Microsoft Support, the AppData folder is a hidden folder, which is why using %appdata% is the easiest way to access it.
2.2 Finding the Screenshot Folder on Windows 10 (Bedrock Edition)
If you’re playing the Bedrock Edition on Windows 10, the process is slightly different:
- Open Xbox Game Bar: Press
Win + Gto open the Xbox Game Bar. - Access Game Capturing Settings: In the Game Bar, find the settings for Game Capturing.
- Take a Screenshot: Click the camera button to take a screenshot.
- Find the Screenshot Location: A notification will appear, showing the screenshot’s save location. The default location is typically
C:\Users\<username>\Videos\Captures.
The Xbox Game Bar is a convenient tool for capturing gameplay moments quickly and easily.
2.3 Finding the Screenshot Folder on macOS
For macOS users, the screenshot folder is located in a hidden directory. Here’s how to find it:
- Open Finder: Open Finder from your dock or by pressing
Cmd + Spaceand typing “Finder.” - Go to Folder: Click “Go” in the menu bar, then select “Go to Folder.”
- Enter the Path: Type
~/Library/Application Support/minecraft/screenshotsand press Enter. - Access Screenshots: This will take you directly to the
screenshotsfolder, where you’ll find all your captured images.
The Library folder is often hidden by default on macOS, so using the “Go to Folder” command is the easiest way to access it.
2.4 Finding the Screenshot Folder on Linux
Linux users can find their Minecraft screenshots in a similar manner to macOS:
- Open File Manager: Open your preferred file manager.
- Navigate to .minecraft: Go to the
~/.minecraft/screenshotsdirectory.
The ~ symbol represents your home directory in Linux, making it easy to locate the .minecraft folder.
3. How to Take Screenshots in Minecraft: A Device-Specific Guide
The method for taking screenshots in Minecraft varies depending on the device you’re using. Here’s a comprehensive guide for different platforms.
3.1 Taking Screenshots on Windows PC
On most Windows PCs, taking a screenshot in Minecraft is simple:
- Press F2: Simply press the
F2key while in the game. A notification will appear briefly on the screen, indicating that the screenshot has been saved. The screenshot will be saved in thescreenshotsfolder located in the.minecraftdirectory.
Using F2 is the quickest and most straightforward method for capturing screenshots in Minecraft on Windows.
3.2 Taking Screenshots on Windows 10
Windows 10 offers several convenient ways to take screenshots:
- Windows Key + Print Screen: Press the
Windows Key + Print Screenbuttons simultaneously. The screen will briefly dim, indicating that a screenshot has been taken. The screenshot is saved in thePictures > Screenshotsfolder. - Xbox Game Bar: Open the Xbox Game Bar by pressing
Windows + G, then click the camera icon to take a screenshot. These screenshots are saved in the default screenshot folder atLocal Disk C: > Users > *username* > Videos > Captures.
According to a Microsoft Support article, using the Windows Key + Print Screen shortcut is a universal way to capture the entire screen in Windows 10.
3.3 Taking Screenshots on Mac
Taking screenshots on a Mac is also very straightforward:
- Command + Shift + 4: Press
CMD + SHIFT + 4simultaneously. This will turn your cursor into a crosshair, allowing you to select the area of the screen you want to capture. The screenshot will be saved directly to your desktop.
The CMD + SHIFT + 4 shortcut is a versatile tool for capturing specific portions of your screen on macOS.
4. Enhancing Your Screenshot Experience with Markup Hero
While Minecraft’s built-in screenshot functionality is useful, third-party tools like Markup Hero offer enhanced features for capturing, annotating, and sharing your screenshots.
4.1 Why Choose Markup Hero?
Markup Hero provides a range of benefits over the standard screenshot methods:
- Cross-Platform Compatibility: Works seamlessly on Windows, Mac, and Linux.
- Annotation Tools: Add arrows, text, boxes, and other annotations to highlight specific elements in your screenshots.
- Organization: Store and organize your screenshots in a dedicated folder for easy access.
- Sharing: Quickly share your screenshots with friends and colleagues via shareable links.
Markup Hero streamlines the process of capturing, editing, and sharing screenshots, making it an invaluable tool for Minecraft enthusiasts.
4.2 How to Use Markup Hero for Minecraft Screenshots
Here’s how to use Markup Hero to take and annotate Minecraft screenshots:
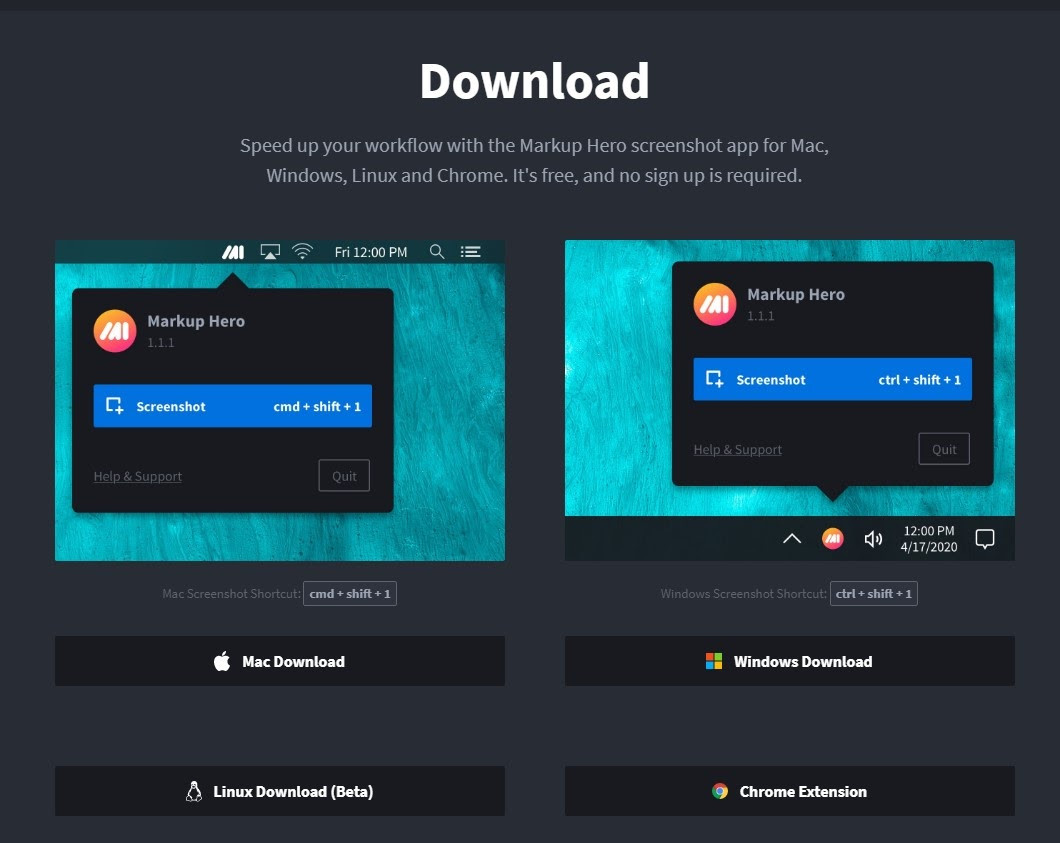
- Download and Install Markup Hero: Download the Markup Hero Desktop App from the official website. It’s available for Windows, Mac, and Linux.
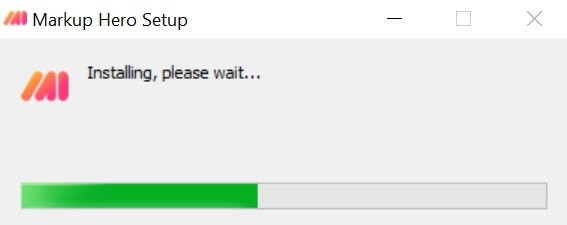
- Run the Installer File: After downloading the app, run the installer file to begin the installation process.
- Start Taking Screenshots:
- Windows: Press
CTRL + SHIFT + 1to take a screenshot. - Mac: Press
CMD + SHIFT + 1to take a screenshot.
- Windows: Press
- Annotate and Organize: Once you capture a screenshot, it will be uploaded to Markup Hero, where you can add annotations and organize your images.
Markup Hero’s annotation tools allow you to highlight important details in your screenshots, making them more informative and engaging.
5. Organizing Your Minecraft Screenshots for Easy Access
Keeping your Minecraft screenshots organized is essential for easy access and sharing. Here are some tips for effective organization.
5.1 Creating a Dedicated Folder Structure
Create a folder structure within your screenshots directory to categorize your images:
- By Date: Create subfolders for each month or year to organize screenshots chronologically.
- By Project: Create subfolders for different Minecraft projects or builds.
- By Server: If you play on multiple servers, create subfolders for each server.
A well-organized folder structure makes it easy to find specific screenshots quickly and efficiently.
5.2 Using Descriptive File Names
Rename your screenshots with descriptive file names to make them easier to identify:
- Include Dates: Add the date to the file name (e.g.,
2024-07-15-castle.png). - Describe the Content: Use keywords to describe the contents of the screenshot (e.g.,
Eiffel-Tower-Minecraft.png). - Add Server Information: If applicable, include the server name in the file name (e.g.,
Emerald-Dream-village.png).
Descriptive file names provide valuable context and make it easier to search for specific screenshots.
5.3 Utilizing Cloud Storage
Consider using cloud storage services like Google Drive, Dropbox, or OneDrive to back up and sync your Minecraft screenshots:
- Automatic Backup: Cloud storage services automatically back up your files, ensuring that your screenshots are safe and secure.
- Accessibility: Access your screenshots from any device with an internet connection.
- Sharing: Easily share folders and individual screenshots with friends and collaborators.
According to a survey by Backblaze, 60% of individuals have lost data due to hardware failure, highlighting the importance of regular backups.
6. Optimizing Minecraft Screenshots for Sharing
Before sharing your Minecraft screenshots, consider optimizing them for the best visual impact.
6.1 Adjusting Resolution and Quality
Adjusting the resolution and quality of your screenshots can enhance their appearance and reduce file size:
- Resolution: Use a resolution that is appropriate for the intended sharing platform. For social media, a resolution of 1920×1080 is generally sufficient.
- Quality: Experiment with different quality settings to find the best balance between visual fidelity and file size.
High-resolution screenshots can consume significant storage space and bandwidth, so it’s essential to optimize them for efficient sharing.
6.2 Using Image Editing Software
Enhance your screenshots with image editing software like Adobe Photoshop, GIMP, or Paint.NET:
- Color Correction: Adjust the colors and brightness to make your screenshots more vibrant.
- Cropping: Crop out unnecessary elements to focus on the most important aspects of the image.
- Adding Text: Add text annotations to provide context and highlight key features.
Image editing software can transform ordinary screenshots into visually stunning masterpieces.
6.3 Choosing the Right File Format
Select the appropriate file format for your screenshots:
- PNG: Use PNG for images with sharp lines, text, and graphics. PNG is a lossless format, meaning that it preserves all the original image data.
- JPEG: Use JPEG for photographs and images with complex gradients. JPEG is a lossy format, meaning that it compresses the image data, resulting in smaller file sizes.
PNG is generally the best choice for Minecraft screenshots, as it preserves the sharp details and vibrant colors of the game.
7. Sharing Your Minecraft Screenshots with the World
Once you’ve captured and optimized your Minecraft screenshots, it’s time to share them with the world.
7.1 Sharing on Social Media
Share your screenshots on social media platforms like Twitter, Instagram, and Facebook to connect with other Minecraft enthusiasts:
- Use Relevant Hashtags: Use hashtags like #Minecraft, #MinecraftBuilds, and #MinecraftCreations to increase the visibility of your posts.
- Engage with Followers: Respond to comments and questions from your followers to build a community around your screenshots.
Social media is a powerful tool for showcasing your Minecraft creations and connecting with other players.
7.2 Sharing on Minecraft Forums and Communities
Share your screenshots on Minecraft forums and communities like Reddit’s r/Minecraft and the official Minecraft Forums:
- Provide Context: Provide context for your screenshots by describing the build, project, or adventure they depict.
- Ask for Feedback: Ask for feedback on your creations to improve your building skills and design aesthetic.
Minecraft forums and communities are valuable resources for sharing your screenshots and receiving constructive criticism.
7.3 Creating a Minecraft Portfolio
Create a Minecraft portfolio on websites like Imgur, Flickr, or Behance to showcase your best screenshots:
- Curate Your Best Work: Select your most impressive and visually appealing screenshots to include in your portfolio.
- Provide Descriptions: Provide detailed descriptions for each screenshot, including the build process, inspiration, and technical details.
A Minecraft portfolio is an excellent way to showcase your skills and creativity to potential collaborators and employers.
8. Troubleshooting Common Screenshot Issues
Encountering issues while taking or locating Minecraft screenshots can be frustrating. Here are some solutions to common problems.
8.1 Screenshots Not Saving
If your screenshots are not saving, try the following solutions:
- Check the Screenshot Folder Location: Ensure that you are looking in the correct screenshot folder. Refer to the platform-specific guides in Section 2 for the correct location.
- Verify File Permissions: Ensure that you have write permissions to the screenshot folder. Right-click the folder, select “Properties,” and check the “Security” tab.
- Restart Minecraft: Restarting Minecraft can sometimes resolve temporary glitches that prevent screenshots from saving.
If the issue persists, consult the Minecraft support forums for additional troubleshooting tips.
8.2 Screenshots are Low Quality
If your screenshots are low quality, try the following solutions:
- Increase Graphics Settings: Increase the graphics settings in Minecraft to improve the visual quality of the game.
- Use High-Resolution Textures: Use high-resolution texture packs to enhance the details and clarity of your screenshots.
- Disable Mipmapping: Disable mipmapping in Minecraft’s settings to prevent textures from appearing blurry at a distance.
Optimizing your graphics settings can significantly improve the quality of your Minecraft screenshots.
8.3 Screenshot Hotkeys Not Working
If your screenshot hotkeys are not working, try the following solutions:
- Check for Conflicting Programs: Check for other programs that may be using the same hotkeys. Close any conflicting programs and try again.
- Reset Minecraft Keybindings: Reset Minecraft’s keybindings to their default settings. This can resolve conflicts that may be preventing the hotkeys from working.
- Update Keyboard Drivers: Update your keyboard drivers to ensure that they are functioning correctly.
Ensuring that your keyboard drivers are up-to-date can resolve a variety of input-related issues.
9. Advanced Tips for Minecraft Photography
Elevate your Minecraft screenshots to the next level with these advanced photography tips.
9.1 Using Shaders and Resource Packs
Enhance the visual appeal of your screenshots with shaders and resource packs:
- Shaders: Shaders add realistic lighting, shadows, and reflections to your Minecraft world, creating stunning visual effects. Popular shader packs include SEUS, BSL, and Continuum.
- Resource Packs: Resource packs change the textures and models in Minecraft, allowing you to customize the look and feel of the game. Popular resource packs include Faithful, Sphax PureBDcraft, and John Smith Legacy.
Experimenting with different shaders and resource packs can dramatically transform the appearance of your Minecraft screenshots.
9.2 Mastering Camera Angles and Composition
Mastering camera angles and composition is essential for creating visually compelling screenshots:
- Rule of Thirds: Use the rule of thirds to create balanced and dynamic compositions. Divide the screen into nine equal parts and place key elements along the lines or intersections.
- Leading Lines: Use leading lines to guide the viewer’s eye through the scene and create a sense of depth.
- Symmetry: Use symmetry to create a sense of balance and harmony in your screenshots.
Understanding the principles of composition can help you create more visually appealing and engaging Minecraft screenshots.
9.3 Creating Dynamic Scenes with Mods
Use mods like Replay Mod and Camera Studio Mod to create dynamic scenes and capture stunning time-lapses:
- Replay Mod: Replay Mod allows you to record and replay your Minecraft gameplay, giving you complete control over the camera and allowing you to create cinematic videos and screenshots.
- Camera Studio Mod: Camera Studio Mod adds a virtual camera to Minecraft, allowing you to create smooth camera movements and capture stunning shots from any angle.
Mods like Replay Mod and Camera Studio Mod unlock a world of possibilities for creating dynamic and visually stunning Minecraft content.
10. Save Money While Enjoying Minecraft
Enjoying Minecraft doesn’t have to break the bank. Savewhere.net is your go-to resource for smart spending and savvy saving strategies. Here are some tips on how to enjoy Minecraft while keeping your budget in check:
10.1 Look for Deals on Minecraft and Related Products
Keep an eye out for sales and discounts on Minecraft and related products:
- Official Minecraft Website: Check the official Minecraft website and authorized retailers for promotions and discounts.
- Online Marketplaces: Browse online marketplaces like Amazon, eBay, and Steam for deals on Minecraft merchandise and accessories.
Subscribing to newsletters and following social media accounts can help you stay informed about the latest deals and promotions.
10.2 Utilize Free Resources and Content
Take advantage of the wealth of free resources and content available for Minecraft:
- Minecraft Wiki: Consult the Minecraft Wiki for detailed information on game mechanics, crafting recipes, and building tips.
- YouTube Tutorials: Watch YouTube tutorials for inspiration and guidance on building techniques, redstone contraptions, and game strategies.
- Community Forums: Participate in community forums and discussions to share ideas, ask questions, and learn from other players.
Leveraging free resources can enhance your Minecraft experience without costing you a dime.
10.3 Join Minecraft Communities for Shared Experiences
Connect with other Minecraft players through online communities and local events:
- Online Servers: Join public Minecraft servers to play with other players and collaborate on builds and projects.
- Local Meetups: Attend local Minecraft meetups and events to connect with players in your area and share your passion for the game.
Connecting with other players can enhance your Minecraft experience and provide opportunities for shared learning and collaboration.
By following these tips, you can enjoy Minecraft to the fullest while staying within your budget. Remember to visit Savewhere.net for more money-saving tips and resources.
Final Words
Whether you’re a seasoned Minecraft veteran or a newcomer to the world of block-building, capturing and sharing your creations is a rewarding experience. By following the tips and techniques outlined in this guide, you can easily find your Minecraft screenshots, optimize them for sharing, and connect with other players around the world. And remember, for more ways to save money and make the most of your resources, visit Savewhere.net!
Your Windows or Mac device may provide you with a few ways to capture a screenshot in Minecraft, but with limited features. It’s going to be a lot more fun and easier to use an application that offers rich features like Markup Hero. You can not only take screenshots but also edit and share them effortlessly. Whatever method you opt for, make sure you’re capturing the right moments and sharing images of your vast empire with your friends!
Ready to take your Minecraft experience to the next level? Visit savewhere.net to discover more tips, tricks, and resources for making the most of your favorite games and hobbies.
FAQ: Minecraft Screenshots
1. Where are Minecraft screenshots saved by default on Windows?
Minecraft screenshots are saved by default in the .minecraftscreenshots folder, located within the AppDataRoaming directory on Windows.
2. How do I access the AppData folder on Windows to find my Minecraft screenshots?
To access the AppData folder, press Windows Key + R, type %appdata% in the Run dialog box, and press Enter. This will take you directly to the Roaming folder, where you can find the .minecraft folder.
3. Where are Minecraft screenshots saved on macOS?
On macOS, Minecraft screenshots are saved in the ~/Library/Application Support/minecraft/screenshots directory.
4. How do I find the Library folder on macOS to access my Minecraft screenshots?
To access the Library folder, open Finder, click “Go” in the menu bar, select “Go to Folder,” type ~/Library, and press Enter. Then navigate to Application Support/minecraft/screenshots.
5. What is the easiest way to take a screenshot in Minecraft on Windows?
The easiest way to take a screenshot in Minecraft on Windows is to press the F2 key while in the game.
6. How can I take a screenshot of a specific area of the screen on macOS?
To capture a specific area of the screen on macOS, press CMD + SHIFT + 4 simultaneously. This will turn your cursor into a crosshair, allowing you to select the area you want to capture.
7. Can I use third-party tools to take and annotate Minecraft screenshots?
Yes, you can use third-party tools like Markup Hero to take, annotate, and organize your Minecraft screenshots. Markup Hero offers a range of features, including annotation tools, cross-platform compatibility, and easy sharing options.
8. How do I organize my Minecraft screenshots for easy access?
To organize your Minecraft screenshots, create a folder structure within your screenshots directory. You can categorize your images by date, project, or server. Additionally, rename your screenshots with descriptive file names to make them easier to identify.
9. What file format should I use for my Minecraft screenshots?
For Minecraft screenshots, it is generally best to use the PNG file format. PNG is a lossless format that preserves the sharp details and vibrant colors of the game.
10. How can I share my Minecraft screenshots with the world?
You can share your Minecraft screenshots on social media platforms like Twitter, Instagram, and Facebook. You can also share them on Minecraft forums and communities like Reddit’s r/Minecraft and the official Minecraft Forums. Additionally, you can create a Minecraft portfolio on websites like Imgur, Flickr, or Behance to showcase your best screenshots.