Saving pictures on your laptop is essential for preserving memories and important visuals. Are you looking for the best ways to save images on your laptop and manage your digital life efficiently? This article from savewhere.net provides various methods and helpful tips for picture saving and organization, so you can keep those cherished memories safe and accessible. With these easy to use tips, you can enhance your photo storage solutions and digital preservation techniques with savewhere.net today.
1. Why is Saving Pictures on Your Laptop Important?
Saving pictures on your laptop is important because it preserves precious memories, secures important visual data, and offers convenient accessibility.
- Preserving Memories: Saving pictures ensures you don’t lose irreplaceable moments.
- Securing Visual Data: Storing important documents as images protects them from loss.
- Convenient Accessibility: Having pictures on your laptop allows quick access for personal or professional use.
- Creating Backups: Uploading images to your laptop creates an extra backup in case of device failures.
2. What Are The Different Ways To Save Pictures On Your Laptop?
There are several ways to save pictures on your laptop, including using the OneDrive website, File Explorer, Windows settings, desktop app, mobile app, or directly from Microsoft Office applications.
2.1 Using the OneDrive Website
One way to save pictures is through the OneDrive website.
-
Sign in to the OneDrive website with your Microsoft account.
-
Browse to the desired location for your files.
-
Select Upload.
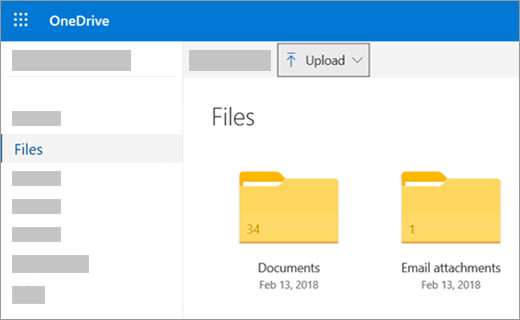 Upload files or pictures in OneDrive
 -
Choose the files to upload and select Open.
Tips:
- Drag files from File Explorer or Mac Finder directly to the OneDrive website.
- Use the Folder option in Google Chrome or Microsoft Edge to upload entire folders.
- Organize photos using OneDrive’s built-in features.
2.2 Copying or Moving Files Using File Explorer or Mac Finder
Another way to save pictures is by copying or moving files using File Explorer or Mac Finder.
-
Copying Files: Right-click the file or folder, select Copy, then Paste it into the OneDrive folder.
-
Moving Files (Windows File Explorer): Drag files from the right pane to OneDrive in the left pane.
-
Moving Files (Mac Finder): Drag files to OneDrive in the left pane. Finder will update to show OneDrive files, allowing you to drag the file to a sub-folder.
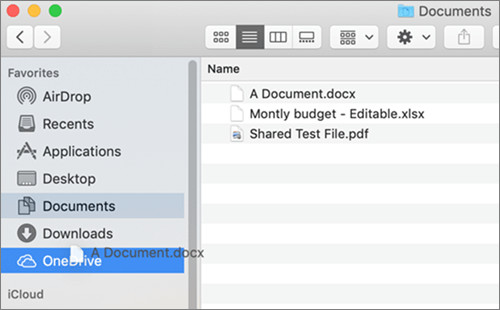 Mac Finder window showing drag-and-drop to move files
2.3 Utilizing Windows 10 or 11 Settings
In Windows 10 or 11, files can save to OneDrive by default, providing access from any device and ensuring protection against computer damage. You can adjust the save settings anytime.
- Access PC settings by swiping from the right edge of the screen and tapping Settings, then Change PC settings.
- For documents, select OneDrive and enable Save documents to OneDrive by default.
- For photos, choose Camera roll and select either Upload photos at good quality or Upload photos at best quality.
When moving files, you’re removing them from your PC and adding them to OneDrive.
- Select the arrow next to OneDrive and choose This PC.
- Browse and select the files you want to move.
- Select Cut.
- Select the arrow next to This PC and choose OneDrive to browse to a folder in your OneDrive.
- Select Paste.
2.4 Using the OneDrive Desktop App
Another option to save is to use the OneDrive desktop app, which is available for Mac.
- Download the free OneDrive desktop app.
- Automatically upload files and folders to OneDrive.
2.5 Utilizing a Mobile App
You can also save using the OneDrive mobile app, which is available for Android or iOS.
2.6 Saving Directly from Microsoft Office or Microsoft 365
In any Office document, you can save your photos directly from Microsoft Office or Microsoft 365.
- Select File > Save As.
- Choose your OneDrive.
- Pick the folder where you want to save the file.
3. What Are The Benefits Of Saving Pictures To OneDrive?
Saving pictures to OneDrive offers several benefits, including automatic backup, accessibility across devices, enhanced security, and collaboration features.
3.1 Automatic Backup
One of the primary advantages of using OneDrive is its automatic backup feature.
- Continuous Protection: OneDrive automatically backs up your photos, ensuring they are safe even if your laptop is damaged, lost, or stolen.
- Real-Time Syncing: As soon as you save a picture to your OneDrive folder, it syncs to the cloud.
- Version History: OneDrive keeps a history of previous versions of your files.
According to Microsoft, OneDrive’s automatic backup ensures your files are continuously protected.
3.2 Accessibility Across Devices
OneDrive allows you to access your photos from any device.
- Multi-Device Access: View and manage your pictures from any computer, tablet, or smartphone.
- Web-Based Access: Access your files through a web browser.
- Mobile App: The OneDrive mobile app for iOS and Android provides convenient access on the go.
This accessibility ensures you always have your photos.
3.3 Enhanced Security
OneDrive provides robust security measures to protect your photos.
- Encryption: Microsoft uses advanced encryption to protect your data.
- Data Loss Prevention: OneDrive includes features that help prevent data loss.
- Two-Factor Authentication: Add an extra layer of security.
Microsoft’s security protocols for OneDrive ensure your photos are safe from unauthorized access and data breaches.
3.4 Collaboration Features
OneDrive facilitates easy collaboration with others.
- Sharing Files: Share photos with friends, family, or colleagues.
- Shared Folders: Create shared folders.
- Co-editing: Work on documents together in real-time.
These collaboration tools make OneDrive ideal for sharing and working on photo-related projects.
4. How Do You Organize Your Saved Pictures On Your Laptop?
Organizing saved pictures on your laptop involves creating a structured folder system, using descriptive file names, and leveraging tagging and metadata.
4.1 Creating a Structured Folder System
Start by setting up a well-organized folder system.
- Categorize by Date: Create folders based on years, months, or specific dates.
- Event-Based Folders: Organize photos by events such as “Vacation 2023,” “Family Reunion,” or “Wedding.”
- Project-Specific Folders: If you use photos for specific projects, create folders.
- Avoid Deep Nesting: Keep the folder structure relatively shallow to avoid difficulty.
A structured folder system makes it easier to locate specific photos.
4.2 Using Descriptive File Names
Descriptive file names can significantly improve your ability to find and manage photos.
- Include Dates: Start file names with the date (YYYY-MM-DD) to keep them chronological.
- Add Keywords: Include relevant keywords that describe the content of the photo.
- Be Consistent: Use a consistent naming convention for all your photos.
- Avoid Special Characters: Stick to letters, numbers, and underscores in your file names.
For example, instead of “IMG1234.jpg,” use “2023-12-24_Christmas_Family_Dinner.jpg.”
4.3 Leveraging Tagging and Metadata
Tagging and metadata allow you to add extra information to your photo files.
- Tagging: Use photo management software.
- Metadata: Add details such as camera settings, location, and descriptions directly to the file’s metadata.
- Keywords: Add keywords to the metadata to make the photos searchable.
Software like Adobe Lightroom, Windows Photos, and Apple Photos provides robust tagging and metadata management features.
4.4 Regular Maintenance
Maintaining your photo library is important.
- Delete Duplicates: Regularly check for and remove duplicate photos.
- Backup Your Library: Create backups of your organized photo library.
- Review and Reorganize: Periodically review and reorganize your folders and files.
- Update Metadata: Update metadata to reflect new information.
Regular maintenance ensures your photo library remains organized.
5. How Can You Manage Storage Space When Saving Pictures On Your Laptop?
Managing storage space when saving pictures on your laptop involves compressing images, using external storage devices, and utilizing cloud storage solutions.
5.1 Compressing Images
Compressing images reduces their file size.
- Use Compression Tools: Use image editing software like Adobe Photoshop or online tools like TinyPNG to compress images without significant quality loss.
- Adjust Resolution: Reduce the resolution of images.
- Choose the Right Format: Save images in formats like JPEG.
By compressing your images, you can store more photos without filling up your laptop’s storage.
5.2 Using External Storage Devices
External storage devices offer a convenient way to expand your storage capacity.
- External Hard Drives: Use external hard drives for storing large photo libraries.
- USB Flash Drives: Use USB flash drives for smaller, portable storage.
- NAS Devices: Network-Attached Storage (NAS) devices provide centralized storage.
When using external storage, make sure to regularly back up your photos to prevent data loss.
5.3 Utilizing Cloud Storage Solutions
Cloud storage solutions like OneDrive provide a scalable way to store your photos.
- OneDrive: Upload your photos to OneDrive.
- Google Photos: Google Photos offers free storage.
- Dropbox: Dropbox is another popular option.
According to a study by Statista, cloud storage adoption is increasing, with more users relying on these services.
5.4 Regularly Backing Up Your Data
Regularly backing up your data is essential for preventing data loss.
- Automated Backups: Use backup software.
- Multiple Backups: Keep multiple backups in different locations.
- Test Your Backups: Regularly test your backups.
Regular backups ensure that your photos are safe.
6. How Do You Back Up Your Pictures Saved On Your Laptop?
Backing up pictures saved on your laptop is essential for data protection.
6.1 Using Cloud Storage Services
Cloud storage services offer a convenient and automated way to back up your photos.
- OneDrive: Microsoft OneDrive integrates seamlessly.
- Google Photos: Google Photos offers automatic backups.
- Dropbox: Dropbox is another popular cloud storage option.
By using cloud storage, your photos are automatically backed up.
6.2 Using External Hard Drives
External hard drives provide a reliable way to back up your photo library.
- Connect and Copy: Connect the external hard drive.
- Use Backup Software: Use backup software.
- Schedule Regular Backups: Set up a schedule.
External hard drives offer a secure and offline backup solution.
6.3 Using Network-Attached Storage (NAS) Devices
NAS devices provide a centralized backup solution for multiple devices.
- Centralized Storage: NAS devices offer centralized storage for your home network.
- Automated Backups: Configure the NAS device.
- Remote Access: Access your backups remotely.
NAS devices are a good option for households.
6.4 Creating a Backup Schedule
Creating a backup schedule ensures that your photos are backed up.
- Determine Frequency: Decide how often you need to back up your photos.
- Automate the Process: Use backup software or cloud services to automate the process.
- Verify Backups: Regularly verify your backups to ensure they are working.
A well-defined backup schedule ensures your photos are always protected.
7. What Are Some Common Mistakes To Avoid When Saving Pictures On A Laptop?
Avoiding common mistakes when saving pictures on a laptop ensures the safety and accessibility of your memories.
7.1 Not Backing Up Your Photos
One of the most common and critical mistakes is failing to back up your photos.
- Risk of Data Loss: Without backups, you risk losing your photos.
- Regular Backups: Implement a regular backup schedule.
- Multiple Backup Locations: Store backups in multiple locations.
According to a study by the University of Texas, data loss can have significant emotional and financial consequences.
7.2 Saving Photos Only in One Location
Relying on a single location for your photos is risky.
- Hardware Failure: Laptops can fail, leading to data loss.
- Theft or Damage: Laptops can be stolen or damaged.
- Use Multiple Locations: Store your photos.
Diversifying your storage locations ensures that your photos.
7.3 Neglecting Organization
Failing to organize your photos can make it difficult to find them.
- Difficulty Locating Photos: Poor organization can make it hard to find specific photos.
- Create a System: Develop a clear folder and naming system.
- Use Metadata: Utilize metadata to add descriptive information.
A well-organized photo library is easier to manage.
7.4 Ignoring Image Compression
Ignoring image compression can lead to storage issues.
- Storage Limitations: High-resolution photos can quickly fill up your storage.
- Compress Images: Compress your photos without sacrificing too much quality.
- Choose Appropriate Formats: Use formats like JPEG.
By compressing images, you can store more photos.
7.5 Not Protecting Against Viruses and Malware
Failing to protect against viruses and malware can compromise your photo library.
- Risk of Corruption: Viruses and malware can corrupt or delete your photos.
- Use Antivirus Software: Install and regularly update antivirus software.
- Be Cautious Online: Be careful when downloading files or clicking on links.
Protecting your laptop from viruses and malware is essential.
8. What Are The Best Image Formats For Saving Pictures On A Laptop?
Choosing the right image formats for saving pictures on a laptop ensures optimal quality and storage efficiency.
8.1 JPEG (Joint Photographic Experts Group)
JPEG is the most widely used format for photographs due to its excellent compression capabilities.
- High Compression: JPEGs can significantly reduce file size.
- Good for Photos: Ideal for photographs with complex colors and gradients.
- Lossy Compression: JPEGs use lossy compression, which means some data is lost during compression.
JPEG is the go-to format.
8.2 PNG (Portable Network Graphics)
PNG is a lossless format that preserves image quality.
- Lossless Compression: PNG uses lossless compression, which means no data is lost.
- Good for Graphics: Ideal for graphics, logos, and images with text.
- Larger File Size: PNG files are typically larger than JPEGs.
PNG is a better choice for images.
8.3 TIFF (Tagged Image File Format)
TIFF is a versatile format often used in professional photography and printing.
- High Quality: TIFF preserves image quality.
- Large File Size: TIFF files are very large.
- Professional Use: Used in professional photography.
TIFF is suitable for archiving important images.
8.4 WebP
WebP is a modern image format.
- Superior Compression: WebP offers superior compression.
- Support for Animation: WebP supports both lossy and lossless compression.
- Growing Adoption: WebP is gaining popularity.
WebP.
9. How Can You Transfer Pictures From Your Phone To Your Laptop?
Transferring pictures from your phone to your laptop is essential for backing up memories and managing your digital content.
9.1 Using a USB Cable
Transferring pictures using a USB cable is a direct and reliable method.
- Connect Your Phone: Connect your phone to your laptop using a USB cable.
- Select Transfer Mode: On your phone, select the transfer mode.
- Access Files: On your laptop, access your phone.
- Copy Photos: Copy the photos.
Using a USB cable is a straightforward method.
9.2 Using Cloud Storage Services
Cloud storage services offer a seamless way to transfer photos between your phone and laptop.
- OneDrive: Upload photos from your phone to OneDrive.
- Google Photos: Google Photos offers automatic syncing.
- Dropbox: Dropbox is another popular option.
Cloud storage services provide a convenient way to keep your photos.
9.3 Using Email or Messaging Apps
Email or messaging apps can be used to transfer individual photos or small batches.
- Attach Photos: Attach the photos to an email or message.
- Send to Yourself: Send the email or message to yourself.
- Download on Laptop: Download the photos.
Email or messaging apps are suitable.
9.4 Using Wi-Fi Transfer Apps
Wi-Fi transfer apps allow you to transfer photos wirelessly between your phone and laptop.
- Install App: Install a Wi-Fi transfer app.
- Connect Devices: Connect both devices to the same Wi-Fi network.
- Transfer Photos: Use the app to transfer photos.
Wi-Fi transfer apps.
10. What Are Some Useful Tools And Software For Managing Pictures On A Laptop?
Several useful tools and software options are available for managing pictures on a laptop.
10.1 Adobe Lightroom
Adobe Lightroom is a professional photo management and editing software.
- Photo Management: Lightroom.
- Editing Tools: Lightroom offers a wide range of editing tools.
- Cloud Syncing: Lightroom.
Adobe Lightroom is a powerful tool for managing and editing photos.
10.2 Google Photos
Google Photos is a free and user-friendly photo management service.
- Free Storage: Google Photos offers free storage.
- Automatic Backup: Google Photos.
- AI Features: Google Photos.
Google Photos.
10.3 Microsoft Photos
Microsoft Photos is a built-in photo management app for Windows.
- Basic Editing: Microsoft Photos.
- Integration: Microsoft Photos integrates seamlessly.
- User-Friendly: Microsoft Photos.
Microsoft Photos.
10.4 IrfanView
IrfanView is a lightweight and versatile image viewer and editor.
- Fast and Efficient: IrfanView.
- Batch Processing: IrfanView.
- Plugin Support: IrfanView.
IrfanView is a great option.
10.5 digiKam
digiKam is an advanced open-source photo management application.
- Advanced Features: digiKam.
- Open-Source: digiKam.
- Cross-Platform: digiKam.
digiKam.
Navigating the world of digital photography can be overwhelming, but savewhere.net is here to simplify your journey. By exploring these methods and tools, you can safeguard your precious memories and maintain an organized digital life.
Ready to take control of your digital memories and save money while doing it? Visit savewhere.net today to discover more tips, exclusive deals, and a supportive community that will help you make the most of your digital life. Don’t wait—start your journey towards better photo management and financial savings with savewhere.net now.
Address: 100 Peachtree St NW, Atlanta, GA 30303, United States
Phone: +1 (404) 656-2000
Website: savewhere.net
FAQ: How To Save Pictures On Laptop
-
How do I save pictures from the internet onto my laptop?
Right-click on the image and select “Save image as,” then choose a location on your laptop.
-
What is the best way to organize my pictures on my laptop?
Create a structured folder system, use descriptive file names, and leverage tagging and metadata.
-
How can I back up my pictures saved on my laptop?
Use cloud storage services, external hard drives, or NAS devices, and create a backup schedule.
-
What are the best image formats for saving pictures on my laptop?
JPEG for general photos, PNG for graphics, and TIFF for professional use.
-
How can I transfer pictures from my phone to my laptop?
Use a USB cable, cloud storage services, email, or Wi-Fi transfer apps.
-
What are some common mistakes to avoid when saving pictures on a laptop?
Not backing up photos, saving photos in only one location, and neglecting organization.
-
How do I manage storage space when saving many pictures on my laptop?
Compress images, use external storage devices, and utilize cloud storage solutions.
-
What are some useful tools and software for managing pictures on a laptop?
Adobe Lightroom, Google Photos, Microsoft Photos, IrfanView, and digiKam.
-
How do I automatically save photos from my camera to my laptop?
Use software that supports automatic transfer or cloud syncing.
-
Is it safe to save my pictures on cloud storage services?
Yes, cloud storage services offer robust security measures, but use strong passwords.