Saving a Word document as read only is a smart way to protect your work from accidental edits, and at savewhere.net, we understand the importance of securing your valuable content. This guide provides simple yet effective methods to ensure your documents are viewed as intended, maintaining their integrity and preventing unwanted alterations. Let’s explore how to safeguard your files and enhance your document security with these easy-to-follow steps.
1. Why Make a Word Document Read Only?
Want to know why protecting your Word documents is a great idea? Here are some key reasons:
-
Prevent Accidental Changes: The main reason is to stop unintentional edits. When a document is read-only, anyone opening it can read it but cannot make changes unless they save a copy.
-
Maintain Document Integrity: Ensuring the document stays as you intended is crucial, especially for legal or formal documents.
-
Facilitate Reviews: When you share documents for review, making them read-only ensures reviewers focus on providing feedback without altering the original content.
-
Control Editing Access: If you only want certain individuals to edit the document, setting it to read-only for others is an effective way to manage who can make changes.
-
Collaboration Safety: In collaborative environments, it reduces the risk of conflicting edits or accidental deletions.
-
Protection from Malware: Although not foolproof, making a document read-only can offer a slight layer of protection against certain types of malware that attempt to modify files.
-
Compliance Requirements: Some industries require documents to be stored in a read-only format to comply with regulatory standards, ensuring data isn’t tampered with.
Making a document read-only can be an important step in protecting your work and ensuring its accuracy and integrity.
2. Methods to Save a Word Document as Read Only
Want to make sure your Word documents are safe from unwanted edits? Here are several methods you can use:
2.1. Using the ‘Always Open as Read-Only’ Option
This is a straightforward method. Here’s how to do it:
-
Open the Document: First, open the Word document you want to protect.
-
Go to Info: Click on the File tab in the top left corner, then select Info from the menu.
-
Protect Document: Click on Protect Document.
-
Choose ‘Always Open as Read-Only’: Select Always Open as Read-Only from the dropdown menu.
-
Save the Document: Save the document. Now, every time someone opens this document, it will open in read-only mode.
2.2. Restricting Editing
Restricting editing is another way to prevent changes to your document:
-
Open the Document: Open the Word document you wish to protect.
-
Go to the Review Tab: Click on the Review tab in the ribbon.
-
Restrict Editing: In the Protect group, click Restrict Editing.
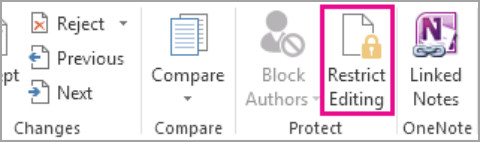 Restrict editing
 -
Editing Restrictions: Under Editing restrictions, check the box that says Allow only this type of editing in the document.
-
Select ‘No changes (Read only)’: In the dropdown menu, choose No changes (Read only).
-
Start Enforcing Protection: Click Yes, Start Enforcing Protection.
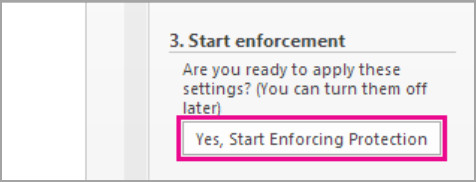 Start enforcement
 -
Password (Optional): You can add a password to prevent others from removing the restriction. Enter and confirm your password in the dialog box. If you don’t set a password, anyone can stop the protection.
-
Save the Document: Save the document to apply the changes.
2.3. Marking as Final
Marking a document as final is a simpler way to discourage editing, though it’s not as secure as the other methods:
-
Open the Document: Open the Word document.
-
Go to Info: Click on the File tab, then select Info.
-
Protect Document: Click on Protect Document.
-
Mark as Final: Select Mark as Final from the dropdown menu.
-
Confirm: Word will display a message indicating the document will be marked as final. Click OK to confirm.
-
Save the Document: Save the document. When others open the document, Word will indicate that the author has marked it as final and discourage editing.
2.4. Saving as a PDF
Saving your Word document as a PDF is a great way to ensure it remains read-only. Here’s how:
-
Open the Document: Start by opening the Word document you want to make read-only.
-
Go to ‘Save As’: Click on the File tab in the top left corner and select Save As.
-
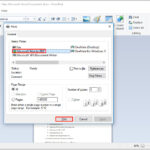
Choose PDF Format: In the Save As dialog box, select PDF (*.pdf) from the Save as type dropdown menu.
-
Optimize for Standard: Ensure the optimization is set to Standard for best quality.
-
Save: Click the Save button.
-
Review Permissions (Optional): Some PDF software allows you to set permissions to further restrict editing, printing, or copying.
-
Share the PDF: Now, share the PDF file. It’s much harder to edit than a Word document, making it a great way to keep your content safe.
2.5. Using OneDrive’s View-Only Sharing
OneDrive offers a way to share documents with view-only permissions:
-
Upload to OneDrive: Upload your Word document to your OneDrive account.
-
Share: Right-click on the file and select Share.
-
Set Permissions: In the sharing settings, select Anyone with the link can view.
-
Apply: Apply the settings.
-
Copy the Link: Copy and share the view-only link.
**2.6. Compatibility Mode Considerations
Here’s a closer look at how compatibility mode can affect your ability to save a Word document as read-only:
Understanding Compatibility Mode:
-
What it is: Compatibility Mode is a feature in Microsoft Word that allows newer versions of Word to open and work with documents created in older versions (e.g., Word 97-2003).
-
Why it exists: It ensures that older documents can still be opened and edited, preserving their original formatting and features.
How Compatibility Mode Affects Read-Only Options:
-
Limited Functionality: When a document is opened in Compatibility Mode, some of the newer features of Word are disabled, including certain advanced protection features.
-
Restricting Editing Issues: The “Restrict Editing” feature, which is commonly used to make a document read-only, might not function as expected or might not be available at all.
-
‘Always Open as Read-Only’ Issues: Similarly, the ‘Always Open as Read-Only’ option may not be fully effective in Compatibility Mode.
Steps to Ensure Full Functionality:
-
Check if the Document is in Compatibility Mode:
- Open the document in Word.
- Look at the title bar at the top of the Word window. If it says “[Compatibility Mode]” next to the file name, the document is in Compatibility Mode.
-
Convert the Document to the Latest Format:
-
Click the File tab.
-
Click Info.
-
Click Convert.
-
Word will display a warning message about upgrading the document format. Click OK to proceed.
-
Save the document. This will save the document in the latest Word format (.docx), and remove the Compatibility Mode limitations.
-
-
Apply Read-Only Settings:
- After converting the document, apply the read-only settings using one of the methods described earlier (e.g., Restrict Editing or ‘Always Open as Read-Only’).
Best Practices:
- Always Convert Older Documents: If you frequently work with older documents, convert them to the latest format to take advantage of all the features in newer versions of Word.
- Inform Collaborators: If you share documents with others, inform them about the importance of using the latest Word format to ensure compatibility and security.
- Test Read-Only Settings: After applying read-only settings, test the document by opening it on another computer or with another user account to ensure the settings are working as expected.
2.7. Using Third-Party Software
While Microsoft Word offers built-in methods to save documents as read-only, third-party software can provide enhanced protection and control. Here’s how and why you might use such tools:
Why Use Third-Party Software?
- Enhanced Security: Some third-party tools offer more robust security features than Word’s built-in options, such as stronger encryption and permission controls.
- Advanced Permissions: These tools can provide more granular control over who can view, edit, print, or copy the document.
- Password Protection: Stronger password protection options can prevent unauthorized users from removing read-only restrictions.
- Integration with Other Security Measures: Third-party software can integrate with other security protocols, like data loss prevention (DLP) systems, to provide comprehensive protection.
Examples of Third-Party Software:
- Adobe Acrobat Pro:
- Features: Adobe Acrobat Pro allows you to create PDFs with advanced security settings, including password protection, permission restrictions, and digital signatures.
- How to Use: Open your Word document in Adobe Acrobat Pro, convert it to PDF, and then use the security settings to restrict editing, printing, and copying.
- Nitro PDF:
- Features: Nitro PDF offers similar functionalities to Adobe Acrobat Pro, including the ability to add passwords, restrict editing, and apply digital signatures.
- How to Use: Convert your Word document to PDF using Nitro PDF, and then apply the desired security settings.
- Microsoft Office Protected View:
- Features Although a built in security Feature in Microsoft Office Suite, it provides added protection by opening potentially unsafe files, like those from the internet, in a read-only environment,
General Steps to Use Third-Party Software:
- Choose the Right Software: Research and select a third-party software that meets your specific security needs. Consider factors like cost, features, ease of use, and compatibility with your existing systems.
- Install the Software: Download and install the software on your computer.
- Convert to PDF: Open your Word document and convert it to PDF using the third-party software.
- Apply Security Settings: Use the software’s security settings to add password protection, restrict editing, printing, and copying, and apply any other desired permissions.
- Save the Protected Document: Save the protected PDF document.
- Test the Protection: Open the protected document to ensure that the security settings are working as expected.
3. Step-by-Step Guide: Save Word Document as Read Only
Want a quick guide to make your Word document read-only? Here’s how:
-
Open Your Document: Open the Word document you want to protect.
-
Go to the File Tab: Click on File in the top left corner.
-
Select Info: Choose Info from the menu.
-
Protect Document: Click on Protect Document.
-
Choose an Option:
- Always Open as Read-Only: Select this to have the document always open in read-only mode.
- Restrict Editing: Choose this to limit what changes can be made.
-
Restrict Editing Steps (If Chosen):
- Click Review > Restrict Editing.
- Check Allow only this type of editing in the document.
- Select No changes (Read only).
- Click Yes, Start Enforcing Protection.
- Enter a password if desired.
-
Save Your Document: Save the document to apply the settings.
4. Understanding Read-Only Restrictions
Want to know what it really means when a Word document is read-only? Let’s break it down:
-
What Read-Only Means: A read-only document means you can open and view the file, and even copy its contents, but you can’t make any changes to the original.
-
Why It’s Useful: It’s great for sharing documents for review, protecting legal documents, or ensuring templates aren’t accidentally altered.
-
How It Works: When you try to edit a read-only document, Word will usually prompt you to save a copy with a new name or in a different location. This keeps the original intact.
-
Limitations: Read-only isn’t foolproof. Someone can still save a copy and edit that version. For stronger protection, consider password protection or saving as a PDF with editing restrictions.
-
Different Methods: There are several ways to make a document read-only, including the ‘Always Open as Read-Only’ option, restricting editing, marking as final, or saving as a PDF.
5. Best Practices for Document Protection
Want to keep your Word documents safe and sound? Here are some best practices to follow:
-
Choose the Right Method: Pick the protection method that best fits your needs. For basic protection against accidental edits, “Mark as Final” might do. For stronger control, use “Restrict Editing” or save as a PDF with restricted permissions.
-
Use Strong Passwords: If you opt to password-protect your document, use a strong, unique password. A mix of upper and lower case letters, numbers, and symbols is ideal.
-
Educate Collaborators: If you’re sharing documents with others, let them know why you’ve set certain restrictions. Clear communication can prevent misunderstandings and ensure everyone respects the document’s integrity.
-
Regularly Update Software: Keep your Microsoft Word and other related software up to date. Updates often include security patches that can protect your documents from vulnerabilities.
-
Backup Your Documents: Regularly back up your important documents. This way, if something happens to the original file, you have a copy.
-
Be Careful with Email Attachments: When sending documents via email, be mindful of who has access to them. Consider encrypting sensitive documents before sending.
-
Review Permissions Regularly: If you have documents with specific permissions set, review them periodically to ensure they are still appropriate. People’s roles and responsibilities can change, so the level of access they need might also change.
-
Use Digital Signatures: For important documents, consider using digital signatures. These can verify the document’s authenticity and ensure it hasn’t been tampered with.
By following these practices, you can significantly enhance the security and integrity of your Word documents.
6. Common Issues and Troubleshooting
Running into snags while trying to save your Word document as read-only? Here are some common issues and how to tackle them:
-
Problem: Can’t find the ‘Restrict Editing’ option.
- Solution: Make sure you’re in the Review tab. If you still don’t see it, your version of Word might be different. Look for ‘Protect Document’ under the File > Info menu.
-
Problem: The ‘Always Open as Read-Only’ option doesn’t seem to work.
- Solution: Ensure the document is not opening in Compatibility Mode. Convert the document to the latest format by going to File > Info > Convert.
-
Problem: Forgetting the password for Restrict Editing.
- Solution: Unfortunately, if you forget the password, there’s no built-in way to recover it in Word. You might need to use third-party password recovery tools, but these aren’t always reliable. It’s best to keep a secure record of your passwords.
-
Problem: Changes can still be made after marking as final.
- Solution: ‘Mark as Final’ is more of a suggestion than a restriction. It discourages editing but doesn’t prevent it. For stricter control, use ‘Restrict Editing’ or save as a PDF with restricted permissions.
-
Problem: Difficulty saving as a PDF.
- Solution: Ensure you have a PDF reader or creator installed on your computer. If the issue persists, try using the ‘Print to PDF’ option.
-
Problem: Read-only settings are lost when sharing the document.
- Solution: When sharing, use OneDrive or a similar service that allows you to set view-only permissions. This ensures the document remains read-only for the recipient.
-
Problem: Compatibility issues with older versions of Word.
- Solution: Save the document in a widely compatible format, like .doc, or convert it to a PDF before sharing.
-
Problem: Third-party software conflicts.
- Solution: Ensure the third-party software is compatible with your version of Word and operating system. Check for updates or try a different tool if conflicts persist.
7. How to Open a Document Shared as Read Only
When someone shares a Word document with you as read-only, here’s how to handle it:
-
Open the Document: Double-click the file to open it in Microsoft Word.
-
Read-Only Mode: Word will notify you that the document is shared as read-only. This means you can view and copy the content, but you can’t make changes to the original file.
-
Options:
- To Open as Read Only: Select Yes when prompted. This ensures you open the document in view-only mode.
- To Open in Editing Mode (If Allowed): Select No when prompted. Note that this option is only available if the document owner has granted editing permissions.
-
Making Changes:
- If you need to make changes, you’ll have to save a copy of the document. Go to File > Save As, and save the document with a new name or in a different location. This leaves the original document untouched.
-
Understanding Permissions:
- If the document owner has set editing restrictions, you may not be able to make any changes, even in a saved copy. In this case, you’ll need to contact the owner to request editing permissions.
-
OneDrive and SharePoint:
- If the document is shared via OneDrive or SharePoint, the sharing settings will determine whether you can edit the document. Ensure you have the correct permissions before attempting to make changes.
8. Advanced Tips for Securing Word Documents
Want to take your Word document security to the next level? Here are some advanced tips to consider:
-
Digital Signatures: Add a digital signature to your document to verify its authenticity and integrity. This assures recipients that the document hasn’t been altered since it was signed.
-
Encryption: Use Word’s built-in encryption feature to protect sensitive documents with a password. This makes it nearly impossible for unauthorized users to access the content.
-
Information Rights Management (IRM): If you’re using Microsoft 365, explore IRM to control who can access, forward, print, or copy your documents. This is especially useful for highly confidential information.
-
Data Loss Prevention (DLP) Policies: Implement DLP policies to prevent sensitive information from leaving your organization. These policies can automatically detect and block the transmission of confidential data.
-
Watermarks: Add watermarks to your documents to discourage unauthorized use. You can use text like “Confidential” or “Do Not Copy” to make it clear that the document is not for general distribution.
-
Metadata Removal: Before sharing a document, remove any metadata that could reveal sensitive information about the author, organization, or creation process.
-
Document Access Auditing: Use auditing tools to track who is accessing your documents and what actions they are taking. This can help you identify and address potential security breaches.
-
Secure Collaboration Platforms: Use secure collaboration platforms like Microsoft Teams or SharePoint to share and co-author documents. These platforms offer advanced security features and access controls.
-
Regular Security Assessments: Conduct regular security assessments to identify vulnerabilities in your document protection practices. This can help you stay ahead of potential threats and ensure your documents remain secure.
-
Educate Users: Provide training to your users on best practices for document security. This can help them understand the importance of protecting sensitive information and avoid common security mistakes.
9. Legal and Compliance Considerations
When dealing with sensitive or regulated information in Word documents, it’s crucial to consider legal and compliance requirements:
-
Data Protection Laws: Understand and comply with data protection laws like GDPR (General Data Protection Regulation) in Europe and CCPA (California Consumer Privacy Act) in the United States. These laws govern how personal data is collected, processed, and stored.
-
Industry-Specific Regulations: Be aware of industry-specific regulations like HIPAA (Health Insurance Portability and Accountability Act) for healthcare and PCI DSS (Payment Card Industry Data Security Standard) for financial information. These regulations require specific security measures to protect sensitive data.
-
Document Retention Policies: Implement document retention policies to ensure that documents are stored for the required period and then securely disposed of. This helps comply with legal and regulatory requirements and reduces the risk of data breaches.
-
Legal Review: Have your document protection practices reviewed by legal counsel to ensure they comply with all applicable laws and regulations.
-
Privacy Policies: Develop and implement privacy policies that clearly explain how you collect, use, and protect personal information in your documents.
-
Audit Trails: Maintain audit trails of document access and modifications to demonstrate compliance with legal and regulatory requirements.
-
Incident Response Plan: Develop an incident response plan to address data breaches or security incidents. This plan should outline the steps to take to contain the breach, notify affected parties, and prevent future incidents.
-
Employee Training: Provide regular training to employees on legal and compliance requirements related to document protection. This can help them understand their responsibilities and avoid compliance violations.
-
Third-Party Vendor Management: If you use third-party vendors to store or process your documents, ensure they comply with all applicable legal and regulatory requirements.
10. FAQ About Saving Word Documents as Read Only
Have questions about saving Word documents as read-only? Here are some frequently asked questions to help you out:
-
Q: How do I make a Word document read-only?
- A: You can make a Word document read-only by using the “Always Open as Read-Only” option (File > Info > Protect Document), restricting editing (Review > Restrict Editing), marking as final (File > Info > Protect Document), or saving it as a PDF with restricted permissions.
-
Q: What does it mean when a Word document is read-only?
- A: A read-only Word document means that you can open, view, and copy the contents of the file, but you cannot make any changes to the original document.
-
Q: How can I remove read-only from a Word document?
- A: To remove read-only, go to File > Info and uncheck “Always Open as Read-Only.” If editing is restricted, go to Review > Restrict Editing and click “Stop Protection.” You may need a password to do this.
-
Q: Can I password-protect a read-only Word document?
- A: Yes, you can password-protect a read-only Word document by using the “Restrict Editing” option. This prevents unauthorized users from removing the read-only restriction.
-
Q: What happens if I try to edit a read-only Word document?
- A: If you try to edit a read-only Word document, Word will prompt you to save a copy of the document with a new name or in a different location. The original document will remain unchanged.
-
Q: How do I share a Word document as read-only with others?
- A: You can share a Word document as read-only by using OneDrive or a similar service that allows you to set view-only permissions. Alternatively, you can save the document as a PDF with restricted permissions.
-
Q: Does marking a document as final prevent editing?
- A: Marking a document as final discourages editing but doesn’t prevent it. It’s more of a suggestion to recipients that the document is in its final form.
-
Q: Can I make a Word document read-only on a Mac?
- A: Yes, you can make a Word document read-only on a Mac using the same methods as on a Windows PC.
-
Q: What should I do if I forget the password to remove read-only restrictions?
- A: Unfortunately, there is no built-in way to recover a lost password in Word. You may need to use third-party password recovery tools, but these are not always reliable.
-
Q: Is it possible to track who is accessing my read-only Word document?
- A: Yes, if you are using a collaboration platform like SharePoint or OneDrive, you can track who is accessing your document and what actions they are taking.
Securing your Word documents is crucial, and savewhere.net is here to help you with the latest tips and tricks to manage your digital content effectively. For more insights and resources on protecting your financial and personal documents, visit savewhere.net today and explore our comprehensive guides and tools. Whether you’re looking to save money or secure your data, we’ve got you covered!
(Contact Information: Address: 100 Peachtree St NW, Atlanta, GA 30303, United States. Phone: +1 (404) 656-2000. Website: savewhere.net.)