Saving images from Google is a common task, but do you know the most effective methods? This comprehensive guide from savewhere.net will show you How To Save Google Images efficiently, manage them effectively, and even use them responsibly, all while saving money and maximizing your resources.
1. What Are The Easiest Ways To Save Google Images On Different Devices?
The easiest ways to save Google Images vary depending on the device you are using. Generally, right-clicking on a computer or long-pressing on a mobile device brings up a menu with a “Save image as…” or “Download image” option.
Saving Google Images depends on your device. Here’s a breakdown:
-
Desktop (Windows/Mac):
- Right-Click Method: Right-click on the image and select “Save image as…” Choose your desired folder and click “Save”.
- Drag-and-Drop Method: Click and drag the image directly to your desktop or a folder.
-
Mobile (Android/iOS):
- Long-Press Method: Tap and hold the image until a menu appears. Select “Download image” (Android) or “Add to Photos” (iOS).
- Screenshot Method: Take a screenshot of the image. Crop the image to remove any unnecessary parts.
It is important to consider image quality and usage rights. Downloading in the original format ensures the best quality, while understanding the licensing terms is crucial for legal use. According to the U.S. Copyright Office, unauthorized use of copyrighted images can lead to legal repercussions.
2. How Can I Save Google Images On My Computer With Different Browsers?
Saving Google Images on your computer is generally straightforward across different browsers, with minor variations in the steps. The process typically involves right-clicking on the image and selecting a “Save image” option.
Here’s how to save images using popular browsers:
- Google Chrome:
- Right-click on the image you want to save.
- Select “Save image as…”
- Choose the desired folder and click “Save.”
- Mozilla Firefox:
- Right-click on the image.
- Select “Save Image As…”
- Name the file and choose the location.
- Microsoft Edge:
- Right-click on the image.
- Select “Save picture as…”
- Specify the folder and save the image.
- Safari:
- Right-click (or Control-click) on the image.
- Select “Save Image to Downloads” or “Save Image As…” to choose a specific location.
3. What Are The Steps To Save A Google Image On An Android Device?
To save a Google Image on an Android device, tap and hold the image, then select “Download image” from the options that appear. This saves the image directly to your device’s download folder.
Here’s a more detailed breakdown:
- Open Google Images: Use the Google app or a browser to search for the image you want to save.
- Find Your Image: Locate the specific image you want to download.
- Tap and Hold: Tap and hold the image for a few seconds. This action will bring up a context menu.
- Select “Download Image”: From the menu that appears, select “Download image.” The exact wording may vary slightly depending on your device and browser.
- Locate the Image: The image is typically saved in your device’s “Downloads” folder. You can access it through your file manager app or gallery app.
Did you know that managing your data usage can also save you money? According to a report by the Pew Research Center, many smartphone users are concerned about exceeding their data limits. By downloading images over Wi-Fi, you can avoid using your mobile data, contributing to potential savings. This is just one of the many ways savewhere.net helps you manage your digital life efficiently.
4. How Do I Save A Google Image To My iPhone Or iPad?
Saving a Google Image to your iPhone or iPad involves tapping and holding the image, then selecting “Add to Photos” to save it to your device’s Photos app. This method ensures the image is easily accessible in your photo library.
Here’s a more detailed guide:
- Find the Image: Open the Google app or Safari and search for the image you want to save.
- Tap and Hold: Tap and hold the image until a menu appears.
- Select “Add to Photos”: From the menu, choose “Add to Photos.” This will save the image to your device’s photo library.
- Access the Image: Open the Photos app on your iPhone or iPad. The saved image will be in your “Recents” album.
According to a study by Statista, iPhone users are increasingly concerned about data privacy. Saving images directly to your device ensures that you maintain control over your data, aligning with the growing emphasis on digital privacy.
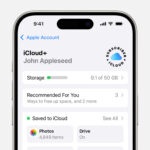
5. Is It Possible To Save Google Images Directly To Cloud Storage?
Yes, it is possible to save Google Images directly to cloud storage such as Google Drive or Dropbox using browser extensions or third-party apps that offer this functionality.
Here’s a breakdown:
- Browser Extensions:
- Install a browser extension like “Save to Google Drive” or “Save to Dropbox.”
- Right-click on the Google Image and select the option to save it directly to your chosen cloud service.
- Third-Party Apps:
- Use apps that integrate with Google Images and allow you to select and save images directly to cloud storage.
For example, the “Save to Google Drive” Chrome extension allows you to save images directly to a specific folder in your Google Drive with just a few clicks. Similarly, the “Save Image to Dropbox” extension offers the same functionality for Dropbox users.
6. How Can I Save Multiple Google Images At Once?
Saving multiple Google Images at once can be achieved using browser extensions designed for batch downloading, or by utilizing third-party applications that support bulk image saving.
Here’s how to do it:
- Browser Extensions:
- Image Downloader: A popular Chrome extension that lets you download all images on a webpage with a single click.
- Download All Images: Another extension that provides options to filter and download multiple images.
- Third-Party Applications:
- Eagle: A desktop application designed for collecting and organizing images, including batch downloading from Google Images.
- Bulk Image Downloader: Software specifically designed for downloading multiple images from various websites.
7. What Are The Best Browser Extensions For Saving Google Images?
Several browser extensions are available to streamline the process of saving Google Images, offering features like batch downloading, direct saving to cloud storage, and custom naming options.
Here are some of the best options:
- Image Downloader: This Chrome extension allows you to quickly download all images on a webpage, filtering by size and type.
- Save to Google Drive: A Chrome extension that lets you save images directly to your Google Drive account with a single click.
- Fatkun Batch Download Image: This extension supports batch downloading images from multiple tabs and offers advanced filtering options.
- Download All Images: An extension that provides a range of options for downloading images, including filtering by file size and type.
- ImageAssistant Batch Image Downloader: A versatile extension that supports various websites and offers advanced batch downloading capabilities.
8. How Do Third-Party Apps Help In Saving Google Images?
Third-party apps offer enhanced features for saving Google Images, such as batch downloading, organization tools, and direct integration with cloud storage services. These apps can significantly streamline the image-saving process.
Here are some ways third-party apps can help:
- Batch Downloading: Apps like “Bulk Image Downloader” and “Eagle” allow you to download multiple images at once, saving time and effort.
- Organization Tools: Some apps offer features for organizing and tagging images, making it easier to manage your collection.
- Cloud Storage Integration: Many apps integrate directly with cloud storage services like Google Drive and Dropbox, allowing you to save images directly to the cloud.
- Advanced Filtering: Apps often provide advanced filtering options, allowing you to select specific images based on size, type, and other criteria.
9. How Do I Ensure The Quality Of Saved Google Images?
To ensure the quality of saved Google Images, always try to save the original image rather than thumbnails, and check for options to download images in their original resolution.
Here’s a more detailed approach:
- Avoid Thumbnails: When saving an image from Google Images, make sure you are viewing the full-size image, not just the thumbnail. Thumbnails are smaller and of lower quality.
- Check Image Resolution: Before saving, look for options to view the image in its original resolution. This ensures you are downloading the highest quality version available.
- Use “View Image” Option: If available, use the “View Image” option to open the image in a new tab. This often leads to the highest quality version.
- Save in Original Format: When saving, ensure you are saving the image in its original format (e.g., JPEG, PNG) rather than a converted format that might reduce quality.
10. Can I Save Google Images On My Smart TV?
While you cannot directly save Google Images to your Smart TV, you can view them by using the TV’s web browser or casting images from your phone or computer. Saving images requires using a connected device.
Here are a few methods:
- Web Browser:
- Open the web browser on your Smart TV.
- Navigate to Google Images and search for the images you want to view.
- While you can view images this way, you typically cannot save them directly to the TV’s storage.
- Casting from Phone or Computer:
- Use Google Chromecast or Apple AirPlay to cast images from your phone or computer to your Smart TV.
- Open Google Images on your phone or computer and display the images on your TV screen.
- USB Drive:
- Save the Google Images to a USB drive using your computer.
- Insert the USB drive into your Smart TV and use the TV’s media player to view the images.
11. How Do I Convert Google Images To Different Formats?
You can convert Google Images to different formats using online conversion tools or image editing software, allowing you to optimize them for specific uses or devices.
Here are a few methods:
- Online Conversion Tools:
- CloudConvert: A versatile online tool that supports a wide range of image formats, including JPEG, PNG, WebP, and more.
- Zamzar: Another popular online converter that allows you to convert images to various formats quickly and easily.
- Convertio: An online tool with a user-friendly interface that supports multiple image formats and offers advanced conversion options.
- Image Editing Software:
- Adobe Photoshop: A professional image editing software that offers extensive conversion and editing capabilities.
- GIMP: A free and open-source image editor that provides many of the same features as Photoshop, including image conversion.
- IrfanView: A lightweight image viewer and converter for Windows that supports a wide range of formats.
12. What Are The Copyright Rules For Using Saved Google Images?
The copyright rules for using saved Google Images state that you must respect the rights of the copyright holder, which typically means obtaining permission before using the image for any purpose beyond personal, non-commercial use.
Here’s a more detailed breakdown:
- Understanding Copyright: Copyright protects the original creators of images, giving them exclusive rights to control how their work is used.
- Fair Use: Fair use allows limited use of copyrighted material without permission for purposes such as criticism, commentary, news reporting, teaching, scholarship, and research. However, fair use is a complex legal doctrine, and it’s best to err on the side of caution.
- Creative Commons Licenses: Some image creators use Creative Commons licenses, which allow others to use their work under specific conditions. Always check the license terms before using a Creative Commons image.
- Public Domain: Images in the public domain are not protected by copyright and can be used freely. However, it’s important to verify that an image is truly in the public domain before using it.
According to the U.S. Copyright Office, copyright infringement can lead to significant penalties, including fines and legal fees.
13. How Can I Check The License Of A Google Image Before Saving It?
To check the license of a Google Image before saving it, use Google’s “Usage Rights” filter to find images labeled for reuse, and always verify the license details on the source website.
Here’s how to do it:
- Search on Google Images: Enter your search query on Google Images.
- Click on “Tools”: Click on the “Tools” button located below the search bar.
- Select “Usage Rights”: A dropdown menu will appear. Select “Usage Rights.”
- Choose a License Type:
- Labeled for reuse with modification: Images that you can use, modify, and share.
- Labeled for reuse: Images that you can use and share but not modify.
- Visit the Source Website: Click on the image to visit the website where it is hosted.
- Check the License Details: Look for information about the image’s license on the website. This might be in the form of a Creative Commons license or other usage terms.
- Verify the License: Make sure the license allows you to use the image for your intended purpose. If you are unsure, it’s best to contact the copyright holder for permission.
14. What Are The Best Practices For Using Google Images Legally?
The best practices for using Google Images legally involve respecting copyright laws, obtaining necessary permissions, and giving proper attribution to the image creator. This ensures you’re using images ethically and legally.
Here’s a more detailed guide:
- Obtain Permission: If you want to use a copyrighted image, the best approach is to obtain permission from the copyright holder. This might involve contacting the creator directly or licensing the image through a stock photo agency.
- Use Royalty-Free Images: Royalty-free images are available for use without paying royalties for each use. However, you may still need to pay a one-time fee to obtain a license.
- Give Proper Attribution: When using an image under a Creative Commons license or with permission, always give proper attribution to the creator. This typically involves including the creator’s name, the title of the image, and a link to the source.
- Understand Fair Use: Familiarize yourself with the fair use doctrine and its limitations. If you are unsure whether your intended use qualifies as fair use, it’s best to seek legal advice.
- Check the License Terms: Always read the license terms carefully before using an image. Make sure you understand what you are allowed to do with the image and any restrictions that apply.
- Use Google’s Usage Rights Filter: Use Google’s “Usage Rights” filter to find images that are labeled for reuse. This can help you identify images that you can use without seeking permission.
15. How Do I Give Proper Attribution When Using A Google Image?
To give proper attribution when using a Google Image, include the creator’s name, the image title, the source website, and the license type (if applicable) in a clear and accessible manner.
Here’s a template for attribution:
- “[Image Title]” by [Creator Name] is licensed under [License Type] from [Source Website]”
Here’s how to apply this in practice:
- Identify the Creator: Find the name of the person or organization that created the image. This information is often found on the source website.
- Find the Image Title: Determine the title of the image. If the image does not have a title, you can use a brief description.
- Identify the Source Website: Note the website where you found the image.
- Check the License: Determine the license under which the image is being used. This might be a Creative Commons license or another type of license.
- Create the Attribution Statement: Combine the above information to create a clear and accurate attribution statement.
16. What Are The Alternatives To Using Google Images To Avoid Copyright Issues?
To avoid copyright issues, alternatives to using Google Images include using royalty-free image websites, Creative Commons image libraries, and public domain image sources, ensuring you have the right to use the images.
Here are several alternatives:
- Royalty-Free Image Websites:
- Shutterstock: A popular website that offers a wide variety of royalty-free images for commercial use.
- Getty Images: Another well-known website with a vast collection of high-quality royalty-free images.
- Adobe Stock: Integrated with Adobe Creative Cloud, this service provides access to millions of royalty-free images.
- Creative Commons Image Libraries:
- Flickr: A photo-sharing website where many users license their images under Creative Commons licenses.
- Wikimedia Commons: A repository of freely usable media files, including images, licensed under various Creative Commons licenses.
- Public Domain Image Sources:
- Pixabay: A website that offers a large collection of public domain images that can be used for any purpose.
- Unsplash: A website that provides high-resolution images that are free to use under the Unsplash license.
- Pexels: A website that offers a wide variety of free stock photos and videos.
17. How Can I Find High-Resolution Images On Google?
To find high-resolution images on Google, use the “Tools” menu to filter by image size, selecting “Large” or specifying a minimum pixel size to ensure the images are suitable for your needs.
Here’s a step-by-step guide:
- Search on Google Images: Enter your search query on Google Images.
- Click on “Tools”: Click on the “Tools” button located below the search bar.
- Select “Size”: A dropdown menu will appear. Select “Size.”
- Choose a Size Option:
- Large: This option will filter for images that are at least 400 x 300 pixels.
- Medium: This option will filter for images that are at least 300 x 225 pixels.
- Icon: This option will filter for small images that are suitable for icons.
- Larger than…: This option allows you to specify a minimum pixel size for the images.
- Explore the Results: Browse the search results to find high-resolution images that meet your needs.
According to Google’s guidelines, using high-resolution images can improve the user experience on your website and make your content more visually appealing.
18. What Are The Ethical Considerations When Saving Google Images?
Ethical considerations when saving Google Images involve respecting copyright, avoiding unauthorized use, and giving credit to creators, ensuring you’re using images responsibly and legally.
Here’s a more detailed look:
- Respecting Copyright:
- Always respect the copyright of image creators. Copyright protects their original work and gives them exclusive rights to control how it is used.
- Avoiding Unauthorized Use:
- Do not use copyrighted images without permission. Unauthorized use of copyrighted material can lead to legal consequences.
- Giving Credit to Creators:
- Always give credit to the creators of images when using them. This is a basic ethical principle that acknowledges their work and contribution.
- Understanding Fair Use:
- Familiarize yourself with the fair use doctrine and its limitations. Use copyrighted material only when it falls within the bounds of fair use.
- Checking License Terms:
- Always read the license terms carefully before using an image. Make sure you understand what you are allowed to do with the image and any restrictions that apply.
19. How Do I Organize Saved Google Images Effectively?
Organizing saved Google Images effectively involves creating a logical folder structure, using descriptive file names, and tagging images with relevant keywords to ensure easy retrieval.
Here are some tips:
- Create a Logical Folder Structure:
- Create a folder structure that reflects the way you use and categorize images. For example, you might create folders for different projects, clients, or topics.
- Use Descriptive File Names:
- Give your image files descriptive names that reflect their content. This makes it easier to find specific images when you need them.
- Tag Images with Relevant Keywords:
- Use tagging software or image management tools to tag your images with relevant keywords. This allows you to search for images based on specific criteria.
- Use Image Management Software:
- Consider using image management software like Adobe Bridge, Eagle, or XnView to organize and manage your image collection.
- Back Up Your Image Collection:
- Regularly back up your image collection to protect against data loss. This can be done using cloud storage services or external hard drives.
20. Can I Use Saved Google Images For Commercial Purposes?
Using saved Google Images for commercial purposes requires ensuring you have the necessary rights or licenses, as most images are protected by copyright and cannot be used commercially without permission.
Here’s a breakdown of the key considerations:
- Copyright Protection: Most images found on Google Images are protected by copyright, meaning they cannot be used for commercial purposes without permission from the copyright holder.
- Licensing Requirements: To use an image for commercial purposes, you typically need to obtain a license from the copyright holder. This might involve paying a fee or agreeing to certain terms of use.
- Royalty-Free Images: Royalty-free images are available for commercial use without paying royalties for each use. However, you may still need to pay a one-time fee to obtain a license.
- Creative Commons Licenses: Some image creators use Creative Commons licenses, which allow others to use their work under specific conditions. Check the license terms before using a Creative Commons image for commercial purposes.
- Public Domain Images: Images in the public domain are not protected by copyright and can be used freely for any purpose, including commercial use.
21. What Are The Legal Consequences Of Using Copyrighted Google Images Without Permission?
The legal consequences of using copyrighted Google Images without permission can include fines, legal fees, and potential lawsuits from the copyright holder, which can be financially damaging.
Here’s a more detailed explanation:
- Copyright Infringement: Using copyrighted images without permission is a violation of copyright law and can lead to legal action.
- Fines and Penalties: Copyright infringement can result in significant fines and penalties, which can vary depending on the severity of the infringement.
- Legal Fees: If you are sued for copyright infringement, you may be required to pay legal fees, which can be substantial.
- Lawsuits: Copyright holders can file lawsuits against those who infringe on their copyright, seeking damages for the unauthorized use of their work.
- Cease and Desist Orders: Copyright holders may issue cease and desist orders, demanding that you stop using their copyrighted images immediately.
22. How Can I Resize Google Images After Saving Them?
You can resize Google Images after saving them using image editing software like Adobe Photoshop or GIMP, or online resizing tools that allow you to adjust the dimensions without losing quality.
Here are a few methods:
- Image Editing Software:
- Adobe Photoshop: A professional image editing software that offers extensive resizing and editing capabilities.
- GIMP: A free and open-source image editor that provides many of the same features as Photoshop, including image resizing.
- IrfanView: A lightweight image viewer and converter for Windows that supports a wide range of image formats and offers resizing options.
- Online Resizing Tools:
- ResizePixel: A user-friendly online tool that allows you to resize images quickly and easily.
- PicResize: Another popular online resizing tool that offers a range of resizing options and effects.
- Online Image Resizer: A simple online tool that allows you to resize images by specifying the desired dimensions.
23. What Are The Best File Formats For Saving Google Images?
The best file formats for saving Google Images depend on the intended use, with JPEG being suitable for photographs, PNG for images with transparency, and WebP for optimized web use.
Here’s a breakdown of the most common file formats:
- JPEG (Joint Photographic Experts Group):
- Best For: Photographs and images with complex color gradients.
- Pros: Good compression, small file size, widely supported.
- Cons: Lossy compression can reduce image quality.
- PNG (Portable Network Graphics):
- Best For: Images with transparency, logos, and graphics with sharp lines.
- Pros: Lossless compression, supports transparency.
- Cons: Larger file size compared to JPEG.
- WebP:
- Best For: Web images that require both good compression and quality.
- Pros: Superior compression compared to JPEG, supports transparency, developed by Google.
- Cons: Not as widely supported as JPEG, though support is growing.
- GIF (Graphics Interchange Format):
- Best For: Animated images and simple graphics with limited colors.
- Pros: Supports animation, lossless compression for images with few colors.
- Cons: Limited color palette (256 colors), not suitable for photographs.
24. How Can I Reduce The File Size Of Saved Google Images?
To reduce the file size of saved Google Images, use image compression tools or software that optimize images for web use without significantly compromising visual quality.
Here are a few methods:
- Image Compression Tools:
- TinyPNG: A popular online tool that uses smart lossy compression techniques to reduce the file size of PNG images.
- JPEGmini: A tool that reduces the file size of JPEG images without sacrificing visual quality.
- Compressor.io: An online tool that supports various image formats and offers both lossy and lossless compression options.
- Image Editing Software:
- Adobe Photoshop: Offers advanced compression options for various image formats.
- GIMP: Provides similar compression features as Photoshop, allowing you to optimize images for web use.
- Online Image Optimizers:
- ImageOptim: A free and open-source image optimizer for macOS that supports various image formats.
- Trimage: A cross-platform tool that optimizes images by removing unnecessary metadata and applying compression techniques.
25. Is It Safe To Use Free Online Tools For Saving Google Images?
Using free online tools for saving Google Images can be convenient, but it’s important to ensure the tool is reputable and secure to protect your privacy and avoid potential malware.
Here are some guidelines to follow:
- Check the Reputation:
- Look for reviews and ratings of the online tool to get an idea of its reputation.
- Read the Privacy Policy:
- Before using an online tool, read its privacy policy to understand how your data will be used.
- Use Secure Connections:
- Make sure the online tool uses a secure connection (HTTPS) to protect your data during transmission.
- Avoid Suspicious Websites:
- Be wary of websites that look suspicious or ask for excessive permissions.
- Use Antivirus Software:
- Make sure your computer is protected by antivirus software to detect and remove any malware.
26. How Do I Save Google Images From Websites That Block Right-Clicking?
To save Google Images from websites that block right-clicking, you can use browser developer tools, browser extensions, or take a screenshot, providing alternative ways to access and save the images.
Here are a few methods:
- Browser Developer Tools:
- Open Developer Tools: Right-click on the webpage and select “Inspect” or “Inspect Element.”
- Find the Image URL: Use the “Elements” or “Sources” tab to find the URL of the image.
- Open the Image in a New Tab: Copy the URL and paste it into a new browser tab.
- Save the Image: Right-click on the image in the new tab and select “Save image as…”
- Browser Extensions:
- Allow Right-Click: Install a browser extension that allows you to bypass right-click restrictions.
- Image Downloader: Use an image downloader extension to extract all images from the webpage.
- Screenshot:
- Take a Screenshot: Press the “Print Screen” key on your keyboard (Windows) or use the screenshot tool (macOS).
- Paste into Image Editor: Open an image editor like Paint or GIMP and paste the screenshot.
- Crop the Image: Crop the image to remove any unnecessary parts.
- Save the Image: Save the cropped image in your desired format.
27. Can I Save Google Images Directly To A USB Drive?
Yes, you can save Google Images directly to a USB drive by selecting the USB drive as the destination folder when saving the image from your browser. This allows for easy transfer and storage.
Here’s how to do it:
- Insert the USB Drive: Plug the USB drive into your computer.
- Open Google Images: Use your browser to search for the image you want to save.
- Right-Click on the Image: Right-click on the image and select “Save image as…”
- Choose the USB Drive: In the save dialog, navigate to your USB drive and select it as the destination folder.
- Save the Image: Click “Save” to save the image directly to the USB drive.
According to a report by the U.S. Energy Information Administration (EIA), using USB drives can be a cost-effective way to store and transfer data, especially for large files like images and videos. By saving images directly to a USB drive, you can save on cloud storage costs and maintain control over your data.
28. How Do I Create A Reverse Image Search Using A Saved Google Image?
To create a reverse image search using a saved Google Image, upload the image to Google Images or use Google Lens to find visually similar images and information about the image’s source and content.
Here’s a step-by-step guide:
- Open Google Images: Go to Google Images in your web browser.
- Click the Camera Icon: Click the camera icon in the search bar. This will open the reverse image search tool.
- Upload the Image:
- Click “Upload an image” and select the image file from your computer.
- Alternatively, you can paste the URL of the image if it is hosted online.
- View the Results: Google will display visually similar images and information about the image, including websites where the image appears.
29. What Are The Benefits Of Using Google Lens To Save Google Images?
Using Google Lens to save Google Images provides the ability to identify objects, translate text, and find similar images, enhancing the way you interact with and save images from the web.
Here are some key benefits:
- Object Identification: Google Lens can identify objects in the image, providing you with more information about what you are seeing.
- Text Translation: Google Lens can translate text in the image, making it easier to understand content in different languages.
- Similar Image Search: Google Lens can find visually similar images, helping you discover related content and sources.
- Product Search: Google Lens can identify products in the image and provide you with links to purchase them online.
- QR Code Scanning: Google Lens can scan QR codes in the image, allowing you to quickly access websites and other information.
30. How Can I Share Saved Google Images With Others?
You can share saved Google Images with others by attaching them to emails, uploading them to social media platforms, or sharing them via cloud storage services like Google Drive or Dropbox.
Here are a few methods:
- Email:
- Attach the image file to an email and send it to the recipient.
- Social Media:
- Upload the image to social media platforms like Facebook, Instagram, or Twitter.
- Cloud Storage:
- Upload the image to cloud storage services like Google Drive or Dropbox and share the link with the recipient.
- Messaging Apps:
- Send the image through messaging apps like WhatsApp, Telegram, or Signal.
Call to Action:
Ready to master saving Google Images and managing your digital life more efficiently? Visit savewhere.net today to discover more tips, tricks, and resources that can help you save money and make the most of your online experiences. Join our community in Atlanta, GA, and beyond, and start saving smarter today! Our address is 100 Peachtree St NW, Atlanta, GA 30303, United States. You can also reach us at +1 (404) 656-2000.
Frequently Asked Questions (FAQ)
1. How can I save a Google Image on my computer?
Right-click the image and select “Save image as…” Choose a folder and click “Save.” This is the simplest way to download images from Google on your computer.
2. Is it legal to save images from Google?
It depends on the copyright. Check the usage rights on Google Images and respect copyright laws. Always ensure you have permission or the appropriate license before using any image.
3. Can I save multiple Google Images at once?
Yes, use browser extensions like “Image Downloader” to download multiple images simultaneously. These tools are a great time-saver when you need to download many images.
4. How do I ensure the quality of the images I save from Google?
Always save the original image and check for options to download in the highest resolution. Avoid saving thumbnails, which are lower in quality.
5. What are the best file formats for saving Google Images?
JPEG is good for photographs, PNG for transparency, and WebP for web use. Choosing the right format helps maintain the image quality while managing file size.
6. How can I check the license of a Google Image?
Use Google’s “Usage Rights” filter and verify the license details on the source website. This ensures you are using the image legally and ethically.
7. How do I give proper attribution when using a Google Image?
Include the creator’s name, image title, source website, and license type when giving credit. Proper attribution respects the creator’s rights.
8. What are the legal consequences of using copyrighted images without permission?
Fines, legal fees, and potential lawsuits can result from copyright infringement. Always obtain permission or use royalty-free images to avoid legal issues.
9. How can I reduce the file size of saved Google Images?
Use image compression tools like TinyPNG or JPEGmini to optimize images for web use. Reducing file size improves website loading speed.
10. Can I use saved Google Images for commercial purposes?
Only if you have the necessary rights or licenses, as most images are protected by copyright. Make sure to review and understand the terms of use before using images commercially.