
Saving all your photos to iCloud is a smart move to safeguard your memories and free up space on your devices. This article will guide you through the process, offering tips and tricks to optimize your iCloud storage and manage your photos efficiently. At savewhere.net, we are committed to providing you with practical solutions for managing your digital life while saving money. Ready to declutter your phone and secure your cherished photos?
1. Understanding iCloud Storage and Its Benefits
Saving your photos to iCloud isn’t just about backing them up. It’s about making your digital life more manageable and accessible. Let’s delve into what iCloud storage is and the numerous benefits it offers.
What is iCloud Storage?
iCloud Storage is Apple’s cloud storage service, allowing you to store various types of data, including photos, videos, documents, and device backups, on remote servers. This means your data is accessible across all your Apple devices and securely stored in case of device loss or damage. Think of it as a digital vault where your precious memories and important files are kept safe and sound.
Benefits of Saving Photos to iCloud
- Data Security: iCloud provides a secure way to back up your photos, protecting them from loss due to device damage, theft, or accidental deletion.
- Cross-Device Access: Access your photos from any Apple device (iPhone, iPad, Mac) as long as you are signed in to your iCloud account.
- Space Optimization: By storing photos in iCloud, you can optimize storage on your iPhone or iPad, keeping only lower-resolution versions on your device while maintaining access to the full-resolution originals in the cloud.
- Organization: iCloud Photos automatically organizes your photos into Moments, Collections, and Years, making it easier to find specific images.
- Sharing: Easily share photos and albums with friends and family via iCloud Photo Sharing, allowing collaborative photo collections.
- Automatic Backup: Once set up, iCloud automatically backs up your photos, ensuring that new photos are immediately and securely stored in the cloud.
- Peace of Mind: Knowing your photos are safely stored in iCloud provides peace of mind, eliminating the worry of losing irreplaceable memories.
2. Setting Up iCloud Photos on Your Devices
Setting up iCloud Photos is a straightforward process that ensures your photos are automatically backed up and synchronized across your Apple devices. Follow these simple steps to get started.
Enabling iCloud Photos on iPhone and iPad
-
Open Settings: On your iPhone or iPad, tap the “Settings” app icon.
-
Tap Your Name: At the top of the Settings menu, tap your name to access your Apple ID settings.
-
Select iCloud: In the Apple ID menu, tap “iCloud”.
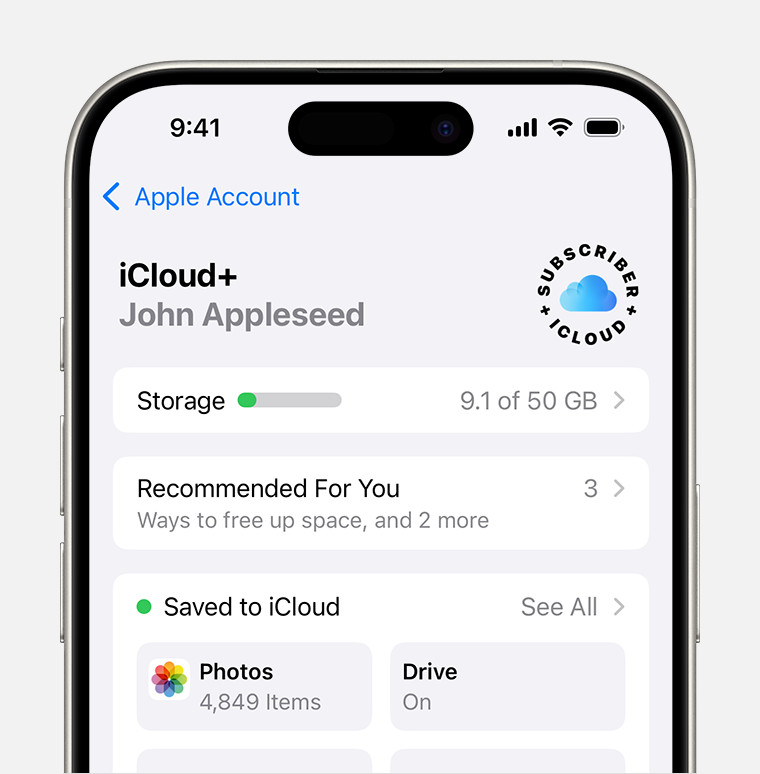 iCloud settings showing recommendations and app options
 -
Choose Photos: In the iCloud menu, tap “Photos”.
-
Enable iCloud Photos: Toggle the switch next to “Sync this iPhone” (or “iCloud Photos” in older iOS versions) to turn it on.
-
Optimize Storage: Select “Optimize iPhone Storage” to save space on your device. This option stores full-resolution photos in iCloud and keeps smaller, device-optimized versions on your iPhone or iPad.
Enabling iCloud Photos on Mac
- Open System Preferences: On your Mac, click the Apple menu in the top-left corner of your screen and select “System Preferences”.
- Click Apple ID: In System Preferences, click “Apple ID”. If you’re using macOS Mojave or earlier, click “iCloud”.
- Sign In: If you’re not already signed in, sign in with your Apple ID.
- Select Photos: In the Apple ID menu, check the box next to “Photos”.
- Options: Click the “Options” button next to Photos to choose your library location and set preferences.
Verifying Sync and Upload Status
- iPhone and iPad: After enabling iCloud Photos, you can check the upload status by going to Photos > Albums and scrolling to the bottom. You will see a status message indicating whether photos are currently uploading or if the upload is complete.
- Mac: In the Photos app on your Mac, look at the bottom of the window for a message indicating the sync status. You can also go to View > Status to see more detailed information.
3. Managing iCloud Storage: Plans and Pricing
iCloud offers different storage plans to accommodate varying needs. Understanding these plans and their pricing is essential for effectively managing your photo storage.
Overview of iCloud Storage Plans
Apple provides several iCloud storage plans. As of 2024, the options include:
| Plan | Storage | Price (USD/Month) | Benefits |
|---|---|---|---|
| Free | 5 GB | $0.00 | Basic storage for photos, documents, and backups. |
| iCloud+ | 50 GB | $0.99 | Enough storage for most users, includes iCloud Private Relay and Hide My Email. |
| iCloud+ | 200 GB | $2.99 | Suitable for families, includes iCloud Private Relay and Hide My Email. |
| iCloud+ | 2 TB | $9.99 | Ideal for large photo and video libraries, includes iCloud Private Relay and Hide My Email. |
| Apple One (Bundled) | Varies | Varies | Bundled with other Apple services like Apple Music, Apple TV+, and Apple Arcade. |
How to Choose the Right Plan
- Assess Your Needs: Evaluate how many photos and videos you have, as well as other data you plan to store in iCloud (documents, backups, etc.).
- Check Current Usage: Go to Settings > [Your Name] > iCloud > Manage Storage to see how much storage you’re currently using.
- Consider Future Growth: Think about how your storage needs might increase over time, especially if you take a lot of photos or videos.
- Compare Plans: Compare the different iCloud storage plans and choose the one that best fits your needs and budget.
- Family Sharing: If you have a family, consider the 200 GB or 2 TB plan, which can be shared with up to five family members.
Upgrading or Downgrading Your iCloud Storage
- On iPhone or iPad:
- Go to Settings > [Your Name] > iCloud > Manage Storage or iCloud Storage.
- Tap “Change Storage Plan” or “Upgrade”.
- Choose the plan you want and follow the on-screen instructions to confirm your purchase.
- On Mac:
- Go to System Preferences > Apple ID > iCloud > Manage.
- Click “Change Storage Plan”.
- Choose the plan you want and follow the on-screen instructions to confirm your purchase.
Managing Storage Costs
To manage storage costs effectively, regularly review your storage usage and delete unnecessary files. Consider using “Optimize iPhone Storage” to keep smaller versions of your photos on your device while storing the full-resolution versions in iCloud. Services like savewhere.net can help you find deals on Apple products and services that can save you money.
4. Optimizing Photo Storage on Your Devices
Optimizing photo storage is crucial for managing space efficiently on your devices and in iCloud. Here are effective strategies to help you make the most of your storage.
Using “Optimize iPhone Storage”
The “Optimize iPhone Storage” feature is an excellent way to save space on your device while still having access to all your photos and videos.
-
Enable the Feature:
- Go to Settings > [Your Name] > iCloud > Photos.
- Select “Optimize iPhone Storage”.
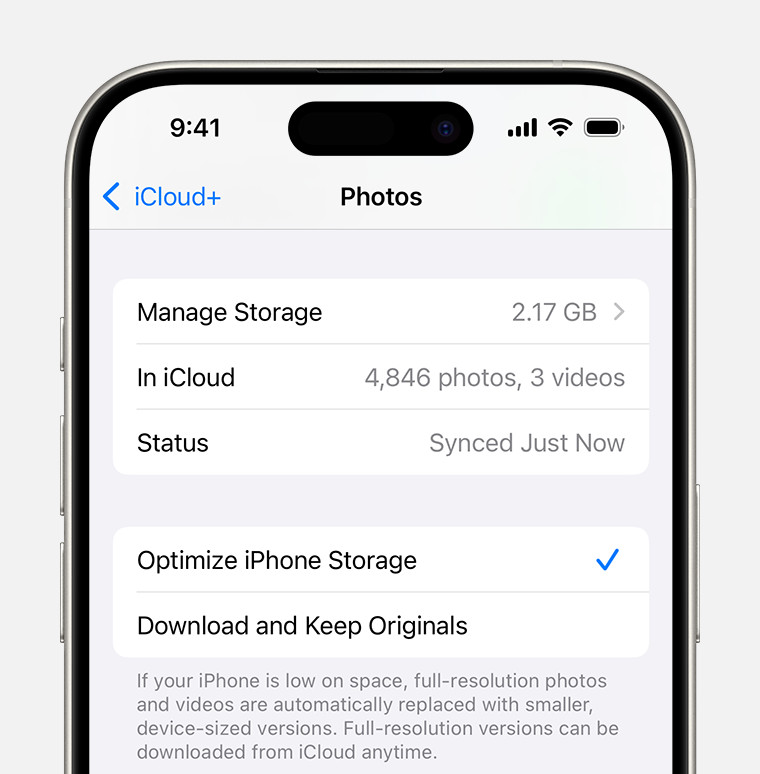 iCloud Photos settings showing storage options
 -
How It Works: When this feature is enabled, full-resolution photos and videos are stored in iCloud, and smaller, device-optimized versions are kept on your iPhone or iPad. When you view a photo or video, the full-resolution version is downloaded from iCloud as needed.
-
Benefits:
- Saves significant space on your device.
- Maintains access to all your photos and videos.
- Automatically manages storage based on your device’s available space.
Deleting Duplicate Photos and Videos
Duplicate photos and videos can take up valuable storage space. Regularly cleaning up duplicates can help you optimize your storage.
- Identify Duplicates:
- Manually: Go through your Photos app and identify duplicate photos or videos.
- Using Apps: Use third-party apps like Gemini Photos or Remo Duplicate Photos Remover to automatically find and delete duplicates.
- Delete Duplicates:
- After identifying duplicates, select the ones you want to delete and tap the trash icon.
- Deleted photos and videos will be moved to the “Recently Deleted” album, where they will be permanently deleted after 30 days.
Compressing Large Videos
Large videos can consume a significant amount of storage. Compressing them can help reduce their file size without significantly impacting quality.
- Using iMovie:
- Open the iMovie app on your iPhone or iPad.
- Import the video you want to compress.
- Edit the video if necessary, then tap the “Done” button.
- Tap the “Share” button and select “Save Video”.
- Choose a lower resolution option (e.g., 720p or 540p) to compress the video.
- Using Third-Party Apps:
- Use apps like Video Compressor or HandBrake to compress videos.
- These apps allow you to adjust the compression settings to balance file size and quality.
Regularly Reviewing and Cleaning Up Your Photo Library
Make it a habit to regularly review your photo library and delete unwanted photos and videos.
- Set a Schedule: Set aside time each month to go through your photos and videos.
- Delete Unwanted Content: Delete blurry photos, accidental shots, and videos you no longer need.
- Organize Your Library: Organize your photos into albums to make it easier to find and manage them.
5. Transferring Photos from Other Devices to iCloud
Consolidating your photos from various devices into iCloud ensures they are all backed up and accessible in one place. Here’s how to transfer photos from different sources.
Importing Photos from a Computer
- Using iCloud for Windows:
- Download and install iCloud for Windows from the Apple website.
- Sign in with your Apple ID.
- Select “Photos” and choose the folder where you want to store your iCloud photos on your computer.
- Copy the photos you want to transfer into this folder, and they will automatically upload to iCloud.
- Using iCloud.com:
- Go to iCloud.com and sign in with your Apple ID.
- Click on “Photos”.
- Click the “Upload” button in the top-right corner.
- Select the photos you want to upload from your computer.
Transferring Photos from Android Devices
- Using iCloud for Windows (Indirect Method):
- Connect your Android device to your computer.
- Copy the photos from your Android device to a folder on your computer.
- Follow the steps above to import the photos from your computer to iCloud using iCloud for Windows.
- Using Third-Party Apps:
- Use apps like Google Photos to back up your photos from your Android device.
- Then, download the photos from Google Photos to your computer and import them to iCloud using iCloud for Windows.
Using External Storage Devices
- Copy Photos to Your Computer:
- Connect the external storage device (e.g., USB drive, SD card) to your computer.
- Copy the photos from the external storage device to a folder on your computer.
- Import to iCloud:
- Follow the steps above to import the photos from your computer to iCloud using iCloud for Windows or iCloud.com.
6. Sharing Photos with Family and Friends Using iCloud
iCloud offers several convenient ways to share your photos with family and friends, making it easy to collaborate and share memories.
Creating Shared Albums
- On iPhone or iPad:
- Open the Photos app.
- Tap the “+” button in the top-left corner and select “New Shared Album”.
- Give the album a name and tap “Next”.
- Invite people to the album by entering their names or email addresses.
- Tap “Create”.
- Add photos and videos to the album by selecting them and tapping the “Share” button, then choosing the shared album.
- On Mac:
- Open the Photos app.
- Click the “+” button in the toolbar and select “New Shared Album”.
- Give the album a name and click “Create”.
- Invite people to the album by clicking the “People” button in the toolbar and entering their names or email addresses.
- Add photos and videos to the album by selecting them and dragging them into the shared album in the sidebar.
Sharing Individual Photos and Videos
- On iPhone, iPad, or Mac:
- Open the Photos app.
- Select the photo or video you want to share.
- Tap the “Share” button.
- Choose how you want to share the photo or video (e.g., Messages, Mail, AirDrop, social media).
Using iCloud Photo Sharing Links
- Create a Public Link:
- Open the Photos app on your iPhone, iPad, or Mac.
- Select the photo or video you want to share.
- Tap the “Share” button.
- Select “Copy iCloud Link” to create a public link to the photo or video.
- Share the link with anyone you want to view the photo or video.
Managing Shared Album Settings
- On iPhone or iPad:
- Open the Photos app.
- Go to the “Albums” tab and select the shared album.
- Tap the “People” button at the bottom of the screen.
- Manage the settings, such as who can add photos and whether notifications are enabled.
- On Mac:
- Open the Photos app.
- Select the shared album in the sidebar.
- Click the “People” button in the toolbar.
- Manage the settings, such as who can add photos and whether notifications are enabled.
7. Troubleshooting Common iCloud Photo Issues
Even with the best setup, you might encounter issues with iCloud Photos. Here are some common problems and how to troubleshoot them.
Photos Not Syncing Across Devices
- Check Your Internet Connection:
- Make sure your devices are connected to a stable Wi-Fi network.
- Verify iCloud Settings:
- Ensure iCloud Photos is enabled on all your devices (Settings > [Your Name] > iCloud > Photos).
- Check that you are signed in to iCloud with the same Apple ID on all devices.
- Restart Your Devices:
- Restart your iPhone, iPad, and Mac to refresh the connection to iCloud.
- Check iCloud Storage:
- Make sure you have enough available storage in iCloud (Settings > [Your Name] > iCloud > Manage Storage).
- Update Your Devices:
- Ensure your devices are running the latest version of iOS, iPadOS, or macOS.
- Disable and Re-enable iCloud Photos:
- Turn off iCloud Photos on one device, wait a few minutes, and then turn it back on. This can sometimes resolve syncing issues.
Photos Missing from iCloud
- Check “Recently Deleted” Album:
- Open the Photos app and check the “Recently Deleted” album. Photos and videos in this album are permanently deleted after 30 days.
- Verify iCloud Photo Library:
- Ensure that iCloud Photo Library is enabled on all your devices and that they are all signed in with the same Apple ID.
- Check Hidden Album:
- Sometimes photos can accidentally be hidden. Check the Hidden album to see if your missing photos are there.
- Contact Apple Support:
- If you still can’t find your missing photos, contact Apple Support for assistance.
iCloud Storage Full
- Delete Unnecessary Photos and Videos:
- Review your photo library and delete any photos or videos you no longer need.
- Optimize Storage:
- Enable “Optimize iPhone Storage” to store smaller versions of your photos on your device.
- Upgrade Your iCloud Storage Plan:
- If you need more storage, upgrade to a larger iCloud storage plan (Settings > [Your Name] > iCloud > Manage Storage).
- Transfer Photos to a Computer or External Drive:
- Move some of your photos to a computer or external drive to free up space in iCloud.
Slow Upload or Download Speeds
- Check Your Internet Connection:
- Make sure you have a fast and stable internet connection.
- Avoid Peak Hours:
- Try uploading or downloading photos during off-peak hours when internet traffic is lower.
- Close Unnecessary Apps:
- Close any apps that are using a lot of bandwidth to improve upload and download speeds.
- Restart Your Router:
- Restart your router to refresh your internet connection.
8. Advanced Tips for Managing Your Photo Library in iCloud
For power users, here are some advanced tips to help you take full control of your photo library in iCloud.
Using Smart Albums on Mac
Smart Albums on Mac automatically organize your photos based on specific criteria, making it easier to find and manage your photos.
- Create a Smart Album:
- Open the Photos app on your Mac.
- Go to File > New Smart Album.
- Enter a name for the album and set the criteria (e.g., photos taken in a specific location, photos with specific keywords).
- Click “OK” to create the smart album.
- Example Criteria:
- Location: Create a smart album for photos taken in Atlanta.
- Keywords: Create a smart album for photos with the keyword “Family”.
- Date: Create a smart album for photos taken in 2023.
Leveraging Keywords and Metadata
Adding keywords and metadata to your photos makes it easier to search for and organize them.
- Add Keywords:
- Select a photo in the Photos app.
- Press Command + I to open the Info window.
- Add keywords in the “Keywords” field.
- Add Titles and Descriptions:
- Add titles and descriptions to your photos to provide more context.
- Use Location Data:
- Ensure location services are enabled on your devices so that your photos are tagged with location data.
Creating Custom Albums and Folders
Creating custom albums and folders helps you organize your photos in a way that makes sense to you.
- Create an Album:
- Open the Photos app.
- Go to File > New Album.
- Enter a name for the album and add photos to it.
- Create a Folder:
- Open the Photos app.
- Go to File > New Folder.
- Enter a name for the folder and add albums to it.
Backing Up Your iCloud Photos to an External Drive
While iCloud provides a secure way to store your photos, it’s always a good idea to have a backup.
- Download Photos to Your Computer:
- Download all your photos from iCloud to your computer.
- Copy Photos to an External Drive:
- Copy the photos from your computer to an external drive.
- Update Regularly:
- Make sure to update your backup regularly to include any new photos or videos.
9. Saving Money on iCloud Storage and Apple Products
Saving money while managing your digital life is essential. Here are some tips to help you save on iCloud storage and Apple products.
Utilizing Family Sharing for iCloud Storage
Family Sharing allows you to share your iCloud storage plan with up to five family members, saving you money compared to purchasing individual plans.
- Set Up Family Sharing:
- Go to Settings > [Your Name] > Family Sharing.
- Follow the instructions to set up Family Sharing and invite family members.
- Share iCloud Storage:
- Choose the 200 GB or 2 TB iCloud storage plan and share it with your family members.
Bundling Services with Apple One
Apple One bundles several Apple services, including iCloud storage, Apple Music, Apple TV+, and Apple Arcade, into a single subscription, saving you money compared to subscribing to each service individually.
- Choose an Apple One Plan:
- Go to Settings > [Your Name] > Subscriptions > Apple One.
- Choose the Apple One plan that best fits your needs.
- Enjoy Bundled Services:
- Enjoy the included iCloud storage and other Apple services at a discounted price.
Finding Deals and Discounts on Apple Products
Look for deals and discounts on Apple products and services from various retailers and providers.
- Check Apple’s Website:
- Visit Apple’s website to check for any special offers or promotions.
- Shop at Authorized Resellers:
- Shop at authorized Apple resellers like Best Buy or Amazon to find discounted prices.
- Look for Refurbished Products:
- Consider purchasing refurbished Apple products, which are often available at a lower price.
- savewhere.net:
- Check savewhere.net for deals and discounts.
Monitoring and Optimizing Your Data Usage
- Regularly Review Your Usage:
- Go to Settings > [Your Name] > iCloud > Manage Storage to see how much storage you’re using.
- Delete Unnecessary Files:
- Delete any files you no longer need to free up storage space.
- Use “Optimize iPhone Storage”:
- Enable “Optimize iPhone Storage” to store smaller versions of your photos on your device.
By implementing these tips, you can effectively manage your photo library in iCloud, keep your memories safe, and save money along the way. Remember to visit savewhere.net for more tips and resources on managing your finances and digital life efficiently.
10. Understanding iCloud’s Security and Privacy Features
When entrusting your precious photos to iCloud, understanding its security and privacy features is paramount. Apple has implemented several measures to ensure your data remains safe and private.
End-to-End Encryption for Sensitive Data
iCloud employs end-to-end encryption for certain sensitive data, providing an extra layer of security. This means that only you can access your data, and even Apple cannot decrypt it.
- Data Protected by End-to-End Encryption:
- iCloud Keychain (passwords and credit card information)
- Health data
- Home data
- iCloud Messages (when iCloud Backup is enabled)
- Payment information
- Siri information
Two-Factor Authentication for Enhanced Security
Two-factor authentication (2FA) adds an extra layer of security to your Apple ID, requiring a verification code from a trusted device or phone number when you sign in on a new device.
- Enable Two-Factor Authentication:
- Go to Settings > [Your Name] > Password & Security.
- Turn on Two-Factor Authentication and follow the instructions.
- Benefits of Two-Factor Authentication:
- Prevents unauthorized access to your account, even if someone knows your password.
- Adds an extra layer of security to your iCloud data.
Data Minimization and Privacy Controls
Apple is committed to data minimization, collecting only the information necessary to provide its services. It also provides users with robust privacy controls to manage their data.
- Privacy Controls:
- Go to Settings > Privacy to manage your privacy settings for various features and apps.
- Control which apps have access to your location, contacts, photos, and other data.
- Data Minimization:
- Apple collects only the data necessary to provide its services and is committed to protecting your privacy.
Transparency and Accountability
Apple is transparent about its data practices and accountable for protecting your privacy.
- Privacy Policy:
- Review Apple’s Privacy Policy to understand how your data is collected, used, and protected.
- Transparency Reports:
- Apple publishes transparency reports that provide information about government requests for user data.
Data Storage Locations
Apple stores iCloud data in data centers around the world, including the United States and Europe.
- Data Center Security:
- Apple’s data centers are highly secure and employ advanced security measures to protect your data.
- Data Residency:
- Apple complies with local laws and regulations regarding data residency.
FAQ: How Do I Save All My Photos to iCloud?
Here are some frequently asked questions about saving photos to iCloud.
1. How do I turn on iCloud Photos?
To turn on iCloud Photos, go to Settings > [Your Name] > iCloud > Photos and toggle the “Sync this iPhone” switch.
2. What does “Optimize iPhone Storage” do?
“Optimize iPhone Storage” stores full-resolution photos in iCloud and keeps smaller, device-optimized versions on your iPhone, saving space.
3. How much iCloud storage do I need?
The amount of iCloud storage you need depends on the size of your photo and video library, as well as other data you plan to store in iCloud. Check your current usage in Settings > [Your Name] > iCloud > Manage Storage.
4. Can I share my iCloud storage with my family?
Yes, you can share your iCloud storage with up to five family members using Family Sharing.
5. How do I transfer photos from my computer to iCloud?
You can transfer photos from your computer to iCloud using iCloud for Windows or by uploading them to iCloud.com.
6. What happens if my iCloud storage is full?
If your iCloud storage is full, you will need to delete unnecessary photos and videos, upgrade your storage plan, or transfer photos to a computer or external drive.
7. How secure is iCloud for storing my photos?
iCloud employs end-to-end encryption for sensitive data and two-factor authentication for enhanced security.
8. How do I access my photos on iCloud from a different device?
You can access your photos on iCloud from any Apple device by signing in with the same Apple ID and enabling iCloud Photos.
9. Can I use iCloud Photos on an Android device?
No, iCloud Photos is primarily designed for Apple devices. However, you can access your photos on iCloud.com from any web browser on an Android device.
10. What should I do if my photos are not syncing to iCloud?
Check your internet connection, verify your iCloud settings, restart your devices, and ensure you have enough available storage in iCloud.
Managing your photos with iCloud doesn’t have to be a headache. With the right strategies, you can keep your memories safe, accessible, and organized, all while saving space and money. Visit savewhere.net for more tips and tricks on how to make the most of your digital life and manage your finances effectively.