Contouring has become a makeup staple, celebrated for its ability to enhance facial features. If you’ve ever wondered Where To Put Contour to achieve that sculpted look, you’re not alone. Many tutorials showcase dramatic transformations, but this guide focuses on subtle, everyday contouring and highlighting techniques. We’ll break down exactly where to put contour powder or cream to naturally define your best features without looking overdone.
Think of your foundation as a blank canvas, evening out your skin tone. Contouring, highlighting, and blush then reintroduce dimension, bringing back the shadows and light that naturally define your face. This tutorial will teach you where to put contour to create depth and enhance your bone structure, achieving a refined and polished everyday look.
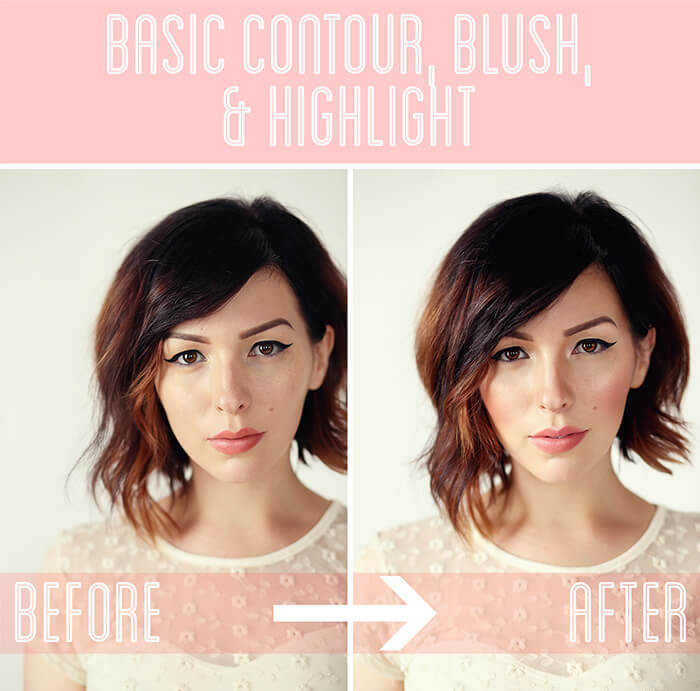 Basic Contour, Blush, and Highlight Tutorial
What You’ll Need for Contouring
Before we dive into where to put contour, let’s gather your tools and products. Whether you prefer powder or cream formulas, the principles of where to put contour remain the same.
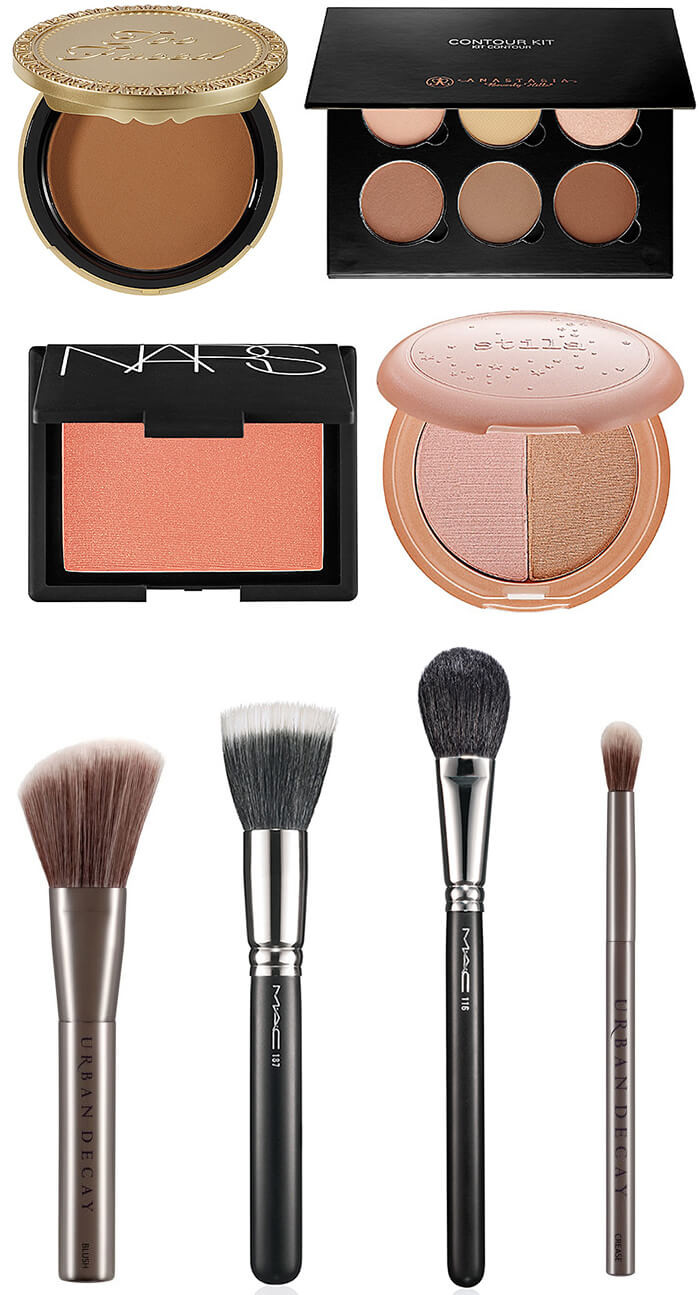
Products Used in this Tutorial:
- Contour Powder: Too Faced Chocolate Soleil Medium/Deep Matte Bronzer (A matte bronzer a few shades darker than your skin tone is ideal for creating natural shadows).
- Highlight Powder (Matte): Anastasia Beverly Hills Contour Kit (Using a matte highlight to brighten key areas without shimmer).
- Blush: NARS Deep Throat Blush (A natural-toned blush to add a flush of color to the cheeks).
- Highlight Powder (Shimmer): Stila “Kitten” Allover Shimmer Powder (A shimmer highlight to catch the light on the high points of the face).
Brushes:
- Slanted Blush Brush: Urban Decay Blush Brush (Perfect for precise contour application).
- Duo Fiber Brush: MAC 187 Duo Fiber Brush (Essential for blending out harsh contour lines).
- Precise Blush/Highlight Brush: MAC 116 brush (For targeted blush and shimmer highlight application).
- Small Shadow Brush: Urban Decay crease brush (For contouring smaller areas like the nose).
 Basic Contour, Blush, and Highlight Tutorial
Step-by-Step Guide: Where to Put Contour for a Natural Look
Now, let’s get to the crucial part: where to put contour. Remember, the goal is to mimic natural shadows, so placement is key.
-
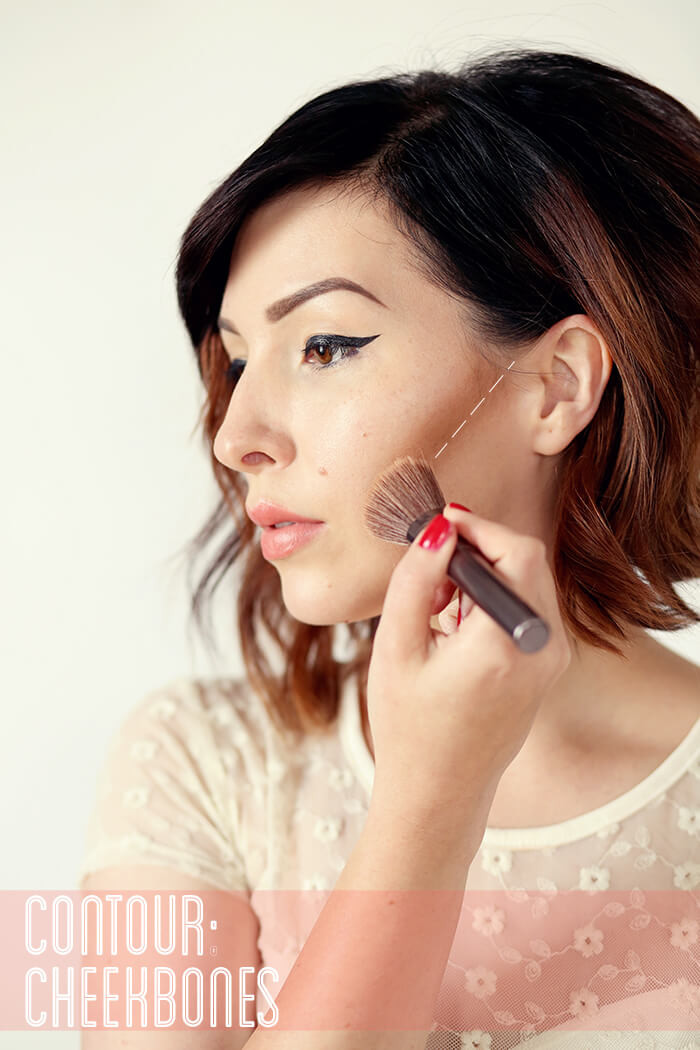
Contour the Hollows of Your Cheeks:
Using your slanted blush brush and matte bronzer, locate the hollows of your cheeks. To find them, feel along your cheekbone, just underneath it. This is where to put contour to create definition. Apply the contour powder in this hollow area, starting from your ear and blending towards the corner of your mouth, stopping about two finger widths away from your lips.
 Too Faced bronzer product shot
 -
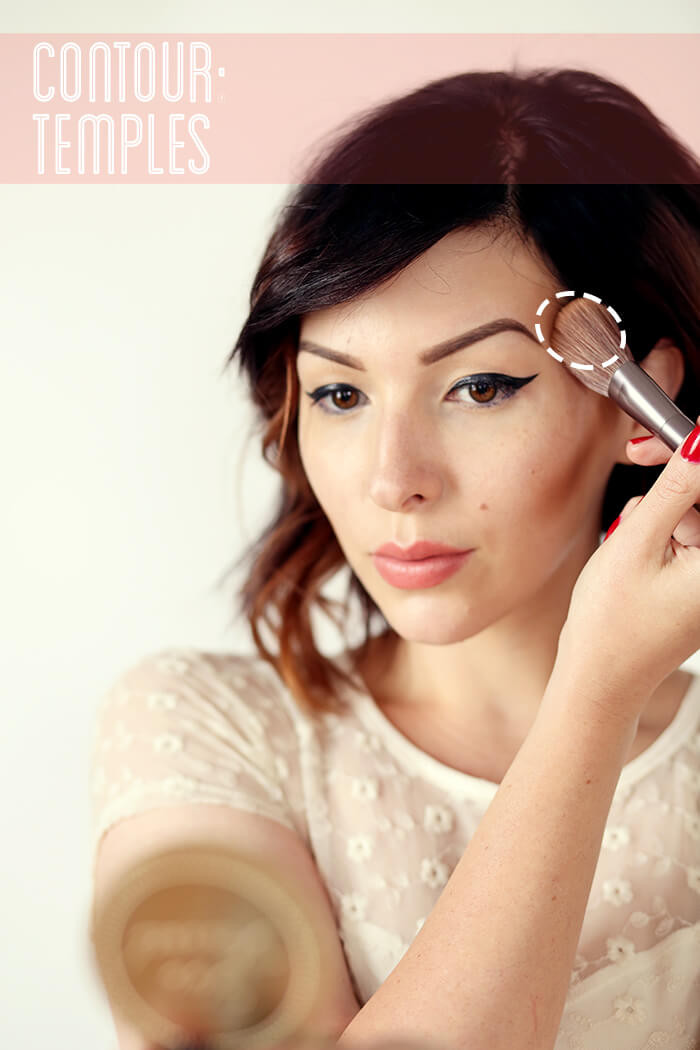
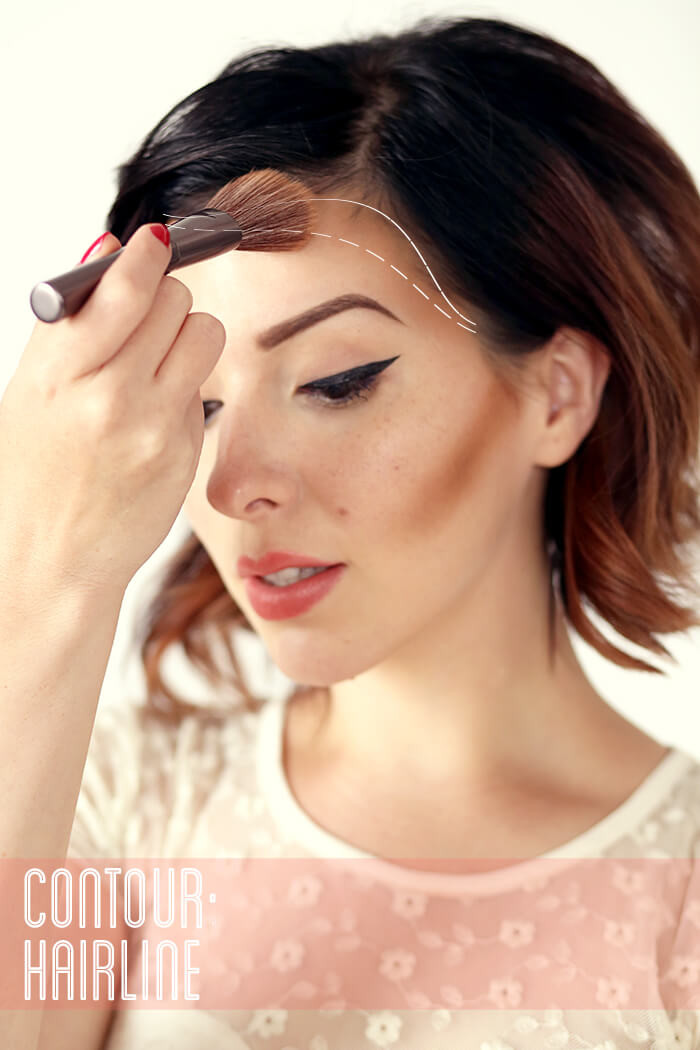
Contour Temples and Hairline:
Next, apply contour to your temples and along your hairline. This helps to frame your face and create a more balanced look. This is another key area for where to put contour to add subtle dimension. Blend the contour powder along the sides of your forehead, near your hairline, and slightly onto your temples.
 Applying contour to cheek area using a brush
 -
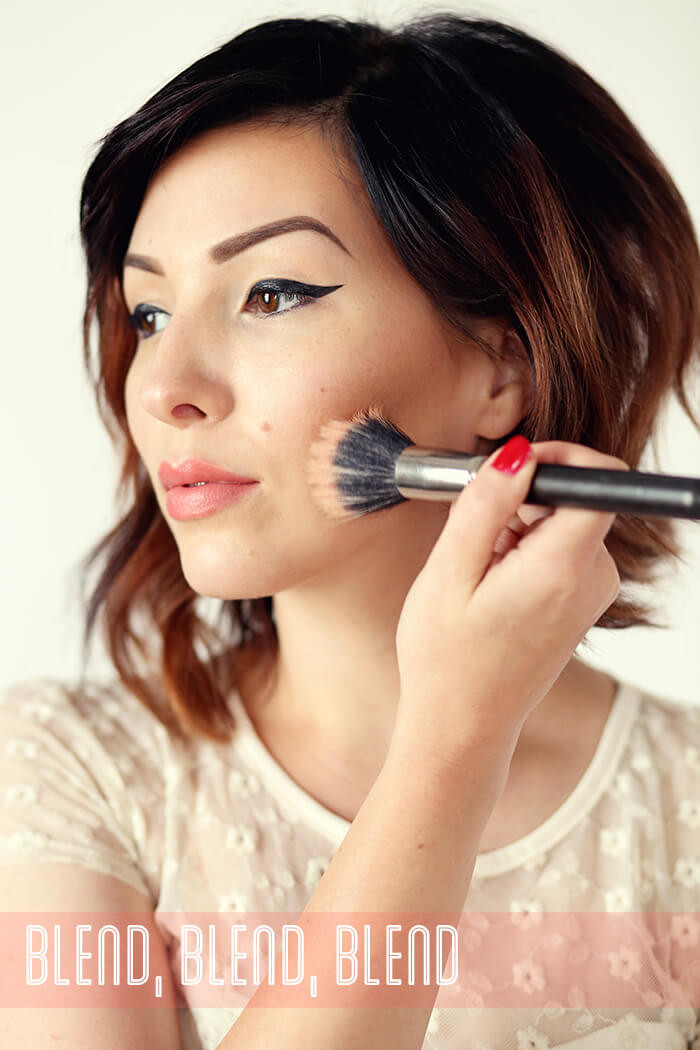
Blend, Blend, Blend:
Using your duo fiber brush, thoroughly blend the contour you’ve applied. Blending is crucial to avoid harsh lines and achieve a natural, seamless finish. This step is just as important as where to put contour itself. Blend in circular motions until the contour seamlessly merges with your foundation.
 Blending contour on cheek with duo fiber brush
 -
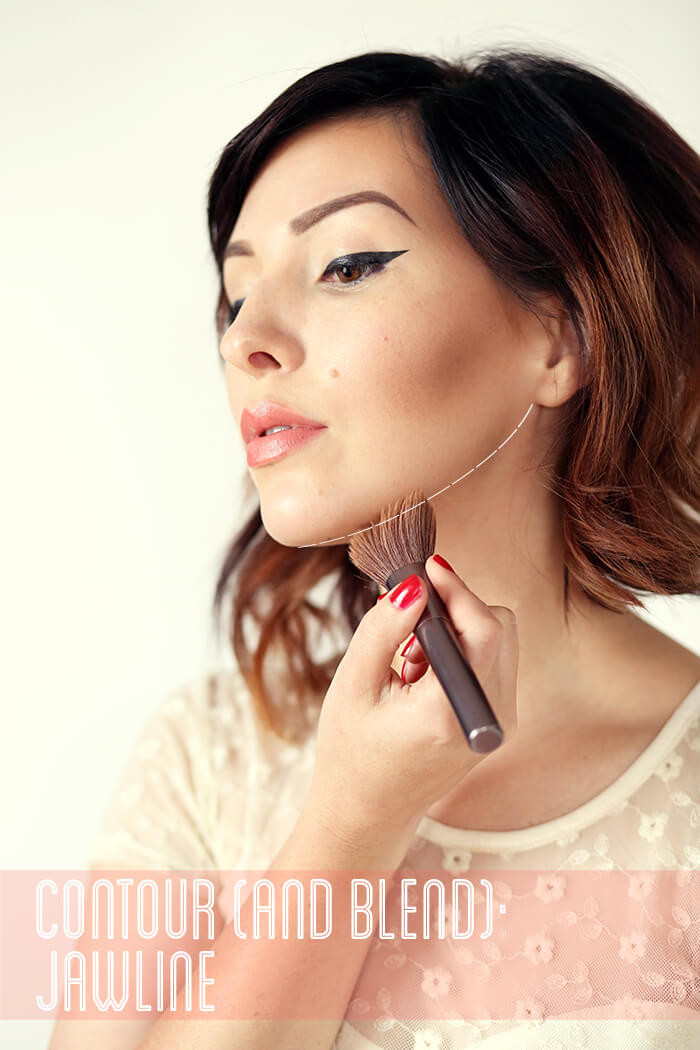
Contour Your Jawline:
For a more defined jawline, lightly contour along your jawline, starting from under your ears and blending towards your chin. This is optional, but effective if you want to enhance jaw definition. This subtle touch demonstrates effective where to put contour technique.
 Contouring cheek and temple area with blush brush
 -
Blend Jawline Contour:
Again, blend the jawline contour using your duo fiber brush to soften any harsh lines and create a natural shadow. Proper blending ensures that where to put contour looks intentional yet subtle.
 Blending cheek contour with duo fiber brush
 -
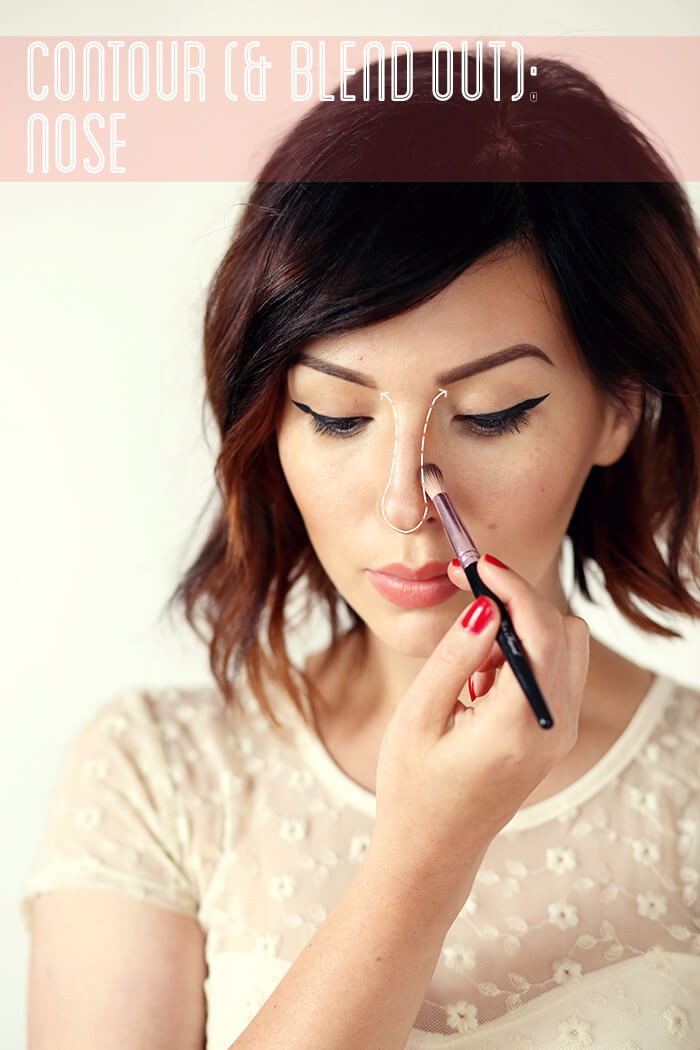
Contour Your Nose (Optional):
If desired, use a small shadow brush to contour the sides of your nose and underneath the tip. This can help to create the illusion of a slimmer, more defined nose. Less is more when considering where to put contour on the nose. Blend outwards to ensure a natural look.
 Contouring jawline with blush brush
 -
Blend Nose Contour:
Blend the nose contour carefully with your small shadow brush to remove any distinct lines. Seamless blending is key, especially when determining where to put contour on smaller features like the nose.
 Contouring nose with small shadow brush
 -
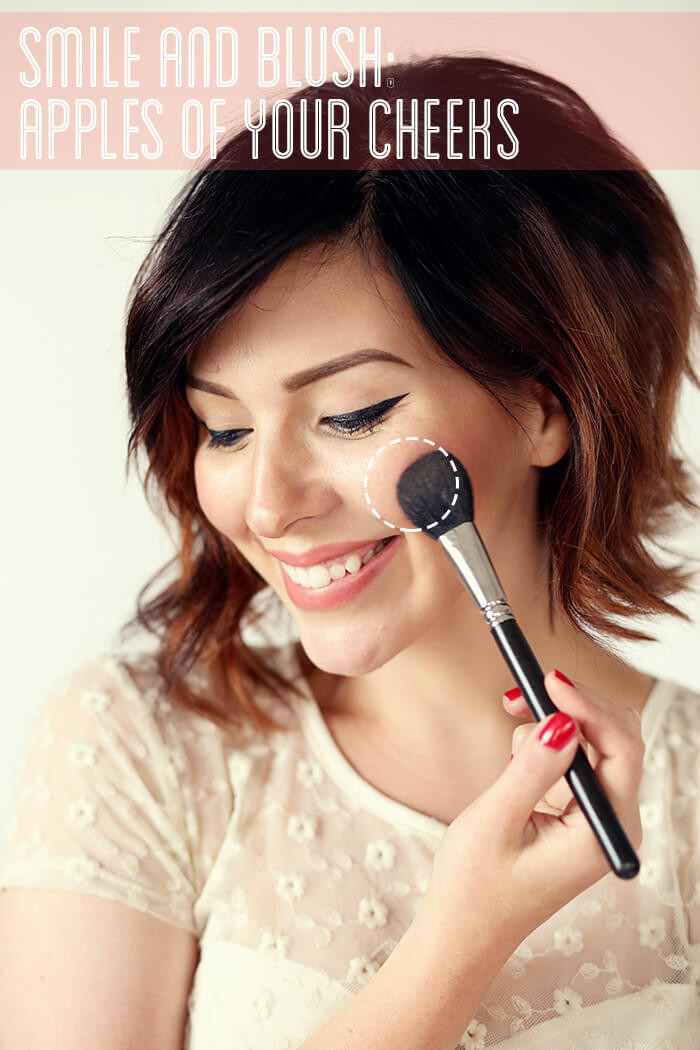
Apply Blush to the Apples of Your Cheeks:
Smile to find the apples of your cheeks, and apply blush to this area. Blush adds a touch of color and vibrancy, complementing your contour. While not contour, blush placement works with where to put contour to enhance overall facial structure.
 Smiling to show apples of cheeks for blush application
 -
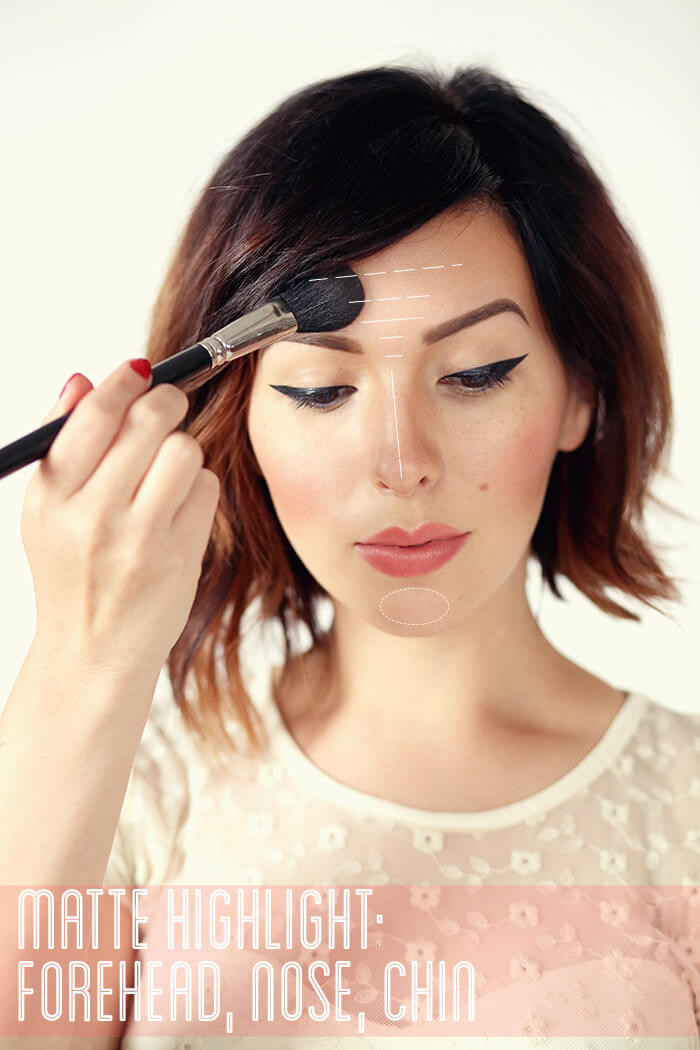
Apply Matte Highlight:
Use a matte highlight on the center of your forehead, the bridge of your nose, and the middle of your chin. Matte highlight brings these areas forward without adding shimmer, creating balance with your contour. Understanding where to put contour is enhanced by knowing where to strategically place highlight.
 Applying matte highlight to forehead, nose and chin with blush brush
 -
Apply Shimmer Highlight:
Finally, apply shimmer highlight to the tops of your cheekbones, under your brow bones, the inner corners of your eyes, and cupid’s bow. Shimmer highlight catches the light and emphasizes the high points of your face, completing your contoured look. Strategic shimmer highlight placement enhances the effects of where to put contour.
 Applying shimmer highlight to cheekbones, brow bone and inner corner of eye
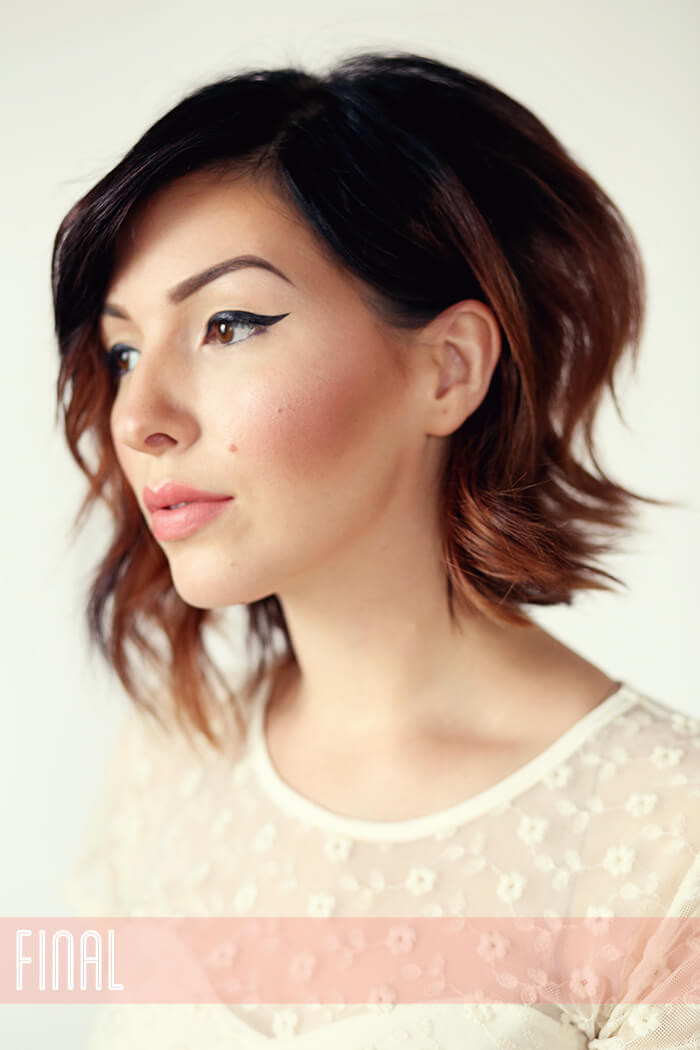
Mastering Contour Placement
Understanding where to put contour is the foundation for achieving a sculpted yet natural makeup look. Practice in front of a mirror, experimenting to find what works best for your face shape. Remember, subtle application and thorough blending are key to mastering the art of contouring for everyday wear.