Printing documents from your Mac is a straightforward process, whether you need a hard copy for personal records, business presentations, or any other purpose. The macOS operating system offers a built-in Print dialog that provides a range of options to customize your printed output. While using your home or office printer is a common scenario, you might find yourself in situations where you need to print documents elsewhere. This guide will walk you through using the Print dialog on your Mac and explore various locations where you can effectively print your documents.
Printing Directly from Your Mac Using the Print Dialog
The primary method for printing documents from your Mac involves using the Print dialog. This versatile tool allows you to select your desired printer and configure various settings to ensure your documents print exactly as you need them.
-
Accessing the Print Dialog:
With your document open in any application on your Mac, navigate to the menu bar at the top of your screen. Click on “File” and then select “Print” from the dropdown menu. Alternatively, you can use the keyboard shortcut Command-P to quickly open the Print dialog.
A window will appear, displaying a preview of your document as it will be printed. This Print dialog is your central hub for managing your print job.
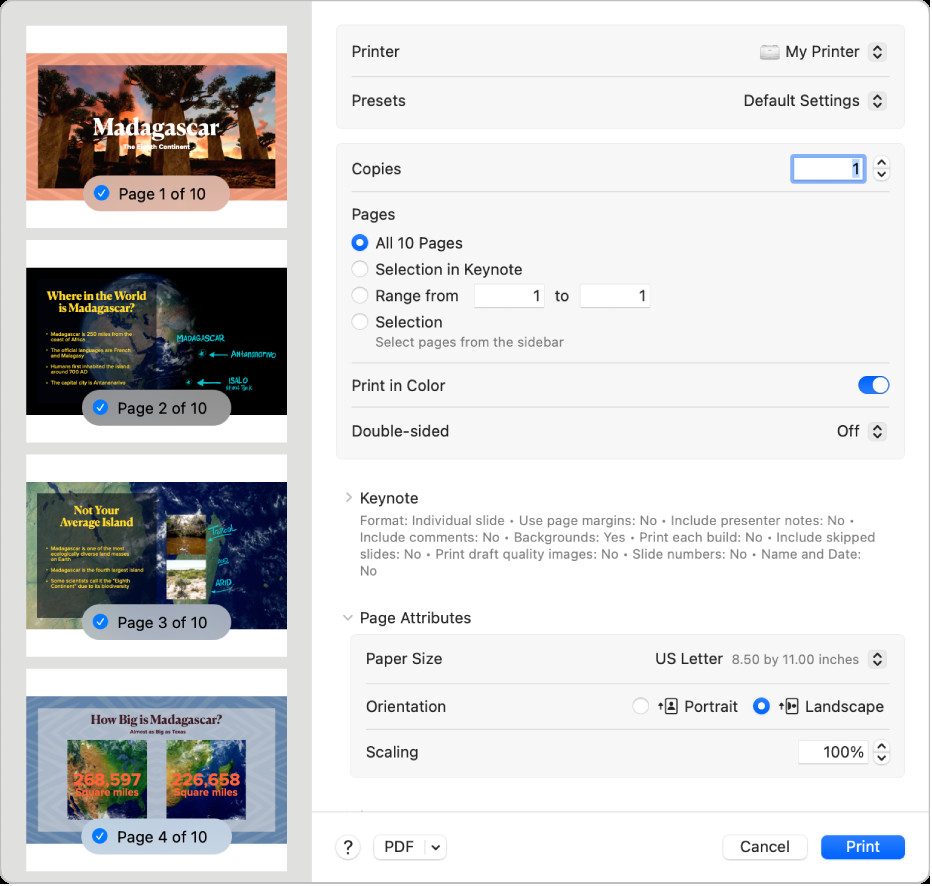 The Print dialog box on macOS, displaying various print options and a document preview.
Note: The specific options you see in the Print dialog may vary slightly depending on the printer you are using and the application from which you are printing. If you encounter differences from the following steps, consult the help documentation for your specific application by clicking “Help” in the menu bar.
-
Initiating a Quick Print:
If the default settings in the Print dialog are suitable for your needs, simply click the “Print” button. Your document will be sent to the selected printer, and the printing process will begin.
-
Adjusting Print Settings for Customized Output:
To fine-tune your print job and achieve specific results, the Print dialog offers a variety of customizable options. Here are some of the most commonly used settings:
-
Printer Selection: Use the “Printer” dropdown menu to choose the printer you want to use. If you are signed into the same Apple ID across multiple devices, recently used AirPrint printers will automatically appear in the list. If your desired printer is not listed, you can add it by following the instructions in Add a printer to your printer list.
-
Presets: Presets are saved groups of print settings that you can apply for recurring print jobs. The “Presets” menu allows you to select from default settings or choose a custom preset you have previously saved. To learn how to save your preferred settings as a preset, refer to Save frequently used print settings.
-
Number of Copies: Specify the desired number of copies using the “Copies” field. If you need collated copies (complete sets printed before the next set begins), access the “Paper Handling” options and select “Collate Sheets.” More information on collation can be found in Print pages in normal order.
-
Page Range: Define which pages of your document you want to print using the “Print Range” options. You can print “All Pages” or specify a custom range, such as pages 6 to 9 of a 10-page document. The “Selection” button allows you to print only selected pages from the preview sidebar, even if they are not consecutive.
-
Color Printing: If your printer supports color printing, the “Print in Color” option allows you to enable or disable color output. Disabling this option will print your document in black and white.
-
Double-Sided Printing: For printers with duplexing capabilities, the “Double-Sided” menu offers options for printing on both sides of the paper. Choose “On” for standard double-sided printing or “On (Short Edge)” for documents intended to be bound at the top edge.
-
Paper Size: Select the appropriate paper size for your document from the “Paper Size” menu. Ensure this setting matches the paper loaded in your printer. Common options include “US Letter” (8.5 x 11 inches) and “A4”.
-
Orientation: Switch between portrait (vertical) and landscape (horizontal) orientation using the orientation buttons. The preview in the sidebar will update to reflect your chosen orientation.
-
Scaling: Adjust the size of the printed image relative to the paper size using the “Scaling” percentage field. Increasing the percentage enlarges the image, while decreasing it reduces the size. The preview will reflect the scaling changes.
-
-
Finalizing and Printing:
Once you have configured all your desired print settings, click the “Print” button to send your document to the printer.
Beyond Home and Office: Other Locations to Print Documents
While having a printer at home or in the office is convenient, there are many other places where you can print documents when you are on the go or need specialized printing services:
-
Public Libraries: Most public libraries offer printing services for a small fee. Libraries are readily accessible and provide a quiet environment for printing and handling documents.
-
Local Print Shops: Print shops, such as FedEx Office or The UPS Store, are dedicated to printing and document services. They offer a wide range of printing options, including color printing, various paper types, and finishing services like binding and lamination.
-
Office Supply Stores: Stores like Staples or Office Depot also provide printing and document services, often with self-service printing stations.
-
Co-working Spaces: If you are a member of a co-working space, printing facilities are usually included as part of the amenities.
-
Hotels and Business Centers: Many hotels, especially those catering to business travelers, have business centers equipped with computers and printers for guest use.
-
University and College Campuses: University and college libraries and computer labs often provide printing services for students and sometimes for the public.
Tips for Optimizing Your Document Printing
-
Margin and Paper Size Compatibility: If you encounter unexpected margins or text clipping when printing, it might be due to a mismatch between the margins set in your application and the non-printable area defined for your printer and paper size. Try setting the non-printable area to 0. For detailed instructions, see Print on unusual sized paper by creating a custom paper size.
-
Preview Before Printing: Always utilize the preview feature in the Print dialog to ensure your document layout and settings are correct before sending the job to the printer. This can save paper and ink.
-
Consider Digital Alternatives: Before printing, evaluate if a digital alternative might suffice. Sharing documents electronically or using digital signature tools can sometimes eliminate the need for printing altogether.
By understanding the Print dialog on your Mac and knowing where to find printing services when needed, you can efficiently manage your document printing needs in any situation.
See also:
Choose a paper size for your printed document on Mac
Add a printer to your printer list so you can use it on Mac
Check on a printer or print job using the Dock on Mac
Solve printing problems on Mac