Ever pressed the Print Screen key on your Windows machine and then… wondered where on earth your screenshot disappeared to? You’re not alone. It’s a common frustration, especially when you need to quickly grab something on your screen and find it later. Navigating the file system to locate your screenshots can feel like a digital scavenger hunt.
This guide is designed to clearly answer the question: “Where Do Screenshots Go On Windows?”. We’ll walk you through the default location, explain why it might not always be the most convenient, and offer solutions to streamline your screenshot workflow. Whether you’re a seasoned Windows user or new to the platform, understanding where your screenshots are saved is essential for productivity.
Understanding the Default Windows Screenshot Location
When you capture a screenshot on Windows, typically by pressing the Print Screen (PrtScn) key, the image is initially saved to your clipboard. This means it’s temporarily stored in your computer’s memory, ready to be pasted into applications like Paint, Word, or image editors.
However, if you’re looking for a saved file of your screenshot, Windows 10 and 11 have a default location within your file system. To find your screenshots, you’ll need to delve into File Explorer and follow a specific path. Here’s how to navigate to the default screenshot folder:
- Open File Explorer: Click on the folder icon in your taskbar, or press Windows key + E.
- Navigate to “This PC”: You’ll usually find this in the left-hand sidebar of File Explorer. Click on it.
- Access Your Local Disk: This is typically labeled as Local Disk (C:) or Windows (C:). Double-click to open it.
- Open the “Users” Folder: Scroll down and find the “Users” folder, then open it.
- Select Your Username Folder: You’ll see a folder with your username. This is your personal user profile folder. Open it.
- Find the “OneDrive” Folder: Inside your user folder, locate and open the “OneDrive” folder.
- Go to “Pictures”: Within OneDrive, find and open the “Pictures” folder.
- Finally, Open “Screenshots”: Inside “Pictures,” you’ll find the “Screenshots” folder. This is the default location where Windows saves screenshots captured using the Windows key + PrtScn or PrtScn in conjunction with other keys like Alt or Shift.
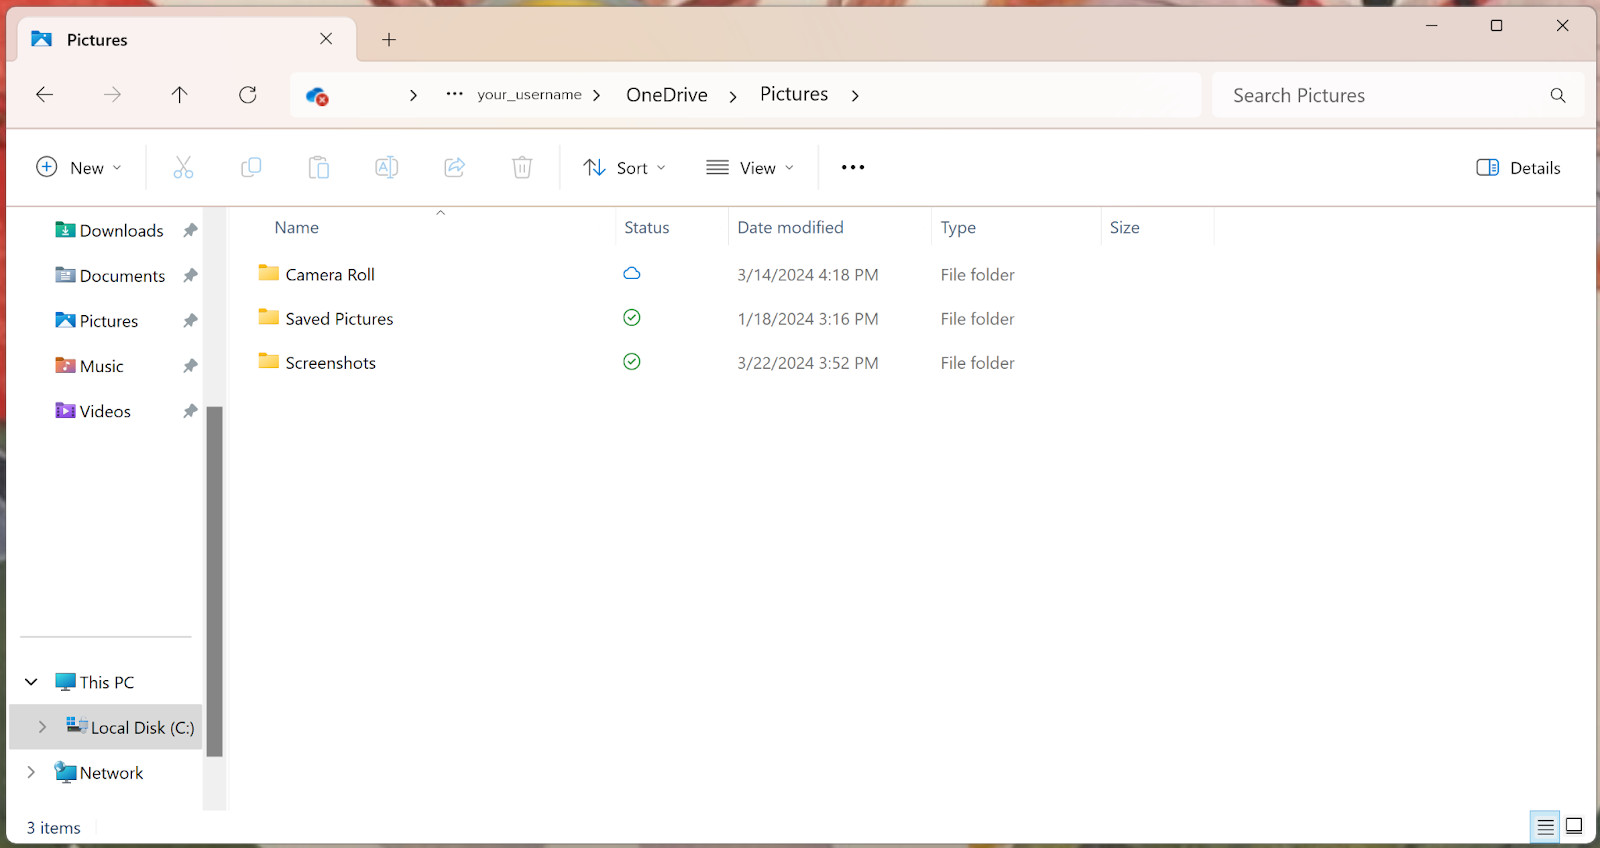 Navigating to the Screenshots folder in Windows File Explorer.
It’s important to note that the presence of the “OneDrive” folder in this path is significant. If you have OneDrive configured to back up your Pictures folder, your screenshots will be automatically synced to your OneDrive cloud storage.
Limitations of the Default Screenshot Location
While Windows provides a default screenshot folder, it’s not without its drawbacks:
- Deep File Path: As you can see from the steps above, accessing the default screenshots folder requires navigating through several layers of folders. This can be time-consuming if you frequently need to access your screenshots.
- Reliance on OneDrive: The default location being within OneDrive means that if you don’t use OneDrive or if syncing is paused, screenshots might not be saved as expected or readily accessible offline.
- Clipboard Dependency: Simply pressing PrtScn only saves the screenshot to the clipboard, not directly as a file in the Screenshots folder. To automatically save to the folder, you typically need to use Windows key + PrtScn. This nuance can be confusing for users.
Customizing Your Screenshot Saving Location in Windows
If the default screenshot location isn’t working for you, Windows offers a few workarounds to customize where your screenshots are saved. One common method involves using Paint, the built-in image editor.
Here’s how you can use Paint to save screenshots to a location of your choice:
- Capture your screenshot: Press the Print Screen (PrtScn) key to copy the screenshot to your clipboard.
- Open Paint: Search for “Paint” in the Windows search bar and open the application.
- Paste your screenshot: Press Ctrl + V to paste the screenshot into Paint.
- Save As: Click on File in the top left corner, then select Save As. Choose your desired image format (PNG, JPG, etc.).
- Choose your saving location: In the Save As dialog box, navigate to the folder where you want to save your screenshot. You can create a new folder specifically for screenshots for easier access.
- Name your file and save: Give your screenshot a descriptive name and click Save.
While this method allows for custom locations, it adds extra steps to your screenshot process. For each screenshot, you need to open Paint, paste, and manually save. This can become tedious if you take screenshots frequently.
Streamlining Your Screenshot Workflow with Dedicated Tools
For users who regularly take screenshots, relying on default locations or manual saving processes can be inefficient. This is where dedicated screenshot tools like Snagit come into play. These tools are designed to significantly enhance your screenshot workflow by offering features that go beyond basic capture and save functionalities.
Snagit, for example, provides a much more user-friendly and organized approach to managing screenshots. Here’s how it simplifies the process:
- Customizable Capture Options: Snagit allows you to capture specific regions, windows, or entire scrolling screens, giving you more control than the basic Print Screen function.
- Direct Saving to Custom Locations: With Snagit, you can pre-define your preferred saving location. You can create a dedicated “Screenshots” folder anywhere on your computer and set Snagit to automatically save all captures there.
- Automatic File Naming and Organization: Snagit can automatically name your screenshots based on date, time, or even the application you captured from. Its library feature further organizes your captures, making it easy to find them later.
- Built-in Editing and Annotation Tools: Snagit includes a powerful editor that allows you to annotate, add text, shapes, and effects to your screenshots immediately after capture. This eliminates the need to open separate image editing software.
- Tagging and Search Capabilities: Snagit allows you to tag your screenshots with keywords, making it incredibly easy to search and retrieve specific images from your library.
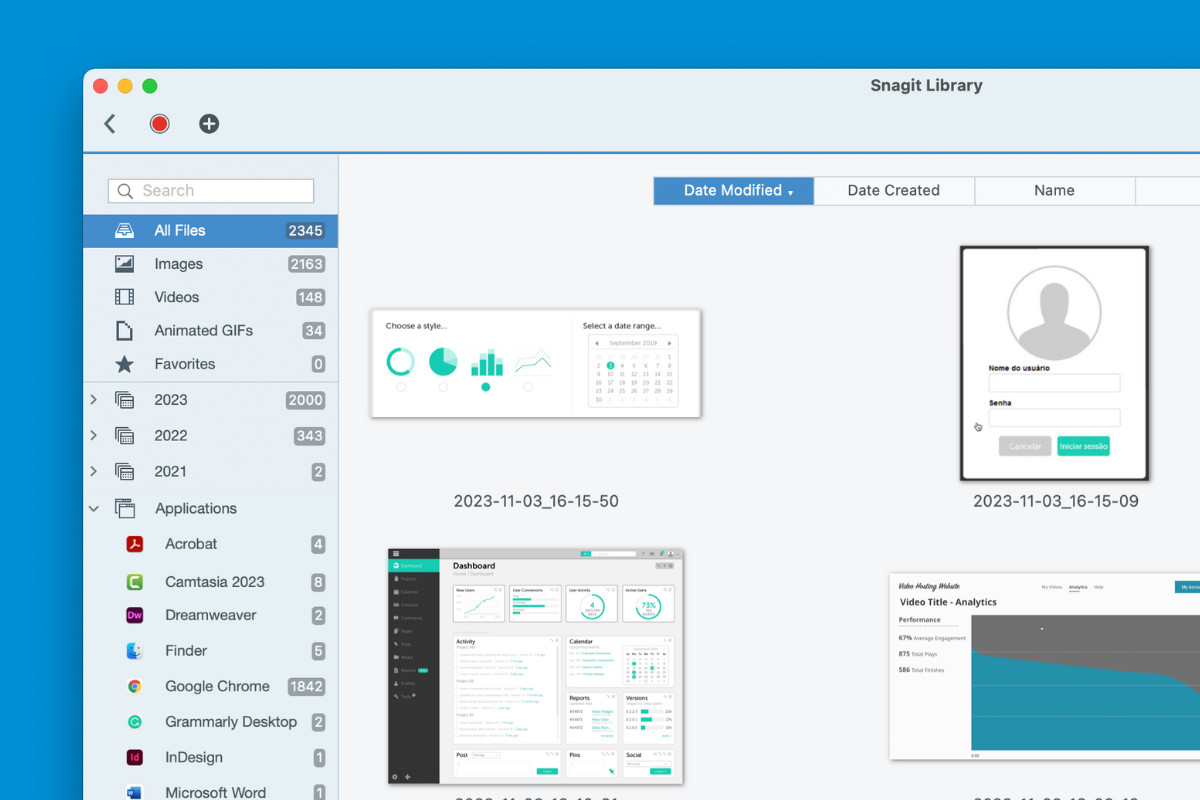 Snagit's library view showcasing organized screenshots with tags and search functionality.
By using a dedicated tool like Snagit, you eliminate the hassle of navigating deep file paths or manually saving each screenshot. You gain a streamlined workflow that saves time and keeps your screenshots organized and easily accessible.
Stop Asking “Where Did My Screenshot Go?”
Finding your screenshots on Windows doesn’t have to be a mystery. While the default location exists, it’s not always the most practical. By understanding where Windows saves screenshots by default and exploring alternative methods like using Paint or dedicated tools like Snagit, you can take control of your screenshot workflow.
For those seeking efficiency and organization, investing in a specialized screenshot tool can be a game-changer. Imagine never having to ask “Where do screenshots go on Windows?” again. With the right approach, you can capture, save, and find your screenshots with ease, boosting your productivity and eliminating a common digital frustration.
Learn more about Snagit and streamline your screenshot process