Saving documents on Pages is key to protecting your work and ensuring you can access it later; savewhere.net is here to guide you. This article will show you how to save, rename, and manage your Pages documents effectively, leading to greater financial savings and productivity. Learn how to secure your files and make the most of Pages with our tips for digital document management.
1. Understanding the Basics of Saving Documents on Pages
Saving a document in Pages is straightforward, but knowing the different options ensures your work is always secure and accessible. Let’s look at the fundamental ways to save your work on Pages.
1.1. How do I save a new document for the first time on Pages?
When saving a new document for the first time in Pages, the process is quite simple. Name your document and choose where to save it, whether on your desktop or in a specific folder. To save a new document:
- Click anywhere within the document window to activate it.
- Navigate to the File menu located at the top of your screen.
- Select “Save” from the dropdown menu.
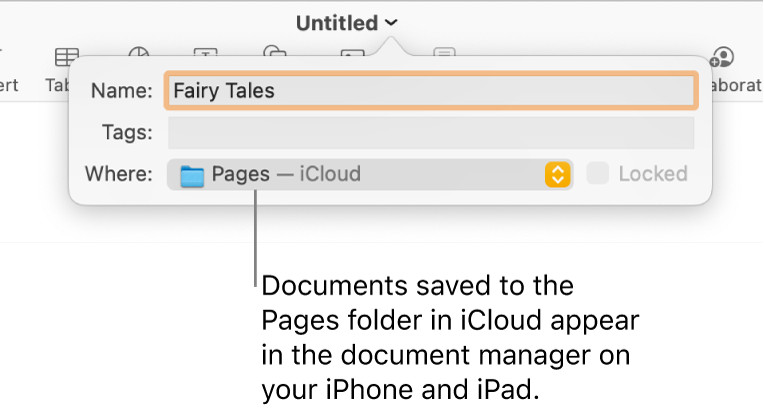 Pages Save Dialog Box
In the “Save As” field, provide a descriptive name for your document that reflects its content. You can also add tags to help categorize and locate your document more easily later. Adding descriptive tags is like labeling storage bins in your home, making it easier to find exactly what you need when you need it.
1.2. What is autosave in Pages, and how does it help?
Autosave in Pages is a background feature that automatically saves your work as you progress. This feature is particularly beneficial because it prevents data loss due to unexpected events such as power outages or application crashes. By continuously saving your document in the background, autosave ensures that you always have the most current version of your work safely stored.
1.3. How to choose the right location for saving your Pages documents?
Selecting the appropriate location for saving your Pages documents is crucial for ensuring easy access and efficient organization. Pages offers several options, allowing you to save documents on your device or in the cloud.
- iCloud Drive: Saving to iCloud Drive allows you to access your documents from any device connected to your iCloud account. This is especially useful if you work on multiple devices or need to share documents with others.
- On Your Mac: You can save documents directly on your Mac in folders like Documents, Desktop, or any custom folder.
- External Drives: Saving to external drives provides a physical backup of your documents and is ideal for archiving or transferring large files.
- Network Locations: If you work in a collaborative environment, saving to a network location allows multiple users to access and work on the same document.
Choosing the right location depends on your specific needs and workflow. For example, if you frequently switch between your Mac and iPad, iCloud Drive is the best option.
1.4. What are the common file formats supported by Pages for saving documents?
Pages primarily saves documents in its native .pages format. However, it also supports exporting to other formats, which can be useful for sharing documents with people who use different word processors. According to Apple Support, Pages can export documents to the following formats:
- Microsoft Word (.docx): Ideal for sharing with users who use Microsoft Word.
- PDF (.pdf): Great for creating a fixed-layout document that preserves formatting and is easy to share.
- Plain Text (.txt): Suitable for saving the document content without any formatting.
- Rich Text Format (.rtf): Useful for preserving basic formatting while ensuring compatibility across different platforms.
- EPUB (.epub): Used for creating e-books that can be read on various e-readers and devices.
To export a document to another format:
- Open the document in Pages.
- Go to File > Export To, and then choose the desired format.
- Adjust the settings as needed and click Next.
- Choose where to save the exported file and click Export.
2. Step-by-Step Guide to Saving a Document on Pages
To effectively save a document on Pages, follow these detailed steps that ensure your work is securely stored and easily accessible.
2.1. Detailed steps on how to save a new Pages document:
Saving a new document in Pages involves a few simple steps that ensure your work is securely stored and easily retrievable.
- Open the Pages App: Start by opening the Pages application on your Mac.
- Create a New Document: Either start a new document from scratch or open an existing one that you want to save.
- Access the Save Menu: Once your document is ready, click anywhere within the document window to make it active. Then, navigate to the “File” menu at the top of your screen and select “Save.”
- Name Your Document: In the “Save As” field, enter a descriptive name for your document. This name should reflect the content of the document, making it easier to find later.
- Add Tags (Optional): Adding tags can further help in organizing and locating your document. Tags are keywords or labels that you assign to your document, which can be searched for in Finder.
- Choose a Save Location: Click the “Where” pop-up menu to choose where you want to save the document. You can select from options like “Desktop,” “Documents,” “iCloud Drive,” or any other folder on your Mac.
- Create a New Folder (Optional): If you want to save your document in a new folder, click the “Where” pop-up menu, choose “Other,” and then click “New Folder” at the bottom of the dialog. Enter a name for the folder and click “Create.”
- Save the Document: After selecting the location, click the “Save” button to save your document.
2.2. How to save changes to an existing document?
To save changes to an existing document in Pages, follow these steps to ensure your latest edits are securely stored.
- Open the Document: Open the Pages document you want to save.
- Make Changes: Make the necessary edits to your document.
- Save the Changes: To save the changes, go to the “File” menu at the top of your screen and select “Save.” Alternatively, you can use the keyboard shortcut Command + S.
- Verify the Save: After saving, take a moment to verify that your changes have been saved correctly.
2.3. Saving a copy: How to use the ‘Save As’ option in Pages?
The “Save As” option in Pages is useful when you want to create a copy of a document, either to have a backup or to make changes without altering the original file. Here’s how to use it:
- Open the Document: Open the Pages document you want to copy.
- Access ‘Save As’: Hold down the Option key on your keyboard. Then, go to the “File” menu at the top of your screen. You will see the “Save As” option appear.
- Name the Copy: In the “Save As” field, enter a new name for the copy. This name should be different from the original document’s name to avoid confusion.
- Choose a Save Location: Select the location where you want to save the copy.
- Save the Copy: Click the “Save” button to save the copy of your document.
2.4. How to revert to a previous version of a Pages document?
Reverting to a previous version of a Pages document is a great way to undo unwanted changes or restore a file to an earlier state.
- Open the Document: Open the Pages document you want to revert.
- Access Version History: Go to the “File” menu at the top of your screen, then select “Revert To” and choose “Browse All Versions.”
- Browse Versions: A window will open showing the current version of your document on the left and previous versions on the right.
- Select a Version: Click on the version you want to revert to. You can use the arrows to scroll through different versions.
- Restore the Version: Once you have found the version you want, click the “Restore” button.
According to Apple Support, Pages automatically saves versions of your document periodically, allowing you to revert to an earlier version if needed.
3. Optimizing Your Workflow with Pages’ Saving Features
To enhance your productivity, Pages offers several saving features that optimize your workflow. Understanding and using these features will help you manage your documents more efficiently.
3.1. Using iCloud Drive for seamless saving and access across devices:
iCloud Drive offers a seamless way to save and access your Pages documents across all your Apple devices.
- Enable iCloud Drive: First, ensure that iCloud Drive is enabled on your Mac and other Apple devices.
- Save Documents to iCloud Drive: When saving a new document or a copy, choose iCloud Drive as the save location.
- Access Documents on Other Devices: On your other devices (iPad, iPhone, etc.), open the Pages app and access your documents from iCloud Drive.
3.2. How to set up automatic backups for your Pages documents?
Setting up automatic backups for your Pages documents ensures that your work is always safe and recoverable.
- Use Time Machine: Time Machine is the built-in backup software on macOS.
- Connect an External Drive: Connect an external hard drive to your Mac.
- Enable Time Machine: Go to System Preferences > Time Machine.
- Select Backup Disk: Click “Select Backup Disk” and choose your external drive.
- Automatic Backups: Time Machine will automatically start backing up your files, including your Pages documents.
3.3. Utilizing tags for better document organization and retrieval:
Tags are keywords or labels that you can assign to your Pages documents to help organize and retrieve them more efficiently.
- Add Tags When Saving: When saving a new document or a copy, enter tags in the “Tags” field.
- Add Tags to Existing Documents: To add tags to an existing document, locate the file in Finder, right-click, and select “Get Info.” In the Info window, you can add tags in the “Tags” field.
- Search by Tags: To find documents using tags, open Finder and enter the tag name in the search bar.
3.4. Creating custom templates to save time on repetitive documents:
Creating custom templates in Pages can save you a lot of time and effort when dealing with repetitive documents.
- Create a New Document: Start by creating a new Pages document with the layout and formatting you want to use as a template.
- Customize the Template: Add placeholders for text, images, and other elements that you want to be easily customizable.
- Save as Template: Go to File > Save as Template.
- Name the Template: Enter a name for your template and choose whether to save it to the Template Chooser or to iCloud.
- Use the Template: To use your custom template, open Pages and choose New Document. Your template will appear in the Template Chooser.
According to Apple Support, custom templates can include placeholders for text and images, making it easy to create new documents with a consistent look and feel.
4. Troubleshooting Common Saving Issues in Pages
Even with its user-friendly interface, you might encounter issues while saving documents in Pages. Here are some common problems and how to fix them.
4.1. What to do if Pages is not saving your document?
If Pages is not saving your document, there are several steps you can take to troubleshoot the issue.
- Check Disk Space: Make sure you have enough free space on your hard drive.
- Close Unnecessary Programs: Close any unnecessary programs to free up system resources.
- Restart Pages: Close and reopen Pages to see if that resolves the issue.
- Restart Your Mac: Restart your Mac to clear any temporary issues.
- Save as a Copy: Try saving the document as a copy to a different location.
- Check Permissions: Ensure you have the necessary permissions to save files to the selected location.
- Update Pages: Make sure you are using the latest version of Pages.
4.2. How to recover a lost or unsaved document in Pages?
Losing an unsaved document can be frustrating, but Pages has features to help you recover your work.
- Check Autosave: Pages automatically saves your work every few minutes. Reopen Pages to see if the autosaved version is available.
- Look in the AutoRecovery Folder: macOS has an AutoRecovery folder where temporary files are stored.
- Use Time Machine: If you have Time Machine enabled, you can restore a previous version of the document.
- Check Temporary Files: Look in the temporary files folder on your Mac.
4.3. Resolving error messages during the saving process:
Encountering error messages during the saving process can be confusing, but understanding the message is the first step to resolving the issue.
- Insufficient Permissions: If you see an error message about permissions, make sure you have the necessary permissions to save files to the selected location.
- File Already Exists: If you see an error message indicating that the file already exists, try saving the document with a different name.
- Disk Full: If the error message indicates that your disk is full, free up some space on your hard drive.
- Corrupted File: If you suspect the file is corrupted, try opening it on another computer or using a file repair tool.
4.4. Addressing compatibility issues when saving in different formats:
When saving a Pages document in a different format, you might encounter compatibility issues.
- Save as PDF: PDF is generally the most reliable format for preserving formatting and ensuring compatibility across different platforms.
- Use Microsoft Word Format: If you need to share the document with Microsoft Word users, save it in the .docx format.
- Check Font Compatibility: Some fonts might not be supported in all formats. Use common fonts like Arial or Times New Roman to avoid issues.
- Simplify Formatting: Complex formatting can sometimes cause compatibility issues. Try simplifying the formatting to ensure the document displays correctly.
5. Advanced Tips for Managing Pages Documents
To become proficient in managing your Pages documents, consider these advanced tips that will help you streamline your workflow and keep your files organized.
5.1. How to password protect your Pages documents?
Password protecting your Pages documents adds an extra layer of security, ensuring that sensitive information is protected.
- Open the Document: Open the Pages document you want to password protect.
- Set a Password: Go to File > Set Password.
- Enter a Password: Enter your desired password in the dialog box.
- Verify the Password: Re-enter the password to verify it.
- Add a Password Hint (Optional): Add a password hint to help you remember the password.
- Apply the Password: Click Set Password to apply the password to your document.
5.2. Sharing and collaborating on Pages documents:
Pages makes it easy to share and collaborate on documents with others, whether they are using Pages or other word processors.
- Share via iCloud: Save your document to iCloud Drive, then click the Collaborate button in the toolbar.
- Invite Participants: Enter the email addresses of the people you want to invite to collaborate.
- Set Permissions: Choose whether participants can make changes or only view the document.
- Send Invitation: Click Share to send the invitation.
- Export to Other Formats: Export your document to other formats like Microsoft Word or PDF to share with people who don’t use Pages.
5.3. Converting Pages documents to other formats for compatibility:
Converting Pages documents to other formats is essential for sharing your work with people who use different word processors.
- Open the Document: Open the Pages document you want to convert.
- Export to Another Format: Go to File > Export To and choose the desired format.
- Adjust Settings: Adjust the settings as needed for the selected format.
- Export the Document: Click Next, choose a save location, and click Export.
5.4. Archiving old documents to save storage space:
Archiving old documents is a great way to save storage space and keep your Pages library organized.
- Compress Files: Compress old documents into a zip file to reduce their file size.
- Move to External Storage: Move the archived documents to an external hard drive or cloud storage service.
- Remove from iCloud Drive: If you are using iCloud Drive, remove the archived documents to free up space.
By following these advanced tips, you can effectively manage your Pages documents, ensuring they are secure, organized, and easily accessible.
6. Maximizing Efficiency with Pages: Tips and Tricks
To further enhance your efficiency with Pages, consider these additional tips and tricks that can streamline your workflow.
6.1. Using keyboard shortcuts for quick saving and document management:
Keyboard shortcuts can significantly speed up your workflow in Pages. Here are some useful shortcuts for saving and managing documents.
| Shortcut | Action |
|---|---|
| Command + S | Save |
| Command + Shift + S | Save As |
| Command + O | Open |
| Command + N | New Document |
| Command + W | Close Window |
| Command + Q | Quit Pages |
| Command + Z | Undo |
| Command + Shift + Z | Redo |
| Command + P | |
| Command + F | Find |
| Command + A | Select All |
| Command + C | Copy |
| Command + X | Cut |
| Command + V | Paste |
| Command + B | Bold |
| Command + I | Italic |
| Command + U | Underline |
| Command + K | Insert Link |
| Command + T | Show Fonts |
| Command + + (Plus) | Increase Font Size |
| Command + – (Minus) | Decrease Font Size |
| Command + [ | Align Left |
| Command + } | Align Right |
| Command + Shift + ` | Show/Hide Inspector Panel |
According to Apple Support, using keyboard shortcuts can save you time and effort when working in Pages.
6.2. Customizing the Pages toolbar for frequently used saving options:
Customizing the Pages toolbar allows you to quickly access your most frequently used saving options.
- Open Pages: Open the Pages application on your Mac.
- Customize Toolbar: Go to View > Customize Toolbar.
- Add Icons: Drag and drop icons for saving options, such as Save, Save As, and Export, from the customization panel to the toolbar.
- Remove Icons: Drag icons off the toolbar to remove them.
- Done: Click Done to save your changes.
6.3. Integrating Pages with other apps for seamless document management:
Integrating Pages with other apps can streamline your document management process.
- Use iCloud Drive: Store your Pages documents in iCloud Drive to access them from other apps.
- Export to Compatible Formats: Export your Pages documents to compatible formats like PDF or Microsoft Word to use them in other apps.
- Use Drag and Drop: Drag and drop files between Pages and other apps to quickly move content.
6.4. Utilizing templates for efficient document creation and saving:
Templates can significantly speed up the document creation process in Pages.
- Use Built-In Templates: Pages comes with a variety of built-in templates for different types of documents.
- Create Custom Templates: Create your own custom templates to save time on repetitive documents.
- Save as Template: Go to File > Save as Template to save your custom template.
By utilizing these tips and tricks, you can maximize your efficiency with Pages, making document creation and management a breeze.
7. Saving Money and Time: The Savewhere.net Approach
At savewhere.net, we understand the value of both time and money. By using Pages effectively, you can save both.
7.1. How savewhere.net helps you optimize your use of Pages for financial savings:
savewhere.net provides resources and tips to help you optimize your use of Pages, which can lead to financial savings in several ways.
- Efficient Document Creation: Creating documents quickly and efficiently saves time, allowing you to focus on other important tasks.
- Reduced Printing Costs: By creating and sharing documents digitally, you can reduce printing costs.
- Better Organization: Keeping your documents organized helps you find what you need quickly, saving you time and reducing the risk of losing important information.
7.2. Practical tips for budgeting and financial planning using Pages:
Pages can be a useful tool for budgeting and financial planning.
- Create a Budget Spreadsheet: Use Pages to create a budget spreadsheet to track your income and expenses.
- Track Your Spending: Use Pages to create a spending tracker to monitor your spending habits.
- Set Financial Goals: Use Pages to set and track your financial goals, such as saving for a down payment on a house or paying off debt.
7.3. Leveraging Pages for creating professional financial reports and presentations:
Pages is an excellent tool for creating professional financial reports and presentations.
- Use Templates: Use Pages templates to create visually appealing reports and presentations.
- Add Charts and Graphs: Add charts and graphs to your reports and presentations to illustrate financial data.
- Use Tables: Use tables to present financial information in a clear and organized manner.
7.4. How savewhere.net’s resources enhance your financial management skills?
savewhere.net offers a variety of resources to enhance your financial management skills.
- Budgeting Tips: Learn how to create and stick to a budget.
- Saving Strategies: Discover effective strategies for saving money.
- Investment Advice: Get expert advice on investing your money wisely.
- Debt Management: Learn how to manage and pay off debt.
By leveraging Pages and savewhere.net’s resources, you can improve your financial management skills and save both time and money.
8. Real-Life Scenarios: Saving Documents in Pages Effectively
Understanding how to save documents in Pages effectively can be applied to various real-life scenarios, making your workflow more efficient and secure.
8.1. Scenario 1: Saving a business proposal:
Imagine you are drafting a business proposal for a potential client. You’ve spent hours crafting the perfect content, and you want to ensure it’s saved securely.
- Create the Proposal: Open Pages and start writing your business proposal.
- Save Frequently: Save your document frequently by pressing Command + S.
- Use ‘Save As’ for Backups: Periodically, use the ‘Save As’ option to create backup copies with different names (e.g., “Business Proposal Draft 1,” “Business Proposal Draft 2”).
- Save to iCloud Drive: Save the final version to iCloud Drive for easy access from any device.
8.2. Scenario 2: Managing personal financial records:
Keeping track of personal financial records is essential for budgeting and financial planning.
- Create Financial Records: Use Pages to create documents for tracking your income, expenses, and investments.
- Password Protect Sensitive Documents: Password protect sensitive documents containing personal financial information.
- Organize with Tags: Use tags to organize your financial records by year, type, or category.
- Backup Regularly: Back up your financial records regularly to an external drive or cloud storage service.
8.3. Scenario 3: Collaborating on a school project:
Working on a school project with classmates requires efficient collaboration.
- Create the Document: Open Pages and start working on the project.
- Share via iCloud: Save the document to iCloud Drive and share it with your classmates.
- Set Permissions: Set permissions to allow classmates to make changes to the document.
- Track Changes: Use the track changes feature to see who made what changes.
- Communicate Effectively: Communicate with your classmates about changes and updates.
8.4. Scenario 4: Creating and saving a novel:
Writing a novel is a long-term project that requires careful management.
- Create Chapters: Create separate Pages documents for each chapter of your novel.
- Save Frequently: Save your work frequently to avoid losing progress.
- Use ‘Save As’ for Different Versions: Use the ‘Save As’ option to create different versions of your novel.
- Backup Regularly: Back up your novel regularly to an external drive or cloud storage service.
- Password Protect: Password protect your novel to prevent unauthorized access.
9. Addressing Common Concerns About Saving on Pages
When using Pages, you might have some concerns about saving your documents. Here are some common questions and answers to address those concerns.
9.1. What happens if Pages crashes while I’m working on a document?
If Pages crashes while you’re working on a document, don’t panic.
- Reopen Pages: Reopen Pages.
- Check Autosaved Version: Pages will usually recover the autosaved version of your document.
- Check AutoRecovery Folder: If the autosaved version is not available, check the AutoRecovery folder on your Mac.
- Use Time Machine: If you have Time Machine enabled, you can restore a previous version of the document.
9.2. Is it safe to save sensitive documents on iCloud Drive?
Saving sensitive documents on iCloud Drive can be safe if you take the necessary precautions.
- Use a Strong Password: Use a strong, unique password for your iCloud account.
- Enable Two-Factor Authentication: Enable two-factor authentication to add an extra layer of security to your account.
- Password Protect Documents: Password protect sensitive documents before saving them to iCloud Drive.
9.3. How do I ensure my Pages documents are accessible on older versions of Pages?
To ensure your Pages documents are accessible on older versions of Pages:
- Save as an Older Format: When saving your document, choose “Pages ’09” as the file format.
- Export to PDF: Export your document to PDF to ensure it can be opened on any device.
- Use Common Fonts: Use common fonts to avoid compatibility issues.
9.4. What are the best practices for naming my Pages documents?
Following best practices for naming your Pages documents can help you stay organized and find your files quickly.
- Use Descriptive Names: Use descriptive names that reflect the content of the document.
- Use Consistent Naming Conventions: Use consistent naming conventions to make it easier to find related documents.
- Include Dates: Include dates in your file names to track different versions of the document.
10. The Future of Saving and Document Management with Pages
As technology evolves, so do the capabilities of Pages. Here’s a glimpse into the future of saving and document management with Pages.
10.1. Predicted updates and enhancements to Pages’ saving features:
- Improved Autosave: Enhanced autosave features that save your work more frequently and reliably.
- Better Cloud Integration: Improved integration with cloud storage services for seamless access and collaboration.
- Enhanced Version History: More detailed version history that allows you to easily revert to previous versions of your documents.
- AI-Powered Suggestions: AI-powered suggestions for naming and organizing your documents.
10.2. The role of cloud storage in future document management:
Cloud storage will play an increasingly important role in future document management.
- Seamless Access: Cloud storage allows you to access your documents from any device, anywhere in the world.
- Collaboration: Cloud storage makes it easy to collaborate on documents with others.
- Backup and Recovery: Cloud storage provides automatic backup and recovery of your documents.
10.3. How AI and machine learning might impact saving and organizing documents:
AI and machine learning have the potential to revolutionize how we save and organize documents.
- Automatic Tagging: AI can automatically tag your documents based on their content.
- Smart Organization: AI can automatically organize your documents into folders based on their type and content.
- Predictive Saving: AI can predict when you are about to lose power or encounter a system crash and automatically save your work.
10.4. The importance of staying updated with Pages’ latest features:
Staying updated with Pages’ latest features is crucial for maximizing your productivity and efficiency.
- Check for Updates: Regularly check for updates to Pages.
- Read Release Notes: Read the release notes to learn about new features and enhancements.
- Explore New Features: Take the time to explore new features and learn how to use them.
Saving documents on Pages is essential for safeguarding your work and optimizing your productivity. By following the tips and strategies outlined in this guide, you can efficiently manage your documents, save time and money, and enhance your financial management skills with savewhere.net.
For more tips, strategies, and resources on saving money and managing your finances, visit savewhere.net today. Let us help you take control of your financial future.
Address: 100 Peachtree St NW, Atlanta, GA 30303, United States
Phone: +1 (404) 656-2000
Website: savewhere.net
FAQ
1. How do I save a document on Pages for the first time?
To save a new document on Pages, click anywhere within the document window, then go to File > Save. Enter a name in the Save As field, add tags if desired, choose a save location, and click Save. This ensures your document is securely stored for future access.
2. What should I do if Pages is not saving my document?
If Pages is not saving your document, first check your disk space and close unnecessary programs. Then, try restarting Pages or your Mac. If the issue persists, save the document as a copy to a different location and ensure you have the necessary permissions to save files.
3. How can I recover a lost or unsaved document in Pages?
To recover a lost or unsaved document in Pages, check for autosaved versions by reopening the app. Also, look in the AutoRecovery folder on your Mac or use Time Machine to restore a previous version of the document if you have backups enabled.
4. How do I save a copy of a document in Pages?
To save a copy of a document in Pages, open the document, hold down the Option key, then go to File > Save As. Enter a new name for the copy, choose a save location, and click Save. This allows you to make changes without altering the original file.
5. How can I password protect my Pages documents?
To password protect your Pages documents, open the document and go to File > Set Password. Enter and verify your desired password, add a hint if needed, and click Set Password to apply the protection.
6. How do I share and collaborate on Pages documents with others?
To share and collaborate on Pages documents, save your document to iCloud Drive and click the Collaborate button. Enter the email addresses of participants, set permissions for editing or viewing, and send the invitation.
7. What is the best way to organize my Pages documents?
To organize your Pages documents, use descriptive names and consistent naming conventions. Add tags for easy searching and categorize your files into folders. Regularly archive old documents to save storage space and keep your library organized.
8. How do I set up automatic backups for my Pages documents?
To set up automatic backups for your Pages documents, use Time Machine. Connect an external drive, go to System Preferences > Time Machine, select your backup disk, and enable automatic backups to ensure your files are regularly backed up.
9. How can I access my Pages documents on all my devices?
To access your Pages documents on all your devices, save your documents to iCloud Drive. Ensure iCloud Drive is enabled on all your Apple devices, and your documents will be seamlessly synced and accessible from anywhere.
10. What file formats can I save a Pages document in?
You can save a Pages document in various file formats, including Microsoft Word (.docx), PDF (.pdf), Plain Text (.txt), Rich Text Format (.rtf), and EPUB (.epub). To export, go to File > Export To and choose your desired format.