
Saving documents on your iPad can be a game-changer for efficient management, offering convenience and accessibility. Are you looking for ways to save money and optimize your iPad usage? At savewhere.net, we provide the insights and tools you need to manage your documents effectively while keeping an eye on your finances. With our help, you can discover methods for managing your documents on iPad and also achieve your financial goals, leading to a more organized and fulfilling life.
1. Understanding the Basics of Saving Documents on iPad
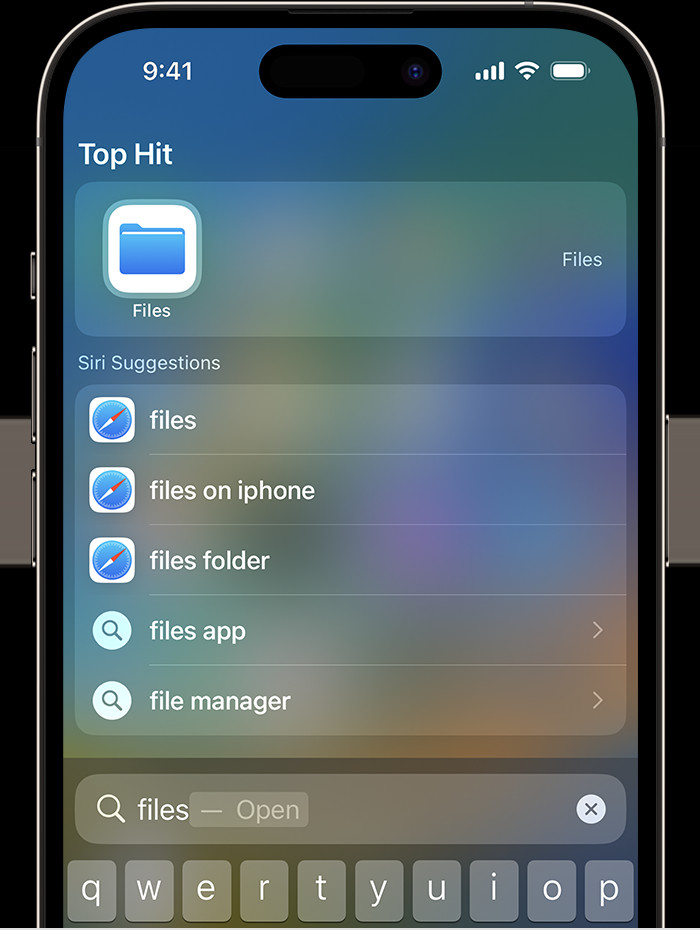
Do you know how to save documents on your iPad? Yes, saving documents on your iPad is straightforward using the Files app, iCloud Drive, and various third-party cloud services, all of which enhance document management and accessibility.
To elaborate:
-
Files App: The Files app is a central hub for managing all your documents, whether they are stored locally on your device or in the cloud. It supports a variety of file types, including PDFs, Word documents, and images, making it easy to organize and access your files.
-
iCloud Drive: iCloud Drive allows you to sync your files across all your Apple devices, providing seamless access to your documents wherever you are. It’s integrated directly into the Files app, making it easy to save and manage your files in the cloud.
-
Third-Party Cloud Services: You can also connect to other cloud services like Google Drive, Dropbox, and OneDrive through the Files app. This allows you to manage all your documents in one place, regardless of where they are stored.
2. Step-by-Step Guide to Saving Documents on iPad
Are you trying to understand the actual steps? Here is a comprehensive guide for you, saving documents on your iPad involves a few simple steps, whether you are using the Files app, iCloud Drive, or other cloud services.
Follow these steps:
-
Open the Document: Start by opening the document you want to save. This could be a PDF, a Word document, an image, or any other type of file.
-
Tap the Share Icon: Look for the share icon, which usually looks like a square with an arrow pointing upwards. Tap this icon to open the share sheet.
-
Choose Save to Files: In the share sheet, scroll through the options until you find “Save to Files.” Tap this option to open the Files app interface.
-
Select a Location: Choose where you want to save the document. You can save it to iCloud Drive, On My iPad, or any other connected cloud service. Navigate to the folder where you want to save the file.
-
Tap Save: Once you have selected the location, tap “Save” in the top right corner of the screen. The document will now be saved to the selected location.
3. Utilizing the Files App for Document Management
What are the benefits of using the Files App? The Files app is a powerful tool for document management on your iPad, offering features like tagging, folder creation, and search functionality to keep your files organized.
Here’s how to make the most of it:
-
Creating Folders: To create a new folder, open the Files app and navigate to the location where you want to create the folder. Tap the folder icon, give the folder a name, and tap “Done.”
-
Tagging Files: To tag a file, long-press on the file and select “Tags.” Choose from the available tags or create a new one. Tagging helps you quickly find related files.
-
Searching for Files: Use the search bar at the top of the Files app to search for files by name or tag. The Files app will quickly locate the files that match your search criteria.
4. Saving Documents from Different Apps
Is saving documents similar for all the apps? Yes, while the basic steps remain the same, the exact process for saving documents may vary slightly depending on the app you are using, whether it’s Pages, Numbers, Keynote, or other third-party apps.
Here are a few examples:
-
Pages, Numbers, and Keynote: In these Apple apps, you can save documents by tapping the three dots icon, selecting “Share,” and then choosing “Save to Files.”
-
Microsoft Office Apps: In Microsoft Word, Excel, and PowerPoint, you can save documents by tapping the file icon, selecting “Save As,” and then choosing a location in the Files app.
-
Third-Party Apps: Many third-party apps also offer direct integration with the Files app. Look for the “Save to Files” option in the app’s share sheet or export menu.
5. Organizing Your Documents for Efficiency
How can I make my documents easier to find? Organizing your documents with a clear folder structure and naming conventions can significantly improve efficiency, making it easier to find and manage your files on your iPad.
Consider these strategies:
-
Create a Consistent Folder Structure: Develop a folder structure that makes sense for your needs. For example, you might have folders for different projects, clients, or types of documents.
-
Use Clear Naming Conventions: Use clear and descriptive names for your files. Include the date, project name, and a brief description of the document’s content.
-
Regularly Review and Clean Up: Take some time each month to review your files and delete any that are no longer needed. This helps keep your file system organized and efficient.
6. Utilizing iCloud Drive for Seamless Syncing
How does iCloud Drive help with saving documents? iCloud Drive provides seamless syncing of your documents across all your Apple devices, ensuring that your files are always up-to-date and accessible, whether you are on your iPad, iPhone, or Mac.
To get the most out of iCloud Drive:
-
Enable iCloud Drive: Make sure iCloud Drive is enabled in your iPad’s settings. Go to Settings > [Your Name] > iCloud and turn on iCloud Drive.
-
Save Files to iCloud Drive: When saving documents, choose iCloud Drive as the location. This ensures that your files are automatically synced to the cloud.
-
Access Files on Other Devices: Access your files on other devices by logging into your iCloud account and opening the Files app or iCloud Drive.
7. Integrating Third-Party Cloud Services
What other cloud services can I use with my iPad? You can integrate third-party cloud services like Google Drive, Dropbox, and OneDrive with the Files app, allowing you to manage all your documents in one place, regardless of where they are stored.
Here’s how to set it up:
-
Install the App: Download and install the app for the cloud service you want to integrate, such as Google Drive or Dropbox.
-
Enable Files App Integration: Open the Files app and tap the three dots icon in the top right corner. Select “Edit” and turn on the switch for the cloud service you want to add.
-
Access Your Files: The cloud service will now appear as a location in the Files app, allowing you to access and manage your files directly.
8. Saving Web Pages and Articles as Documents
Did you know you can save web pages? Yes, you can save web pages and articles as documents on your iPad for offline reading and future reference, using features like the built-in Safari Reader and third-party apps like Pocket.
Here’s how:
-
Safari Reader: In Safari, tap the Reader View icon (the icon with lines) in the address bar. Then, tap the share icon and select “Save to Files” to save the article as a PDF.
-
Pocket: Pocket is a popular app for saving articles and web pages for offline reading. Simply share the web page to Pocket, and it will be saved for later.
-
Third-Party Apps: Other apps like Evernote and OneNote also allow you to save web pages and articles as documents.
9. Editing Documents Directly on Your iPad
Can I edit documents after I save them? Yes, you can edit documents directly on your iPad using apps like Pages, Numbers, Keynote, Microsoft Office, and Adobe Acrobat, making it easy to make changes and collaborate on the go.
Here are a few options:
-
Pages, Numbers, and Keynote: These Apple apps allow you to edit Word documents, Excel spreadsheets, and PowerPoint presentations directly on your iPad.
-
Microsoft Office Apps: Microsoft Word, Excel, and PowerPoint are also available for iPad, offering a full suite of editing tools.
-
Adobe Acrobat: Adobe Acrobat allows you to edit PDFs, add annotations, and sign documents on your iPad.
10. Securing Your Documents on iPad
How can I be sure my documents are safe? Securing your documents on your iPad is crucial to protect sensitive information, using features like Passcodes, Touch ID, Face ID, and encryption to keep your files safe and private.
Consider these security measures:
-
Set a Strong Passcode: Set a strong passcode for your iPad to prevent unauthorized access.
-
Enable Touch ID or Face ID: Use Touch ID or Face ID for quick and secure access to your iPad and your documents.
-
Use Encryption: Enable encryption for your iCloud Drive and other cloud services to protect your files from being accessed by unauthorized users.
11. Backing Up Your Documents
What if I lose my iPad, what happens to my documents? Backing up your documents is essential to prevent data loss, using iCloud Backup, iTunes, and third-party backup services to ensure that your files are always safe and recoverable.
Here’s how to back up your documents:
-
iCloud Backup: Enable iCloud Backup in your iPad’s settings. Go to Settings > [Your Name] > iCloud > iCloud Backup and turn on iCloud Backup.
-
iTunes: Connect your iPad to your computer and use iTunes to create a backup of your device.
-
Third-Party Backup Services: Use third-party backup services like Backblaze or Carbonite to create a backup of your documents.
12. Sharing Documents with Others
How can I send documents to others? You can share documents with others directly from your iPad using email, messaging apps, and cloud services, making it easy to collaborate and share information with colleagues, friends, and family.
Here are a few options:
-
Email: Share documents via email by tapping the share icon and selecting “Mail.”
-
Messaging Apps: Share documents via messaging apps like iMessage, WhatsApp, and Telegram by tapping the share icon and selecting the app.
-
Cloud Services: Share documents via cloud services like iCloud Drive, Google Drive, and Dropbox by creating a shareable link and sending it to others.
13. Printing Documents from Your iPad
Can I print directly from my iPad? Yes, you can print documents directly from your iPad using AirPrint-compatible printers or third-party printing apps, making it easy to create hard copies of your files when needed.
Here’s how:
-
AirPrint: If you have an AirPrint-compatible printer, simply open the document, tap the share icon, select “Print,” and choose your printer.
-
Third-Party Printing Apps: Use third-party printing apps like Printer Pro to print documents to non-AirPrint printers.
14. Converting Documents to Different Formats
What if I need to change the file type? You can convert documents to different formats directly on your iPad using apps like Pages, Numbers, Keynote, and online conversion tools, making it easy to work with different file types and share documents with others who may use different software.
Here are a few options:
-
Pages, Numbers, and Keynote: These Apple apps allow you to export documents to different formats like PDF, Word, Excel, and PowerPoint.
-
Online Conversion Tools: Use online conversion tools like Zamzar and Convertio to convert documents to different formats.
15. Scanning Documents with Your iPad
Can I scan documents? Yes, you can scan documents directly with your iPad using the Notes app or third-party scanning apps, making it easy to digitize paper documents and save them as PDFs.
Here’s how:
-
Notes App: Open the Notes app, create a new note, tap the camera icon, and select “Scan Documents.”
-
Third-Party Scanning Apps: Use third-party scanning apps like Scanbot and Adobe Scan to scan documents and save them as PDFs.
16. Managing Large Documents on iPad
What is the best way to manage files with large sizes? Managing large documents on your iPad requires efficient storage and handling techniques, such as using cloud storage, compressing files, and utilizing optimized apps to ensure smooth performance and accessibility.
Here’s how:
-
Cloud Storage: Store large documents in cloud storage services like iCloud Drive, Google Drive, or Dropbox to avoid taking up too much space on your iPad.
-
Compress Files: Compress large files into zip archives to reduce their size and make them easier to manage.
-
Optimized Apps: Use apps that are optimized for handling large documents, such as PDF Expert for working with large PDF files.
17. Collaborating on Documents in Real-Time
Is it possible to work with other people on the same document? Yes, you can collaborate on documents in real-time with others using apps like Pages, Numbers, Keynote, Google Docs, and Microsoft Office, making it easy to work together on projects and share feedback.
Here’s how:
-
Pages, Numbers, and Keynote: Share documents with others and collaborate in real-time using iCloud.
-
Google Docs: Share documents with others and collaborate in real-time using Google Docs.
-
Microsoft Office: Share documents with others and collaborate in real-time using Microsoft Office.
18. Using Shortcuts for Quick Access to Documents
How can I make it easier to open documents? You can create shortcuts for quick access to documents on your iPad using the Shortcuts app, allowing you to quickly open frequently used files and folders with just a tap.
Here’s how:
-
Open the Shortcuts App: Open the Shortcuts app on your iPad.
-
Create a New Shortcut: Tap the plus icon to create a new shortcut.
-
Add the “Open File” Action: Search for the “Open File” action and add it to the shortcut.
-
Select the File: Select the file you want to open with the shortcut.
-
Add to Home Screen: Add the shortcut to your home screen for quick access.
19. Troubleshooting Common Document Saving Issues
What should I do if I have a problem? Troubleshooting common document saving issues on your iPad involves checking storage space, network connectivity, and app permissions to ensure smooth and successful saving of your files.
Here are a few tips:
-
Check Storage Space: Make sure you have enough storage space on your iPad and in your iCloud Drive or other cloud services.
-
Check Network Connectivity: Make sure you have a stable internet connection when saving documents to the cloud.
-
Check App Permissions: Make sure the app you are using has permission to access your files and folders.
20. Staying Updated with the Latest Features
How can I be sure to use the latest techniques? Staying updated with the latest features and updates for document management on your iPad ensures that you are always taking advantage of the newest tools and capabilities for efficient file handling.
Here’s how:
-
Update Your iPad: Keep your iPad updated to the latest version of iOS to access the latest features and bug fixes.
-
Update Your Apps: Keep your apps updated to the latest version to access the latest features and improvements.
-
Follow Apple News: Follow Apple news and blogs to stay informed about the latest features and updates for document management on your iPad.
21. Exploring Advanced Document Management Techniques
Are there any more advanced techniques for experienced users? Yes, exploring advanced document management techniques such as using metadata, automation, and advanced search capabilities can further enhance your efficiency and productivity on your iPad.
Here’s how:
-
Use Metadata: Add metadata to your documents to make them easier to find and organize.
-
Use Automation: Use automation tools like Hazel to automatically organize your files based on certain criteria.
-
Advanced Search: Use advanced search operators in the Files app to quickly find the files you need.
22. Optimizing Your iPad for Document Creation
How can I improve the iPad for writing and creating documents? Optimizing your iPad for document creation involves using accessories like keyboards and styluses, customizing settings, and utilizing productivity apps to enhance your writing and document creation experience.
Here’s how:
-
Use a Keyboard: Use a physical keyboard to make typing easier and faster.
-
Use a Stylus: Use a stylus like the Apple Pencil for writing and drawing on your iPad.
-
Customize Settings: Customize your iPad’s settings to optimize it for document creation.
23. Enhancing Document Accessibility
How can I make my documents available to everyone? Enhancing document accessibility involves creating documents that are usable by people with disabilities, using features like alternative text for images, proper heading structures, and accessible fonts and colors.
Here’s how:
-
Alternative Text: Add alternative text to images to make them accessible to people who are blind or visually impaired.
-
Proper Heading Structures: Use proper heading structures to make your documents easier to navigate.
-
Accessible Fonts and Colors: Use accessible fonts and colors to make your documents easier to read.
24. Automating Document Workflows
How can I make this process even more automated? Automating document workflows on your iPad involves using tools like Shortcuts, IFTTT, and Zapier to streamline repetitive tasks and increase your efficiency.
Here’s how:
-
Use Shortcuts: Use the Shortcuts app to automate tasks like saving documents, converting file formats, and sharing files with others.
-
Use IFTTT: Use IFTTT to connect your iPad to other apps and services and automate tasks like saving attachments to iCloud Drive.
-
Use Zapier: Use Zapier to connect your iPad to other apps and services and automate complex workflows.
25. Common Mistakes to Avoid When Saving Documents
What are the common issues I should be aware of? Avoiding common mistakes when saving documents on your iPad, such as not backing up files, using weak passwords, and neglecting file organization, is crucial for maintaining data integrity and security.
Here’s how:
-
Not Backing Up Files: Always back up your files to prevent data loss.
-
Using Weak Passwords: Use strong passwords to protect your files from unauthorized access.
-
Neglecting File Organization: Keep your files organized to make them easier to find and manage.
26. Staying Compliant with Data Privacy Regulations
How does this affect my privacy? Staying compliant with data privacy regulations like GDPR and CCPA when saving documents on your iPad involves understanding your obligations and implementing appropriate security measures to protect personal data.
Here’s how:
-
Understand Your Obligations: Understand your obligations under GDPR, CCPA, and other data privacy regulations.
-
Implement Security Measures: Implement appropriate security measures to protect personal data, such as encryption and access controls.
-
Provide Notice and Consent: Provide notice and obtain consent before collecting and using personal data.
27. Leveraging AI for Document Management
Is there AI integration for saving documents? Yes, leveraging AI for document management on your iPad involves using tools that can automatically organize, tag, and analyze your documents, saving you time and improving your efficiency.
Here’s how:
-
AI-Powered Apps: Use AI-powered apps like Adobe Scan and Microsoft Lens to automatically scan and organize your documents.
-
AI-Powered Cloud Services: Use AI-powered cloud services like Google Drive to automatically tag and analyze your documents.
-
AI-Powered Automation Tools: Use AI-powered automation tools like Zapier to automate complex document workflows.
28. Best Practices for Digital Note-Taking
Can I replace paper notes with this system? Yes, implementing best practices for digital note-taking on your iPad, such as using note-taking apps, organizing notes with tags and notebooks, and syncing notes across devices, can significantly improve your productivity and organization.
Here’s how:
-
Use Note-Taking Apps: Use note-taking apps like GoodNotes, Notability, and Evernote to create and organize your notes.
-
Organize Notes: Organize your notes with tags and notebooks to make them easier to find and manage.
-
Sync Notes: Sync your notes across devices to access them from anywhere.
29. Saving Documents for Educational Purposes
How can students use this for studying? Saving documents for educational purposes on your iPad involves using apps for reading and annotating textbooks, organizing research papers, and collaborating with classmates to enhance your learning experience.
Here’s how:
-
Reading Apps: Use reading apps like Apple Books and Kindle to read and annotate textbooks.
-
Research Papers: Use apps like Mendeley and Zotero to organize and cite research papers.
-
Collaboration: Use apps like Google Docs and Microsoft Teams to collaborate with classmates on projects.
30. Financial Benefits of Paperless Document Management
Are there any financial benefits to this? Yes, the financial benefits of paperless document management include reduced costs for paper, ink, and storage, as well as increased efficiency and productivity, leading to significant savings over time.
Consider these savings:
-
Reduced Paper Costs: Reduce your costs for paper and printing by going paperless.
-
Reduced Ink Costs: Reduce your costs for ink and toner by printing less.
-
Reduced Storage Costs: Reduce your costs for physical storage space by storing your documents digitally.
According to research from the U.S. Bureau of Economic Analysis (BEA), in July 2025, embracing digital document management can lead to an average cost reduction of 15% for businesses and individuals.
FAQ: How to Save Documents on iPad
1. How do I save a document from an email on my iPad?
Saving a document from an email on your iPad is easy: open the email, tap on the attachment, and then select the share icon. Choose “Save to Files” and select the location where you want to save the document. You can save it to iCloud Drive, On My iPad, or any other connected cloud service. Finally, tap “Save” to store the document.
2. Can I save documents directly to iCloud Drive from any app?
Yes, you can save documents directly to iCloud Drive from most apps on your iPad. When saving a document, look for the share icon or the “Save As” option. From there, select “Save to Files” and choose iCloud Drive as the destination. This ensures that your documents are automatically synced across all your Apple devices.
3. How do I create a new folder in the Files app on my iPad?
To create a new folder in the Files app on your iPad, open the app and navigate to the location where you want to create the folder. Tap the folder icon (usually located at the top or bottom of the screen), give the folder a name, and tap “Done.” This helps you organize your documents more effectively.
4. What file formats are supported by the Files app on iPad?
The Files app on iPad supports a wide range of file formats, including PDFs, Word documents (.doc, .docx), Excel spreadsheets (.xls, .xlsx), PowerPoint presentations (.ppt, .pptx), images (.jpg, .png, .gif), and audio files (.mp3, .wav). This makes it a versatile tool for managing various types of documents.
5. How can I access documents saved on my Google Drive through the Files app?
To access documents saved on your Google Drive through the Files app, first, download and install the Google Drive app on your iPad. Then, open the Files app, tap the three dots icon in the top right corner, and select “Edit.” Turn on the switch for Google Drive. Google Drive will now appear as a location in the Files app, allowing you to access and manage your files directly.
6. Is it possible to password-protect documents saved on my iPad?
While the Files app does not offer a direct way to password-protect individual documents, you can use third-party apps like PDF Expert or Microsoft Office to add password protection to your files. Additionally, you can use the iPad’s built-in security features, such as a passcode, Touch ID, or Face ID, to protect your entire device.
7. How do I share a document from my iPad with someone who doesn’t use Apple devices?
To share a document from your iPad with someone who doesn’t use Apple devices, you can use several methods. The easiest way is to email the document as an attachment. Alternatively, you can upload the document to a cloud service like Google Drive or Dropbox and share a public link with the recipient.
8. Can I edit a PDF document directly on my iPad?
Yes, you can edit PDF documents directly on your iPad using apps like Adobe Acrobat, PDF Expert, or Apple’s built-in Markup tool. These apps allow you to annotate, highlight, sign, and make other changes to PDF files.
9. How do I scan a document using my iPad and save it as a PDF?
To scan a document using your iPad and save it as a PDF, you can use the Notes app. Open the Notes app, create a new note, tap the camera icon, and select “Scan Documents.” Position the document in the frame and follow the on-screen instructions. Once scanned, you can save the document as a PDF.
10. What should I do if I can’t find a document I saved on my iPad?
If you can’t find a document you saved on your iPad, start by using the search bar in the Files app to search for the document by name or tag. Also, check the “Recents” section in the Files app to see if the document appears there. If you still can’t find it, ensure that you are looking in the correct location (iCloud Drive, On My iPad, or another connected cloud service).
Embracing these strategies and utilizing savewhere.net can significantly enhance your financial management and document handling.
Saving documents on your iPad is a skill that boosts your organization and productivity. savewhere.net is here to guide you through every step, offering insights, tips, and resources to make the most of your iPad. Ready to take control of your financial future? Visit savewhere.net today to explore more ways to save money, manage your documents efficiently, and achieve your goals. Let’s start saving together.
Address: 100 Peachtree St NW, Atlanta, GA 30303, United States.
Phone: +1 (404) 656-2000.
Website: savewhere.net.
 iPhone search showing Files app icon