Saving pumpkin seeds is a fantastic way to enjoy the fruits (or rather, vegetables) of your labor year after year. Are you wondering How Do You Save Pumpkin Seeds for planting or even as a tasty, healthy snack? At savewhere.net, we’ll guide you through every step, ensuring you maximize your savings while enjoying these versatile seeds. Prepare to discover the best practices for harvesting, cleaning, and storing pumpkin seeds, ensuring you get the most out of your pumpkins this season and save money.
1. What Are The Benefits of Saving Pumpkin Seeds?
Saving pumpkin seeds provides dual advantages, from propagating future harvests to enjoying their nutritional value. Understanding these benefits can motivate you to integrate this simple practice into your routine.
Pumpkin seeds are not only great for planting but also a nutritional powerhouse. They are rich in fiber, antioxidants, and healthy fats. Saving pumpkin seeds allows you to grow your own pumpkins, ensuring a fresh supply for cooking, carving, and more. Plus, you’re reducing waste and saving money. If you’re looking to save even more, visit savewhere.net for tips on budgeting and finding deals on gardening supplies.
1.1. Planting for Future Harvests
Planting pumpkin seeds can be an economical way to grow your own pumpkins.
Saving seeds from heirloom or open-pollinated pumpkins ensures you get plants that are true to type. These types of pumpkins haven’t been cross-bred and maintain their distinct characteristics. This is crucial if you have a specific variety you love and want to preserve. Avoid using seeds from hybrid pumpkins, as they might not produce the same quality or type of pumpkin.
1.2. Nutritional Benefits of Eating Pumpkin Seeds
Pumpkin seeds are packed with nutrients.
They’re a great source of magnesium, zinc, iron, and essential fatty acids, making them a healthy snack option. Eating pumpkin seeds can improve heart health, boost your immune system, and even promote better sleep. Roasting them enhances their flavor and makes them a crunchy, satisfying treat. For more healthy eating tips and budget-friendly recipes, check out savewhere.net.
1.3. Creative Uses for Pumpkins
Beyond planting and eating, pumpkins offer many creative uses.
Pumpkins can be used in a variety of recipes, from pies and soups to roasted vegetables. The pulp can also be used to make homemade beauty products like face masks. Additionally, pumpkins add a festive touch to fall decorations. By saving pumpkin seeds, you’re unlocking a world of possibilities. To discover more creative and cost-effective ideas, visit savewhere.net.
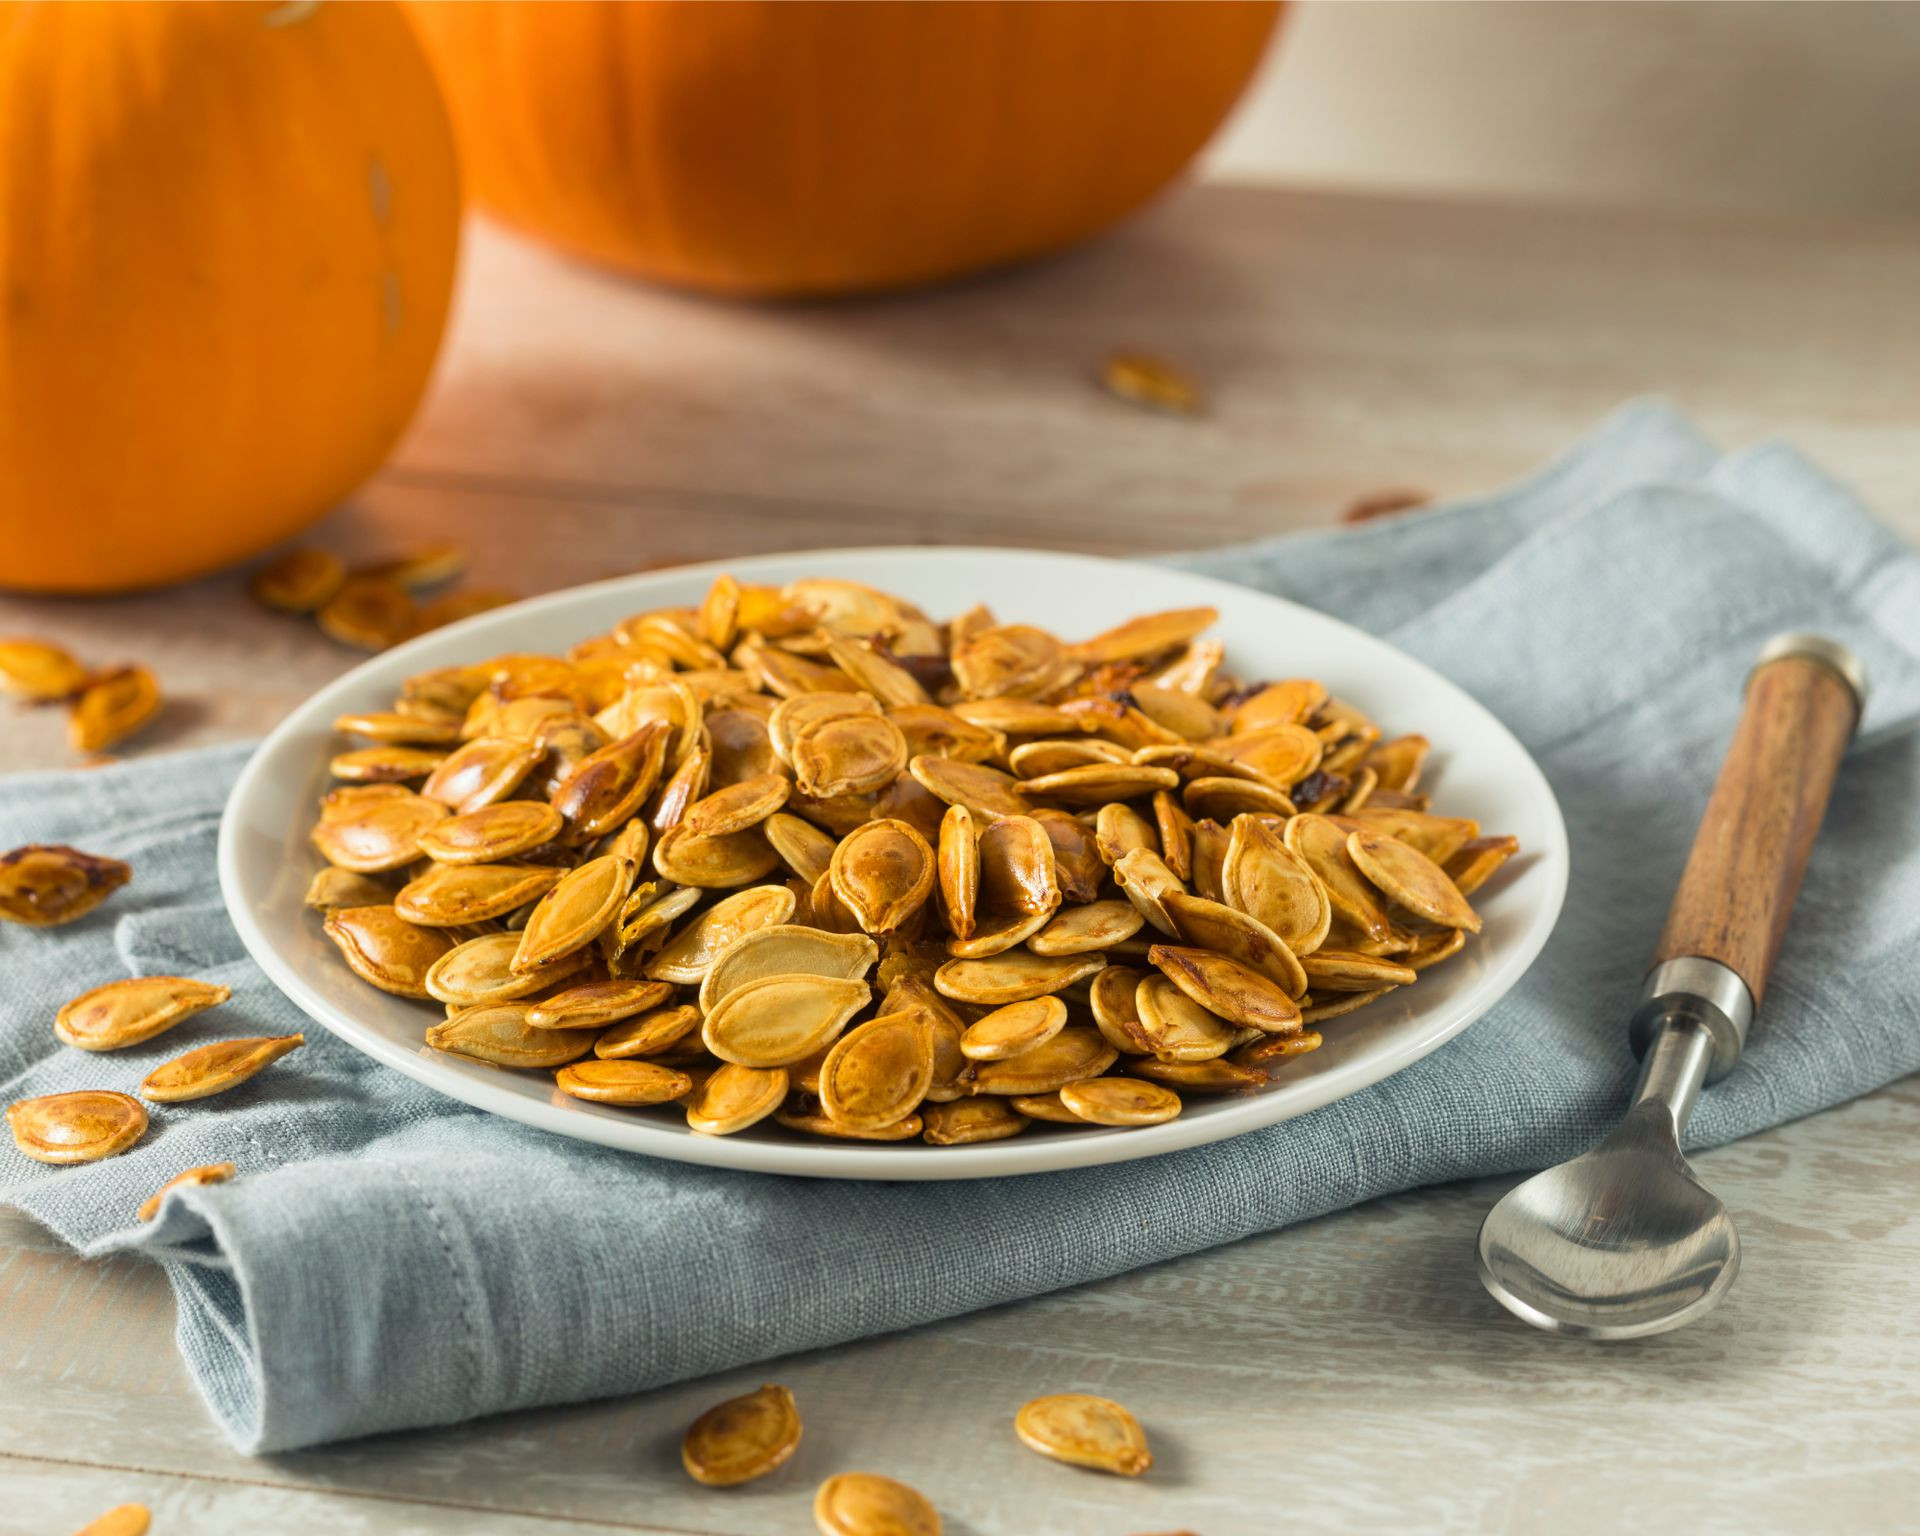 Roasted pumpkin seeds on a plate with a spoon
2. How to Harvest Pumpkin Seeds Correctly?
Harvesting pumpkin seeds is straightforward, but proper technique ensures you get the best seeds for planting or eating. Follow these steps for optimal results.
The harvesting process is the same whether you’re saving the seeds for planting or eating. Start by selecting a healthy, mature pumpkin. Wash the outside to remove any dirt. Cut the pumpkin open and scoop out the seeds. Rinse the seeds thoroughly to remove any pulp. Now you’re ready to proceed based on your purpose. Need help managing your budget for groceries? Visit savewhere.net for expert advice.
2.1. Selecting a Healthy Pumpkin
Choosing the right pumpkin is essential for harvesting good seeds.
A healthy pumpkin should be firm, have vibrant color, and be free from bruises or soft spots. The stem should be intact and dry. These qualities indicate that the pumpkin is mature and the seeds inside are fully developed. Avoid pumpkins that show signs of rot or disease.
2.2. Washing and Rinsing the Seeds
Cleaning the seeds properly is vital for their preservation.
After scooping the seeds out, place them in a colander. Rinse them under running water, removing as much of the stringy pulp as possible. This step can be a bit messy, but it’s crucial to prevent mold and ensure the seeds dry properly. Continue rinsing until the seeds feel clean to the touch.
2.3. Separating Seeds from Pulp
Effectively separating the seeds from the pulp ensures a clean harvest.
The easiest way to do this is by using your hands to gently pull the seeds away from the pulp while rinsing. You can also use a strainer to help separate them. Make sure to remove all the pulp, as any remaining material can cause the seeds to rot.
2.4. Choosing the Best Seeds
Selecting the largest and most robust seeds improves your chances of successful planting.
Once you’ve rinsed a good amount of seeds, look them over carefully. Choose the biggest, plumpest seeds, as these are more likely to germinate. Discard any seeds that are small, shriveled, or damaged. Remember, saving three times more seeds than the number of plants you plan to grow increases your odds of success.
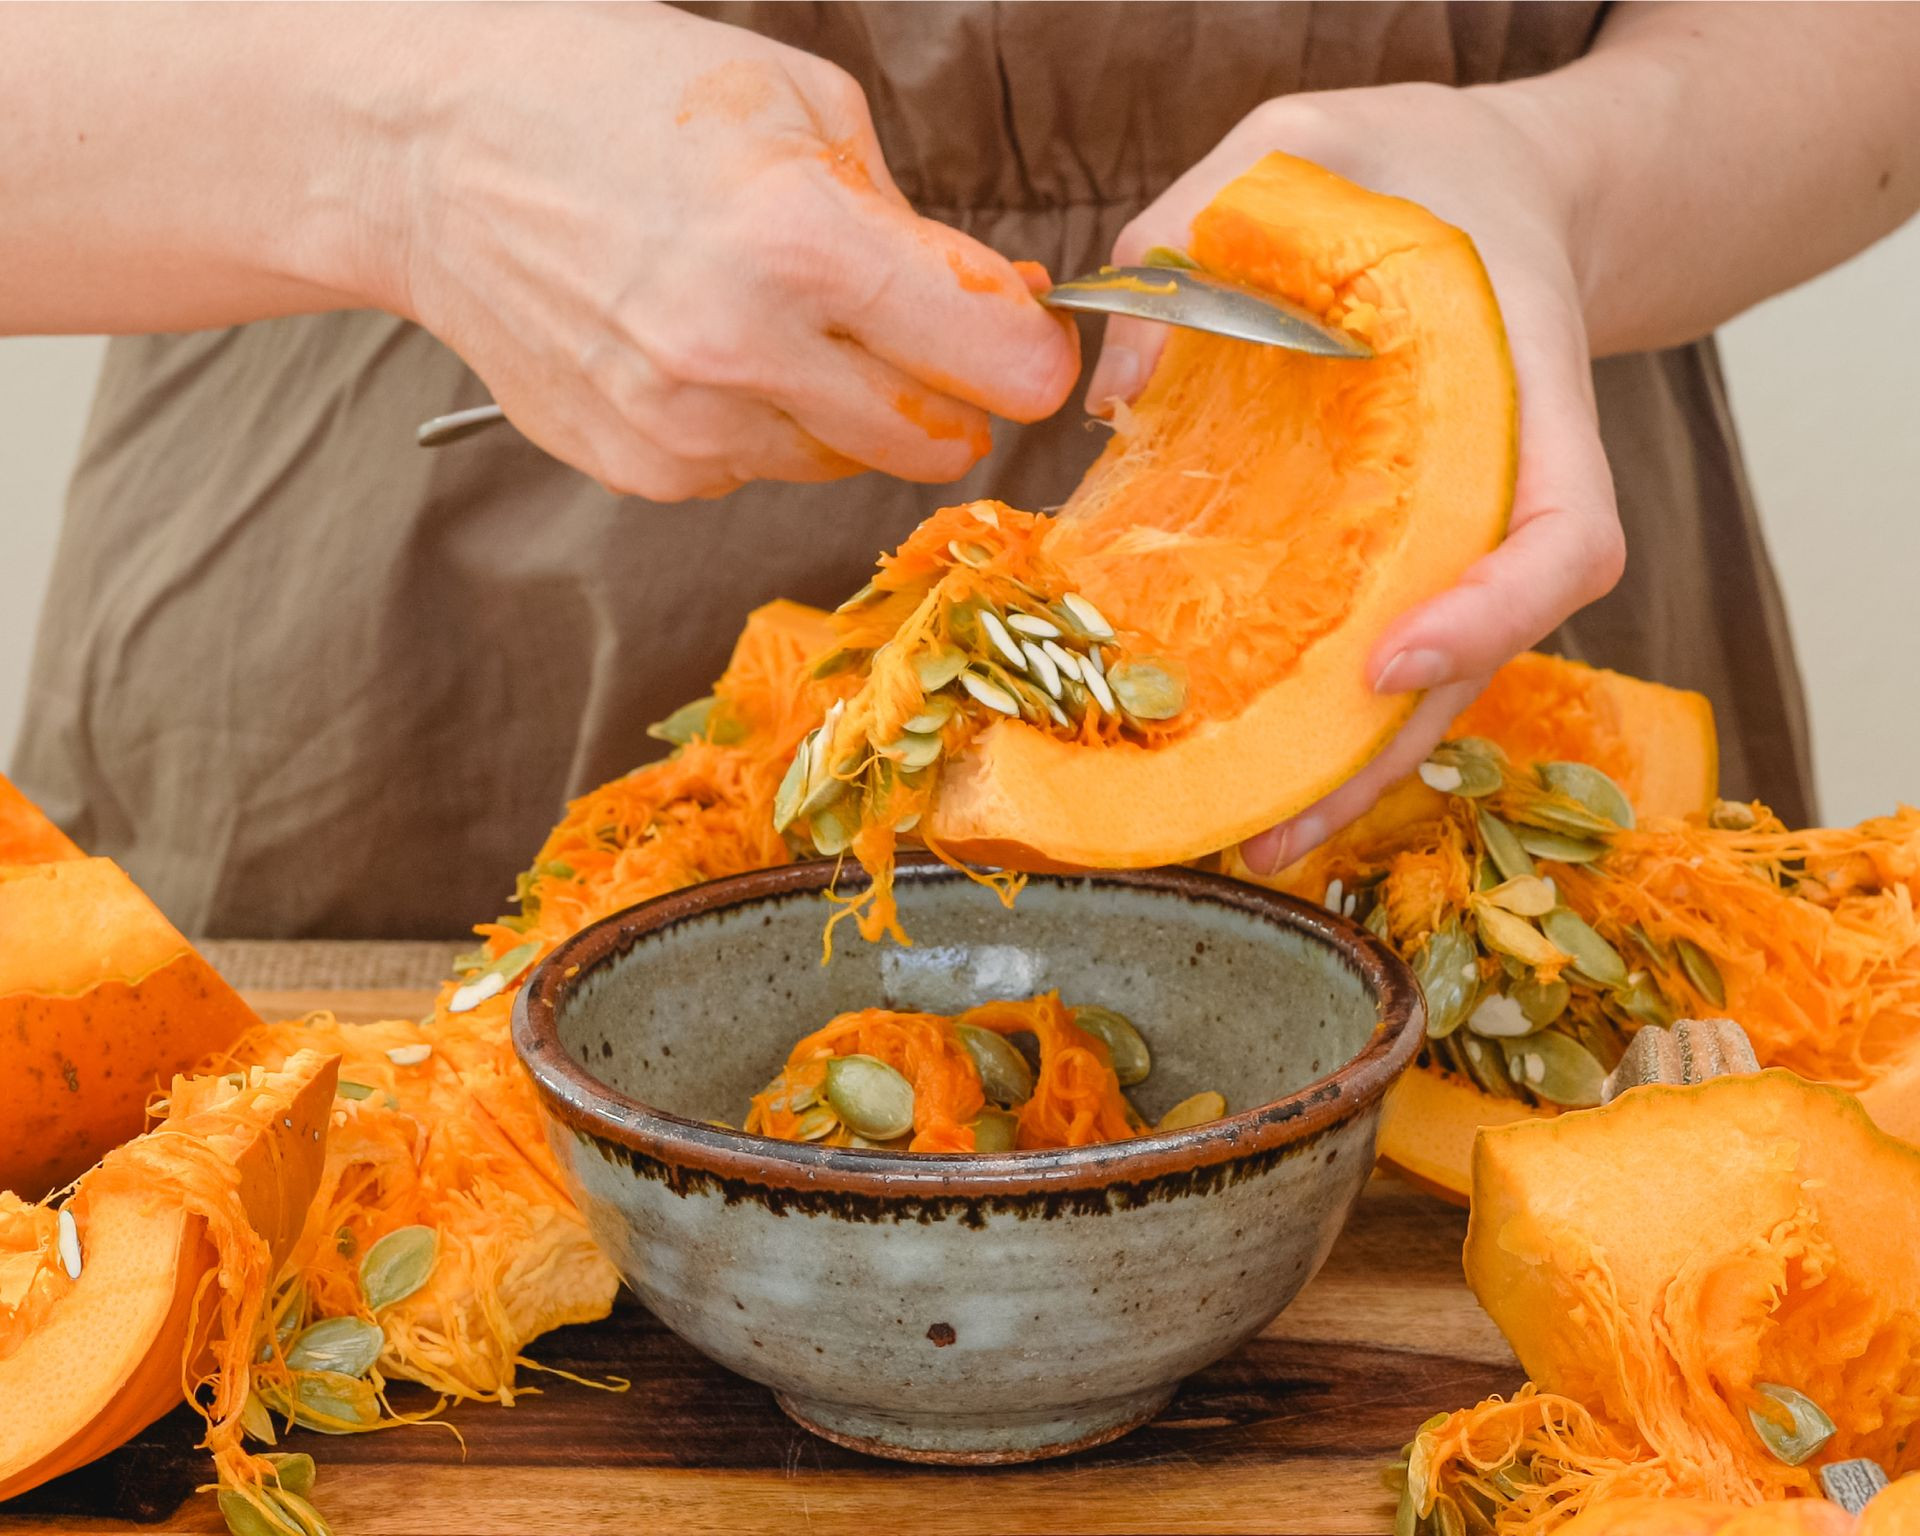 Woman scooping out pumpkin seeds
3. How Do You Save Pumpkin Seeds For Planting?
Proper drying and storing methods are key to preserving pumpkin seeds for future planting.
Saving pumpkin seeds for planting requires a bit more care to ensure they remain viable. Start by spreading the rinsed seeds in a single layer on a screen or paper towel. Let them dry completely for a few weeks, turning them occasionally. Once dry, store them in a cool, dry place. Savewhere.net offers tips on creating a budget for your gardening needs.
3.1. Drying Pumpkin Seeds
Allowing pumpkin seeds to dry thoroughly prevents mold and ensures viability.
Spread the rinsed seeds in a single layer on a clean surface, such as a window screen or paper towel. Ensure they are spaced out to allow for proper air circulation. Turn the seeds over every few days to ensure even drying. This process can take a few weeks, so be patient.
3.2. Packaging and Labeling
Proper packaging and labeling helps you stay organized and ensures you know what you’re planting.
Once the seeds are completely dry, package them in paper envelopes or sealed plastic bags. Label each package with the type of pumpkin and the date of harvest. This information is crucial for future reference. Proper labeling helps you keep track of your seeds and ensures you plant the right variety.
3.3. Storing Pumpkin Seeds
Storing pumpkin seeds in the right conditions maximizes their lifespan.
Store the packaged seeds in a cool, dry place, such as a basement or refrigerator. Avoid areas with high humidity or temperature fluctuations, as these can reduce the seeds’ viability. Properly stored pumpkin seeds can remain viable for up to four years.
4. How to Save Pumpkin Seeds For Eating?
Saving pumpkin seeds for eating involves drying, seasoning, and roasting for a delicious snack.
Saving pumpkin seeds for eating is similar to saving them for planting, but with a few extra steps. After rinsing and separating the seeds, dry them thoroughly. Then, season them with your favorite spices and roast them until they’re golden brown and crunchy. Need help saving money on spices? Check out savewhere.net for tips on finding deals.
4.1. Drying Pumpkin Seeds for Consumption
Thoroughly drying pumpkin seeds is essential to achieve the perfect roasted texture.
As with planting seeds, spread the rinsed seeds in a single layer on a clean surface. You can use a window screen, paper towel, or even a baking sheet. Ensure the seeds are spaced out to allow for proper air circulation. Let them dry completely, turning them occasionally. This process can take a few days.
4.2. Seasoning Options
Experimenting with different seasonings can transform your pumpkin seeds into a gourmet snack.
Once the seeds are dry, toss them with your favorite seasonings. Popular options include salt, pepper, garlic powder, onion powder, paprika, and cayenne pepper. For a sweeter treat, try cinnamon, sugar, or maple syrup. Get creative and customize your seeds to your taste preferences.
4.3. Roasting Pumpkin Seeds
Roasting pumpkin seeds to perfection unlocks their nutty flavor and crunchy texture.
Preheat your oven to 300°F (149°C). Spread the seasoned seeds in a single layer on a baking sheet. Roast them for 30-40 minutes, stirring every 10 minutes to ensure even roasting. The seeds are done when they’re golden brown and crunchy.
4.4. Dehulling Pumpkin Seeds
Dehulling pumpkin seeds can make them easier to eat and more versatile in recipes.
If you prefer to remove the hulls, boil the seeds in salted water for about 10 minutes. This helps to loosen the hulls. Drain the seeds and spread them on a baking sheet. Roast them as described above. Alternatively, you can crack the hulls manually before roasting.
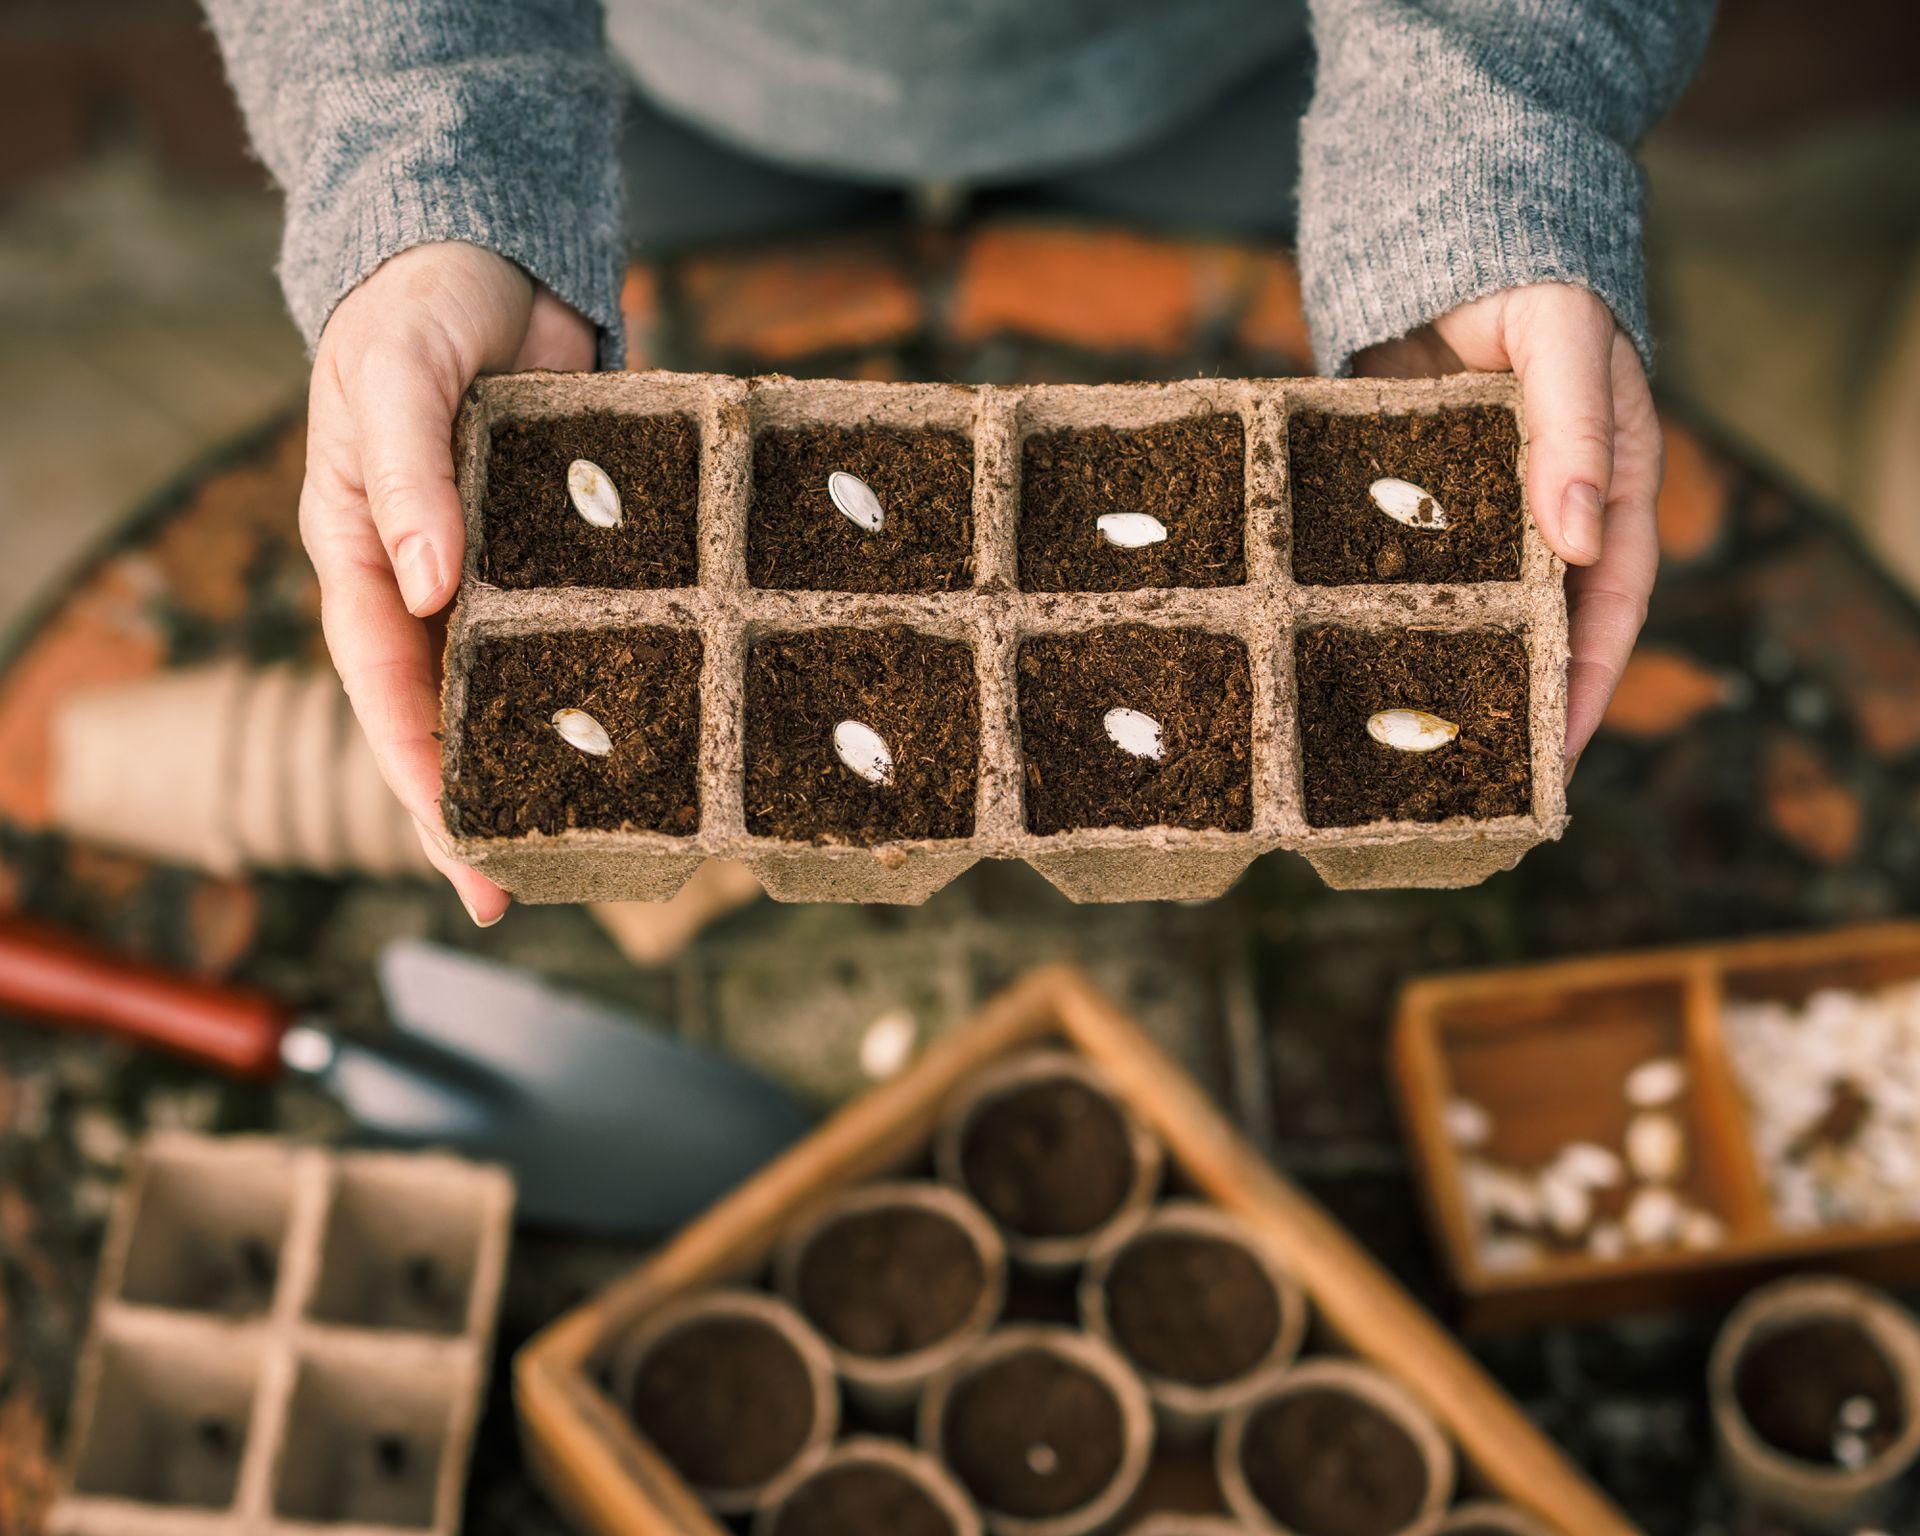 Woman planting pumpkin seeds in tray
5. Storing Pumpkin Seeds for Planting: Best Practices
Effective storage is crucial for maintaining the viability of pumpkin seeds intended for planting.
Storing pumpkin seeds for planting requires specific conditions to maintain their ability to germinate. Keep them in a cool, dry place, away from sunlight and temperature fluctuations. A refrigerator is an excellent option. Properly stored seeds can last for several years. Savewhere.net provides tips on managing your gardening budget and making the most of your resources.
5.1. Optimal Storage Conditions
Maintaining the right conditions is key to preserving seed viability.
Pumpkin seeds store best in a cool, dry, and dark environment. Avoid areas with high humidity or temperature fluctuations, as these can damage the seeds. A consistent temperature between 32°F and 41°F (0°C and 5°C) is ideal.
5.2. Using Airtight Containers
Airtight containers protect seeds from moisture and pests.
Store your dried pumpkin seeds in airtight containers, such as glass jars or plastic containers with tight-fitting lids. This helps to prevent moisture from seeping in and keeps pests out. Add a desiccant, such as silica gel packets, to absorb any excess moisture.
5.3. Storing in the Refrigerator
Refrigeration extends the lifespan of pumpkin seeds.
Storing pumpkin seeds in the refrigerator is an excellent way to prolong their viability. Place the airtight container with the seeds at the back of the fridge, where the temperature is most stable. Make sure the seeds are completely dry before refrigerating them to prevent mold.
6. Roasting Pumpkin Seeds: Step-by-Step Guide
Learn the best methods for roasting pumpkin seeds, whether in the oven or microwave, for a delicious snack.
Roasting pumpkin seeds is a simple process that yields a tasty and nutritious snack. Whether you prefer the oven or microwave method, follow these steps for perfect results. Savewhere.net offers tips on saving money on groceries and snacks.
6.1. Oven Roasting Method
Oven roasting pumpkin seeds provides a consistent and flavorful result.
Preheat your oven to 300°F (149°C). Toss the dried pumpkin seeds with a little oil and your favorite seasonings. Spread them in a single layer on a baking sheet. Roast for 30-40 minutes, stirring every 10 minutes to ensure even roasting. The seeds are done when they’re golden brown and crunchy.
6.2. Microwave Roasting Method
Microwave roasting is a quick and easy alternative for roasting pumpkin seeds.
Pat the dried pumpkin seeds dry with a paper towel. Melt 2 tablespoons of butter in a microwave-safe dish. Spread the seeds in a single layer on top of the melted butter. Microwave on high for 7-8 minutes, stirring every two minutes. Remove from the microwave and season with salt and any other seasonings you’d like.
6.3. Boiling and Roasting Method
Boiling before roasting can help to create a crispier texture.
Boil the pumpkin seeds in salted water for about 10 minutes. Drain the seeds and spread them on a baking sheet. Roast them in a preheated oven at 300°F (149°C) for 30-40 minutes, stirring every 10 minutes. This method helps to create a crispier texture.
6.4. Toasting Hulled Seeds
Toasting hulled pumpkin seeds offers a different flavor profile and texture.
If you’ve removed the hulls, you can toast the seeds in a skillet. Heat a skillet over medium-low heat. Add the hulled seeds and cook, stirring frequently, until they begin to pop and smell nutty. This process takes only a few minutes and results in a delicious, toasted snack.
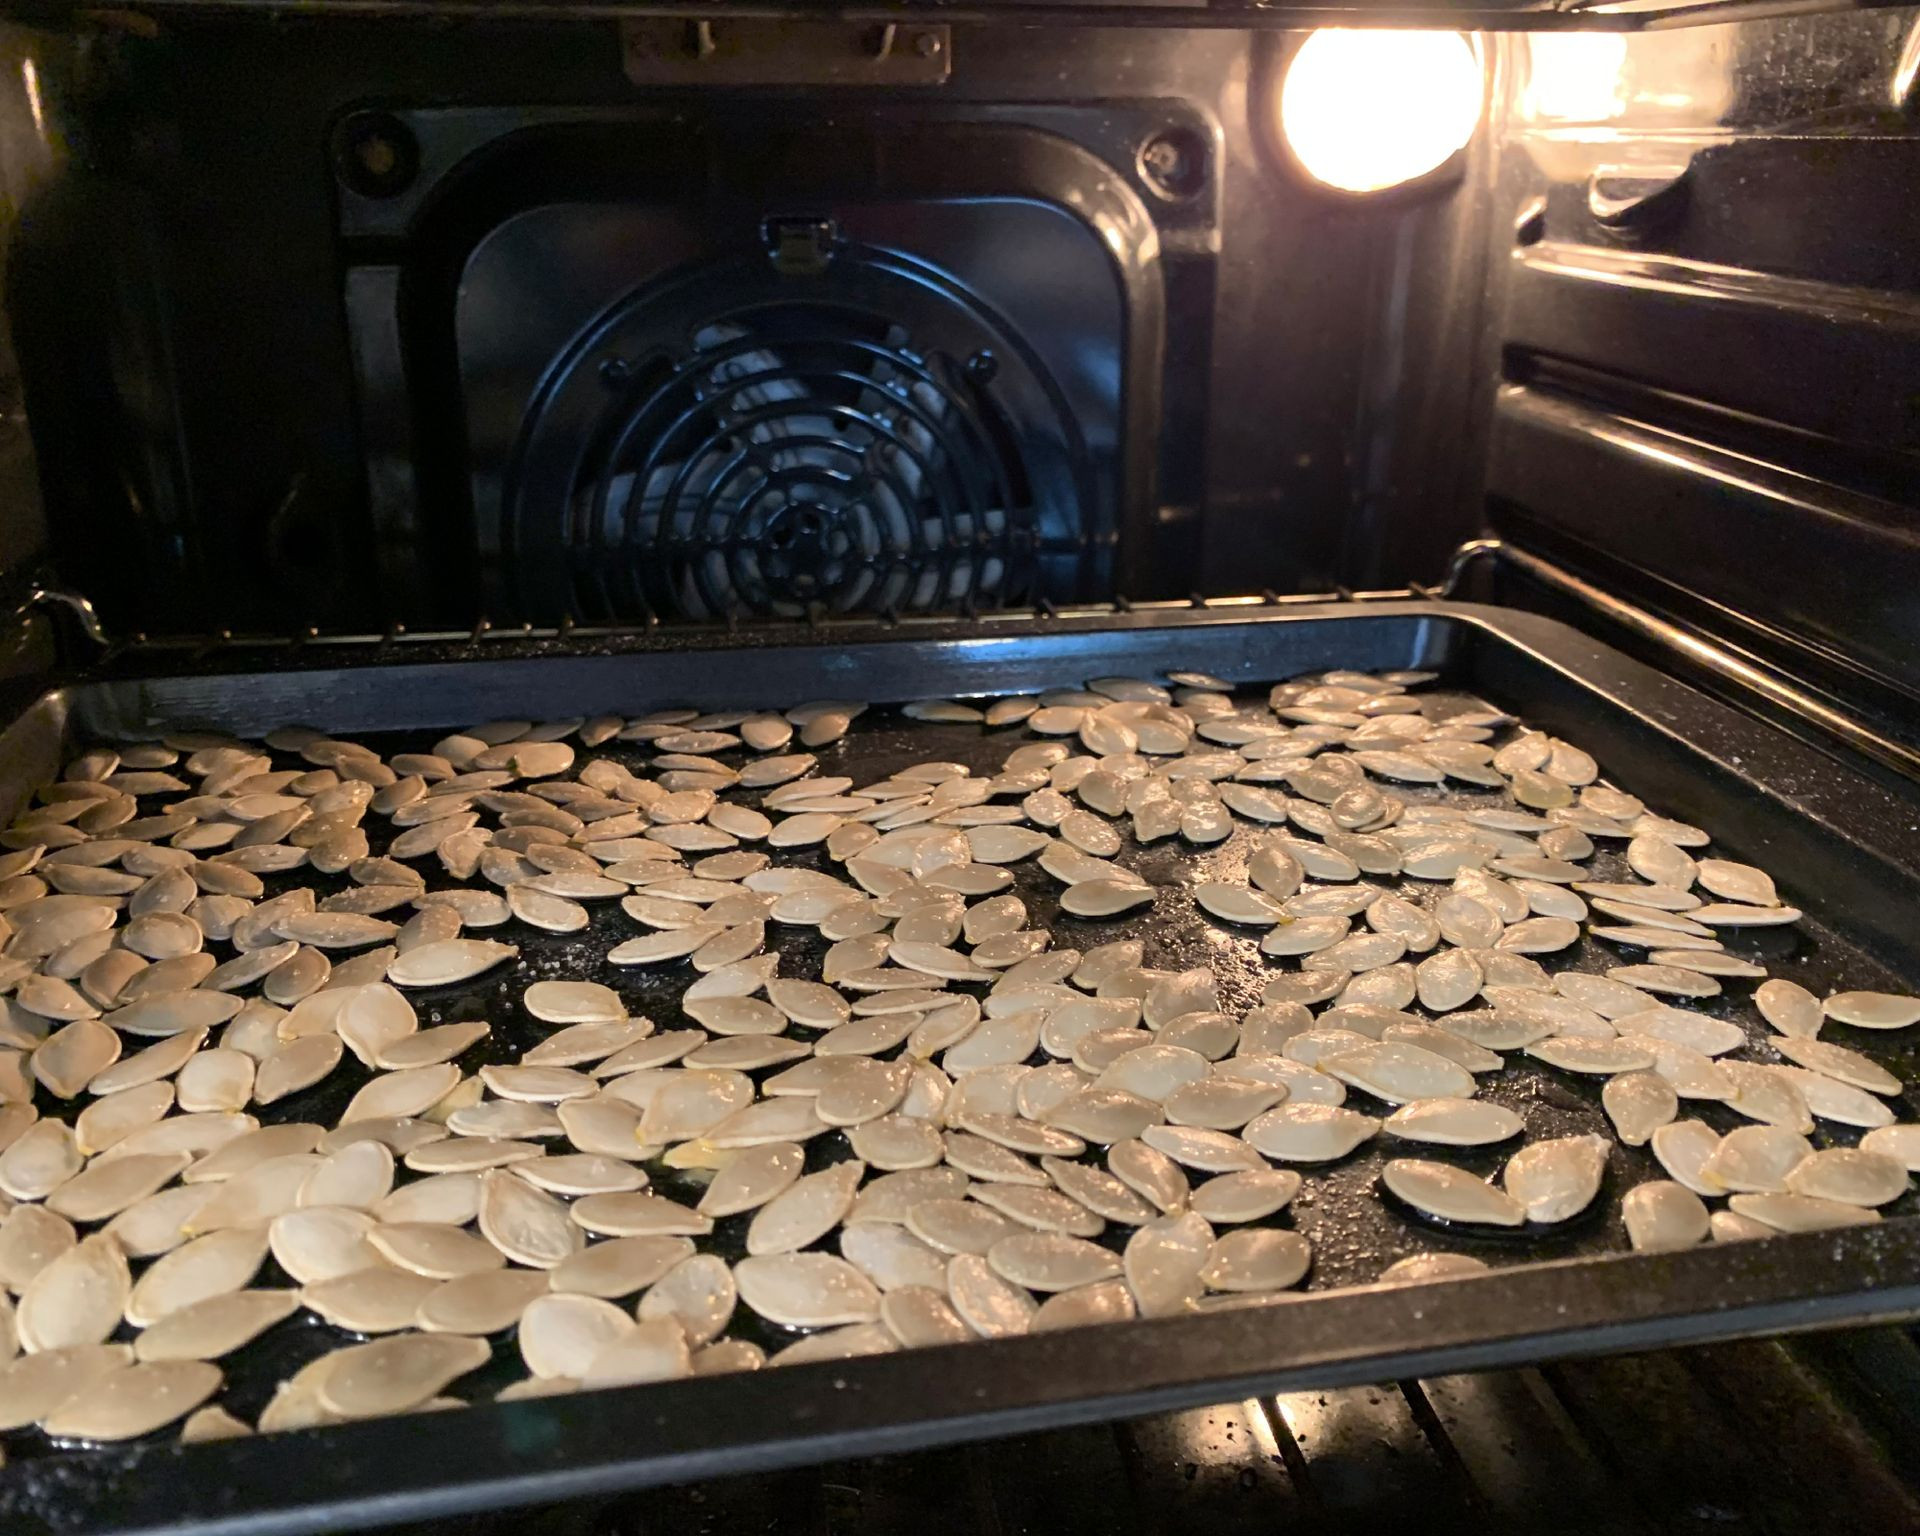 Roasting pumpkin seeds in an oven
7. Frequently Asked Questions About Saving Pumpkin Seeds
Get answers to common questions about saving pumpkin seeds, from storage duration to planting fresh seeds.
7.1. How Long Do Pumpkin Seeds Last?
Under the right conditions, pumpkin seeds can last for several years.
Properly stored pumpkin seeds can remain viable for up to four years. Store dried seeds in a cool, dry area or in the refrigerator to extend their lifespan. Always label your seeds with the date of harvest to keep track of their age.
7.2. Can You Plant Pumpkin Seeds Straight from the Pumpkin?
Yes, but drying them first is recommended.
While you can plant fresh pumpkin seeds directly from the pumpkin, it’s best to dry them first. Drying prevents mold and ensures the seeds are properly preserved for planting in the spring. Simply rinse, dry, and store the seeds until you’re ready to plant.
7.3. What Are Pepitas?
Pepitas are hull-less pumpkin seeds.
Pepitas are pumpkin seeds that don’t have a hull. They come from specific varieties of pumpkins that naturally produce hull-less seeds. Pepitas are often sold roasted and salted as a snack.
7.4. How Do You Know if Pumpkin Seeds Are Still Good?
Perform a germination test to check viability.
To test if your pumpkin seeds are still good, perform a germination test. Place a few seeds between two damp paper towels. Put the paper towels in a plastic bag and keep them in a warm place. Check the seeds after a few days. If they sprout, they are still viable.
7.5. What Are the Best Pumpkin Varieties for Saving Seeds?
Heirloom and open-pollinated varieties are ideal.
The best pumpkin varieties for saving seeds are heirloom and open-pollinated types. These pumpkins produce seeds that are true to type, meaning they will grow into plants that are similar to the parent plant. Avoid saving seeds from hybrid pumpkins, as they may not produce the same quality or type of pumpkin.
7.6. Can Cross-Pollination Affect Saved Seeds?
Yes, cross-pollination can alter the characteristics of future plants.
If pumpkins cross-pollinate with other members of the Cucurbit family, such as squash or cucumbers, the seeds you harvest may produce plants that are a mix of the two. To avoid cross-pollination, separate your Cucurbit crops by at least half a mile or choose to grow only one variety of pumpkin.
7.7. What Are the Best Ways to Season Pumpkin Seeds?
Experiment with different spices and flavors.
There are endless ways to season pumpkin seeds. Some popular options include salt, pepper, garlic powder, onion powder, paprika, cayenne pepper, cinnamon, sugar, and maple syrup. Get creative and customize your seeds to your taste preferences.
7.8. How Do You Prevent Mold When Drying Pumpkin Seeds?
Ensure proper air circulation and complete drying.
To prevent mold when drying pumpkin seeds, ensure proper air circulation and complete drying. Spread the seeds in a single layer on a clean surface and turn them over every few days. Avoid placing the seeds in a humid environment. If you live in a humid area, consider using a dehydrator to dry the seeds more quickly.
7.9. Can You Eat the Hull of Pumpkin Seeds?
Yes, the hull is edible and nutritious.
The hull of pumpkin seeds is edible and nutritious. It’s a good source of fiber and adds a crunchy texture to the seeds. If you prefer to remove the hull, you can boil the seeds or crack the hulls manually before roasting.
7.10. What Are Some Creative Uses for Roasted Pumpkin Seeds?
Add them to salads, trail mix, or baked goods.
Roasted pumpkin seeds can be used in a variety of creative ways. Add them to salads for a crunchy topping, mix them into trail mix for a healthy snack, or use them as an ingredient in baked goods like bread and muffins. They can also be ground into a powder and used as a seasoning.
Saving pumpkin seeds is a rewarding practice that offers both gardening and culinary benefits. By following these tips, you can enjoy a sustainable harvest and a delicious snack while saving money.
Ready to take control of your finances and discover more ways to save? Visit savewhere.net today for expert tips, resources, and a supportive community. Whether you’re looking to cut costs on groceries, find the best deals on gardening supplies, or create a budget that works for you, savewhere.net has everything you need to achieve your financial goals. Don’t wait – start saving today! Visit us at 100 Peachtree St NW, Atlanta, GA 30303, United States, or call +1 (404) 656-2000. Your journey to financial freedom starts now at savewhere.net.