Saving strawberry seeds is a fantastic way to save money and cultivate plants perfectly adapted to your local environment. At savewhere.net, we’re all about smart solutions, and preserving strawberry seeds is a budget-friendly approach to expanding your garden. Discover how to preserve strawberry seeds, ensuring a delightful yield of these tasty jewels for years to come, and learn more about preserving seeds and smart gardening practices.
1. Understanding Strawberry Seed Saving: Which Varieties Work Best?
Saving strawberry seeds can be a rewarding endeavor, but knowing which types of strawberries will yield the best results is essential. Not all strawberries are created equal when it comes to seed saving.
Heirloom Varieties: These are your best bet. Heirloom strawberry varieties produce seeds that grow true to form, meaning the offspring will closely resemble the parent plant. Choose your best berries from which to harvest seeds, as this will increase the likelihood of producing similar, high-quality fruits.
Hybrid Varieties: Hybrids, like Seascape, might not produce fruit that matches the parent plant. These are the result of cross-pollinating two different varieties, and the seeds may carry unpredictable traits. Grocery store strawberries are usually hybrids, so their seeds may or may not sprout at all. However, there’s no harm in trying if you’re feeling adventurous.
Clonal Propagation: Hybrid strawberry cultivars are often propagated clonally by rooting runners. Clones often produce fruit in the first year, while seed-started plants take two years to mature. According to a study by the American Society for Horticultural Science, clonal propagation ensures genetic consistency and faster fruit production in hybrid strawberry varieties.
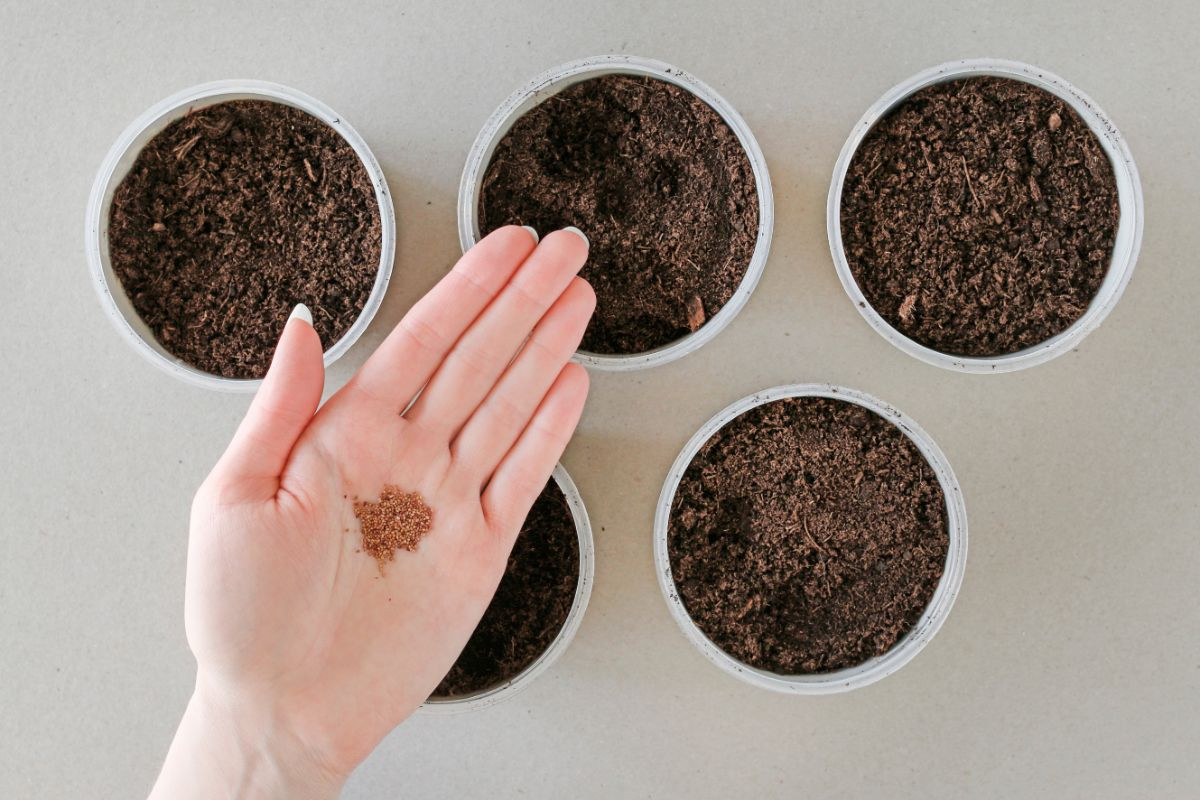 Strawberry seeds on a palm over pots with soil.
2. Seed Harvesting Methods: Four Ways to Save Strawberry Seeds
There are several ways to save strawberry seeds, each with its own level of effort and suitability based on your resources. Here are four effective methods:
2.1. The Blender Method
The blender method is a quick and efficient way to extract strawberry seeds when you have a larger batch of berries.
How to Do It:
-
Place 4-5 strawberries in your blender with about a quart of water. The exact amount of water isn’t crucial, so approximating is fine.
-
Run the blender on its lowest setting for about 10 seconds. Blending for too long can damage viable seeds, so keep it brief.
-
Wait a few minutes to allow the pulp and seeds to separate. Viable seeds will sink to the bottom, while unviable seeds and pulp will float.
-
Pour off the pulp and unusable seeds. You can pour them through a sieve to save the pulp for treats like strawberry fruit roll-ups.
-
Pour the viable seeds onto a paper towel to dry completely. Once dry, store them in a paper envelope in the fridge.
2.2. The Sieve Method
The sieve method is best suited for overripe or soft-fleshed strawberries. It’s a gentle way to separate seeds without damaging them.
How to Do It:
-
Cut your ripe berries into smaller pieces to speed up the process.
-
Place the pieces in a sieve and press the flesh through, leaving the seeds behind.
-
Rinse the seeds gently to remove any remaining pulp.
-
Spread the seeds on a paper towel to dry completely.
-
Store the dried seeds in a paper envelope in the fridge.
2.3. The Dried Skins Method
The dried skins method is a longer process but equally straightforward. It’s a great way to use strawberries that are already drying.
How to Do It:
-
You can peel your strawberries and dry only the skins or dry the whole strawberries. Use a low-heat dehydrator or sun-dry them if you plan to grow the seeds.
-
Once the skins or berries are dry, hold one at a time over a dish.
-
Gently but firmly rub them with your thumb to loosen the seeds.
-
Pour the seeds into a paper envelope and store them in the fridge.
According to the University of Minnesota Extension, drying strawberry skins preserves the seeds and prevents mold growth.
2.4. The Tweezers Method
The tweezers method is the most time-consuming but a good option if you have limited growing space and only need a few seeds.
How to Do It:
-
Use a pair of tweezers to remove each individual seed from your ripe strawberries.
-
Place the seeds on a paper towel to dry completely.
-
Store the dried seeds in a paper envelope in the fridge.
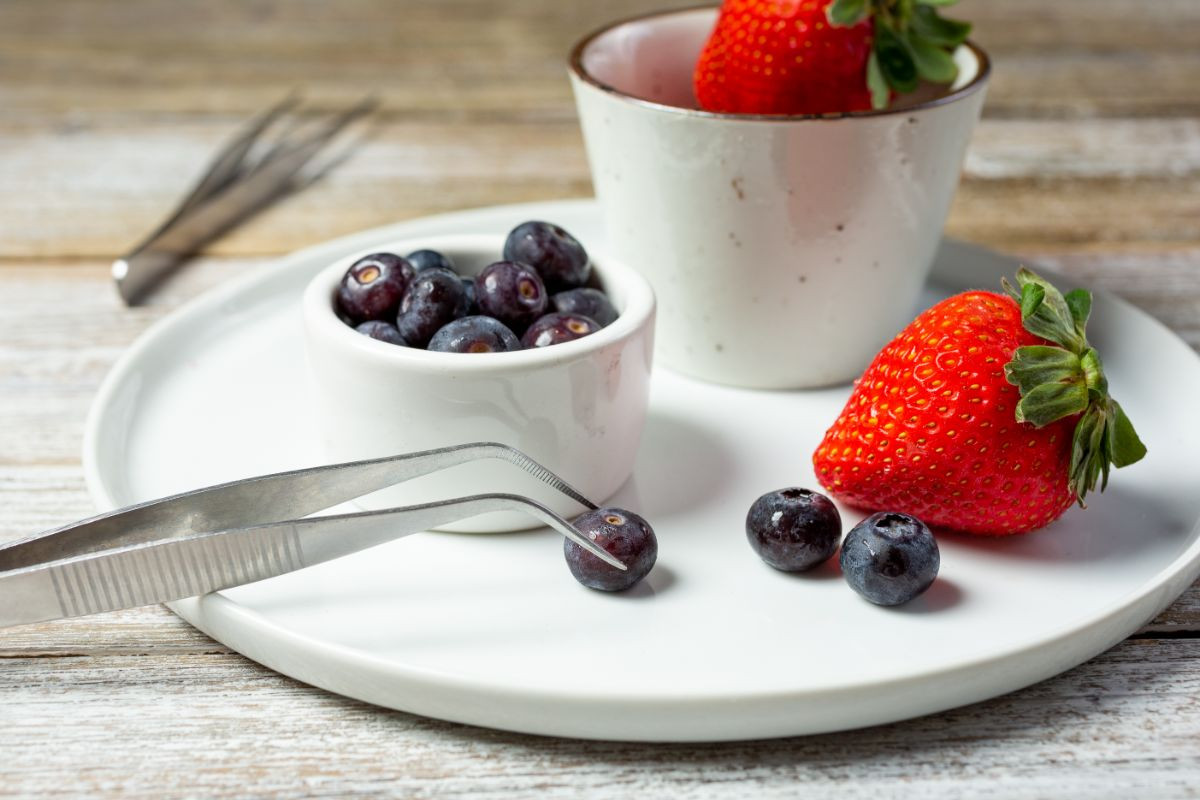 Tweezers, blueberrie and strawberries on the white plate.
3. How to Grow Strawberries From Saved Seeds: A Step-by-Step Guide
Growing strawberries from saved seeds requires patience and attention to detail, but the reward of seeing your own plants sprout from seeds you’ve saved is well worth the effort. Here’s a step-by-step guide:
3.1. Cold Stratification
Most strawberry seeds require cold stratification, a period of cold exposure that mimics winter conditions, to break dormancy and promote germination.
Natural Method: Sow your seeds in the fall and allow them to overwinter outdoors. They will naturally germinate in the spring.
Artificial Method:
-
Remove the paper envelope full of strawberry seeds from the fridge and place it in a jar or plastic bag.
-
Move the sealed jar to a safe place in the freezer for a month.
-
After a month, remove the jar or bag and leave it on the counter to return to room temperature overnight. Keep the seeds sealed to prevent condensation.
3.2. Preparing a Seed-Starting Tray
Prepare a seed-starting tray to provide a suitable environment for germination.
How to Do It:
-
Spread your favorite seed-starting mixture about ½ an inch deep in the tray. A good mixture for strawberry seeds is three parts peat moss to one part richly organic soil.
-
Moisten the mixture until it is uniformly damp but not sopping.
-
When the seeds have returned to room temperature, sow them thinly in the moistened potting mix.
-
Barely cover the seeds with more potting mix.
3.3. Germination
Strawberry seeds need light to germinate, so place them where they’ll receive plenty of light.
How to Ensure Proper Germination:
-
If you don’t have a window or greenhouse shelf where they can receive direct sunlight, provide a grow light.
-
Keep the seed-starting medium moist.
-
Be patient: strawberry seeds can take anywhere from 1 to 6 weeks to germinate, though 2-3 weeks is typical.
3.4. Thinning and Transplanting
Once the seedlings have grown to about 1-2 inches tall, thin any seedlings growing too close together.
How to Thin and Transplant:
-
After they grow their third leaf, transfer them to larger containers.
-
Once temperatures rise into the 50s, begin hardening off your strawberry seedlings. Place them outside in the shade for several hours a day, gradually increasing their exposure to sunlight.
-
After a week or two of hardening off, they are ready to be transplanted to your strawberry patch.
4. Maximizing Your Strawberry Harvest: Tips and Tricks
To ensure a bountiful harvest, consider these additional tips and tricks.
4.1. Soil Preparation
Strawberries thrive in well-drained, slightly acidic soil. Amend your soil with compost or other organic matter to improve its fertility and drainage.
4.2. Watering
Strawberries need consistent moisture, especially during fruit development. Water deeply and regularly, but avoid overwatering, which can lead to root rot.
4.3. Fertilizing
Feed your strawberry plants with a balanced fertilizer in the spring and again after the first harvest. This will provide them with the nutrients they need to produce abundant fruit.
4.4. Pest and Disease Control
Keep an eye out for common strawberry pests and diseases, such as aphids, spider mites, and gray mold. Take action promptly to prevent infestations and infections from spreading.
4.5. Mulching
Mulch around your strawberry plants with straw or wood chips to help retain moisture, suppress weeds, and keep the berries clean.
5. Save Money With Strawberries: Strategies for the Frugal Gardener
Strawberries are not only delicious but also offer numerous opportunities for saving money. From propagation to creative culinary uses, here’s how to make the most of your strawberry harvest while keeping your budget in check.
5.1. Propagate for Free Plants
One of the most cost-effective ways to expand your strawberry patch is through propagation. Strawberries naturally send out runners, which are stems that produce new plantlets.
How to Propagate:
- Encourage Rooting: Place small pots filled with soil near the mother plant and guide the runners into the pots.
- Secure the Runner: Use a U-shaped pin or a small stone to hold the runner in contact with the soil.
- Wait for Roots: In a few weeks, the plantlet will develop its own root system.
- Sever the Connection: Once the new plant is well-established, cut the runner connecting it to the mother plant. You now have a free strawberry plant ready to be transplanted elsewhere in your garden.
According to a study by the National Gardening Association, propagating your own plants can save hundreds of dollars compared to purchasing new plants from nurseries each year.
5.2. Make Your Own Compost and Soil Amendments
Healthy soil is crucial for a productive strawberry patch, but buying commercial fertilizers and soil amendments can be expensive. Instead, create your own compost and soil enrichments using kitchen scraps and garden waste.
Composting Basics:
- Collect Materials: Gather fruit and vegetable scraps, coffee grounds, eggshells, grass clippings, and fallen leaves.
- Layer Materials: Alternate layers of “green” (nitrogen-rich) and “brown” (carbon-rich) materials in a compost bin or pile.
- Maintain Moisture: Keep the compost pile moist but not waterlogged.
- Turn Regularly: Turn the pile every week or two to aerate it and speed up decomposition.
- Use the Compost: After a few months, you’ll have nutrient-rich compost to amend your strawberry beds.
DIY Soil Amendments:
- Eggshells: Crush eggshells and sprinkle them around your strawberry plants to add calcium to the soil, which helps prevent blossom-end rot.
- Coffee Grounds: Used coffee grounds are slightly acidic and can improve soil drainage.
- Banana Peels: Bury banana peels near your strawberry plants to provide potassium, which promotes strong root growth and fruit production.
5.3. Save Water with Efficient Irrigation
Watering is essential for strawberry plants, but it’s easy to waste water (and money) with inefficient irrigation methods. Implement these water-saving strategies to keep your strawberries hydrated while minimizing your water bill.
Water-Saving Techniques:
- Drip Irrigation: Install a drip irrigation system that delivers water directly to the roots of your strawberry plants, reducing evaporation and runoff.
- Mulching: Apply a layer of organic mulch around your plants to help retain soil moisture.
- Watering Schedule: Water deeply but less frequently, allowing the soil to dry slightly between waterings. Water in the morning to reduce evaporation and the risk of fungal diseases.
- Rainwater Harvesting: Collect rainwater in barrels or tanks and use it to water your strawberry plants. Rainwater is naturally soft and free of chemicals, making it ideal for gardening.
5.4. Use Strawberries in Cost-Effective Recipes
Beyond eating them fresh, strawberries can be used in a variety of cost-effective recipes that stretch your harvest further.
Budget-Friendly Strawberry Recipes:
- Strawberry Jam: Preserve your strawberry harvest by making homemade jam. It’s a great way to enjoy the taste of summer all year round.
- Strawberry Smoothies: Blend strawberries with yogurt, bananas, and a splash of milk for a healthy and filling breakfast or snack.
- Strawberry Vinegar: Infuse vinegar with strawberries to create a tangy and flavorful condiment for salads and marinades.
- Strawberry Fruit Leather: Puree strawberries and dry them in a dehydrator or low-temperature oven to make a chewy and nutritious snack.
5.5. Participate in Seed Swaps and Community Gardens
Connect with other gardeners in your community to share resources and reduce your gardening expenses.
Benefits of Seed Swaps and Community Gardens:
- Seed Swaps: Exchange seeds with other gardeners to try new varieties and save money on seed purchases.
- Community Gardens: Share gardening tasks, tools, and knowledge with fellow gardeners. Community gardens often have communal compost piles and other resources that can help you save money.
- Networking: Learn new gardening techniques and tips from experienced gardeners in your area.
6. SaveWhere.net: Your Partner in Smart Saving and Gardening
At savewhere.net, we’re dedicated to providing you with the best tips and resources for saving money in all aspects of your life, including gardening. Our website offers a wealth of information on frugal gardening practices, from seed saving to DIY pest control.
Explore Our Resources:
- Gardening Guides: Access our comprehensive guides on growing various fruits, vegetables, and herbs.
- DIY Projects: Discover creative DIY projects for your garden, such as building raised beds or making your own plant markers.
- Community Forum: Connect with other gardeners in our community forum to share tips, ask questions, and find inspiration.
- Deals and Discounts: Find exclusive deals and discounts on gardening supplies from our partner retailers.
We understand the challenges of managing finances and the desire to live sustainably. Our platform is designed to help you navigate these challenges with ease, offering practical advice and resources tailored to your needs.
Why Choose SaveWhere.net?
- Expert Advice: Benefit from the knowledge and experience of our team of financial experts and gardening enthusiasts.
- Practical Solutions: Find actionable tips and strategies that you can implement right away to save money and grow your own food.
- Community Support: Connect with a supportive community of like-minded individuals who are passionate about saving money and living sustainably.
- Exclusive Deals: Access exclusive deals and discounts that can help you save even more money.
7. Common Mistakes to Avoid When Saving Strawberry Seeds
Saving strawberry seeds can be a rewarding experience, but it’s easy to make mistakes that can reduce your chances of success. Here are some common pitfalls to avoid:
7.1. Saving Seeds from Hybrids
As mentioned earlier, saving seeds from hybrid strawberry varieties can be unpredictable. The offspring may not resemble the parent plant, and you may end up with inferior fruit. Stick to heirloom varieties for best results.
7.2. Not Allowing Seeds to Dry Completely
Moisture is the enemy of seed viability. If you store your strawberry seeds before they are completely dry, they are likely to develop mold and rot. Ensure that your seeds are thoroughly dry before storing them in a paper envelope.
7.3. Storing Seeds in a Warm Place
Heat can degrade seeds and reduce their germination rate. Store your strawberry seeds in a cool, dark place, such as the refrigerator.
7.4. Not Protecting Seeds from Pests
Insects and rodents can damage or destroy your stored seeds. Protect your seeds by storing them in a sealed container or envelope.
7.5. Not Testing Seed Viability
Before planting your saved strawberry seeds, it’s a good idea to test their viability. Place a few seeds on a damp paper towel, fold the towel over, and place it in a plastic bag. After a week or two, check to see if the seeds have sprouted. If most of the seeds have germinated, you can be confident that your saved seeds are viable.
8. The Future of Strawberry Growing: Sustainable Practices
As we look to the future of strawberry growing, sustainable practices will become increasingly important. Here are some ways to grow strawberries in an environmentally friendly way:
8.1. Organic Gardening
Avoid using synthetic pesticides and fertilizers, which can harm the environment and human health. Instead, use organic methods to control pests and diseases and improve soil fertility.
8.2. Water Conservation
Use water-efficient irrigation methods, such as drip irrigation, and collect rainwater to reduce your water consumption.
8.3. Crop Rotation
Rotate your strawberry crops with other plants to prevent soil depletion and reduce the buildup of pests and diseases.
8.4. Companion Planting
Plant strawberries alongside companion plants that can help deter pests, attract beneficial insects, and improve soil health.
8.5. Supporting Local Farmers
Buy strawberries from local farmers who use sustainable growing practices. This will support your local economy and reduce your carbon footprint.
9. Frequently Asked Questions About Saving Strawberry Seeds
Here are some frequently asked questions about saving strawberry seeds:
9.1. Can I save seeds from store-bought strawberries?
Yes, you can try, but store-bought strawberries are often hybrids, so the resulting plants may not produce the same quality of fruit.
9.2. How long do strawberry seeds last?
Strawberry seeds can remain viable for up to four years if stored properly in a cool, dry place.
9.3. Do strawberry seeds need light to germinate?
Yes, strawberry seeds need light to germinate, so don’t bury them too deeply when planting.
9.4. How long does it take for strawberry seeds to germinate?
Strawberry seeds can take anywhere from 1 to 6 weeks to germinate, though 2-3 weeks is typical.
9.5. Can I start strawberry seeds indoors?
Yes, you can start strawberry seeds indoors in a seed-starting tray or individual pots.
9.6. When should I transplant my strawberry seedlings outdoors?
Transplant your strawberry seedlings outdoors after they have grown their third leaf and the temperatures have risen into the 50s.
9.7. How often should I water my strawberry plants?
Water your strawberry plants deeply and regularly, but avoid overwatering. Allow the soil to dry slightly between waterings.
9.8. What are some common strawberry pests and diseases?
Common strawberry pests include aphids, spider mites, and slugs. Common strawberry diseases include gray mold, leaf spot, and powdery mildew.
9.9. How can I prevent pests and diseases in my strawberry patch?
Use organic methods to control pests and diseases, such as companion planting, crop rotation, and beneficial insects.
9.10. When do strawberry plants produce fruit?
Strawberry plants typically begin to produce fruit in their second year of growth.
10. Start Saving Today
Saving strawberry seeds is a rewarding way to save money and grow your own delicious fruit. With a little patience and effort, you can enjoy a bountiful harvest of homegrown strawberries for years to come. Visit savewhere.net for more tips and tricks on frugal living and sustainable gardening.
Ready to transform your garden and your finances? Explore savewhere.net today for a wealth of resources, exclusive deals, and a supportive community. Together, we can cultivate a greener, more sustainable future, one strawberry seed at a time.
Address: 100 Peachtree St NW, Atlanta, GA 30303, United States
Phone: +1 (404) 656-2000
Website: savewhere.net