Are you looking for ways to change the default save location in Excel to better manage your files and improve your workflow? At savewhere.net, we understand the importance of efficient file management and offer solutions to optimize your Excel experience. This comprehensive guide will walk you through the steps to customize your save settings, ensuring your documents are always stored where you need them. By mastering these tips, you’ll enhance your productivity and maintain better control over your financial spreadsheets, budgets, and other important documents.
1. Understanding the Importance of Customizing Your Save Location
Customizing the default save location in Excel is more than just a convenience; it’s a key aspect of efficient file management. By setting a specific location, you ensure that your financial spreadsheets, budget plans, and other critical documents are always stored where you can easily find them. This simple adjustment can save you valuable time and reduce the frustration of searching through multiple folders. For individuals and families focused on managing their finances and saving money, having a streamlined system for organizing financial documents is essential.
Consider these benefits:
- Improved Organization: A designated save location keeps all your related files in one place, making it easier to manage and track your financial data.
- Time Savings: No more wasting time searching for misplaced files. A customized save location allows you to quickly access your documents, saving you valuable minutes each day.
- Enhanced Productivity: When your files are well-organized, you can focus on the task at hand, whether it’s creating a budget, analyzing expenses, or planning for retirement.
- Reduced Stress: Knowing exactly where your important financial documents are stored can reduce stress and provide peace of mind.
- Better Collaboration: If you share files with family members or colleagues, a consistent save location ensures everyone knows where to find the latest version.
For example, if you’re managing a family budget, you might want to set the default save location to a dedicated folder on your computer or in a cloud storage service like Google Drive or Dropbox. This ensures that all your budget spreadsheets, expense trackers, and financial reports are stored in one central location.
According to a study by the U.S. Bureau of Labor Statistics, the average American spends approximately 8.4 hours per day at work. By streamlining tasks such as file management, you can make better use of your time and increase your overall productivity.
Customizing your save location in Excel is a small change that can have a big impact on your efficiency and peace of mind. Take a few minutes to set up your preferred save location, and you’ll enjoy the benefits of a more organized and productive workflow.
2. Why Should I Customize the Default Save Location?
Customizing the default save location in Excel offers several advantages, making it a worthwhile adjustment for anyone who regularly uses the program. The primary reason is improved organization. By directing Excel to save files in a specific folder, you can keep all your related documents together, whether they’re budget spreadsheets, expense trackers, or financial reports. This eliminates the need to search through multiple folders to find the file you need.
Another significant benefit is time savings. Instead of navigating through a series of menus and folders each time you save a file, you can quickly save it to your designated location. This can be particularly helpful if you frequently save files throughout the day.
Moreover, customizing the save location can enhance your overall productivity. When your files are well-organized and easily accessible, you can focus on the task at hand without being distracted by file management issues. This can lead to increased efficiency and better results.
Here are some additional reasons to customize the default save location:
- Data Security: Saving your files to a secure location, such as a password-protected folder or a cloud storage service with encryption, can help protect your sensitive financial information from unauthorized access.
- Backup and Recovery: By saving your files to a cloud storage service, you can automatically back them up and easily recover them if your computer crashes or your files are accidentally deleted.
- Collaboration: If you share files with others, a consistent save location ensures that everyone knows where to find the latest version and can easily access the documents they need.
- Compliance: Some industries have specific regulations regarding data storage and retention. Customizing your save location can help you comply with these regulations and avoid potential penalties.
To illustrate, consider a scenario where you’re working on a project that involves multiple Excel files, such as a budget, a financial forecast, and a project timeline. By setting the default save location to a dedicated folder for this project, you can ensure that all these files are stored together, making it easy to access and manage them.
According to a report by the Consumer Financial Protection Bureau (CFPB), Americans can save money when they establish a budget plan. You can manage your budget better by customizing the save location of your Excel sheet.
Customizing the default save location in Excel is a simple but effective way to improve your file management practices and enhance your overall productivity. By taking the time to set up your preferred save location, you can save time, reduce stress, and ensure that your important financial documents are always stored where you need them.
3. Step-by-Step Guide to Changing the Default Save Location in Excel
Changing the default save location in Excel is a straightforward process that can significantly improve your file management efficiency. Here’s a step-by-step guide to help you customize your save settings:
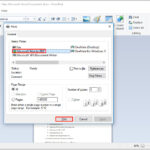
Step 1: Open Excel Options
- Open Microsoft Excel.
- Click on the “File” tab in the top-left corner of the Excel window.
- In the File menu, click on “Options” at the bottom of the list. This will open the Excel Options dialog box.
Step 2: Navigate to the Save Settings
- In the Excel Options dialog box, click on the “Save” tab in the left-hand menu.
- This will display the save-related settings for Excel.
Step 3: Set the Default Save Location
- In the “Save documents” section, look for the “Default local file location” field.
- This field shows the current default save location for your Excel files.
- To change the default save location, click in the “Default local file location” field and type the new path to the folder where you want to save your files.
- Alternatively, you can click the “Browse” button to the right of the field to navigate to the desired folder using the Windows Explorer dialog box.
- Select the folder you want to use as the default save location and click “OK.”
Step 4: Confirm and Save Changes
- Once you’ve entered the new default save location, click “OK” at the bottom of the Excel Options dialog box to save your changes.
- Excel will now use the specified folder as the default save location for all new files.
Additional Tips:
- Create a Dedicated Folder: Consider creating a dedicated folder for your Excel files to keep them organized and separate from other documents. For example, you might create a folder called “Excel Files” or “Financial Documents.”
- Use a Cloud Storage Service: If you want to access your files from multiple devices or collaborate with others, consider using a cloud storage service like Google Drive or Dropbox as your default save location.
- Test the New Setting: After changing the default save location, create a new Excel file and save it to ensure that it is being saved to the correct folder.
For instance, if you want to save all your Excel files to a folder called “Financial Reports” on your desktop, you would enter the following path in the “Default local file location” field: C:UsersYourUsernameDesktopFinancial Reports. Replace “YourUsername” with your actual Windows username.
According to a study by the U.S. Bureau of Economic Analysis (BEA), effective financial planning is crucial for long-term financial stability. Setting the default save location for your Excel files can help you better manage your financial data and make more informed decisions.
By following these simple steps, you can easily change the default save location in Excel and customize your file management settings to suit your needs. This small adjustment can save you time, improve your organization, and enhance your overall productivity.
4. Alternative Methods to Change the Save Location
While the method described above is the most common way to change the default save location in Excel, there are alternative approaches you can use to achieve the same result. These methods can be helpful in specific situations or if you prefer a different workflow.
1. Using the “Save As” Dialog Box
The “Save As” dialog box allows you to specify the save location each time you save a file. While this doesn’t change the default save location, it gives you the flexibility to save individual files to different folders as needed.
- How to Use:
- Open the Excel file you want to save.
- Click on the “File” tab and select “Save As.”
- In the “Save As” dialog box, navigate to the folder where you want to save the file.
- Enter a name for the file and click “Save.”
2. Pinning Locations in the Save Dialog
Excel allows you to pin frequently used locations to the save dialog for quick access. This can be a convenient way to save files to different folders without having to navigate through the entire file system each time.
- How to Use:
- Open the Excel file you want to save.
- Click on the “File” tab and select “Save As.”
- In the “Save As” dialog box, navigate to the folder you want to pin.
- Hover over the folder name in the left-hand pane and click the pin icon that appears.
- The folder will now be pinned to the save dialog for easy access in the future.
3. Using the Quick Access Toolbar
You can add the “Save As” command to the Quick Access Toolbar (QAT) for even faster access. This allows you to quickly open the “Save As” dialog box with a single click.
- How to Use:
- Click on the “File” tab and select “Options.”
- In the Excel Options dialog box, click on the “Quick Access Toolbar” tab.
- In the “Choose commands from” dropdown menu, select “All Commands.”
- Scroll down the list and select “Save As.”
- Click the “Add” button to add the “Save As” command to the QAT.
- Click “OK” to save your changes.
- The “Save As” command will now appear in the QAT, allowing you to quickly open the “Save As” dialog box.
4. Using Keyboard Shortcuts
Excel offers several keyboard shortcuts that can help you save files more quickly. The most common shortcut is “Ctrl + S” to save the current file, but you can also use “F12” to open the “Save As” dialog box.
- How to Use:
- Open the Excel file you want to save.
- Press “F12” on your keyboard to open the “Save As” dialog box.
- Navigate to the folder where you want to save the file.
- Enter a name for the file and click “Save.”
Example Scenario:
Suppose you’re working on a budget spreadsheet and want to save it to a specific folder for your 2024 financial documents. You can use the “Save As” dialog box to navigate to that folder and save the file there. Alternatively, you can pin the 2024 financial documents folder to the save dialog for quick access in the future.
According to research from the U.S. Bureau of Labor Statistics (BLS), Americans spend an average of 37 hours per week at work. By streamlining tasks such as saving files, you can make better use of your time and increase your overall productivity.
While changing the default save location is a useful setting, these alternative methods provide additional flexibility and can help you save files more efficiently in different situations.
5. How to Set a Default Working Folder for Different Microsoft Office Programs
The Documents folder is typically the default working folder for files created in Microsoft Office programs like Excel, Word, PowerPoint, and Project. However, you can customize this setting to better suit your workflow and organizational preferences. Here’s how to set a default working folder for each of these programs:
5.1 Excel, PowerPoint, Project, and Word
- Open the Program: Launch the Microsoft Office program (Excel, PowerPoint, Project, or Word) for which you want to change the default working folder.
- Access Options: Click the “File” tab in the top-left corner of the program window, and then click “Options” at the bottom of the menu.
- Navigate to Save Settings: In the Options dialog box, click on the “Save” tab.
- Set Default Local File Location: In the “Save documents” section, find the “Default local file location” box.
- Enter Path or Browse: Type the full path to the folder you want to use as the default working folder in the box. Alternatively, click the “Browse” button to navigate to the desired folder using the Windows Explorer dialog box.
- Confirm Changes: Click “OK” at the bottom of the Options dialog box to save your changes.
Note: In Word, you can also click “Browse” to navigate to the folder you want to use.
5.2 Access
- Open Access: Launch Microsoft Access.
- Access Options: Click the “File” tab in the top-left corner of the program window, and then click “Options” at the bottom of the menu.
- Navigate to General Settings: In the Options dialog box, click on the “General” tab.
- Set Default Database Folder: Under the “Creating databases” section, find the “Default database folder” box.
- Browse to Folder: Click “Browse” and navigate to the folder you want to use as the default database folder. Alternatively, you can type the full path to the folder in the box.
- Confirm Changes: Click “OK” at the bottom of the Options dialog box to save your changes.
5.3 InfoPath
- Open InfoPath: Launch Microsoft InfoPath.
- Access Options: Click the “File” tab in the top-left corner of the program window, and then click “Options” at the bottom of the menu.
- Navigate to General Settings: In the Options dialog box, click on the “General” tab.
- Access More Options: Under “InfoPath Options,” click “More Options.”
- Navigate to Design Tab: In the “More Options” dialog box, click on the “Design” tab.
- Set Project Location: Find the “Project location for Visual Basic and C# code” field.
- Browse to Folder: Click “Browse” to navigate to the new default folder and click “Open.”
- Confirm Changes: Click “OK” to save your changes in both the “More Options” and “Options” dialog boxes.
5.4 Visio
When you set a default working folder in Visio, the folder you designate for a particular file type is the first place Visio searches for that file type. If Visio can’t find a specific file in the designated folder, it searches in the “My Documents” folder for drawings and templates and in the “My DocumentsMy Shapes” folder for stencils. It searches in the “Documents and Settingsuser name” folder for add-ins.
- Open Visio: Launch Microsoft Visio.
- Access Options: Click the “File” tab in the top-left corner of the program window, and then click “Options” at the bottom of the menu.
- Navigate to Advanced Settings: In the Options dialog box, click on the “Advanced” tab.
- Access File Locations: Under the “General” section, click “File Locations…”
- Set Folder for Each File Type: For each file type you want to set a default folder for, click the appropriate “Browse” button. Then, browse to the folder where you want to store that file type. You can have separate storage folders for each of the following types of files:
- My Shapes
- Drawings
- Templates
- Stencils
- Help
- Add-ons
- Start-up
- Confirm Changes: Click “OK” twice to save your changes.
Note: You can add more than one folder for each file type. If you do so, the first folder is the default working folder. If the first folder is not available (for example, a network share that may be temporarily unavailable), Visio uses the next folder in the list.
Example Scenario:
Suppose you want to set a default working folder for all your Excel files related to your 2024 budget. You can create a folder called “2024 Budget” on your computer and then set it as the default local file location in Excel’s Save Options.
According to a study by the U.S. Bureau of Economic Analysis (BEA), effective financial planning is crucial for long-term financial stability. Setting a default working folder for your Excel files can help you better manage your financial data and make more informed decisions.
By following these steps, you can customize the default working folder for different Microsoft Office programs and streamline your file management process.
6. Troubleshooting Common Issues When Changing Save Locations
While changing the save location in Excel is generally a straightforward process, you may encounter some issues. Here’s a guide to troubleshooting common problems and ensuring a smooth experience:
1. Permission Issues:
- Problem: You may encounter an error message stating that you don’t have permission to save files to the selected location.
- Solution:
- Check User Account Control (UAC) Settings: Ensure that your UAC settings are not too restrictive.
- Run Excel as Administrator: Right-click on the Excel icon and select “Run as administrator.” This will grant Excel elevated privileges, allowing it to save files to protected locations.
- Adjust Folder Permissions: Right-click on the folder you’re trying to save to, select “Properties,” and go to the “Security” tab. Ensure that your user account has “Read & execute,” “List folder contents,” “Read,” “Write,” and “Modify” permissions.
2. Incorrect File Path:
- Problem: Excel may not be able to save files to the specified location if the file path is incorrect or contains invalid characters.
- Solution:
- Verify File Path: Double-check the file path you entered in the “Default local file location” field. Make sure it’s accurate and doesn’t contain any typos.
- Use the Browse Button: Instead of typing the file path manually, use the “Browse” button to navigate to the desired folder. This will ensure that the file path is correct.
- Avoid Special Characters: Avoid using special characters in the file path, such as *, ?, <, >, |, :, “, , or /.
3. Network Drive Issues:
- Problem: If you’re trying to save files to a network drive, you may encounter issues if the drive is disconnected or unavailable.
- Solution:
- Check Network Connection: Ensure that you have a stable network connection.
- Verify Drive Mapping: Make sure the network drive is properly mapped and accessible from your computer.
- Save Locally First: If you’re experiencing network issues, try saving the file to a local folder first and then copying it to the network drive later.
4. Conflicting Settings:
- Problem: In some cases, other settings in Excel or Windows may conflict with the default save location setting, causing unexpected behavior.
- Solution:
- Reset Excel Settings: Try resetting Excel to its default settings by going to “File” > “Options” > “Advanced” and clicking “Reset” under the “General” section.
- Check Group Policy Settings: If you’re using a corporate computer, check with your IT department to see if any group policy settings are overriding your Excel settings.
5. Insufficient Disk Space:
- Problem: You may not be able to save files to the selected location if there is insufficient disk space on the drive.
- Solution:
- Check Disk Space: Check the available disk space on the drive you’re trying to save to.
- Free Up Disk Space: If the drive is full, delete unnecessary files or move them to another location to free up space.
Example Scenario:
Suppose you’re trying to save your Excel files to a folder on a network drive, but you keep getting an error message saying that you don’t have permission to save files to that location. In this case, you should check your network connection, verify that the drive is properly mapped, and ensure that your user account has the necessary permissions to access the folder.
According to a report by the Consumer Financial Protection Bureau (CFPB), Americans can save money when they establish a budget plan. You can manage your budget better by fixing common saving issues of your Excel sheet.
By following these troubleshooting steps, you can resolve common issues when changing the save location in Excel and ensure a smooth and efficient file management experience.
7. Maximizing Efficiency with Cloud Storage and Save Locations
Integrating cloud storage with your Excel save locations can significantly enhance your efficiency, accessibility, and data security. Cloud storage services like Google Drive, Dropbox, and OneDrive offer numerous benefits, including automatic backups, easy file sharing, and access from multiple devices. Here’s how to maximize your efficiency by leveraging cloud storage for your Excel files:
1. Setting a Cloud Storage Folder as the Default Save Location:
-
Benefits:
- Automatic Backups: Your Excel files are automatically backed up to the cloud, protecting them from data loss due to hardware failure, theft, or accidental deletion.
- Accessibility: You can access your files from any device with an internet connection, whether it’s your computer, tablet, or smartphone.
- Collaboration: You can easily share your files with others and collaborate in real-time, making it ideal for team projects or sharing financial information with family members.
-
How to Set Up:
- Install the cloud storage application on your computer (e.g., Google Drive, Dropbox, OneDrive).
- In Excel, go to “File” > “Options” > “Save.”
- In the “Default local file location” field, enter the path to your cloud storage folder. For example, if you’re using Google Drive, the path might be
C:UsersYourUsernameGoogle Drive. - Click “OK” to save your changes.
2. Using Cloud Storage for Collaboration:
-
Benefits:
- Real-Time Collaboration: Multiple users can work on the same Excel file simultaneously, seeing each other’s changes in real-time.
- Version History: Cloud storage services automatically track changes and allow you to revert to previous versions of your files if needed.
- Easy Sharing: You can easily share your files with others by sending them a link or inviting them to collaborate.
-
How to Collaborate:
- Save your Excel file to a cloud storage folder.
- Share the file with others by right-clicking on it in your cloud storage application and selecting “Share.”
- Choose whether to give collaborators “Edit” or “View” access.
- Collaborators can now open the file and work on it simultaneously.
3. Automating File Management with Cloud Storage:
-
Benefits:
- Automatic Synchronization: Cloud storage services automatically synchronize your files across all your devices, ensuring that you always have the latest version.
- Easy File Recovery: If you accidentally delete a file, you can easily recover it from the cloud storage service’s recycle bin.
- Mobile Access: You can access your Excel files from your mobile devices using the cloud storage service’s mobile app.
-
How to Automate:
- Set up automatic synchronization in your cloud storage application.
- Create folders for different types of Excel files (e.g., budgets, financial reports, project plans).
- Save your files to the appropriate folders in your cloud storage account.
- Your files will automatically be synchronized across all your devices and backed up to the cloud.
Example Scenario:
Suppose you’re working on a family budget with your spouse. You can save the budget spreadsheet to a shared folder in Google Drive, allowing both of you to access and edit the file simultaneously. This makes it easy to track expenses, update the budget, and make financial decisions together.
According to research from the U.S. Bureau of Economic Analysis (BEA), effective financial planning is crucial for long-term financial stability. Using cloud storage to manage your Excel files can help you stay organized, collaborate effectively, and protect your financial data.
By integrating cloud storage with your Excel save locations, you can maximize your efficiency, improve your collaboration, and ensure that your important financial documents are always safe and accessible.
8. Best Practices for Organizing Excel Files and Save Locations
Effective organization of your Excel files and save locations is crucial for maintaining productivity, ensuring data integrity, and facilitating easy access to your financial information. Here are some best practices to help you organize your Excel files and save locations:
1. Consistent Naming Conventions:
- Why It Matters: A consistent naming convention makes it easier to find and identify your Excel files, especially when you have a large number of documents.
- Best Practices:
- Use Descriptive Names: Use names that clearly indicate the contents of the file. For example, “2024 Budget,” “Monthly Expense Report,” or “Investment Portfolio.”
- Include Dates: Include dates in the file name to indicate when the file was created or last updated. For example, “2024 Budget (Updated 2024-07-15).”
- Use Keywords: Use relevant keywords in the file name to make it easier to search for the file later. For example, “Real Estate Investment Analysis.”
- Avoid Special Characters: Avoid using special characters in the file name, as they can cause compatibility issues.
2. Hierarchical Folder Structure:
- Why It Matters: A well-organized folder structure helps you categorize your Excel files and makes it easier to navigate to the files you need.
- Best Practices:
- Create Top-Level Folders: Create top-level folders for broad categories of Excel files, such as “Budgets,” “Financial Reports,” “Investments,” and “Taxes.”
- Use Subfolders: Use subfolders to further categorize your files within each top-level folder. For example, under “Budgets,” you might have subfolders for “Monthly Budgets,” “Annual Budgets,” and “Project Budgets.”
- Year-Based Folders: Create year-based folders to archive your Excel files from previous years. For example, create folders for “2022,” “2023,” and “2024” to store your files from those years.
3. Version Control:
- Why It Matters: Version control helps you track changes to your Excel files and avoid overwriting important data.
- Best Practices:
- Use Version Numbers: Include version numbers in the file name to indicate different versions of the file. For example, “2024 Budget v1,” “2024 Budget v2,” and “2024 Budget v3.”
- Use Dates: Include dates in the file name to indicate when each version of the file was created. For example, “2024 Budget (2024-07-01),” “2024 Budget (2024-07-08),” and “2024 Budget (2024-07-15).”
- Use Comments: Add comments to your Excel files to describe the changes you made in each version.
4. Regular Backups:
- Why It Matters: Regular backups protect your Excel files from data loss due to hardware failure, theft, or accidental deletion.
- Best Practices:
- Use Cloud Storage: Use cloud storage services like Google Drive, Dropbox, or OneDrive to automatically back up your Excel files to the cloud.
- Create Local Backups: Create local backups of your Excel files on an external hard drive or USB drive.
- Schedule Regular Backups: Schedule regular backups of your Excel files, such as daily or weekly backups.
Example Scenario:
Suppose you’re managing your family’s finances using Excel. You can create a folder structure like this:
- Finances
- Budgets
- 2023
- 2024
- 2025
- Financial Reports
- 2023
- 2024
- 2025
- Investments
- Real Estate
- Stocks
- Bonds
- Taxes
- 2023
- 2024
- 2025
- Budgets
Within each folder, you can use consistent naming conventions and version control to keep your Excel files organized and up-to-date.
According to a report by the Consumer Financial Protection Bureau (CFPB), Americans can save money when they establish a budget plan. You can manage your budget better by organizing your Excel sheet.
By following these best practices, you can organize your Excel files and save locations effectively, ensuring that your financial information is always accessible, up-to-date, and secure.
9. Understanding Excel’s Autosave and Recovery Features
Excel’s Autosave and Recovery features are essential tools for protecting your work from unexpected data loss. These features automatically save your files at regular intervals and allow you to recover unsaved changes in case of a crash or power outage. Here’s a comprehensive guide to understanding and using these features:
1. Autosave:
- What It Is: Autosave automatically saves your Excel files to a temporary location at regular intervals, typically every few minutes.
- How It Works: When Autosave is enabled, Excel automatically saves a copy of your file in the background while you’re working. If Excel crashes or you experience a power outage, you can recover the latest version of your file from the temporary location.
- How to Enable/Disable:
- Go to “File” > “Options” > “Save.”
- Check or uncheck the “Save AutoRecover information every X minutes” box to enable or disable Autosave.
- Adjust the interval to your preferred setting. A shorter interval provides more frequent saves but may consume more system resources.
- Best Practices:
- Enable Autosave: Always enable Autosave to protect your work from unexpected data loss.
- Adjust Interval: Adjust the Autosave interval to your preferred setting. A shorter interval is generally recommended for important files.
- Verify Autosave Location: Verify that the Autosave location is set to a folder that is backed up regularly.
2. Autorecover:
- What It Is: Autorecover is a feature that automatically recovers unsaved changes to your Excel files after a crash or power outage.
- How It Works: When Excel restarts after a crash or power outage, it automatically detects any unsaved files and prompts you to recover them. You can then choose to open the recovered files and save them to your preferred location.
- How to Use:
- Restart Excel after a crash or power outage.
- Excel will automatically detect any unsaved files and display a “Document Recovery” pane on the left side of the screen.
- Click on the recovered files to open them.
- Review the recovered files to ensure that all your changes have been saved.
- Save the recovered files to your preferred location.
- Best Practices:
- Review Recovered Files: Always review the recovered files to ensure that all your changes have been saved.
- Save Recovered Files: Save the recovered files to your preferred location as soon as possible to prevent further data loss.
- Verify Autosave Settings: Verify that Autosave is enabled and configured correctly to ensure that Excel can automatically recover your files in the event of a crash or power outage.
3. Manual Saving:
- Why It Matters: Even with Autosave and Autorecover enabled, it’s still important to save your Excel files manually at regular intervals.
- How to Save Manually:
- Click on the “File” tab and select “Save.”
- Alternatively, press “Ctrl + S” on your keyboard to save the current file.
- Best Practices:
- Save Frequently: Save your Excel files frequently, especially after making significant changes.
- Use Descriptive Names: Use descriptive names for your Excel files to make it easier to identify them later.
- Use Version Control: Use version control to track changes to your Excel files and avoid overwriting important data.
Example Scenario:
Suppose you’re working on a budget spreadsheet and you experience a power outage. When you restart Excel, the Autorecover feature automatically detects the unsaved file and prompts you to recover it. You can then review the recovered file to ensure that all your changes have been saved and save the file to your preferred location.
According to a report by the Consumer Financial Protection Bureau (CFPB), Americans can save money when they establish a budget plan. You can manage your budget better by understanding Excel’s Autosave and Recovery features.
By understanding and using Excel’s Autosave and Recovery features, you can protect your work from unexpected data loss and ensure that your important financial documents are always safe and accessible.
10. Securing Your Financial Data by Controlling Save Locations
Protecting your financial data is crucial, and controlling where your Excel files are saved is a fundamental aspect of data security. By carefully managing your save locations and implementing security measures, you can minimize the risk of unauthorized access, data breaches, and financial fraud. Here’s a guide to securing your financial data by controlling save locations:
1. Choose Secure Save Locations:
- Avoid Public Computers: Avoid saving your Excel files to public computers or shared devices, as these devices may be vulnerable to malware and unauthorized access.
- Use Password-Protected Folders: Save your Excel files to password-protected folders on your computer or network drive. This will prevent unauthorized users from accessing your files.
- Encrypt Your Files: Encrypt your Excel files using Excel’s built-in encryption feature or a third-party encryption tool. This will protect your files from being read by unauthorized users, even if they gain access to the save location.
- Use Cloud Storage with Security Features: Use cloud storage services that offer robust security features, such as encryption, two-factor authentication, and data loss prevention (DLP).
2. Implement Access Controls:
- Limit Access to Save Locations: Limit access to the save locations where your Excel files are stored. Only grant access to users who need it.
- Use Strong Passwords: Use strong, unique passwords for your user accounts and save locations. Avoid using easily guessable passwords, such as your name, birthday, or pet’s name.
- Enable Two-Factor Authentication: Enable two-factor authentication for your user accounts to add an extra layer of security. This will require you to enter a code from your phone or email in addition to your password when logging in.
- Regularly Review Access Permissions: Regularly review access permissions to ensure that only authorized users have access to your Excel files and save locations.
3. Secure Your Network:
- Use a Firewall: Use a firewall to protect your network from unauthorized access. A firewall acts as a barrier between your network and the internet, blocking malicious traffic and preventing unauthorized users from accessing your computers and data.
- Use Antivirus Software: Use antivirus software to protect your computers from malware. Antivirus software scans your computers for viruses, worms, trojans, and other malicious software and removes them before they can cause damage.
- Keep Your Software Up-To-Date: Keep your operating system, web browser, and other software up-to-date with the latest security patches. Security patches fix vulnerabilities in software that can be exploited by hackers.
- Use a Virtual Private Network (VPN): Use a VPN when connecting to public Wi-Fi networks. A VPN encrypts your internet traffic,