
Are you wondering How To Remove A Snapchat Filter From A Saved Photo? Removing unwanted filters and saving your original pictures is possible with the right tools and techniques. At savewhere.net, we’ll guide you through effective methods to achieve this, allowing you to reclaim your unfiltered memories and save them exactly as you remember them. Discover the tips and tricks that financial experts recommend for saving money and improving your financial literacy in one convenient place, offering resources that can help you reach your savings goals.
1. Understanding Snapchat Filters and Their Impact
Snapchat is known for its fun filters and lenses, but what exactly are they, and why might you want to remove them?
1.1. What Are Snapchat Filters?
Snapchat filters are overlays and effects that you can add to your photos and videos within the Snapchat app. They range from simple color adjustments to complex augmented reality effects that change your appearance or add animations. Filters are a fun way to spice up your snaps, but sometimes you might save a photo with a filter and later regret it.
1.2. Why Remove a Snapchat Filter?
There are several reasons why you might want to remove a Snapchat filter from a saved photo:
- Personal Preference: You might simply prefer the original, unfiltered version of the photo.
- Professional Use: Filtered photos might not be suitable for professional contexts, such as job applications or business profiles.
- Sharing on Other Platforms: Some social media platforms or communities might prefer or require unfiltered images.
- Nostalgia: You might want to revert to the original photo to remember the moment as it truly was, without the added effects.
1.3. Challenges in Removing Filters
Removing filters from saved Snapchat photos can be challenging because:
- Destructive Editing: Snapchat typically applies filters destructively, meaning the original image data is altered when the filter is added.
- Limited In-App Options: Snapchat doesn’t offer a straightforward “remove filter” option for saved photos.
- Third-Party Apps: While third-party apps can help, they may come with privacy concerns or require payment.
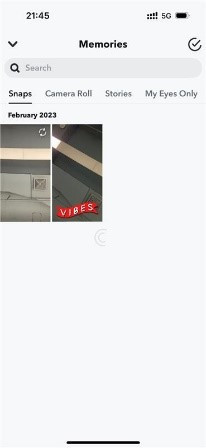 snapchat memories tab
Alt text: Accessing saved Snapchat memories to edit filtered photos.
2. Methods to Remove Snapchat Filters from Saved Photos
While Snapchat doesn’t provide a direct way to remove filters from saved photos, several workarounds and third-party tools can help. Here are some effective methods:
2.1. Using the “Layers” Feature (If Applicable)
Snapchat’s “Layers” feature, if available for the specific filter you used, allows you to remove filters applied in layers.
2.1.1. Step-by-Step Guide to Using Layers
- Open Snapchat and Access Memories: Launch Snapchat and go to the Memories tab to find your saved snaps.
- Select the Photo: Choose the photo with the filter you want to remove.
- Check for the Layers Button: Look for the “Layers” icon at the bottom of the screen. If it’s there, tap it.
- Remove the Filter Layer: If the filter is applied as a separate layer, you can toggle it off or remove it entirely.
- Save the Unfiltered Photo: Save the photo to your camera roll.
2.1.2. Limitations of the Layers Feature
- Availability: The Layers feature is not available for all filters. It depends on how the filter was designed and applied.
- Complexity: Some filters combine multiple layers, making it difficult to isolate and remove the specific effect you want to get rid of.
2.2. Utilizing Third-Party Photo Editing Apps
Several third-party photo editing apps can help you remove or reduce the effects of Snapchat filters. These apps offer a range of tools, from simple adjustments to more advanced editing features.
2.2.1. Popular Photo Editing Apps
- Adobe Photoshop Fix: Offers powerful tools for healing, smoothing, and adjusting images.
- Snapseed: A free, professional-grade photo editing app with a wide range of features.
- VSCO: Known for its high-quality filters and editing tools.
- PicsArt: Provides a variety of editing tools, effects, and stickers.
2.2.2. Step-by-Step Guide to Using Photo Editing Apps
- Download and Install a Photo Editing App: Choose an app from the list above and download it from your app store.
- Import the Photo: Open the app and import the Snapchat photo you want to edit.
- Adjust the Image: Use the app’s editing tools to reduce or remove the effects of the filter. This might involve adjusting brightness, contrast, saturation, and sharpness.
- Use Healing Tools: If the filter has altered specific parts of the image (e.g., smoothing skin), use healing or clone tools to restore the original appearance.
- Save the Edited Photo: Save the edited photo to your camera roll.
2.2.3. Tips for Effective Editing
- Subtlety: Make small, incremental adjustments to avoid making the photo look unnatural.
- Experiment: Try different tools and settings to see what works best for the specific filter you’re trying to remove.
- Backup: Always keep a copy of the original photo in case you’re not happy with the edits.
2.3. Using Online Photo Editing Tools
If you prefer not to download a new app, several online photo editing tools can also help you remove Snapchat filters.
2.3.1. Popular Online Photo Editing Tools
- Fotor: A versatile online photo editor with a range of tools and effects.
- PicMonkey: Offers a variety of editing tools and templates.
- Canva: Known for its design capabilities, but also includes photo editing features.
- LunaPic: A free online photo editor with a wide range of tools.
2.3.2. Step-by-Step Guide to Using Online Tools
- Visit an Online Photo Editor: Choose an online editor from the list above and visit their website.
- Upload the Photo: Upload the Snapchat photo you want to edit.
- Adjust the Image: Use the online editor’s tools to reduce or remove the effects of the filter.
- Download the Edited Photo: Download the edited photo to your computer or device.
2.3.3. Advantages and Disadvantages of Online Tools
- Advantages: No need to download software, accessible from any device with an internet connection.
- Disadvantages: May require an account, can be slower than desktop apps, may have limited features.
Alt text: Steps to remove Snapchat filters using the Layers feature.
3. Advanced Techniques for Removing Filters
For more complex filters or situations where simple adjustments aren’t enough, you might need to use more advanced techniques.
3.1. Using the Clone Stamp Tool
The Clone Stamp tool allows you to copy pixels from one area of the image to another, which can be useful for removing filter effects that have altered specific parts of the photo.
3.1.1. How to Use the Clone Stamp Tool
- Select the Clone Stamp Tool: Open your photo in a photo editing app that has a Clone Stamp tool (e.g., Photoshop, GIMP).
- Choose a Source Area: Select an area of the image that has the texture and color you want to use to replace the filter effect.
- Paint Over the Filtered Area: Carefully paint over the filtered area, using the source area as a reference.
- Adjust Settings: Adjust the size, hardness, and opacity of the Clone Stamp tool to achieve the best results.
3.1.2. Tips for Using the Clone Stamp Tool
- Use Multiple Source Areas: To avoid a repeating pattern, use multiple source areas.
- Zoom In: Zoom in to work on small details.
- Practice: The Clone Stamp tool can be tricky to use, so practice on less important areas of the photo first.
3.2. Using Frequency Separation
Frequency separation is a more advanced technique that separates the image into high-frequency (details) and low-frequency (color and tone) layers. This allows you to adjust the color and tone without affecting the details, which can be useful for removing filter effects that have altered the overall color of the photo.
3.2.1. How to Use Frequency Separation
- Duplicate the Layer: Open your photo in a photo editing app that supports layers (e.g., Photoshop). Duplicate the layer twice.
- Apply Gaussian Blur: On the bottom layer, apply a Gaussian blur to smooth out the details. Adjust the radius until the details are blurred but the overall shape is still visible.
- Apply High Pass Filter: On the top layer, apply a High Pass filter to extract the details. Adjust the radius until the details are sharp but the overall color is gone.
- Change Blending Mode: Change the blending mode of the top layer to “Linear Light” or “Overlay.”
- Adjust Color and Tone: On the bottom layer, adjust the color and tone to remove the filter effect.
3.2.2. Advantages of Frequency Separation
- Preserves Details: Allows you to adjust color and tone without affecting the details of the photo.
- Precise Control: Gives you precise control over the different aspects of the image.
3.3. Restoring Original Colors with Color Correction Tools
Filters often alter the colors in a photo. Using color correction tools can help you restore the original color balance.
3.3.1. Using Color Balance and Curves
- Access Color Correction Tools: Open your photo in a photo editing app and access the color balance and curves tools.
- Adjust Color Balance: Adjust the color balance to correct any color casts caused by the filter. For example, if the filter has added a blue tint, increase the red and yellow tones.
- Adjust Curves: Adjust the curves to fine-tune the overall color and brightness of the photo.
3.3.2. Tips for Color Correction
- Use a Reference: If possible, use a reference photo or your memory of the scene to guide your color corrections.
- Small Adjustments: Make small, incremental adjustments to avoid overcorrecting the colors.
- Check the Histogram: Use the histogram to monitor the distribution of tones in the photo and avoid clipping highlights or shadows.
Alt text: Example of using the Magic Eraser tool on Snapchat.
4. Preventing Filter Regret
The best way to avoid the hassle of removing filters is to prevent filter regret in the first place. Here are some tips for making better decisions about filters:
4.1. Previewing Filters Carefully
Take the time to preview filters carefully before saving a photo. Consider how the filter affects the overall look and feel of the photo and whether it truly enhances the image.
4.2. Saving Original Photos
If possible, save the original, unfiltered photo in addition to the filtered version. This gives you the option to revert to the original if you later change your mind about the filter.
4.3. Using Non-Destructive Editing Techniques
When editing photos, use non-destructive editing techniques whenever possible. This means making adjustments that don’t permanently alter the original image data. For example, use layers and adjustment layers in Photoshop instead of directly modifying the pixels.
4.4. Taking Breaks Before Saving
Sometimes, a filter might look good in the moment, but you might feel differently about it later. Take a break before saving a filtered photo to give yourself time to consider whether you truly like the effect.
5. Ethical Considerations When Editing Photos
While removing filters and editing photos can be a fun and creative process, it’s important to consider the ethical implications of your edits.
5.1. Transparency
Be transparent about your edits, especially if you’re sharing the photos publicly. If you’ve significantly altered the appearance of a person or scene, it’s a good idea to disclose that the photo has been edited.
5.2. Authenticity
Consider the authenticity of your photos. While it’s fine to enhance your photos, avoid making changes that misrepresent reality or deceive viewers.
5.3. Respect
Be respectful of the people in your photos. Avoid making edits that could be harmful or offensive.
5.4. Consent
Get consent from the people in your photos before making significant edits to their appearance.
6. Savewhere.net: Your Resource for Financial Wisdom
At savewhere.net, we’re dedicated to helping you save money and make smart financial decisions. Just as you seek to preserve the authenticity of your photos, we aim to provide you with the most reliable and up-to-date financial advice.
6.1. Explore Money-Saving Tips
Discover practical tips and strategies to save money on everyday expenses. From groceries to travel, we’ve got you covered. Learn how to budget effectively, find the best deals, and maximize your savings.
6.2. Financial Literacy Resources
Enhance your financial knowledge with our comprehensive resources. Understand the basics of investing, retirement planning, and debt management. Make informed decisions that secure your financial future.
6.3. Exclusive Deals and Offers
Find exclusive deals and offers from top brands and retailers. Save money on your favorite products and services with our curated selection of discounts and promotions.
6.4. Community Support
Connect with a community of like-minded individuals who are passionate about saving money and achieving financial independence. Share your tips, ask questions, and get support from others on the same journey.
Alt text: Identifying the Magic Eraser icon on Snapchat for filter removal.
7. Real-Life Examples of Successful Filter Removal
To illustrate the effectiveness of these methods, here are a few real-life examples of how people have successfully removed Snapchat filters from saved photos.
7.1. Case Study 1: Removing a Skin-Smoothing Filter
Challenge: A user saved a photo with a skin-smoothing filter that made their skin look unnatural.
Solution: The user used Adobe Photoshop Fix to reduce the smoothing effect and restore some of the natural texture of their skin. They used the healing tool to remove any remaining blemishes and adjusted the sharpness to bring back some detail.
Result: The user was able to restore a more natural look to their photo while still maintaining some of the filter’s benefits.
7.2. Case Study 2: Correcting a Color Cast
Challenge: A user saved a photo with a filter that added a strong blue color cast to the image.
Solution: The user used Snapseed to adjust the color balance and remove the blue tint. They increased the red and yellow tones and fine-tuned the curves to restore the original colors of the scene.
Result: The user was able to remove the color cast and restore a more accurate representation of the scene.
7.3. Case Study 3: Removing an Unwanted Overlay
Challenge: A user saved a photo with a filter that added an unwanted overlay (e.g., a logo or text).
Solution: The user used the Clone Stamp tool in Photoshop to remove the overlay. They selected a source area near the overlay and carefully painted over it, using the source area as a reference.
Result: The user was able to remove the overlay and restore the original appearance of the photo.
8. Staying Updated with Snapchat Features
Snapchat is constantly evolving, with new features and updates being released regularly. Staying informed about these changes can help you make the most of the app and avoid common pitfalls.
8.1. Following Snapchat News and Updates
Keep an eye on Snapchat’s official blog, social media accounts, and news outlets to stay informed about new features and updates.
8.2. Exploring New Features
When a new feature is released, take the time to explore it and understand how it works. This can help you avoid making mistakes and discover new ways to enhance your photos and videos.
8.3. Providing Feedback
If you have suggestions for improving Snapchat or encounter any issues, provide feedback to the company. This can help shape the future of the app and make it more user-friendly.
8.4. Participating in Snapchat Communities
Join online communities and forums dedicated to Snapchat to share tips, ask questions, and learn from other users.
9. Call to Action: Start Saving Today with Savewhere.net
Ready to take control of your finances and start saving money today? Visit savewhere.net to explore our comprehensive resources, exclusive deals, and supportive community. Whether you’re looking to budget more effectively, find the best discounts, or enhance your financial knowledge, we’re here to help. Join us now and unlock the secrets to financial success.
Address: 100 Peachtree St NW, Atlanta, GA 30303, United States
Phone: +1 (404) 656-2000
Website: savewhere.net
Start your journey towards financial freedom today. At savewhere.net, we transform your saving potential into reality.
Alt text: Using the Magic Eraser on Snapchat to blur and remove unwanted objects.
10. Frequently Asked Questions (FAQs)
10.1. Can I remove a filter from a Snapchat photo after it has been saved to my camera roll?
Yes, you can remove or reduce the effects of a filter from a Snapchat photo saved to your camera roll by using third-party photo editing apps or online tools. These tools offer various adjustments and features to help you restore the original look of your photo.
10.2. Does Snapchat have a built-in feature to remove filters from saved photos?
No, Snapchat does not have a direct, built-in feature to remove filters from saved photos. However, the “Layers” feature, if available for the specific filter, may allow you to toggle off or remove the filter.
10.3. What are some recommended photo editing apps for removing Snapchat filters?
Some recommended photo editing apps for removing Snapchat filters include Adobe Photoshop Fix, Snapseed, VSCO, and PicsArt. These apps offer a range of tools, such as healing, smoothing, color correction, and sharpness adjustments, to help you reduce or remove filter effects.
10.4. Is it possible to completely remove a filter without any trace?
Completely removing a filter without any trace can be challenging, especially if the filter has significantly altered the photo. However, with careful adjustments and the use of advanced techniques like the Clone Stamp tool or frequency separation, you can often achieve a result that is very close to the original.
10.5. Are there any online tools that can help remove Snapchat filters?
Yes, several online photo editing tools can help remove Snapchat filters, including Fotor, PicMonkey, Canva, and LunaPic. These tools allow you to upload your photo and make adjustments without needing to download any software.
10.6. What is the Clone Stamp tool, and how can it help in removing filters?
The Clone Stamp tool is a photo editing tool that allows you to copy pixels from one area of the image to another. This can be useful for removing filter effects that have altered specific parts of the photo, such as overlays or blemishes.
10.7. What is frequency separation, and how does it work?
Frequency separation is an advanced photo editing technique that separates the image into high-frequency (details) and low-frequency (color and tone) layers. This allows you to adjust the color and tone without affecting the details, which can be useful for removing filter effects that have altered the overall color of the photo.
10.8. How can I prevent filter regret in the first place?
To prevent filter regret, take the time to preview filters carefully, save original photos in addition to filtered versions, use non-destructive editing techniques, and take breaks before saving photos to give yourself time to consider whether you truly like the effect.
10.9. Are there any ethical considerations when editing photos?
Yes, ethical considerations when editing photos include transparency, authenticity, respect, and consent. Be transparent about your edits, avoid misrepresenting reality, be respectful of the people in your photos, and get consent before making significant edits to their appearance.
10.10. Where can I find more tips and resources for saving money?
You can find more tips and resources for saving money at savewhere.net. Explore our comprehensive resources, exclusive deals, and supportive community to enhance your financial knowledge and achieve your savings goals.