Saving a picture with text on PowerPoint doesn’t have to be a financial burden; it’s about knowing the right techniques. At savewhere.net, we provide you with the savvy strategies to not only achieve this but also manage your finances effectively. Let’s explore how you can create stunning visuals while keeping more money in your pocket, offering financial tips, budgeting strategies, and smart spending habits.
1. What Is The Easiest Way To Save A Picture With Text On PowerPoint?
The easiest way to save a picture with text on PowerPoint is by grouping the picture and text box, then saving them as an image. This method allows you to combine elements and preserve their arrangement.
Step-by-Step Guide to Saving a Picture with Text
-
Insert Your Elements: Begin by inserting the picture and the text box onto your PowerPoint slide. Ensure they are positioned exactly as you want them to appear in the final image.
-
Group the Elements:
- Select both the picture and the text box. You can do this by holding down the
Shiftkey while clicking on each element. - Right-click on one of the selected elements.
- From the context menu, choose
Group>Group. This combines the picture and text box into a single object.
- Select both the picture and the text box. You can do this by holding down the
-
Save as Picture:
- Right-click on the grouped object.
- Select
Save as Picture.... - Choose a file name and select the desired image format (such as JPEG or PNG).
- Click
Save.
Optimizing for Different Use Cases
-
Presentations: Saving as a picture ensures that the text and image remain aligned, no matter the device or PowerPoint version used for the presentation.
-
Social Media: Creating visually appealing content with text overlay is essential for engaging social media posts.
-
Marketing Materials: Use this technique to create promotional images for your business, ensuring a consistent brand image.
By following these simple steps, you can easily save a picture with text on PowerPoint, making it a valuable skill for both personal and professional use.
2. How Do You Group Text And Images In PowerPoint?
Grouping text and images in PowerPoint is a simple process that allows you to treat multiple objects as a single unit, streamlining your design and saving time.
Steps to Group Text and Images
-
Select the Objects:
- Click on the first object (either the text box or the image).
- Hold down the
Shiftkey on your keyboard. - Click on the remaining objects you want to group. All selected objects will now be highlighted.
-
Access the Grouping Options:
- Right-click on any of the selected objects. A context menu will appear.
-
Group the Objects:
- In the context menu, hover over the
Groupoption. - Click
Groupfrom the submenu. This action combines the selected objects into a single, unified group.
- In the context menu, hover over the
Alternative Method Using the Ribbon
-
Select the Objects: Follow the same steps as above to select all the objects you want to group.
-
Navigate to the Format Tab:
- With the objects selected, a
Shape Formattab will appear on the PowerPoint ribbon. Click on this tab.
- With the objects selected, a
-
Use the Group Command:
- In the
Arrangegroup on the right side of theShape Formattab, click theGroupbutton. - Select
Groupfrom the dropdown menu.
- In the
Benefits of Grouping
-
Easy Manipulation: Once grouped, you can move, resize, rotate, or format all objects simultaneously, saving you time and ensuring consistency.
-
Maintained Alignment: Grouping ensures that the relative positions of the objects remain fixed, preventing accidental misalignments.
-
Simplified Animation: When applying animations, the entire group can be animated as a single entity, creating more dynamic and cohesive effects.
-
Better Organization: Grouping helps organize complex slides by treating related elements as a single, manageable component.
Grouping text and images in PowerPoint enhances your design workflow and ensures your slides look polished and professional.
3. Why Is PowerPoint A Great Tool For Saving Money?
PowerPoint can be a great tool for saving money because it offers versatile features for creating presentations, marketing materials, and educational content in-house, reducing the need for expensive external services.
Cost-Effective Presentation Tool
-
No Subscription Fees: PowerPoint is often included in Microsoft Office suites, which many businesses and individuals already own. This eliminates the need for additional subscription fees associated with specialized presentation software.
-
Professional Templates: PowerPoint offers a wide range of professionally designed templates that can be customized to suit your brand. Using these templates saves time and money compared to hiring a graphic designer to create custom designs from scratch.
-
Reusable Content: You can easily create and reuse slides, templates, and design elements across multiple presentations. This reusability reduces the time and effort required for each new project, translating to cost savings.
Marketing Material Creation
-
In-House Design: PowerPoint enables you to create marketing materials such as brochures, flyers, and social media graphics internally. This reduces reliance on external marketing agencies, which can be expensive.
-
Visual Communication: The software allows you to create visually compelling content using images, charts, and diagrams. Effective visual communication can improve marketing campaign results, increasing ROI.
-
Easy Updates: PowerPoint makes it easy to update marketing materials with new information or branding changes. This flexibility ensures that your materials remain current and relevant without incurring additional design costs.
Educational Content Development
-
Training Materials: PowerPoint is ideal for creating training modules, educational presentations, and instructional guides. Developing these materials in-house saves on outsourcing training development to external consultants.
-
Engaging Content: The software’s animation and multimedia capabilities allow you to create engaging and interactive educational content. This can improve knowledge retention and training effectiveness, leading to better performance and productivity.
-
Customizable Learning: PowerPoint allows you to customize learning materials to meet the specific needs of your audience. This targeted approach enhances the learning experience and ensures that training investments yield maximum results.
Collaborative Features
-
Team Collaboration: PowerPoint supports real-time collaboration, allowing multiple team members to work on the same presentation simultaneously. This streamlines the content creation process and reduces the time required to complete projects.
-
Feedback Integration: The software allows for easy integration of feedback and revisions. Team members can add comments and suggestions directly on the slides, facilitating a more efficient review process.
-
Version Control: PowerPoint’s version control features ensure that you can track changes and revert to previous versions if needed. This minimizes the risk of losing important work and reduces the potential for errors.
By leveraging PowerPoint for presentations, marketing materials, and educational content, individuals and businesses can significantly reduce costs and improve productivity, making it a great tool for saving money.
4. What Are The Best PowerPoint Alternatives For Saving Images With Text?
Several PowerPoint alternatives offer robust features for saving images with text, providing cost-effective and efficient solutions. These alternatives cater to different needs, from free, web-based tools to more comprehensive design platforms.
Canva
-
Overview: Canva is a popular online graphic design tool that offers a user-friendly interface and a wide range of templates. It’s excellent for creating social media graphics, presentations, and marketing materials.
-
Key Features:
- Drag-and-Drop Interface: Easy to use, even for beginners.
- Extensive Template Library: Thousands of professionally designed templates.
- Customizable Text Options: Wide range of fonts, styles, and effects.
- Image Editing Tools: Basic photo editing capabilities.
- Collaboration: Real-time collaboration with team members.
-
How to Save Images with Text:
- Create your design in Canva.
- Add text and images, positioning them as needed.
- Click
Downloadand choose your desired file format (JPEG, PNG, etc.).
-
Pricing: Free version available with limited features; Canva Pro offers more templates and tools for a monthly fee.
Google Slides
-
Overview: Google Slides is a free, web-based presentation program that is part of the Google Workspace suite. It’s a great option for collaborative projects and simple design tasks.
-
Key Features:
- Web-Based: Access from any device with an internet connection.
- Real-Time Collaboration: Multiple users can work on the same presentation simultaneously.
- Basic Image Editing: Crop, resize, and add basic effects to images.
- Text Customization: Choose from a variety of fonts and text styles.
- Integration with Google Drive: Seamlessly save and share your presentations.
-
How to Save Images with Text:
- Create your design in Google Slides.
- Add text boxes and images to your slide.
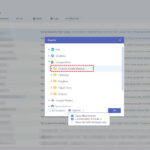
- Go to
File>Downloadand selectJPEG image (.jpg)orPNG image (.png).
-
Pricing: Free with a Google account.
Adobe Spark
-
Overview: Adobe Spark is a suite of design tools, including Spark Post for creating graphics and Spark Page for web pages. It’s ideal for creating social media content and visual stories.
-
Key Features:
- Easy-to-Use Interface: Simple and intuitive design tools.
- Pre-Designed Templates: Wide selection of templates for various purposes.
- Text Effects: Add animations, shadows, and other effects to text.
- Image Integration: Easily import and edit images from Adobe Creative Cloud.
- Branding Tools: Customize designs with your brand colors and logos.
-
How to Save Images with Text:
- Create your design in Adobe Spark Post.
- Add text and images, customizing their appearance.
- Click
Downloadand choose your desired file format.
-
Pricing: Free version available with limited features; Adobe Spark Premium is included with an Adobe Creative Cloud subscription.
Visme
-
Overview: Visme is a comprehensive visual communication platform that allows you to create presentations, infographics, and other types of visual content.
-
Key Features:
- Versatile Templates: Wide range of templates for different industries and purposes.
- Data Visualization: Create charts, graphs, and other data visualizations.
- Interactive Elements: Add animations, videos, and audio to your designs.
- Collaboration Tools: Share and collaborate on projects with team members.
- Branding Options: Customize designs with your brand assets.
-
How to Save Images with Text:
- Create your design in Visme.
- Add text, images, and other visual elements.
- Click
Downloadand select your desired file format.
-
Pricing: Free version available with limited features; paid plans offer more templates and tools.
These PowerPoint alternatives provide diverse options for saving images with text, catering to various needs and budgets. Whether you’re looking for a free tool like Google Slides or a comprehensive platform like Visme, there’s an alternative that can help you create stunning visuals.
5. How Can You Create Visually Appealing PowerPoint Slides While Saving Money?
Creating visually appealing PowerPoint slides while saving money involves leveraging free resources, optimizing design choices, and utilizing built-in features effectively. This approach ensures your presentations are engaging without breaking the bank.
Utilize Free Templates and Themes
-
Microsoft Office Templates: PowerPoint offers a variety of free templates and themes that can be customized to suit your needs. These templates provide a professional starting point and save time on design.
-
Third-Party Template Websites: Websites like SlidesCarnival, PresentationGo, and Canva offer free PowerPoint templates that are visually appealing and easy to customize. These templates often come with pre-designed layouts, color schemes, and font pairings.
-
Create Your Own Template: Design a simple template with your brand colors, logo, and preferred fonts. Save it as a
.potxfile in PowerPoint. This allows you to reuse the template for all your presentations, ensuring consistency and saving time.
Optimize Images and Graphics
-
Use Free Stock Photos: Websites like Unsplash, Pexels, and Pixabay offer high-quality, royalty-free images that can be used in your presentations. These sites provide a wide range of visuals to enhance your slides without incurring licensing fees.
-
Create Simple Graphics: Use PowerPoint’s built-in shapes and tools to create basic graphics and icons. The
Merge Shapesfeature allows you to combine different shapes to create custom designs. -
Compress Images: Large image files can slow down your presentation and increase its file size. Use PowerPoint’s
Compress Picturesfeature to reduce image file sizes without significantly affecting quality.
Choose Fonts Wisely
-
Use System Fonts: Stick to system fonts (e.g., Arial, Times New Roman, Calibri) that are pre-installed on most computers. This avoids compatibility issues and ensures your presentation looks consistent across different devices.
-
Google Fonts: Google Fonts offers a wide selection of free, high-quality fonts that can be downloaded and used in PowerPoint. Ensure that you embed the fonts in your presentation to avoid font substitution issues.
-
Limit Font Variety: Use a maximum of two or three different fonts in your presentation. This helps maintain a consistent and professional look.
Effective Use of Color
-
Choose a Consistent Color Palette: Select a color palette that aligns with your brand or the theme of your presentation. Use these colors consistently throughout your slides.
-
Use Color Contrast: Ensure that there is sufficient contrast between your text and background colors. This makes your text easier to read and improves the overall visual appeal of your slides.
-
Free Color Palette Tools: Use online tools like Coolors or Adobe Color to generate color palettes. These tools help you create visually harmonious color schemes.
Animate Sparingly
-
Subtle Animations: Use animations sparingly and choose subtle effects that enhance your message without distracting the audience. Simple fade or wipe transitions can add visual interest without being overwhelming.
-
Avoid Overuse of Effects: Too many animations and transitions can make your presentation look amateurish and detract from your message. Use animations only when they serve a clear purpose.
Leverage Built-In Features
-
SmartArt Graphics: Use PowerPoint’s SmartArt graphics to create visual representations of data and processes. These graphics are customizable and can add visual interest to your slides.
-
Charts and Graphs: Use PowerPoint’s built-in charting tools to create charts and graphs that illustrate your data. Customize the charts to match your presentation’s color scheme and style.
-
Slide Master: Use the Slide Master view to create consistent layouts and design elements across your presentation. This saves time and ensures that your slides have a professional look.
By leveraging free resources, optimizing design choices, and utilizing PowerPoint’s built-in features effectively, you can create visually appealing presentations that are both engaging and cost-effective.
6. What Free Resources Can Help You Enhance Your PowerPoint Presentations?
Enhancing your PowerPoint presentations doesn’t require spending a fortune. Numerous free resources are available to elevate your slides, from templates and images to fonts and design tools.
Templates and Themes
-
Microsoft Office Templates: PowerPoint offers a wide range of free templates directly within the application. These templates cover various themes and styles, providing a quick and easy way to create professional-looking presentations.
-
SlidesCarnival: SlidesCarnival offers a collection of free PowerPoint and Google Slides templates. Their templates are visually appealing, easy to customize, and suitable for various presentation topics.
-
PresentationGo: PresentationGo provides a variety of free PowerPoint templates, backgrounds, and graphics. Their resources are designed to help you create engaging and visually stunning presentations.
-
Canva: While Canva offers a premium subscription, it also has a selection of free presentation templates. These templates are user-friendly and can be customized to match your brand or topic.
Images and Graphics
-
Unsplash: Unsplash offers a vast library of high-resolution, royalty-free images. Their images are perfect for adding visual appeal to your PowerPoint slides without worrying about copyright issues.
-
Pexels: Pexels provides a collection of free stock photos and videos. Their resources are ideal for enhancing your presentations with high-quality visuals.
-
Pixabay: Pixabay offers a wide range of free images, videos, and music. Their resources can be used to create dynamic and engaging PowerPoint presentations.
-
The Noun Project: The Noun Project provides a collection of free icons that can be used to illustrate concepts and ideas in your presentations. Their icons are available in various styles and formats.
Fonts
-
Google Fonts: Google Fonts offers a vast library of free fonts that can be used in your PowerPoint presentations. Their fonts are easy to download and install, and they provide a wide range of styles to choose from.
-
Font Squirrel: Font Squirrel offers a collection of free fonts that are licensed for commercial use. Their fonts are high-quality and can be used to create visually appealing presentations.
Design Tools
-
Coolors: Coolors is a free color palette generator that helps you create visually harmonious color schemes for your presentations. Their tool allows you to generate, save, and export color palettes.
-
Adobe Color: Adobe Color provides a free tool for creating and exploring color palettes. Their tool allows you to create custom color schemes or browse existing palettes created by other users.
-
Remove.bg: Remove.bg is a free tool that removes the background from images. This tool is useful for creating clean and professional-looking PowerPoint slides.
Tips and Tutorials
-
YouTube: YouTube is a great resource for finding PowerPoint tutorials and tips. Many channels offer free videos that cover various topics, from basic techniques to advanced design strategies.
-
Microsoft Office Support: Microsoft Office Support provides a comprehensive library of articles and tutorials for PowerPoint. Their resources cover various topics, from creating basic presentations to using advanced features.
-
Blogs and Forums: Numerous blogs and forums offer tips and advice on creating effective PowerPoint presentations. These resources can provide valuable insights and inspiration for your own presentations.
By leveraging these free resources, you can enhance your PowerPoint presentations without incurring additional costs. Whether you need templates, images, fonts, or design tools, these resources offer a wealth of options to help you create visually stunning and engaging slides.
7. How To Ensure The Text Is Readable When Saving Pictures With Text On PowerPoint?
Ensuring text readability when saving pictures with text on PowerPoint involves careful consideration of font choices, color contrast, text size, and image resolution. Optimizing these elements will enhance the clarity and impact of your message.
Font Choices
-
Choose Clear Fonts: Select fonts that are easy to read. Sans-serif fonts like Arial, Helvetica, and Calibri are generally more legible than serif fonts like Times New Roman or Garamond, especially at smaller sizes.
-
Avoid Decorative Fonts: Steer clear of overly decorative or script fonts, as they can be difficult to read, particularly when overlaid on images.
-
Limit Font Variety: Use a maximum of two to three different fonts in your design. Too many font styles can make your design look cluttered and unprofessional.
Color Contrast
-
Ensure High Contrast: Make sure there is sufficient contrast between your text color and the background image. Light text on a dark background or dark text on a light background typically works best.
-
Use Color Palette Tools: Use online tools like Coolors or Adobe Color to select color palettes that provide good contrast and visual harmony.
-
Test Readability: Before finalizing your design, test the readability of your text on different screens and devices to ensure it is legible.
Text Size
-
Choose Appropriate Size: Select a text size that is large enough to be easily read but not so large that it overwhelms the image. A minimum font size of 16 points is generally recommended for body text.
-
Consider Viewing Distance: If your image will be viewed from a distance, increase the text size accordingly to ensure readability.
Image Resolution
-
Use High-Resolution Images: Start with high-resolution images to ensure that the text remains clear when the image is scaled or zoomed.
-
Optimize Image Size: While high resolution is important, avoid using excessively large image files, as they can slow down your presentation and increase its file size.
-
Save in the Right Format: Save your image in a format that preserves text clarity. PNG is generally better for text and graphics, while JPEG is better for photographs.
Text Placement
-
Avoid Busy Areas: Place your text in areas of the image that are relatively uncluttered and have a consistent background color.
-
Use Text Boxes: Use text boxes with solid or semi-transparent backgrounds to create a clear area for your text.
-
Consider Alignment: Align your text consistently within the image. Left alignment is generally easier to read than centered or justified alignment.
Add Visual Aids
-
Use Shadows or Outlines: Add a subtle shadow or outline to your text to help it stand out from the background image.
-
Create a Focal Point: Use visual cues like arrows or highlights to draw attention to your text and make it more prominent.
-
Test with Real Users: Ask colleagues or friends to review your design and provide feedback on the readability of your text.
By carefully considering font choices, color contrast, text size, image resolution, and text placement, you can ensure that the text in your PowerPoint images is readable and effective.
8. What Are The Common Mistakes To Avoid When Saving A Picture With Text On PowerPoint?
When saving a picture with text on PowerPoint, several common mistakes can compromise the quality and readability of your image. Avoiding these pitfalls will ensure your visuals are professional and effective.
Neglecting Image Resolution
-
Saving with Low Resolution: One of the most common mistakes is saving images with low resolution. This results in blurry or pixelated text and graphics, especially when the image is scaled up or viewed on larger screens.
-
Solution: Always start with high-resolution images and choose a suitable resolution when saving. For web use, 150-300 DPI is generally sufficient, while print materials may require 300 DPI or higher.
Poor Font Choices
-
Using Unreadable Fonts: Selecting fonts that are difficult to read, such as overly decorative or script fonts, is a common mistake. These fonts can strain the eyes and make it hard to grasp the message.
-
Solution: Opt for clear, legible fonts like Arial, Helvetica, or Calibri. Limit the number of font styles to maintain consistency and readability.
Insufficient Color Contrast
-
Low Contrast Between Text and Background: When the text color is too similar to the background color, the text becomes difficult to read. This is a common oversight that can significantly reduce the effectiveness of your image.
-
Solution: Ensure there is high contrast between your text and background. Use light text on dark backgrounds or dark text on light backgrounds. Use color palette tools to select visually harmonious and accessible color schemes.
Overcrowding the Image
-
Adding Too Much Text: Cramming too much text into an image can make it look cluttered and overwhelming. This makes it hard for viewers to focus on the key message.
-
Solution: Keep your text concise and to the point. Use bullet points or short phrases to convey information. Leave ample white space around your text to improve readability.
Incorrect File Format
-
Saving in the Wrong Format: Choosing the wrong file format can affect the quality and file size of your image. For example, saving a graphic with lots of text as a JPEG can result in a loss of clarity.
-
Solution: Use PNG for graphics with text, as it preserves clarity and detail. Use JPEG for photographs or images with complex color gradients.
Ignoring Text Placement
-
Placing Text in Busy Areas: Placing text over busy or distracting areas of the image can make it difficult to read. The text should be placed in a clear, uncluttered area.
-
Solution: Choose areas of the image with a consistent background color or use a semi-transparent background behind the text to improve readability.
Overusing Effects
-
Applying Excessive Effects: Overusing shadows, outlines, or other effects can make the text look artificial and difficult to read.
-
Solution: Use effects sparingly and subtly. Ensure that any effects you apply enhance rather than detract from the readability of the text.
Neglecting Accessibility
-
Ignoring Accessibility Guidelines: Failing to consider accessibility guidelines can exclude viewers with disabilities. This includes issues like color contrast, font sizes, and alternative text for images.
-
Solution: Use appropriate color contrast ratios, choose legible font sizes, and add alternative text to images to provide context for screen readers.
Failing to Preview
-
Not Previewing the Final Image: A common mistake is not previewing the final image before saving it. This can lead to overlooking issues like poor resolution, incorrect text placement, or low contrast.
-
Solution: Always preview your image at different sizes and on different devices to ensure that it looks good and is easy to read.
By avoiding these common mistakes, you can ensure that your images with text are visually appealing, easy to read, and effective at conveying your message.
9. How Can savewhere.net Help You Save Money On PowerPoint And Other Presentation Tools?
savewhere.net can assist you in saving money on PowerPoint and other presentation tools by providing insights, resources, and strategies to optimize your software usage and explore cost-effective alternatives.
Providing Information on Free Alternatives
-
Identifying Free Tools: savewhere.net offers comprehensive guides and reviews of free presentation tools such as Google Slides, Canva (free version), and LibreOffice Impress. These alternatives can perform many of the same functions as PowerPoint without the cost of a subscription.
-
Comparison Charts: Detailed comparison charts highlight the features, benefits, and limitations of various free presentation tools, helping you make an informed decision based on your specific needs.
Offering Tips on PowerPoint Optimization
-
Maximizing Existing Features: savewhere.net provides tips and tutorials on leveraging PowerPoint’s built-in features to their full potential. This includes using free templates, optimizing image sizes, and utilizing SmartArt graphics to create visually appealing presentations without additional expenses.
-
Cost-Effective Design Strategies: Practical advice on creating professional-looking presentations using free resources and design principles. This can reduce the need for expensive graphic design services.
Showcasing Discounts and Deals
-
Tracking Software Deals: savewhere.net monitors and shares discounts, promotions, and special offers on PowerPoint and other presentation software. This ensures you get the best possible price if you decide to purchase or subscribe.
-
Bundle Offers: Information on bundle offers where PowerPoint is included in a Microsoft Office suite or other software packages, which can be more cost-effective than purchasing PowerPoint separately.
Recommending Educational Resources
-
Free Online Courses: savewhere.net recommends free online courses and tutorials on platforms like YouTube, Coursera, and Udemy that teach you how to use PowerPoint and other presentation tools effectively. This helps you develop the skills needed to create high-quality presentations without paying for expensive training.
-
Community Forums: Links to online forums and communities where you can ask questions, share tips, and learn from other users of PowerPoint and presentation software.
Sharing Strategies for Efficient Usage
-
Time-Saving Tips: savewhere.net offers time-saving tips and shortcuts for creating presentations quickly and efficiently. This reduces the amount of time you spend on each project, freeing up time for other tasks and potentially saving on labor costs.
-
Collaboration Tools: Guidance on using PowerPoint’s collaboration features to work effectively with team members, reducing the need for in-person meetings and travel expenses.
Highlighting Open-Source Solutions
-
Exploring Open-Source Software: savewhere.net introduces open-source presentation software options that are free to use and often offer similar capabilities to commercial tools.
-
User Guides and Support: Resources for finding user guides, tutorials, and community support for open-source presentation software, ensuring you can use these tools effectively.
Providing Budgeting Advice
-
Financial Planning Tips: savewhere.net offers budgeting advice to help you allocate resources effectively for software and technology needs. This includes assessing your actual requirements and avoiding unnecessary expenses.
-
Cost-Benefit Analysis: Guidance on performing a cost-benefit analysis to determine whether investing in premium presentation software is justified based on your specific needs and usage patterns.
By leveraging these resources and insights from savewhere.net, you can make informed decisions about your presentation software and strategies, ultimately saving money while still creating compelling and effective presentations.
10. What Are Some Advanced Techniques For Enhancing Text In PowerPoint Pictures?
Advanced techniques for enhancing text in PowerPoint pictures involve using sophisticated design principles, creative effects, and advanced software features to make your text visually striking and highly readable.
Utilizing Advanced Font Effects
-
Text Outlines and Shadows: Adding subtle outlines or shadows to your text can help it stand out from the background. Experiment with different colors, sizes, and opacities to find the perfect effect.
-
Gradients and Text Fills: Use gradients or textured fills for your text to add depth and visual interest. PowerPoint allows you to create custom gradients or use pre-set options.
-
3D Text Effects: Apply 3D effects to your text to create a sense of depth and dimension. Use the 3D rotation and perspective tools to customize the appearance of your text.
Creative Text Placement
-
Text Masking: Use text as a mask to reveal parts of an image. This technique involves placing text over an image and then using the
Merge Shapesfeature to create a custom shape that reveals the underlying image within the text. -
Curved Text: Use the
Transformoptions to bend or curve your text along a path. This can add a dynamic and creative touch to your designs. -
Text Wrapping: Wrap text around objects or shapes in your image. This technique involves creating a text box and then adjusting the text wrapping settings to fit the text around the object.
Advanced Image Manipulation
-
Color Grading: Use color grading techniques to adjust the colors in your image and create a cohesive look. This can involve adjusting the brightness, contrast, saturation, and hue of your image.
-
Blur Effects: Apply blur effects to your image to create a sense of depth or to soften the background and make your text stand out.
-
Overlay Effects: Use overlay effects to add textures, patterns, or colors to your image. This can add visual interest and create a unique look.
Using Blend Modes
-
Experiment with Blend Modes: PowerPoint supports various blend modes that allow you to blend your text with the underlying image. Experiment with different blend modes like
Multiply,Screen, orOverlayto see how they affect the appearance of your text. -
Create Unique Effects: Use blend modes to create unique and visually striking effects. For example, you can use the
Overlayblend mode to add texture to your text or theMultiplyblend mode to darken your text and make it stand out.
Advanced Animation Techniques
-
Kinetic Typography: Use kinetic typography to animate your text in a dynamic and engaging way. This involves animating the individual letters, words, or phrases in your text to create a visually interesting effect.
-
Morph Transitions: Use morph transitions to create smooth and seamless transitions between different text elements or images. This can add a professional and polished look to your presentations.
-
Interactive Text: Create interactive text elements that respond to user actions, such as hovering or clicking. This can add a layer of engagement and interactivity to your presentations.
Integrating External Tools
-
Adobe Photoshop: Use Adobe Photoshop to create advanced text effects or manipulate your images. You can then import your Photoshop creations into PowerPoint.
-
Adobe Illustrator: Use Adobe Illustrator to create vector-based text and graphics. Vector graphics are scalable and can be used without losing quality.
-
Third-Party Plugins: Explore third-party plugins that offer advanced text effects or image manipulation capabilities. These plugins can extend the functionality of PowerPoint and allow you to create even more stunning visuals.
By mastering these advanced techniques, you can elevate your PowerPoint pictures to new heights and create visually compelling presentations that captivate your audience.
Address: 100 Peachtree St NW, Atlanta, GA 30303, United States.
Phone: +1 (404) 656-2000.
Website: savewhere.net.
Ready to transform your presentations and save money? Visit savewhere.net today to explore more tips, discover exclusive deals, and connect with a community of savvy savers in the USA. Start your journey to financial empowerment now!
Frequently Asked Questions About Saving Pictures with Text on PowerPoint
1. Can I save a PowerPoint slide with text and images as a high-resolution image?
Yes, you can save a PowerPoint slide with text and images as a high-resolution image by right-clicking on the slide in the slide sorter view and selecting “Save as Picture.” Choose a high-resolution format like PNG or TIFF and adjust the resolution settings if available.
2. How do I ensure the text remains clear when saving a PowerPoint slide as an image?
To ensure the text remains clear, use high-resolution images and save the slide in a format like PNG, which preserves text clarity better than JPEG. Also, make sure the text size is large enough and the font is easily readable.
3. Is it possible to save only a portion of a PowerPoint slide as an image?
Yes, group the objects you want to save as an image, then right-click on the grouped object and select “Save as Picture.” This allows you to save only the selected portion of the slide.
4. What’s the best file format for saving a PowerPoint slide with text and images for web use?
For web use, PNG is generally the best file format as it provides good compression and preserves the clarity of text and images. JPEG can also be used, but it may result in some loss of quality, especially with text.
5. How can I save a PowerPoint slide as an image without the background?
To save a PowerPoint slide as an image without the background, ensure that the slide background is transparent. Then, save the slide as a PNG file, which supports transparency.
6. Can I save a PowerPoint slide with animated text as a video or GIF?
Yes, you can save a PowerPoint slide with animated text as a video or GIF by using the “Export” function and selecting the desired video format (like MP4) or creating an animated GIF.
7. How do I prevent text from becoming blurry when saving a PowerPoint slide as a JPEG?
To prevent text from becoming blurry, use a higher quality setting when saving as a JPEG. Also, consider using PNG format for slides with a lot of text, as it handles text more effectively.
8. What are the steps to save a grouped object (text and image) as a picture in PowerPoint?
First, select both the text box and the image. Right-click and choose “Group” > “Group.” Then, right-click on the grouped object and select “Save as Picture,” choosing your desired file format and location.
9. How can I maintain the aspect ratio when saving a PowerPoint slide as an image?
To maintain the aspect ratio, ensure that you do not stretch or distort the slide elements when designing it. When saving, choose a resolution that matches the slide’s aspect ratio to avoid distortion.
10. Is there a way to batch save multiple PowerPoint slides as images?
Yes, you can batch save multiple PowerPoint slides as images by going to “File” > “Save As” and selecting a folder. Choose the “JPEG File Interchange Format” or “PNG Portable Network Graphics Format” as the file type. PowerPoint will save each slide as a separate image in the selected folder.