Saving a screen, whether you call it capturing, saving, or grabbing, is a skill that will save you time and stress. Are you looking for ways to capture what’s on your screen for future reference, tutorials, or sharing? This comprehensive guide, brought to you by savewhere.net, provides you with all the methods for saving your screen on a Mac, ensuring you never miss important information again. Let’s explore the various options.
1. Why Should I Save My Screen on a Mac?
Saving your screen, or taking a screenshot, on a Mac can be incredibly useful in various situations. There are a ton of reasons to use the grab feature. Here are just a few:
- Preserving Information: Capture important data, receipts, or instructions displayed on your screen before they disappear.
- Creating Tutorials: Show others how to use software or complete tasks with visual aids.
- Sharing Information: Easily share visual information with friends, family, or colleagues.
- Troubleshooting: Document errors or problems to get assistance from technical support.
- Inspiration: Save inspiring images, designs, or quotes you find online.
2. What Are the Different Methods to Save a Screen on Mac?
There are multiple ways to save a screen on a Mac, each offering different levels of control and flexibility. Let’s explore them:
2.1 Using Keyboard Shortcuts
Keyboard shortcuts are the quickest and most efficient way to save your screen on a Mac.
- Shift-Command-3: This shortcut captures the entire screen and saves it as a file on your desktop.
 Keyboard shortcut for capturing the entire screen: Shift, Command, and 3.
- Shift-Command-4: This shortcut allows you to select a specific portion of the screen to capture.
 Keyboard shortcut for selecting a portion of the screen: Shift, Command, and 4.
*   Press and release these three keys together: **Shift, Command, and 4.** The pointer turns into a crosshair.
*   To select the area of the screen to capture, click and hold your mouse or trackpad button while dragging the crosshair. Then take any of these actions:
    *   To take the screenshot, release the mouse or trackpad button.
    *   To cancel the screenshot, press the Esc (Escape) key.
* To move the area you selected without changing its size, press and hold Space bar while dragging.- Shift-Command-5: This shortcut opens the Screenshot app, providing additional options and controls.
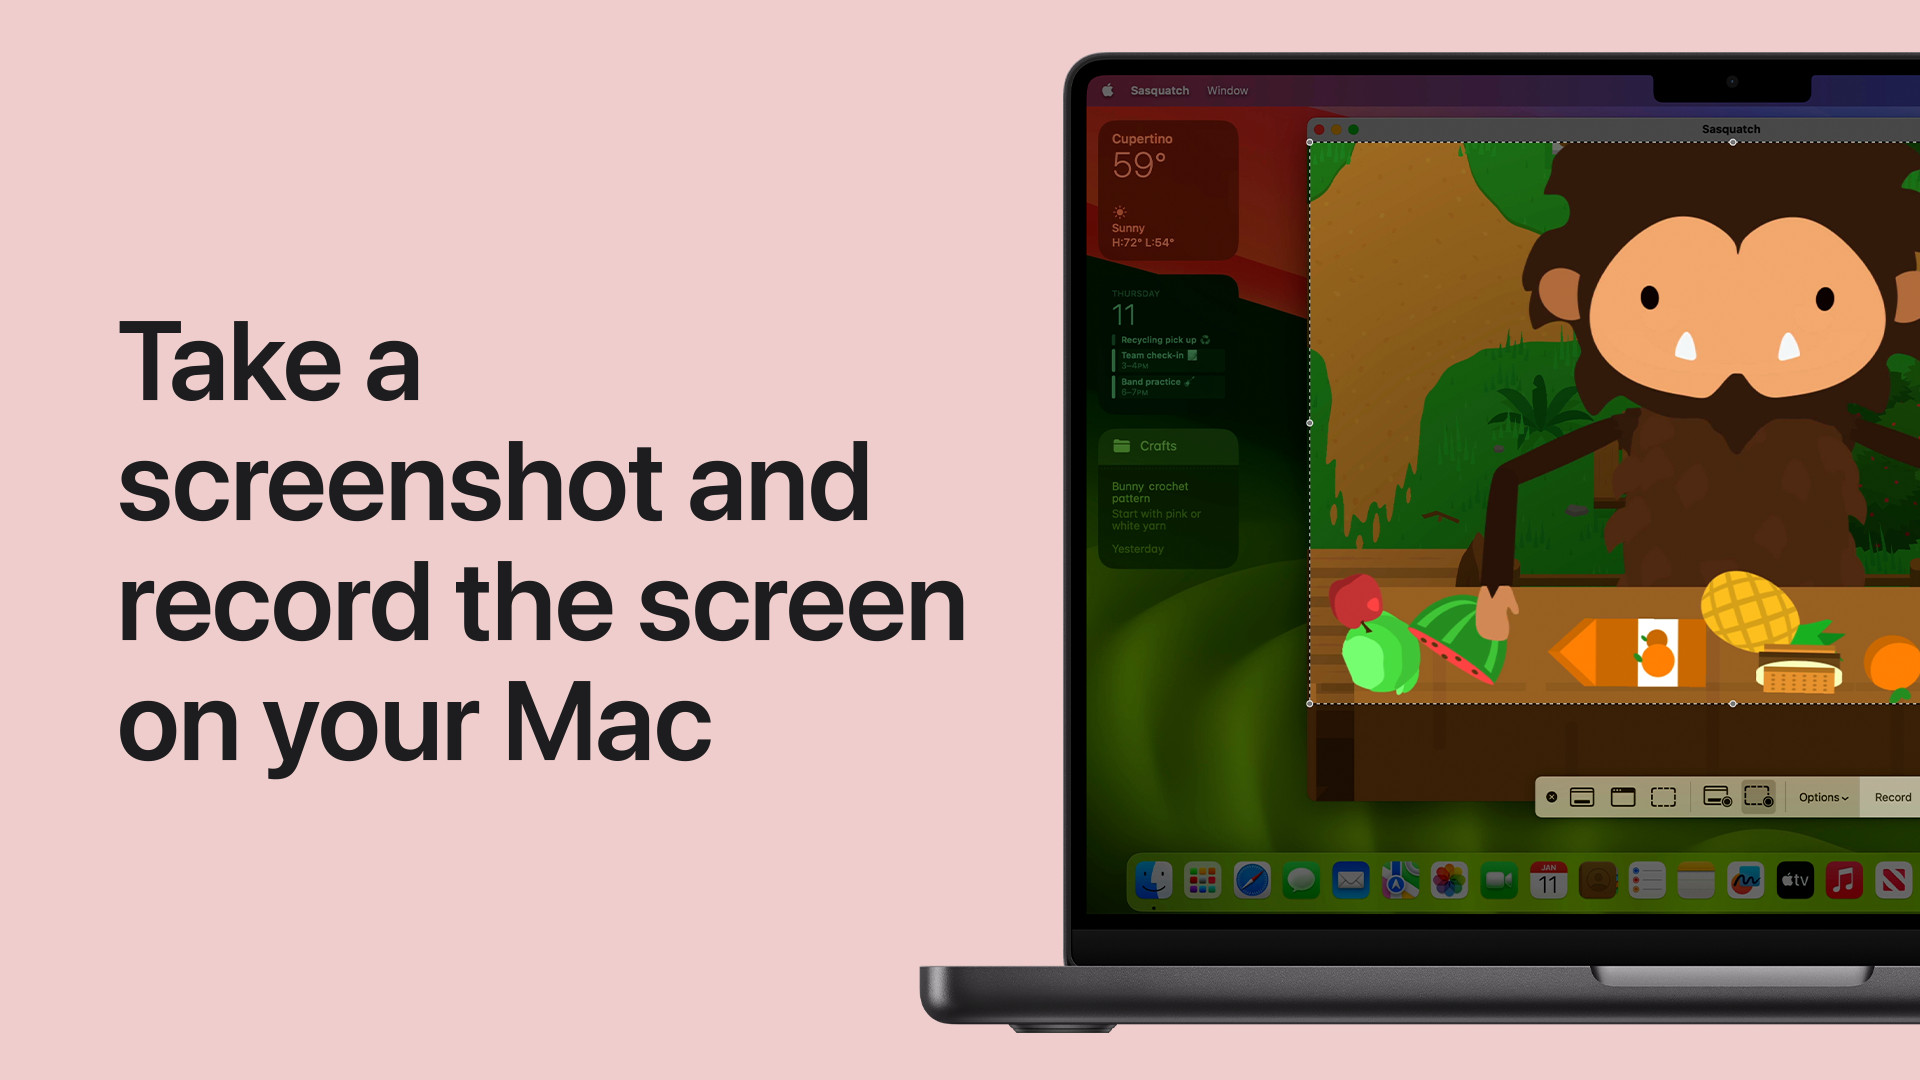
2.2 Using the Screenshot App
Introduced in macOS Mojave (10.14), the Screenshot app offers a more comprehensive set of tools for capturing and recording your screen.
- Accessing the Screenshot App: Press Shift-Command-5 to launch the Screenshot app. Alternatively, you can find it in the Utilities folder within your Applications folder.
- Screenshot App Interface: The Screenshot app presents a toolbar at the bottom of your screen with various options.
- Capture Entire Screen: This option captures the entire screen, similar to the Shift-Command-3 shortcut.
- Capture Selected Window: This option allows you to select a specific window to capture.
- Capture Selected Portion: This option allows you to draw a rectangle around the area you want to capture, similar to the Shift-Command-4 shortcut.
- Record Entire Screen: This option starts recording a video of your entire screen.
- Record Selected Portion: This option allows you to select a specific area of the screen to record.
- Options: This menu provides additional settings, such as choosing where to save the screenshot, setting a timer, and showing or hiding the mouse pointer.
- Taking a Screenshot with the Screenshot App:
- Select the desired capture option (e.g., Capture Selected Portion).
- If you chose Capture Selected Portion, click and drag to select the area you want to capture.
- Click the “Capture” button in the toolbar.
- The screenshot will be saved to the location specified in the Options menu (usually the desktop).
2.3 Using QuickTime Player
QuickTime Player, primarily known for playing media files, also offers screen recording capabilities.
- Opening QuickTime Player: Launch QuickTime Player from your Applications folder.
- Starting a New Screen Recording:
- In the QuickTime Player menu bar, choose File > New Screen Recording.
- The Screen Recording window will appear.
- Recording Options:
- Click the arrow next to the record button to access recording options.
- You can choose to record audio from your microphone.
- You can also choose to show mouse clicks in the recording.
- Starting and Stopping the Recording:
- Click the record button to start recording.
- You can choose to record the entire screen or a selected portion.
- To record a selected portion, drag a rectangle around the area you want to record.
- Click the “Start Recording” button within the selected area.
- To stop the recording, click the stop button in the menu bar or press Command-Control-Esc.
- Saving the Recording:
- QuickTime Player will automatically open the recorded video.
- Choose File > Save to save the recording to your desired location.
3. What Are the Benefits of Using the Screenshot App?
The Screenshot app offers several advantages over basic keyboard shortcuts:
- More Options: It provides a wider range of capture and recording options.
- Customization: You can customize settings like save location, timer, and mouse pointer visibility.
- User-Friendly Interface: The toolbar makes it easy to access different features.
- Screen Recording: It allows you to record videos of your screen, which is not possible with keyboard shortcuts alone.
4. How Can I Annotate Screenshots on Mac?
After capturing a screenshot, you can annotate it to add notes, highlights, or other markings.
4.1 Using the Markup Toolbar
When you take a screenshot, a thumbnail appears in the corner of your screen. Clicking this thumbnail opens the Markup toolbar, which provides various annotation tools:
- Sketch: Draw freeform shapes.
- Draw: Draw precise lines and shapes.
- Shapes: Add pre-defined shapes like rectangles, circles, and arrows.
- Text: Add text boxes to the screenshot.
- Sign: Add your signature to the screenshot.
- Adjust Color: Change the color of the annotations.
- Adjust Style: Change the thickness and style of lines and borders.
4.2 Using Preview
You can also open screenshots in the Preview app for more advanced annotation options:
- Opening the Screenshot in Preview: Double-click the screenshot file to open it in Preview.
- Accessing the Markup Toolbar: Click the Markup toolbar button (a toolbox icon) in the Preview window.
- Annotation Tools: The Markup toolbar in Preview offers the same tools as the one that appears after taking a screenshot, along with additional options like:
- Redact: Hide sensitive information by blurring or blacking out portions of the screenshot.
- Magnify: Zoom in on specific areas of the screenshot.
5. Where Are My Screenshots Saved?
By default, screenshots are saved to your desktop with the name “Screen Shot [date] at [time].png”. However, you can change the default save location using the Screenshot app:
- Opening the Screenshot App: Press Shift-Command-5 to launch the Screenshot app.
- Accessing Options: Click the “Options” menu in the toolbar.
- Choosing a Save Location: Select a new save location from the dropdown menu, such as Documents, Mail, or Other Location.
6. How Can I Copy a Screenshot to the Clipboard?
If you want to quickly paste a screenshot into another application without saving it as a file, you can copy it to the clipboard:
- Using Keyboard Shortcuts: Press Control in addition to the standard screenshot shortcut (e.g., Control-Shift-Command-3 to capture the entire screen to the clipboard).
- Using the Markup Toolbar: After taking a screenshot, Control-click the thumbnail in the corner of your screen and choose “Copy to Clipboard”.
7. How to Save a Specific Window on Mac?
To save a specific window on your Mac, follow these steps:
-
Open the Window: Make sure the window you want to capture is open and active.
-
Use the Shortcut: Press
Shift-Command-4. Your cursor will turn into a crosshair. -
Select the Window: Press the
Spacebar. The crosshair will turn into a camera icon. -
Click the Window: Click on the window you want to capture. The screenshot will be saved to your desktop.
-
Exclude Shadow (Optional): If you don’t want the window’s shadow in the screenshot, press and hold the
Optionkey while clicking the window.
 Save specific window on Mac
8. What Are Some Advanced Tips and Tricks for Saving a Screen on Mac?
Here are some advanced tips and tricks to enhance your screen-saving experience:
- Using the Timer: The Screenshot app allows you to set a timer before capturing the screen. This is useful if you need to set up the screen before the capture occurs.
- Hiding Desktop Icons: If you want to capture a clean screenshot without desktop icons, you can temporarily hide them by using the Terminal command
defaults write com.apple.finder CreateDesktop -bool false; killall Finder. To show them again, usedefaults write com.apple.finder CreateDesktop -bool true; killall Finder. - Customizing Keyboard Shortcuts: You can customize keyboard shortcuts for taking screenshots in System Preferences > Keyboard > Shortcuts > Screenshots.
9. How Do I Record a Video of My Screen on Mac?
Recording a video of your screen can be useful for creating tutorials, presentations, or capturing gameplay.
9.1 Using the Screenshot App
The Screenshot app, introduced in macOS Mojave, offers a convenient way to record your screen.
- Open the Screenshot App: Press
Shift-Command-5to launch the Screenshot app. - Choose Recording Option: Select either “Record Entire Screen” or “Record Selected Portion.”
- “Record Entire Screen” will record everything happening on your display.
- “Record Selected Portion” allows you to draw a rectangle around the area you want to record.
- Start Recording: Click the “Record” button.
- Stop Recording: Click the “Stop” button in the menu bar or press
Command-Control-Esc. - Save Recording: The recording will be saved to your desktop by default. You can change the save location in the “Options” menu of the Screenshot app.
9.2 Using QuickTime Player
QuickTime Player, a pre-installed application on macOS, also provides screen recording capabilities.
- Open QuickTime Player: Launch QuickTime Player from your Applications folder.
- Start New Screen Recording: In the menu bar, choose
File > New Screen Recording. - Recording Controls: A small recording control panel will appear.
- Start Recording: Click the “Record” button.
- Select Area to Record: You can choose to record the entire screen or a selected portion.
- To record the entire screen, click anywhere on the screen.
- To record a selected portion, drag a rectangle around the area you want to record and then click “Start Recording” within the selected area.
- Stop Recording: Click the “Stop” button in the menu bar or press
Command-Control-Esc. - Save Recording: QuickTime Player will open the recorded video. Choose
File > Saveto save the recording to your desired location.
10. What to Do if Screenshots Are Not Saving?
If you encounter issues with screenshots not saving on your Mac, here are a few troubleshooting steps:
- Check Save Location: Ensure that the save location is set correctly in the Screenshot app or QuickTime Player.
- Check Disk Space: Make sure you have enough free disk space on your Mac.
- Reset Screenshot Settings: Reset the Screenshot app settings by deleting the
com.apple.screencapture.plistfile from your Preferences folder in the Library folder. - Restart Your Mac: A simple restart can often resolve minor software glitches.
11. How Can SaveWhere.net Help Me Save Money?
Now that you know how to save your screen on a Mac, let’s talk about saving money with savewhere.net. SaveWhere.net is your go-to resource for finding deals, discounts, and money-saving tips in the USA, particularly in high-cost-of-living areas like Atlanta.
11.1 Finding Deals and Discounts
SaveWhere.net offers a comprehensive database of deals and discounts on various products and services. Whether you’re looking for savings on groceries, dining, entertainment, or travel, SaveWhere.net has you covered.
11.2 Budgeting and Financial Planning
SaveWhere.net provides resources and tools to help you create a budget and manage your finances effectively. You can find articles, guides, and templates to help you track your spending, set financial goals, and save money.
11.3 Practical Money-Saving Tips
SaveWhere.net shares practical tips and strategies for saving money in your daily life. These tips cover a wide range of topics, including:
- Shopping: How to find the best deals, use coupons, and avoid impulse purchases.
- Eating Out: How to save money on dining by cooking at home, using restaurant coupons, and taking advantage of happy hour specials.
- Transportation: How to save money on transportation by using public transit, carpooling, or biking.
- Entertainment: How to find free or low-cost entertainment options in your area.
11.4 Community and Inspiration
SaveWhere.net fosters a community of like-minded individuals who are passionate about saving money. You can connect with others, share your own tips and experiences, and find inspiration to stay motivated on your savings journey.
12. How to Share Screenshots on Social Media?
Sharing screenshots on social media can be a great way to share information, showcase achievements, or simply have fun. Here’s how you can easily share your screenshots:
- Take a Screenshot: Use any of the methods described above to capture your screen.
- Locate the Screenshot: By default, screenshots are saved to your desktop with the name “Screen Shot [date] at [time].png.”
- Open Social Media Platform: Go to the social media platform you want to share the screenshot on (e.g., Facebook, Twitter, Instagram).
- Create a New Post: Start creating a new post on the platform.
- Upload the Screenshot:
- Facebook: Click the “Add Photo/Video” button and select the screenshot from your desktop.
- Twitter: Click the “Add Photo” button and select the screenshot from your desktop.
- Instagram: Open the Instagram app on your phone, tap the “+” button, and select the screenshot from your photo library.
- Add a Caption: Write a caption to provide context or commentary on the screenshot.
- Post: Click the “Post” or “Share” button to publish your screenshot on social media.
13. How to Anonymize Screenshots Before Sharing?
Before sharing screenshots, it’s essential to ensure that you’re not inadvertently sharing sensitive or private information. Here’s how to anonymize screenshots:
- Take a Screenshot: Capture the screen you want to share.
- Open in Preview: Double-click the screenshot to open it in the Preview app.
- Use the Markup Toolbar: Click the Markup toolbar button (a toolbox icon) in the Preview window.
- Redact Sensitive Information:
- Click the “Redact” tool in the Markup toolbar (it looks like a filled rectangle).
- Drag the cursor over the areas you want to hide, such as names, email addresses, or account numbers.
- The selected areas will be blacked out or blurred, depending on your settings.
- Save the Anonymized Screenshot: Choose
File > Saveto save the modified screenshot. - Share the Screenshot: You can now safely share the anonymized screenshot on social media or any other platform.
14. How to Organize Your Screenshots?
As you take more screenshots, it’s essential to organize them so you can quickly find what you need. Here are some tips for organizing your screenshots:
- Create Folders:
- Create folders on your desktop or in your Documents folder to categorize your screenshots.
- For example, you might have folders for “Work,” “Personal,” “Tutorials,” and “Inspiration.”
- Rename Screenshots:
- Rename your screenshots with descriptive names that make it easy to identify their content.
- For example, instead of “Screen Shot 2024-06-09 at 10.30.00 AM.png,” you might use “Website Design Inspiration.png” or “Troubleshooting Error Message.png.”
- Use Tags:
- macOS allows you to add tags to files, which can be a useful way to categorize and search for screenshots.
- To add a tag, right-click on the screenshot file, choose “Tags,” and select or create a tag.
- Use a Screenshot Management Tool:
- Consider using a dedicated screenshot management tool like Snagit or CloudApp, which offer advanced features for organizing, annotating, and sharing screenshots.
- Regularly Clean Up:
- Set aside time to regularly review your screenshots and delete any that are no longer needed.
- This will help you keep your screenshot collection organized and manageable.
15. FAQ About Saving a Screen on Mac
Here are some frequently asked questions about saving a screen on Mac:
- How do I take a screenshot of the entire screen on Mac?
- Press
Shift-Command-3to capture the entire screen and save it as a file on your desktop.
- Press
- How do I capture a specific portion of the screen?
- Press
Shift-Command-4, then click and drag to select the area you want to capture.
- Press
- Where are screenshots saved by default?
- Screenshots are saved to your desktop with the name “Screen Shot [date] at [time].png.”
- How do I copy a screenshot to the clipboard?
- Press
Control-Shift-Command-3to capture the entire screen to the clipboard, orControl-Shift-Command-4to capture a selected portion.
- Press
- How do I record a video of my screen on Mac?
- Use the Screenshot app (
Shift-Command-5) or QuickTime Player (File > New Screen Recording).
- Use the Screenshot app (
- Can I change the default save location for screenshots?
- Yes, you can change the save location in the Options menu of the Screenshot app.
- How do I annotate screenshots on Mac?
- Click the thumbnail that appears after taking a screenshot to open the Markup toolbar, or open the screenshot in Preview.
- How do I hide sensitive information in a screenshot before sharing it?
- Open the screenshot in Preview and use the Redact tool in the Markup toolbar to black out or blur sensitive areas.
- What should I do if screenshots are not saving on my Mac?
- Check the save location, ensure you have enough disk space, reset screenshot settings, or restart your Mac.
- Is there a way to take timed screenshots on a Mac?
- Yes, using the Screenshot app by pressing
Shift-Command-5, you can set a timer in the Options menu to delay the screenshot capture.
- Yes, using the Screenshot app by pressing
Saving your screen on a Mac is a valuable skill for various purposes, from preserving information to creating tutorials. By mastering the different methods and tips outlined in this guide, you can efficiently capture and share your screen content. And while you’re saving screens, don’t forget to visit savewhere.net to discover ways to save money in your daily life.
Ready to start saving both screens and money? Visit savewhere.net today to explore more tips, discounts, and resources that can help you manage your finances effectively and achieve your financial goals. With savewhere.net, you can discover deals, find financial strategies, and connect with a community focused on smart spending. Don’t miss out on the opportunity to enhance your financial well-being!
Address: 100 Peachtree St NW, Atlanta, GA 30303, United States
Phone: +1 (404) 656-2000
Website: savewhere.net