
Saving your Live Photos as videos is a great way to share memories in a dynamic format, and at savewhere.net, we’re all about finding smart solutions to enhance your digital life while keeping your budget in check. It’s simpler than you think! Let’s explore easy ways to convert those lively moments into shareable videos. Thinking about file formats, efficient storage, and budget-friendly options? Keep reading!
1. What Is A Live Photo And Why Convert It To Video?
A Live Photo is more than just a still image; it’s a brief, moving snapshot. When you capture a Live Photo on your iPhone, your device records a few seconds of video both before and after you press the shutter button. This results in a photo that comes to life when you touch and hold it, revealing movement and sound.
1.1. Benefits Of Converting To Video
- Shareability: Videos are universally compatible and easily shared across various platforms like Instagram, Facebook, WhatsApp, and more.
- Accessibility: Not all devices and platforms support Live Photos natively. Converting to video ensures that everyone can view your memories, regardless of their device.
- Storage: While individual Live Photos might not take up significantly more space than regular photos, converting multiple Live Photos into a single video can be more storage-efficient.
- Creative Editing: Once converted to video, you can further edit and enhance your memories using video editing tools. Add music, text, transitions, and more to create engaging content.
- Preservation: Converting your Live Photos to video format ensures that your memories are preserved in a widely supported format, reducing the risk of future compatibility issues.
2. How To Convert A Live Photo To Video On iPhone
Converting a Live Photo to video on your iPhone is a straightforward process. Here are a few simple methods:
2.1. Using The Built-In Photos App
This method is the quickest and easiest, utilizing the native functionality of your iPhone.
- Open the Photos app: Locate and tap the Photos app icon on your iPhone’s home screen.
- Select the Live Photo: Navigate to the Live Photo you wish to convert.
- Tap the Share button: This is the square icon with an arrow pointing upwards, located in the bottom-left corner of the screen.
- Scroll down and select “Save as Video”: This option will save the Live Photo as a video file in your Camera Roll.
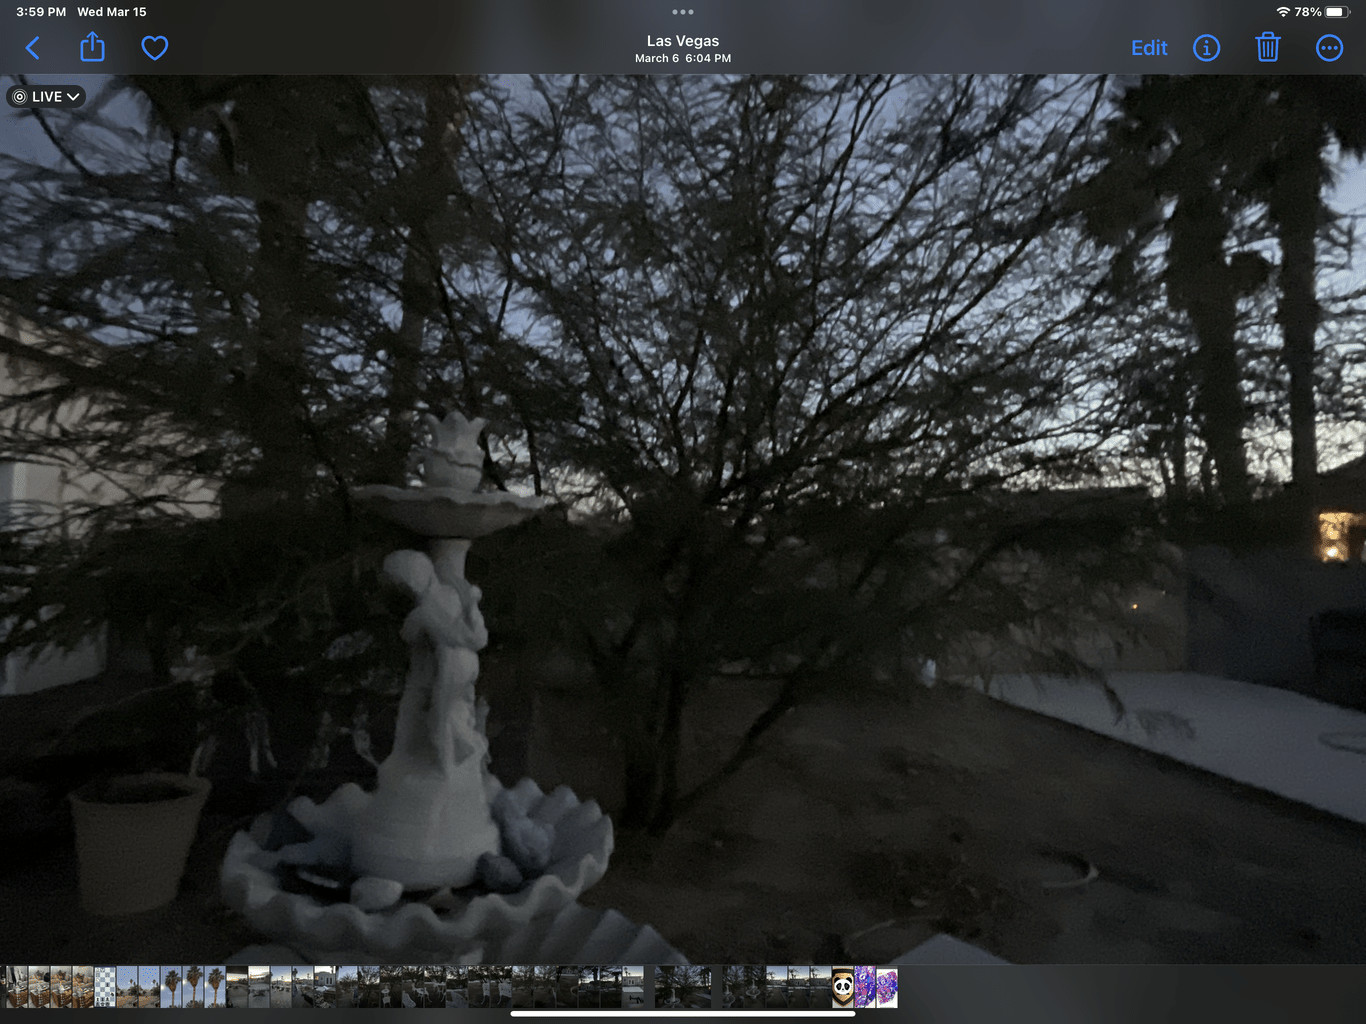 Share button on iPhone
2.2. Using iMovie
iMovie is a free video editing app by Apple that offers more control over the conversion process.
- Download iMovie: If you don’t already have it, download iMovie from the App Store.
- Create a new project: Open iMovie and tap the “+” icon to start a new project. Select “Movie.”
- Import the Live Photo: Tap “Create Movie” then select the Live Photo you want to convert.
- Edit (optional): Trim, adjust, or add effects as desired.
- Export as a video: Tap “Done,” then tap the Share button (square with an arrow), and select “Save Video.” Choose your desired resolution and save the video to your Camera Roll.
2.3. Using Third-Party Apps
Several third-party apps in the App Store specialize in converting Live Photos to videos. These apps often offer additional features like looping, trimming, and adding filters. Some popular options include:
- Motion Stills: A Google app that allows you to create looping GIFs and videos from Live Photos.
- intoLive: An app that converts Live Photos into GIFs or videos with customizable loop settings.
- Lively: A simple app designed specifically for converting Live Photos to GIFs and videos.
To use these apps, simply download them from the App Store, grant them access to your Photos library, and follow their specific instructions to convert your Live Photos.
3. How To Convert Multiple Live Photos To Video On iPhone
Creating a video from multiple Live Photos can tell a more complete story. Here’s how to do it seamlessly on your iPhone:
3.1. Using The Photos App (iOS 16 And Later)
Apple has streamlined the process of combining multiple Live Photos into a single video with iOS 16 and later versions.
- Open the Photos App: Launch the Photos app on your iPhone.
- Select Multiple Live Photos:
- Tap “Select” in the upper-right corner of the screen.
- Choose the Live Photos you want to include in your video.
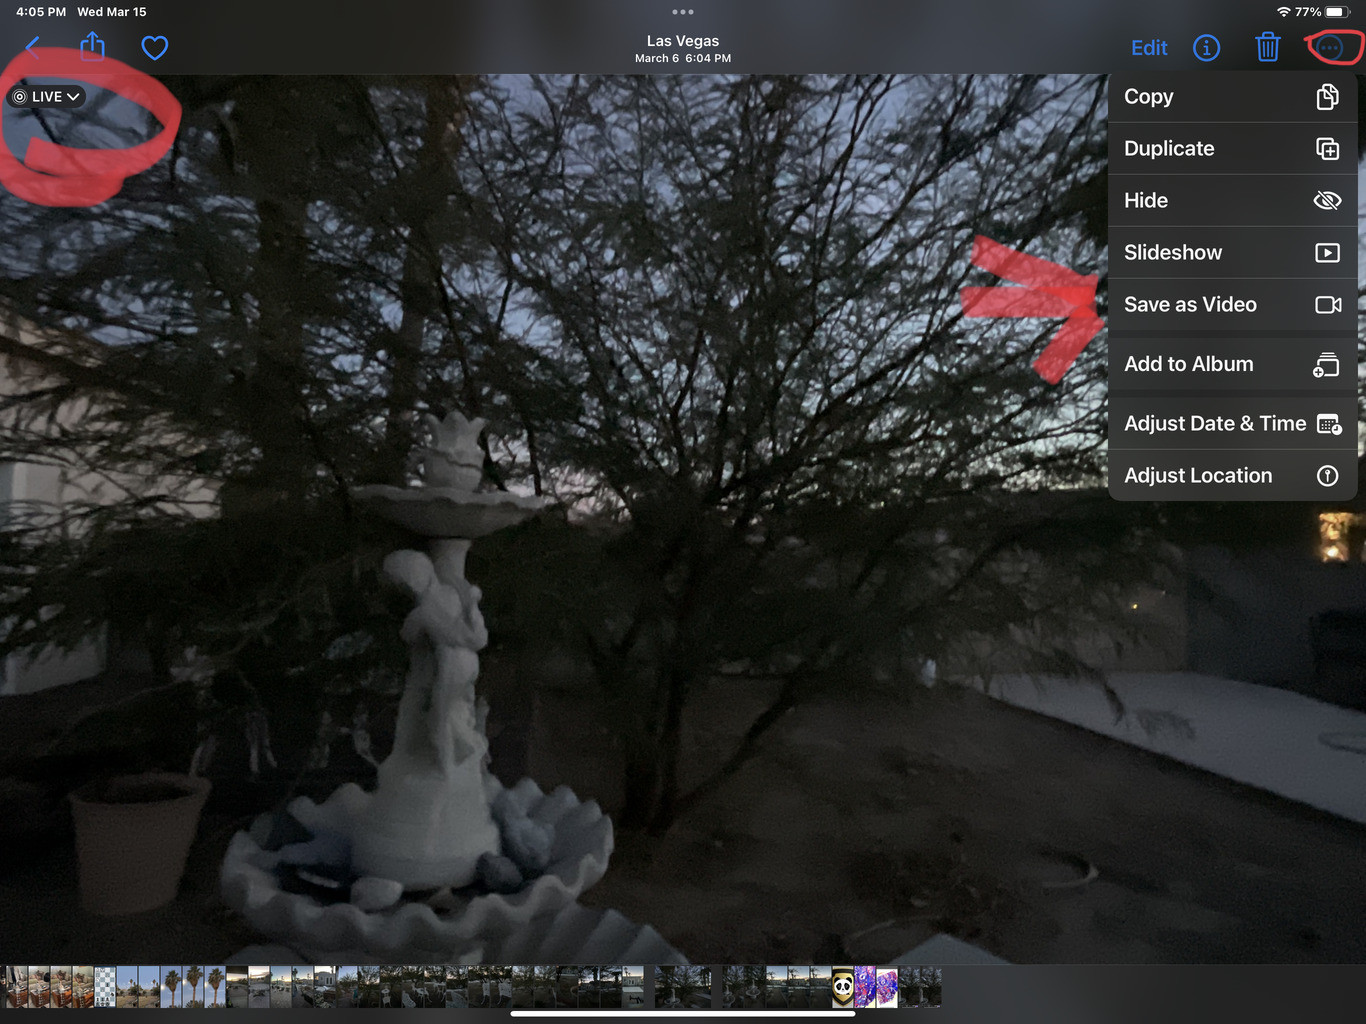
- Access the “Save as Video” Option:
- Tap the three dots “…” at the bottom-right corner of the screen.
- Select “Save as Video” from the menu.
 Select multiple photos
3.2. Using iMovie
iMovie offers greater flexibility and creative control when combining multiple Live Photos.
- Open iMovie: Launch the iMovie app on your iPhone.
- Start a New Project:
- Tap the “+” icon to create a new project.
- Select “Movie.”
- Import the Live Photos:
- Select all the Live Photos you wish to include in your video.
- Tap “Create Movie.”
- Arrange and Edit:
- Drag and drop the clips to arrange them in your desired sequence.
- Trim clips, add transitions, insert text, and apply filters to enhance your video.
- Export the Video:
- Tap “Done” in the upper-left corner.
- Tap the Share button (square with an arrow).
- Select “Save Video.”
- Choose your preferred resolution and save the video to your Camera Roll.
3.3. Third-Party Apps
Many third-party apps specialize in merging multiple Live Photos into videos, offering advanced features and customization options.
- PicPlayPost: Allows you to create video collages and slideshows using Live Photos and other media.
- FilmoraGo: A comprehensive video editing app with a user-friendly interface and powerful editing tools.
- VivaVideo: Offers a wide range of editing features, including transitions, effects, and music integration.
To use these apps:
- Download and Install: Download your chosen app from the App Store.
- Import Live Photos: Import the Live Photos you want to combine into the app.
- Arrange and Edit: Arrange the photos, add transitions, and customize the video as desired.
- Export the Video: Save the final video to your Camera Roll or share it directly to social media platforms.
4. Editing Your Converted Video
Once you’ve converted your Live Photo(s) to video, you might want to enhance it further. Here are some basic editing tips:
4.1. Trimming
- Purpose: Remove unnecessary footage from the beginning or end of your video.
- How to: In the Photos app, open the video, tap “Edit,” and drag the sliders at either end of the timeline. In iMovie or third-party apps, use the trim tool to adjust the clip length.
4.2. Adding Filters
- Purpose: Enhance the visual appeal of your video with color grading and effects.
- How to: In the Photos app, tap “Edit” and select the filter icon. Choose from a variety of preset filters. iMovie and third-party apps offer a wider range of filters and customization options.
4.3. Adding Text And Titles
- Purpose: Provide context, add titles, or include captions in your video.
- How to: In iMovie or third-party apps, use the text tool to add and customize text overlays. Adjust the font, size, color, and placement of the text to suit your video.
4.4. Adding Music
- Purpose: Create an emotional connection and enhance the viewing experience with background music.
- How to: In iMovie or third-party apps, import music from your library or use royalty-free music provided by the app. Adjust the volume of the music to ensure it doesn’t overpower the audio from the Live Photo.
4.5. Adjusting Speed
- Purpose: Speed up or slow down sections of your video for dramatic or comedic effect.
- How to: In iMovie or third-party apps, use the speed tool to adjust the playback speed of your video clips. Experiment with different speeds to achieve the desired effect.
5. Sharing Your Video
Once you’re satisfied with your converted and edited video, it’s time to share it with the world. Here are several ways to share your video:
5.1. Social Media
- Platforms: Share your video on platforms like Instagram, Facebook, Twitter, TikTok, and more.
- How to:
- Save the Video: Ensure your video is saved to your Camera Roll.
- Open the Social Media App: Launch the social media app of your choice.
- Create a New Post: Tap the “+” icon or the “New Post” button.
- Select the Video: Choose the video from your Camera Roll.
- Add a Caption: Write a compelling caption to engage your audience.
- Share: Post the video to your profile.
5.2. Messaging Apps
- Platforms: Send your video via messaging apps like WhatsApp, Telegram, Messenger, and iMessage.
- How to:
- Open the Messaging App: Launch the messaging app.
- Select a Contact: Choose the contact you want to send the video to.
- Attach the Video: Tap the attachment icon (usually a “+” or a paperclip) and select the video from your Camera Roll.
- Send: Send the video to the selected contact.
5.3. Email
- Platforms: Share your video via email using apps like Gmail, Outlook, or the built-in Mail app on your iPhone.
- How to:
- Open the Email App: Launch your email app.
- Create a New Email: Tap the “Compose” button.
- Add Recipient: Enter the recipient’s email address.
- Add Subject: Write a subject line for your email.
- Attach the Video: Tap the attachment icon and select the video from your Camera Roll.
- Send: Send the email with the attached video.
5.4. Cloud Storage
- Platforms: Store and share your video via cloud storage services like Google Drive, Dropbox, or iCloud.
- How to:
- Open the Cloud Storage App: Launch your preferred cloud storage app.
- Upload the Video: Tap the “+” icon or the “Upload” button and select the video from your Camera Roll.
- Share the Link: Once the video is uploaded, generate a shareable link and send it to your friends and family.
6. Troubleshooting Common Issues
Sometimes, converting Live Photos to video can present a few challenges. Here are some common issues and how to troubleshoot them:
6.1. “Save As Video” Option Is Missing
Problem: The “Save as Video” option is not available in the share sheet.
Solutions:
- Ensure it’s a Live Photo: Confirm that the photo is indeed a Live Photo by checking for the “Live” badge in the top-left corner.
- Restart the Photos app: Close and reopen the Photos app to refresh the options.
- Update iOS: Make sure your iPhone is running the latest version of iOS. Go to Settings > General > Software Update to check for updates.
- Check for Live Effects: If the Live Photo has a Live effect applied (e.g., Loop, Bounce), revert it to the original Live Photo before saving as a video.
6.2. Video Quality Is Poor
Problem: The converted video appears pixelated or of low quality.
Solutions:
- Choose a higher resolution: When exporting the video, select a higher resolution option (e.g., 1080p or 4K).
- Use a different app: Try converting the Live Photo using a different app, as some apps may offer better compression algorithms.
- Check original Live Photo quality: Ensure that the original Live Photo is of good quality, as the video quality cannot exceed the quality of the source material.
6.3. Audio Is Missing Or Distorted
Problem: The converted video has no audio or the audio is distorted.
Solutions:
- Check the original Live Photo: Ensure that the original Live Photo has audio and that it is not muted.
- Adjust audio settings: In the video editing app, check the audio settings and make sure the volume is turned up.
- Use a different app: Try converting the Live Photo using a different app, as some apps may handle audio differently.
6.4. Video Is Not Saving
Problem: The video conversion process fails and the video is not saved to your Camera Roll.
Solutions:
- Check storage space: Make sure you have enough free storage space on your iPhone.
- Restart your iPhone: Restarting your iPhone can resolve temporary software glitches.
- Use a different app: Try converting the Live Photo using a different app to see if the issue persists.
6.5. App Crashes During Conversion
Problem: The app crashes or freezes during the video conversion process.
Solutions:
- Close other apps: Close any other apps running in the background to free up memory.
- Update the app: Make sure you are using the latest version of the app.
- Reinstall the app: Uninstall and reinstall the app to resolve any corrupted files.
7. Optimizing Videos For Sharing
To ensure your videos look their best when shared, consider these optimization tips:
7.1. Resolution And Aspect Ratio
- Resolution: Choose a resolution that balances quality and file size. 1080p (1920×1080) is generally a good choice for most platforms. For higher quality and larger screens, consider 4K (3840×2160).
- Aspect Ratio: Use the correct aspect ratio for the platform you’re sharing on. Common aspect ratios include:
- 16:9: For YouTube, Vimeo, and general video playback.
- 1:1: For Instagram posts.
- 9:16: For Instagram Stories, TikTok, and Snapchat.
7.2. File Format
- MP4: MP4 is the most widely supported video format and is recommended for sharing on most platforms. It offers good compression and quality.
- MOV: MOV is Apple’s native video format and is also widely supported. It’s a good choice if you’re primarily sharing videos with other Apple users.
7.3. Compression
- Bitrate: Adjust the video bitrate to balance file size and quality. A higher bitrate results in better quality but also a larger file size. Experiment with different bitrates to find the optimal setting for your video.
- Codec: H.264 is the most common video codec and offers good compression and quality. H.265 (HEVC) is a newer codec that offers even better compression but may not be supported by all devices and platforms.
7.4. File Size
- Consider platform limits: Be aware of the file size limits imposed by the platforms you’re sharing on. For example, Twitter has a video file size limit of 512MB, while Instagram has a limit of 650MB.
- Compress if necessary: If your video file is too large, use a video compression tool to reduce the file size without sacrificing too much quality.
7.5. Audio Levels
- Ensure consistent levels: Adjust the audio levels to ensure that the audio is clear and consistent throughout the video.
- Avoid clipping: Prevent audio clipping (distortion) by keeping the audio levels below the maximum.
- Add background music: Add background music to enhance the viewing experience, but make sure it doesn’t overpower the primary audio.
8. Understanding Video File Formats And Codecs
When working with video files, it’s essential to understand the different file formats and codecs available. Here’s a brief overview:
8.1. File Formats
- MP4 (MPEG-4 Part 14): A widely supported container format that can store video, audio, and metadata. It’s commonly used for online video streaming and sharing.
- MOV (QuickTime Movie): Apple’s native video format, commonly used for storing video and audio on macOS and iOS devices.
- AVI (Audio Video Interleave): An older container format developed by Microsoft. It’s less commonly used today due to its large file sizes and limited codec support.
- WMV (Windows Media Video): A proprietary video format developed by Microsoft. It’s primarily used on Windows-based systems.
- MKV (Matroska Video): A flexible and open-source container format that can store an unlimited number of video, audio, and subtitle tracks.
8.2. Codecs
- H.264 (Advanced Video Coding): The most widely used video codec, offering good compression and quality. It’s supported by most devices and platforms.
- H.265 (High Efficiency Video Coding): A newer codec that offers even better compression than H.264, resulting in smaller file sizes with comparable quality.
- VP9: An open-source video codec developed by Google. It’s commonly used for online video streaming, particularly on YouTube.
- AV1 (AOMedia Video 1): A royalty-free video codec developed by the Alliance for Open Media. It’s designed to be a successor to VP9 and offers even better compression efficiency.
- MPEG-2: An older video codec used for DVD video and broadcast television.
9. Live Photos And Storage Efficiency
Managing storage on your iPhone is crucial, especially when dealing with Live Photos and videos. Here are some tips to optimize storage efficiency:
9.1. Cloud Storage
- iCloud Photos: Enable iCloud Photos to automatically upload your photos and videos to the cloud. This frees up space on your device while keeping your memories safe and accessible.
- Google Photos: Google Photos offers free unlimited storage for photos and videos (with some compression). It’s a great option for backing up your media and freeing up space on your iPhone.
- Dropbox: Dropbox is a versatile cloud storage service that can be used to store and share your photos and videos.
9.2. External Storage
- Lightning Flash Drives: Use a Lightning flash drive to transfer photos and videos from your iPhone to an external storage device. This allows you to free up space on your iPhone without deleting your memories.
- Portable Hard Drives: Connect a portable hard drive to your computer and transfer your photos and videos from your iPhone to the hard drive.
9.3. Compression
- Compress Videos: Use video compression tools to reduce the file size of your videos without sacrificing too much quality. This can help you save storage space on your iPhone and in the cloud.
- Optimize Photos: Enable the “Optimize iPhone Storage” option in iCloud Photos settings. This will automatically replace full-resolution photos and videos on your device with smaller, optimized versions.
9.4. Regular Cleaning
- Delete Unnecessary Files: Regularly review your photos and videos and delete any unnecessary files, such as duplicates, blurry photos, and unwanted videos.
- Clear Cache: Clear the cache of your apps to free up storage space. Go to Settings > General > iPhone Storage and tap on individual apps to clear their cache.
10. Financial Benefits Of Efficient Media Management
Efficiently managing your Live Photos and videos can also have financial benefits. Here’s how:
10.1. Avoiding Additional Storage Costs
- Optimize Storage: By optimizing your media storage, you can avoid the need to purchase additional iCloud storage or other cloud storage plans.
- Free Up Device Space: Efficient media management can free up space on your iPhone, allowing you to avoid upgrading to a higher-capacity device.
10.2. Saving On Data Costs
- Compress Videos: Compressing videos before sharing them can reduce the amount of data consumed, saving you money on data charges.
- Use Wi-Fi: Upload and download photos and videos over Wi-Fi instead of using cellular data to avoid data charges.
10.3. Extending The Life Of Your Devices
- Maintain Performance: By keeping your iPhone’s storage optimized, you can maintain its performance and extend its lifespan. This can delay the need to purchase a new device, saving you money in the long run.
- Reduce Wear And Tear: Efficient media management can reduce wear and tear on your iPhone’s storage, prolonging its lifespan.
10.4. Utilizing Free Resources
- Free Apps: Take advantage of free apps like Google Photos and Motion Stills to manage and convert your Live Photos and videos without incurring any costs.
- Free Cloud Storage: Utilize free cloud storage options like Google Photos to back up your media without paying for additional storage.
FAQ: Saving Live Photos As Videos
1. Can I convert a Live Photo to video without losing quality?
Yes, you can! When saving a Live Photo as a video, especially using the built-in Photos app or iMovie, the quality remains high. Third-party apps might compress the video a bit, so check their settings for quality options.
2. Will converting a Live Photo to video save storage space?
Sometimes, yes! It depends on how you manage your files. Converting multiple Live Photos into a single video can be more space-efficient than keeping each Live Photo separately. Plus, you can then back up the video to cloud storage and remove the original Live Photos from your device.
3. Is it possible to revert a Live Photo back to its original form after converting it to video?
The conversion is non-destructive. The original Live Photo remains in your library, so you’re simply creating a video file from it. You can always access and use the Live Photo as before.
4. Why is the ‘Save as Video’ option missing on my iPhone?
This usually happens if the photo isn’t actually a Live Photo, or if there’s a glitch. Make sure the “Live” icon is visible on the photo. If it is, try restarting the Photos app or your iPhone.
5. Can I combine Live Photos and regular videos into one video project?
Absolutely! Apps like iMovie let you seamlessly mix Live Photos (converted to video) and regular videos. This is great for creating highlight reels or storytelling videos.
6. How do I share a Live Photo as a video on platforms that don’t support Live Photos?
Converting the Live Photo to video is the perfect solution. Once it’s a video, you can share it on any platform, like Instagram, Facebook, or WhatsApp, without compatibility issues.
7. Are there any free apps that do a good job of converting Live Photos to videos?
Yes, several! iMovie (from Apple) is free and excellent. Google’s Motion Stills is another great option, known for creating smooth, looping GIFs and videos from Live Photos.
8. Can I edit the duration of the video when converting a Live Photo?
Yes, you can trim the video to the desired length using the Photos app or iMovie. This is useful if you only want to share a specific part of the Live Photo’s motion.
9. What video format should I choose when saving a Live Photo as a video?
MP4 is the most universally compatible format. It works well on almost all devices and platforms, making it the best choice for sharing.
10. How do I ensure the audio from my Live Photo is included when I save it as a video?
Most conversion methods automatically include the audio. If you’re using a third-party app, double-check the settings to ensure the audio option is enabled.
Conclusion
Converting Live Photos to videos on your iPhone is a fantastic way to share dynamic memories with friends and family, regardless of the devices they use. By following the simple methods outlined in this guide, you can easily transform your Live Photos into engaging videos, optimize them for sharing, and manage your storage efficiently.
Remember to explore the various editing options available to enhance your videos and make them even more captivating. And don’t forget to leverage cloud storage and other optimization techniques to save money and extend the life of your devices.
Visit savewhere.net today to discover more ways to save money and enhance your digital lifestyle. Explore our tips, tricks, and resources to make the most of your technology while staying within your budget. Join our community of savvy savers and start making your money work harder for you!
Address: 100 Peachtree St NW, Atlanta, GA 30303, United States
Phone: +1 (404) 656-2000
Website: savewhere.net