Saving videos from Final Cut Pro can feel overwhelming, but is it really that difficult, and how can you ensure your finished projects are perfect? At savewhere.net, we break down the process into simple, actionable steps to help you master exporting your videos while saving time and resources. Let’s explore how to optimize your workflow and achieve professional results with ease. You will also discover crucial settings, formats, and troubleshooting tips to make your video creation journey smoother.
1. Project Review and Preparation
Why should you double-check your Final Cut Pro project before exporting?
Before exporting, thoroughly reviewing your Final Cut Pro project is vital to prevent time-consuming re-exports. Multiple exports can waste significant time. Ensure accuracy by checking for typos in captions and lower thirds, unusual edits, and inconsistencies in the audio mix, helping you avoid common video editing mistakes.
Spending a few extra minutes to review your project meticulously can save you hours of frustration and rework. Ensuring everything is polished guarantees a professional final product. Pay close attention to details like color correction, audio levels, and transitions. If possible, get a fresh pair of eyes to review your project; they may spot errors you’ve missed.
2. Initiating the Export Process
Where do I find the export options in Final Cut Pro?
To start exporting, navigate to the top-right corner of Final Cut Pro and click the ‘Share’ icon. The primary option is ‘Export File (default)’. Selecting this allows you to customize your export settings and save the project locally, giving you full control over the final output.
Alternatively, for direct uploads to platforms like YouTube and Facebook, there’s a ‘YouTube and Facebook’ export option. However, even with this, your project is still saved as a local file. This is a convenient shortcut for quick sharing while maintaining a local backup of your work.
 Share icon in Final Cut Pro, highlighting the 'Export File (default)' option
3. File Metadata Configuration
How important is metadata when exporting from Final Cut Pro?
Metadata is crucial because it helps organize your files on your Mac and significantly improves your video’s SEO on platforms like YouTube. Precise titles, descriptions, and tags ensure your video is easily discoverable by viewers.
The ‘Info’ tab in the export window allows you to edit this metadata. Matching the file name to your online video title is a best practice. Key video details such as resolution, frame rate, audio channel, and video length are displayed for reference. While these can’t be changed directly in this tab, they provide a useful overview of your project’s specifications. Metadata can boost visibility and save time managing files.
4. Adjusting Export Settings
What are the key export settings to consider in Final Cut Pro?
In the ‘Settings’ tab, you can adjust critical export parameters. The ‘Format’ option lets you select the file type, with MP4 being the most versatile choice for online platforms. You can also choose between Apple Devices (M4V) and Web Hosting (MOV), depending on your specific needs.
- Apple Devices: Use this format for projects intended for Apple devices. M4V files are compatible with both macOS and Windows.
- Web Hosting: Select this to create MOV files, primarily for QuickTime Player but also playable on Windows.
- Computer: This option exports your project as an MP4, ideal for YouTube, TikTok, Facebook, and other video-hosting platforms.
Choosing the right format depends on your intended use, ensuring compatibility and optimal quality.
How can I optimize video quality when exporting from Final Cut Pro?
Under the ‘Video Codec’ section, selecting ‘H.264 Better Quality’ is advisable for superior video quality. Although it takes longer to export, the resulting video is noticeably better. Unless you have a strict time constraint, this option is preferable for professional-looking results.
The ‘Resolution’ tab should typically be set to ‘1920 x 1080’, the standard for YouTube and similar platforms. If your footage was shot and edited in 4K, you’ll have additional higher-resolution options. Leaving ‘Color Space’ and ‘Audio Format’ at their default settings is generally recommended unless you have specific requirements.
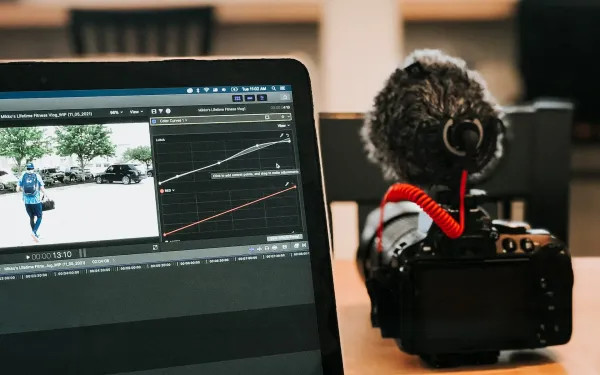
 Collaborating in Final Cut Pro for optimized video exports
How do chapter markers enhance the viewing experience on Final Cut Pro?
Checking the ‘Chapter Markers’ box allows viewers to skip to specific sections of your video, similar to YouTube videos or DVDs. This feature is beneficial for longer videos, improving user experience by allowing quick navigation to relevant content.
Under the ‘Action’ option, clicking ‘Save Only’ ensures your file is saved locally, giving you complete control over its subsequent use. This is particularly useful for archiving or further editing.
5. Exporting Roles as Separate Media
When should I export roles as separate media in Final Cut Pro?
Exporting roles separately is useful when sharing your project with others or as part of a larger project. This involves splitting elements like video, audio, and subtitles into individual files, similar to stems in music production.
To do this, click the ‘Roles’ tab and confirm the elements you want to separate. This step is generally unnecessary if you’re simply uploading your video to YouTube or another similar platform. It’s more relevant for collaborative projects or advanced editing workflows.
6. Finalizing the Export
What’s the final step in exporting my video from Final Cut Pro?
After configuring all settings, click the ‘Next’ button in the bottom-right corner to name and save your file locally. Upon saving, you’ll return to the main Final Cut Pro interface.
Monitor the export progress via the ‘Status’ icon, which visually indicates the completion percentage. Clicking this icon provides detailed export information and allows you to cancel the export if needed. Once finished, locate the saved file and review it one last time. Ensuring everything is perfect before sharing is always a good practice. With these steps, you’ve successfully exported a video from Final Cut Pro.
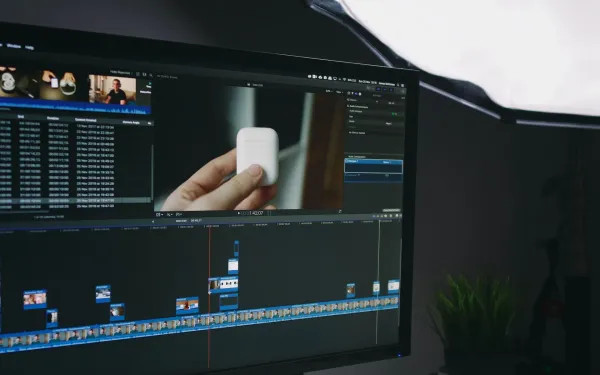
 Final Cut Pro interface showing various export settings and options
7. Understanding Export Settings
What are the best export settings for YouTube in Final Cut Pro?
For YouTube, using the MP4 format with the H.264 codec is generally recommended. Set the resolution to 1920 x 1080 (Full HD) for standard videos or 3840 x 2160 (4K) if your source footage supports it. The frame rate should match your source footage, typically 24, 25, or 30 fps.
Using these settings ensures compatibility and optimizes video quality for YouTube’s platform. Proper export settings prevent issues like pixelation, audio syncing problems, and other common upload errors.
What video format should I choose?
The ‘Format’ option in Final Cut Pro allows you to choose the file type for your export. Here’s a breakdown of the available options:
| Format | Description | Best Use Case |
|---|---|---|
| Apple Devices | Exports video as an M4V, Apple’s proprietary format. | Further use on Apple devices. Compatible with both macOS and Windows. |
| Web Hosting | Creates a MOV file, developed for QuickTime Player. | Playing on QuickTime Player. Also playable on Windows devices. |
| Computer | Exports the project as an MP4, a widely used video format. | YouTube, TikTok, Facebook, and other video-hosting platforms. Versatile for various applications. |
| Audio Only | Exports the audio track as a separate file. | Need a separate audio. |
| Image Sequence | Exports each frame of your video as an individual image file. | Create a Stop Motion. |
How do I improve the video and audio quality of my export?
- Video: Selecting ‘H.264 Better Quality’ under the ‘Video Codec’ setting greatly enhances video quality. It takes longer to export, but the visual improvement is worth it.
- Audio: Ensure your audio levels are properly mixed before exporting. In the audio settings, select AAC (Advanced Audio Coding) for a good balance of quality and file size. A bit rate of 192 kbps or higher is recommended for clear audio.
Properly configured video and audio settings are crucial for a professional final product. Regularly check your settings and adjust as needed based on the specific requirements of your project and distribution platform.
8. Troubleshooting Common Export Issues
What should I do if my Final Cut Pro export is taking too long?
If your export is taking excessively long, several factors could be responsible. Ensure that other applications aren’t using excessive system resources. Also, consider lowering the export resolution or video quality to reduce processing time.
- Check System Resources: Close unnecessary applications to free up memory and processing power.
- Lower Resolution/Quality: Exporting at a lower resolution or using a faster codec can significantly reduce export time.
- Optimize Your Project: Ensure your project is well-organized and doesn’t contain unnecessary effects or transitions that could slow down the export process.
- Check Storage: Make sure you have sufficient storage.
What if my exported video has audio syncing problems?
Audio syncing issues can be frustrating. Before exporting, double-check that your audio and video tracks are properly aligned in Final Cut Pro. If the problem persists in the exported file, try adjusting the audio settings, such as the sample rate and codec.
- Verify Timeline Alignment: Ensure audio and video tracks are correctly synced within Final Cut Pro.
- Adjust Audio Settings: Experiment with different audio codecs and sample rates to find a configuration that resolves the syncing issue.
- Restart Final Cut Pro: Sometimes, simply restarting the application can resolve temporary glitches causing audio syncing problems.
How can I fix pixelation or quality loss in my exported video?
Pixelation and quality loss often result from incorrect export settings. Ensure you’re exporting at a high enough resolution and bit rate for your source footage. Using the H.264 codec with a higher bit rate can significantly improve the visual quality of your exported video.
- Increase Resolution and Bit Rate: Export at a resolution and bit rate that matches or exceeds your source footage quality.
- Use H.264 Codec: This codec is known for its efficient compression and good quality.
- Avoid Excessive Compression: Over-compressing your video can lead to noticeable quality loss.
Why am I getting error messages during export?
Error messages during export can indicate various issues, such as corrupted media files, insufficient disk space, or software glitches. Review the error message closely to identify the specific problem, then take appropriate action, such as replacing corrupted files, freeing up disk space, or restarting Final Cut Pro.
- Read Error Messages Carefully: Understand the specific problem being reported.
- Replace Corrupted Files: If the error indicates a corrupted media file, replace it with a clean copy.
- Free Up Disk Space: Ensure you have enough free space on your hard drive for the exported file.
- Update or Reinstall Final Cut Pro: Software glitches can sometimes be resolved by updating to the latest version or reinstalling the application.
Addressing these common export issues can help streamline your video production process and ensure high-quality final products.
 Final Cut Pro interface showing export progress and status
9. Advanced Tips for Final Cut Pro Users
How can I use proxy media to speed up editing and exporting?
Proxy media involves creating smaller, lower-resolution versions of your original footage for editing. This reduces the processing power required, resulting in smoother playback and faster export times. Final Cut Pro makes it easy to create and use proxy media, especially when working with high-resolution footage.
- Create Proxy Media: Generate proxy files within Final Cut Pro to reduce the load on your system during editing.
- Switch Between Original and Proxy: Toggle between the original and proxy media as needed for detailed work.
- Export Using Original Media: Ensure you export using the original, high-quality media for the final output.
How do I create custom export presets in Final Cut Pro?
Creating custom export presets can save time and ensure consistent results. Final Cut Pro allows you to save your preferred export settings as presets, which can be quickly applied to future projects.
- Configure Export Settings: Set up your desired export settings, including format, resolution, codec, and bit rate.
- Save as Preset: Save these settings as a custom preset for easy access.
- Apply to Future Projects: Quickly apply your custom preset to future projects, ensuring consistent export settings.
Can I export directly to social media platforms from Final Cut Pro?
Yes, Final Cut Pro offers direct export options for social media platforms like YouTube and Facebook. This streamlines the sharing process by allowing you to upload your video directly from within the application.
- Choose Direct Export Option: Select the appropriate social media platform from the export menu.
- Sign In and Configure: Sign in to your social media account and configure the upload settings.
- Upload Directly: Upload your video directly to the platform, saving time and effort.
How do I use roles to organize and export different audio and video elements?
Roles in Final Cut Pro allow you to categorize and organize different audio and video elements within your project. This can be useful for exporting specific elements, such as dialogue, music, or sound effects, as separate files.
- Assign Roles: Assign roles to different audio and video elements in your project.
- Export Roles: Export specific roles as separate files for mixing, mastering, or other post-production tasks.
- Streamline Workflow: Organize your project and streamline your workflow by using roles effectively.
10. Why Choose Savewhere.net for Your Video Editing Needs
Discover Exclusive Deals on Video Editing Software
At savewhere.net, we understand that quality video editing software can be a significant investment. That’s why we offer a dedicated platform for finding exclusive deals and discounts on Final Cut Pro and other leading video editing tools.
Our team diligently curates the best offers, ensuring you have access to affordable options that don’t compromise on quality. Savewhere.net helps you start your video editing journey without breaking the bank.
Learn the best tips for video editing
- Master video editing with ease by saving money.
- Discover savewhere.net for exclusive deals and step-by-step expert guides.
- Start creating captivating content and optimizing your budget today.
Unlock Expert Tutorials and Guides
We also provide expert tutorials and guides on Final Cut Pro and video editing techniques. Whether you’re a beginner or an experienced editor, our resources will help you enhance your skills, improve your workflow, and achieve professional-quality results.
Our tutorials cover a wide range of topics, from basic editing functions to advanced techniques like color correction, audio mixing, and motion graphics. With savewhere.net, you have a comprehensive resource for mastering Final Cut Pro and unleashing your creative potential.
Address: 100 Peachtree St NW, Atlanta, GA 30303, United States
Phone: +1 (404) 656-2000
Website: savewhere.net.
FAQ: Saving Videos from Final Cut Pro
What is the best format to save video from Final Cut Pro for YouTube?
MP4 is generally the best format for YouTube, using the H.264 codec for video and AAC for audio. This ensures good quality and compatibility with the platform.
How do I reduce the file size when exporting from Final Cut Pro?
To reduce file size, lower the bit rate, resolution, or frame rate. Using the H.264 codec is also efficient for compressing video without significant quality loss.
Why is my Final Cut Pro export so slow?
Slow exports can result from high resolution, complex effects, or limited system resources. Try using proxy media or optimizing your project to speed up the process.
How do I export a video with transparent background from Final Cut Pro?
To export with a transparent background, use the ProRes 4444 codec and ensure your project settings support transparency.
What is the best resolution for exporting video from Final Cut Pro?
The best resolution depends on the intended use. For YouTube and general online viewing, 1920×1080 (Full HD) is typically sufficient. For 4K displays, use 3840×2160.
How do I export audio only from Final Cut Pro?
In the export settings, choose ‘Audio Only’ as the format. This will export just the audio track from your project.
Can I export a video in 4K from Final Cut Pro?
Yes, you can export in 4K by setting the resolution to 3840×2160 in the export settings. Ensure your source footage is also in 4K for the best results.
What is the difference between H.264 and ProRes codecs?
H.264 is a compressed codec suitable for final delivery due to its smaller file sizes. ProRes is a less compressed codec used for editing and mastering, offering better quality but larger file sizes.
How do I add chapter markers to my exported video in Final Cut Pro?
Add chapter markers in your timeline, then check the ‘Chapter Markers’ box in the export settings to include them in the final video.
How do I update Final Cut Pro?
You can update Final Cut Pro via the Mac App Store. Open the App Store, go to the ‘Updates’ tab, and install any available updates for Final Cut Pro.
By following these steps and utilizing the resources at savewhere.net, you can master saving videos from Final Cut Pro and achieve professional results while saving time and money. Explore our website for more tips, tricks, and exclusive deals to enhance your video editing journey!