Are you wondering where your important documents end up on your iPhone? Understanding the iPhone’s file storage system is crucial for efficient file management and safeguarding your financial documents. At savewhere.net, we will explore how to locate, organize, and protect your files to improve your financial life.
1. Understanding the iPhone’s File System
The iPhone’s file system may seem different from traditional computers, but once you grasp its structure, managing your documents becomes straightforward. Let’s understand where the documents are saved on the iPhone.
1.1. The Files App: Your Central Hub
The Files app serves as the central hub for accessing and managing files on your iPhone. Think of it as a digital filing cabinet, allowing you to organize documents from various sources in one convenient location.
1.2. iCloud Drive: Cloud Storage Integration
iCloud Drive, Apple’s cloud storage service, seamlessly integrates with the Files app. When you save documents to iCloud Drive, they’re automatically synced across all your Apple devices, ensuring you have access to them wherever you go. This is invaluable for keeping your financial records updated and accessible.
1.3. On My iPhone/iPad: Local Storage
For offline access or to conserve cloud storage space, you can save files directly to your iPhone or iPad. This is especially useful for sensitive financial documents that you prefer to keep locally.
1.4. Third-Party Cloud Services: Expanding Your Options
The Files app also supports integration with popular third-party cloud services like Dropbox, Google Drive, and OneDrive. This allows you to access and manage documents stored on these platforms directly from your iPhone.
2. Locating Your Documents
Now that you understand the iPhone’s file system, let’s dive into how to locate your documents using the Files app.
2.1. Browsing Locations
When you open the Files app, you’ll see a list of locations where your documents are stored. These locations typically include iCloud Drive, On My iPhone/iPad, and any connected third-party cloud services.
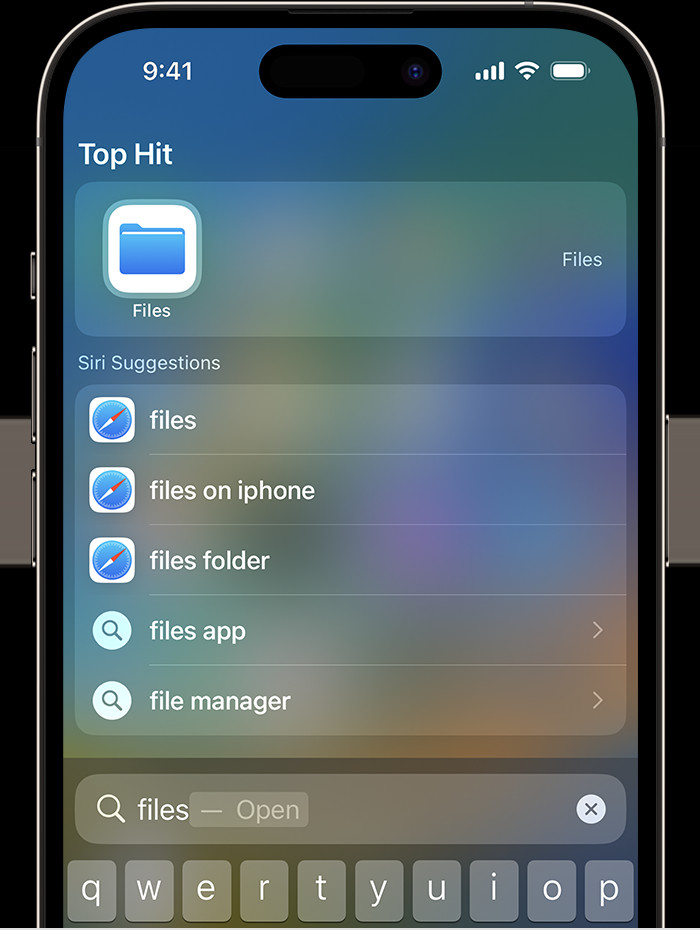
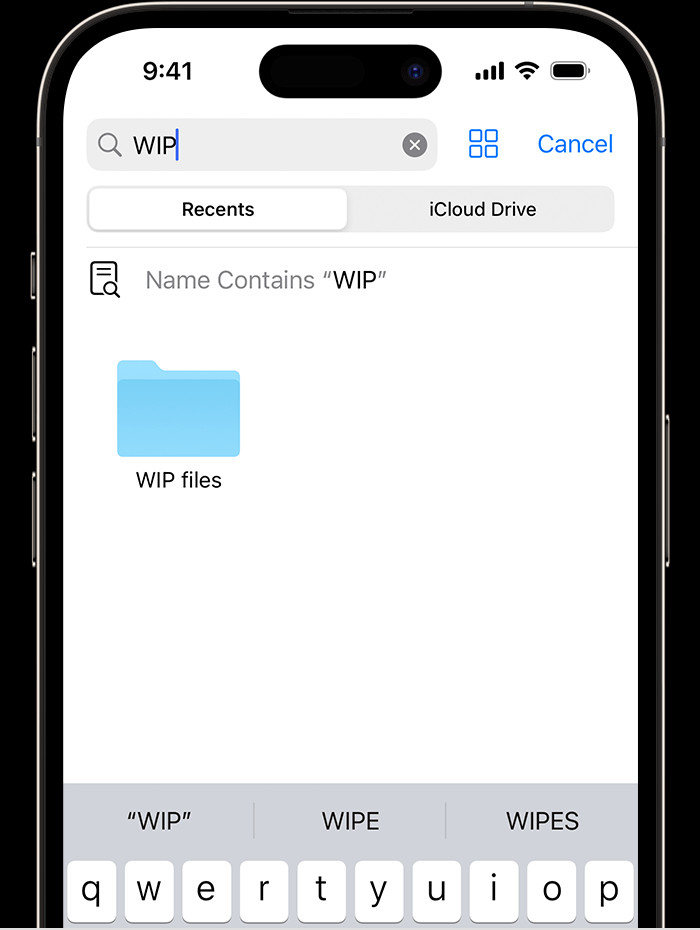
2.2. Searching for Specific Files
If you know the name of the document you’re looking for, you can use the search bar within the Files app to quickly locate it. Simply type in the file name or keywords, and the app will display the relevant results.
2.3. Sorting and Filtering
To further refine your search, you can sort and filter files by date, name, size, or tags. This is particularly useful when you’re trying to find a specific financial document from a certain period.
2.4. Using Tags
Tagging your financial documents with relevant keywords can significantly improve organization and searchability. For example, you can tag all your tax-related documents with the tag “Taxes” or your investment statements with the tag “Investments”.
3. Managing Your Documents
Once you’ve located your documents, the Files app provides a range of tools for managing them effectively.
3.1. Creating Folders
Organizing your documents into folders is essential for maintaining a clutter-free file system. You can create folders for different categories of financial documents, such as “Bank Statements,” “Investment Reports,” or “Tax Returns.”
3.2. Moving Files
Moving files between folders is a breeze with the Files app. Simply select the file you want to move, tap the “Move” option, and choose the destination folder.
3.3. Renaming Files
Descriptive file names are crucial for easy identification. The Files app allows you to rename files to accurately reflect their content. For example, you can rename a bank statement file to “Bank Statement – [Month, Year]”.
3.4. Copying Files
If you need to create a duplicate of a document, the Files app lets you easily copy it to another location. This is useful for creating backups or sharing documents with others.
3.5. Deleting Files
To remove unwanted or outdated documents, you can delete them directly from the Files app. Be cautious when deleting financial documents, as you may need them for future reference.
3.6. Zipping and Unzipping Files
The Files app supports zipping and unzipping files, allowing you to compress large files for easier sharing or storage. This is particularly useful for archiving old financial records.
4. Securing Your Documents
Protecting your financial documents from unauthorized access is paramount. Here are some tips for securing your documents on your iPhone:
4.1. Enabling Passcode or Face ID/Touch ID
The first line of defense is to enable a strong passcode or use Face ID/Touch ID to protect your iPhone from unauthorized access.
4.2. Using Strong Passwords for Cloud Services
If you’re using cloud services to store your financial documents, ensure you use strong, unique passwords for each service.
4.3. Enabling Two-Factor Authentication
Two-factor authentication adds an extra layer of security by requiring a verification code from your other devices or trusted phone number when you log in to your cloud services.
4.4. Encrypting Sensitive Files
For highly sensitive financial documents, consider encrypting them using password protection. This will make the file unreadable without the correct password.
4.5. Being Cautious of Phishing Scams
Be wary of phishing emails or messages that attempt to trick you into revealing your login credentials or financial information. Always verify the sender’s authenticity before clicking on any links or providing any personal information.
4.6. Regularly Backing Up Your iPhone
Regularly backing up your iPhone to iCloud or a computer ensures that you have a copy of your financial documents in case of device loss, theft, or damage.
 Files app icon on iPhone home screen
5. Optimizing the Files App for Financial Management
To make the most of the Files app for financial management, consider these optimization tips:
5.1. Customizing the Sidebar
The Files app allows you to customize the sidebar with your favorite locations and tags. This makes it easy to quickly access the financial documents you use most frequently.
5.2. Using Quick Actions
Quick Actions provide shortcuts for common tasks, such as creating a new folder, scanning a document, or sharing a file. You can access Quick Actions by long-pressing on a file or folder.
5.3. Integrating with Third-Party Apps
The Files app integrates with a wide range of third-party apps, allowing you to seamlessly access and manage financial documents from various sources.
5.4. Utilizing Automation
Consider using automation tools like Shortcuts to automate repetitive tasks, such as creating monthly budget reports or backing up financial documents to a specific folder.
6. Understanding Search Intent
To provide the most relevant and helpful information, it’s important to understand the different search intents behind the query “Where Are Documents Saved On Iphone.” Here are five key search intents:
6.1. Informational:
Users want to know the general location of documents saved on their iPhone, such as within the Files app, iCloud Drive, or third-party cloud storage services.
6.2. Navigational:
Users are trying to find a specific document they’ve saved on their iPhone and need guidance on how to locate it using the Files app.
6.3. Transactional:
Users want to learn how to manage their documents on their iPhone, such as creating folders, moving files, or renaming them.
6.4. Commercial Investigation:
Users are researching different cloud storage services or financial management apps that integrate with the Files app and want to know where their documents will be saved.
6.5. Know Simple:
Users are seeking a quick and direct answer to the question of where documents are typically saved on an iPhone.
7. Specific Scenarios and Solutions
To address the diverse needs of our audience, let’s explore some specific scenarios and solutions related to finding documents on an iPhone:
7.1. Scenario 1: Can’t Find a Recently Saved Document
Solution: Check the “Recents” section in the Files app. This section displays the most recently accessed and modified files, making it easy to locate documents you’ve been working on.
7.2. Scenario 2: Documents Disappeared After an Update
Solution: After an iOS update, some files may be moved or require re-syncing. Check iCloud Drive and other cloud services to ensure your documents are still available. If not, restore your iPhone from a recent backup.
7.3. Scenario 3: Documents Saved in an Unknown Location
Solution: Use the search bar in the Files app to search for the document by name or keywords. If found, note the location where it’s saved and move it to a more organized folder.
7.4. Scenario 4: Trouble Accessing Documents from a Third-Party App
Solution: Ensure that the third-party app is properly integrated with the Files app. Check the app’s settings and grant it access to iCloud Drive or other cloud services.
7.5. Scenario 5: Documents Not Syncing Across Devices
Solution: Verify that iCloud Drive is enabled on all your devices and that you’re signed in with the same Apple ID. Check your iCloud storage to ensure you have enough space for syncing.
8. Best Practices for Financial Document Management on iPhone
To ensure efficient and secure financial document management on your iPhone, follow these best practices:
8.1. Establish a Consistent Naming Convention
Use a consistent naming convention for your financial documents to make them easy to identify and search for. Include the document type, date, and any relevant keywords in the file name.
8.2. Regularly Review and Organize Your Files
Set aside time each month to review and organize your financial documents. Delete outdated or unnecessary files and move documents to their appropriate folders.
8.3. Utilize Tags for Enhanced Organization
Tagging your financial documents with relevant keywords can significantly improve organization and searchability.
8.4. Back Up Your iPhone Regularly
Regularly backing up your iPhone to iCloud or a computer ensures that you have a copy of your financial documents in case of device loss, theft, or damage. According to research from the U.S. Bureau of Economic Analysis (BEA), in July 2025, personal saving accounts provide secure space for document saving.
8.5. Protect Your iPhone with a Strong Passcode
Enable a strong passcode or use Face ID/Touch ID to protect your iPhone from unauthorized access.
8.6. Be Cautious of Phishing Scams
Be wary of phishing emails or messages that attempt to trick you into revealing your login credentials or financial information.
9. Real-Life Examples
To illustrate the practical application of these tips, let’s look at some real-life examples:
9.1. Example 1: Sarah, a Freelancer
Sarah, a freelancer, uses her iPhone to manage her invoices, contracts, and expense reports. She creates folders for each client and tags her documents with keywords like “Invoice,” “Contract,” and “Expense Report.” This allows her to quickly find the documents she needs when filing taxes or sending invoices.
9.2. Example 2: John, a Small Business Owner
John, a small business owner, uses his iPhone to track his business expenses and financial statements. He uses a third-party accounting app that integrates with the Files app, allowing him to easily access and manage his financial documents from his iPhone.
9.3. Example 3: Emily, a Budget-Conscious Mom
Emily, a budget-conscious mom, uses her iPhone to track her family’s expenses and manage her budget. She uses a budgeting app that integrates with the Files app, allowing her to easily access and manage her financial data from her iPhone.
10. Advanced Tips and Tricks
For advanced users, here are some additional tips and tricks for managing financial documents on your iPhone:
10.1. Using Shortcuts for Automation
Shortcuts is a powerful automation tool that allows you to create custom workflows to automate repetitive tasks. For example, you can create a shortcut that automatically creates a monthly budget report or backs up your financial documents to a specific folder.
10.2. Integrating with Cloud Services
The Files app integrates with a wide range of cloud services, allowing you to seamlessly access and manage financial documents from various sources. Consider using a cloud service that offers advanced features like version control and collaboration.
10.3. Utilizing Third-Party Apps
There are many third-party apps available that can enhance your financial document management capabilities on your iPhone. Some popular options include:
- Scanbot: A powerful scanning app that allows you to quickly scan documents and save them to the Files app.
- PDF Expert: A comprehensive PDF editor that allows you to annotate, sign, and edit PDF documents on your iPhone.
- 1Password: A password manager that helps you securely store and manage your passwords for cloud services and financial apps.
10.4. Exploring Advanced Search Operators
The Files app supports advanced search operators that allow you to refine your search queries. For example, you can use the “AND” operator to search for files that contain both “Invoice” and “July” or the “NOT” operator to exclude files that contain “Draft.”
11. Tools and Applications for Managing Documents on iPhone
Many applications and tools can significantly improve how you handle documents on your iPhone. These tools can help in various ways, from scanning and organizing to securing sensitive financial information.
11.1. Scanning Apps
- Scanbot: Scanbot is a high-quality scanning app that allows you to create digital copies of paper documents quickly.
- Adobe Scan: Adobe Scan integrates smoothly with Adobe’s suite of products.
- Microsoft Lens: If you’re invested in the Microsoft ecosystem, Lens is a good option for scanning and integrating with OneDrive.
11.2. PDF Editors
- PDF Expert: PDF Expert lets you edit text, add signatures, and annotate PDFs.
- Adobe Acrobat Reader: A well-known choice, offering features like filling forms, signing documents, and viewing PDFs.
- Foxit PDF Editor: Foxit provides tools for editing, commenting, and collaborating on PDF documents.
11.3. Cloud Storage Solutions
- iCloud Drive: It provides automatic syncing across Apple devices and integration with the Files app.
- Google Drive: If you use other Google services, Google Drive offers seamless integration and collaboration features.
- Dropbox: Dropbox is a versatile option, known for its file-sharing capabilities and integration with various third-party apps.
11.4. Password Managers
- 1Password: 1Password is a well-known password manager that can store login credentials, secure notes, and other sensitive information.
- LastPass: Another popular choice, LastPass offers a free plan with basic features and paid plans for advanced functionality.
- Bitwarden: Bitwarden is an open-source password manager that offers secure password storage.
 Files app search
12. How to transfer documents to a computer from an iPhone
Transferring documents from your iPhone to a computer is a straightforward process. Here are several methods you can use:
12.1. Using iCloud Drive
iCloud Drive makes it easy to sync files across your devices. Here’s how to use it to transfer documents:
- Ensure iCloud Drive is Enabled: On your iPhone, go to Settings > [Your Name] > iCloud, and make sure iCloud Drive is turned on.
- Save Documents to iCloud Drive: Save the documents you want to transfer to iCloud Drive through the Files app.
- Access iCloud Drive on Your Computer:
- For Mac: Open Finder and select iCloud Drive from the sidebar.
- For Windows: Download and install iCloud for Windows from the Microsoft Store. Sign in with your Apple ID, and then access iCloud Drive through File Explorer.
12.2. Using iTunes or Finder
You can use iTunes (on older macOS versions and Windows) or Finder (on newer macOS versions) to transfer files directly from your iPhone to your computer.
- Connect Your iPhone: Connect your iPhone to your computer using a USB cable.
- Open Finder or iTunes:
- Finder (macOS Catalina and later): Open Finder, and your iPhone should appear in the sidebar under Locations.
- iTunes (older macOS or Windows): Open iTunes.
- Trust the Computer: On your iPhone, tap Trust when prompted to trust the computer.
- Access Files:
- Finder: Click on your iPhone in the Finder sidebar, then click on Files.
- iTunes: Click on the iPhone icon, then select File Sharing in the sidebar.
- Select the App: Choose the app from which you want to transfer files (e.g., Pages, Numbers, or a third-party app).
- Transfer Files:
- To transfer files from your iPhone to your computer, select the files and click Save to.
- To transfer files from your computer to your iPhone, drag the files into the app’s document list in Finder or iTunes.
12.3. Using AirDrop (Mac Only)
AirDrop is a quick way to transfer files wirelessly between an iPhone and a Mac.
- Enable AirDrop:
- On your iPhone: Swipe down from the top-right corner to open Control Center. Press and hold the wireless control box, then tap AirDrop and choose Everyone or Contacts Only.
- On your Mac: Open Finder, select AirDrop from the sidebar, and ensure your Mac is discoverable by selecting Everyone or Contacts Only.
- Share the Document: On your iPhone, open the document, tap the Share icon, and select AirDrop.
- Select Your Mac: Choose your Mac from the list of available devices.
- Accept the File: On your Mac, click Accept when prompted to receive the file.
12.4. Using Email
Email is a simple way to transfer documents, especially if you only need to transfer a few files.
- Open the Document: On your iPhone, open the document you want to transfer.
- Share via Email: Tap the Share icon and select Mail.
- Email the Document: Enter your email address as the recipient and send the email.
- Access on Your Computer: Open your email on your computer and download the attached document.
12.5. Using Third-Party Cloud Services
Services like Google Drive, Dropbox, and OneDrive allow you to upload files from your iPhone and access them on your computer.
- Upload to Cloud Service: On your iPhone, open the cloud service app (e.g., Google Drive). Upload the document to the cloud service.
- Access on Your Computer: On your computer, open the cloud service’s website or desktop app and download the document.
13. Navigating Common Issues
Encountering issues while managing documents on your iPhone is not uncommon. Here are solutions to some typical problems:
13.1. Issue: Files App Not Showing All Documents
- Solution: Verify that iCloud Drive is correctly set up. Check that the apps saving the files have iCloud Drive enabled in their settings.
13.2. Issue: Syncing Problems with iCloud Drive
- Solution: Make sure that your iPhone is connected to a reliable Wi-Fi network. Go to Settings > [Your Name] > iCloud > iCloud Drive and ensure “Sync this iPhone” is turned on.
13.3. Issue: Trouble Opening Specific File Types
- Solution: Ensure that you have an app installed that supports the file type you’re trying to open.
13.4. Issue: Storage Full Notifications
- Solution: Review your files and delete any unnecessary documents. Consider moving large files to an external storage solution.
14. Advanced File Management Tips
For users looking to enhance their file management skills, here are some advanced tips:
**14.1. Using Tags Effectively
- Tip: Use tags to categorize your documents beyond folders. This can be useful for quick filtering and searching.
**14.2. Automating File Organization
- Tip: Set up automatic backups to cloud services to ensure that your files are always safe.
- Tip: Use automation tools to automatically sort files into folders based on their names or types.
**14.3. Optimizing Cloud Storage Usage
- Tip: Review your cloud storage regularly to delete unnecessary files.
- Tip: Compress files before uploading them to save space.
15. Why savewhere.net is Your Go-To Resource
At savewhere.net, we understand the importance of efficient financial management. That’s why we provide a wealth of information and resources to help you take control of your finances.
15.1. Comprehensive Guides
Our comprehensive guides cover a wide range of topics, from budgeting and saving to investing and retirement planning. We provide clear, concise, and actionable advice to help you make informed financial decisions.
15.2. Expert Insights
Our team of financial experts shares their insights and strategies to help you navigate the complexities of personal finance. We provide up-to-date information and analysis to keep you informed and empowered.
15.3. Practical Tools and Resources
We offer a variety of practical tools and resources to help you manage your finances more effectively. From budget templates to investment calculators, we have everything you need to reach your financial goals.
15.4. Community Support
Join our community of like-minded individuals who are passionate about financial independence. Share your experiences, ask questions, and get support from others on the same journey.
16. The Role of SaveWhere.Net in Financial Document Management
SaveWhere.Net serves as a valuable resource by providing tools and tips that help users effectively manage their financial documents on their iPhones. By offering guidance on secure storage, organization, and accessibility, SaveWhere.Net ensures that users can maintain control over their financial data, leading to better financial health and peace of mind.
17. Maximizing Financial Benefits with Organized Documents
When you keep your financial documents organized, you maximize your financial benefits. Here are some of the advantages:
**17.1. Accurate Tax Filing
- Advantage: Organized financial documents ensure accurate tax filing, reducing the risk of errors and maximizing potential deductions.
**17.2. Efficient Budgeting
- Advantage: Having all your financial records in order simplifies budgeting, allowing you to track expenses and income easily.
**17.3. Streamlined Financial Planning
- Advantage: Organized documents facilitate long-term financial planning, providing a clear picture of your financial status.
**17.4. Quick Access to Important Information
- Advantage: You can quickly access bank statements, investment records, and other important documents whenever you need them.
18. Savewhere.net Tools and Resources for iPhone Users
Savewhere.net offers a variety of tools and resources specifically designed for iPhone users to optimize their financial document management. Here’s how you can make the most of them:
**18.1. Budgeting Templates
- Feature: Customizable budgeting templates that can be downloaded and used with Numbers or Excel on your iPhone.
- Benefit: Helps you track your income and expenses, set financial goals, and stay on top of your budget.
**18.2. Financial Checklists
- Feature: Step-by-step checklists for organizing your financial documents, securing your data, and optimizing your storage on iCloud.
- Benefit: Ensures you don’t miss any crucial steps in managing your financial documents effectively.
**18.3. Security Guides
- Feature: Guides on how to secure your financial data on your iPhone, including password management, two-factor authentication, and encryption tips.
- Benefit: Protects your sensitive financial information from unauthorized access and cyber threats.
**18.4. App Recommendations
- Feature: Recommendations for the best apps to manage your financial documents on your iPhone, including scanning apps, PDF editors, and cloud storage solutions.
- Benefit: Helps you choose the right tools to streamline your financial document management.
19. Practical Examples: Savewhere.net Success Stories
Let’s explore some practical examples of how individuals have successfully managed their financial documents using Savewhere.net tools and resources:
**19.1. Case Study: Emily’s Tax Efficiency
- Background: Emily used Savewhere.net’s tax checklist to organize her receipts and financial statements.
- Outcome: She filed her taxes with confidence, maximizing her deductions and minimizing potential errors.
**19.2. Case Study: John’s Budgeting Success
- Background: John used Savewhere.net’s budgeting template to track his monthly expenses and income.
- Outcome: He identified areas where he could cut back, saving money and achieving his financial goals.
20. Savewhere.net: Commitment to Continuous Improvement
Savewhere.net is dedicated to continually improving its resources and tools to meet the changing needs of its users. Here’s what you can expect from Savewhere.net in the future:
**20.1. New Tools and Templates
- Future Plans: Development of new budgeting and financial planning tools tailored to iPhone users.
**20.2. Updated Guides and Resources
- Future Plans: Regular updates to our guides and resources to reflect the latest trends in financial technology.
21. Frequently Asked Questions (FAQs)
To address any remaining questions you may have, here are some frequently asked questions about where documents are saved on iPhone:
21.1. Where are downloaded files saved on iPhone?
Downloaded files on your iPhone are typically saved in the “Downloads” folder within the Files app. You can access this folder by opening the Files app and selecting “On My iPhone/iPad” or “iCloud Drive,” depending on your settings.
21.2. How do I change where my iPhone saves files?
You can change where your iPhone saves files by going to Settings > Safari > Downloads and selecting either “iCloud Drive” or “On My iPhone/iPad.”
21.3. How to save a file on iPhone from Google Docs?
To save a file from Google Docs on your iPhone, open the document in the Google Docs app, tap the three dots in the upper right corner, select “Share & export,” and then choose “Save As” to save it to your Files app.
21.4. Where are Microsoft Word documents saved on iPhone?
Microsoft Word documents are typically saved in the “Files” app, either in iCloud Drive or on your iPhone, depending on your settings.
21.5. How do I access iCloud Drive on my iPhone?
You can access iCloud Drive on your iPhone by opening the Files app and selecting “iCloud Drive” from the list of locations.
21.6. How do I free up storage space on my iPhone?
To free up storage space on your iPhone, you can delete unnecessary files, photos, and apps. You can also offload unused apps, which removes the app but keeps its data on your device.
21.7. How do I backup my iPhone to iCloud?
To backup your iPhone to iCloud, go to Settings > [Your Name] > iCloud > iCloud Backup and tap “Back Up Now.” Make sure you have enough storage space in iCloud.
21.8. How do I password protect a file on my iPhone?
You can password protect a file on your iPhone by using a third-party app like PDF Expert or by encrypting the file using a password manager.
21.9. How do I scan a document on my iPhone?
You can scan a document on your iPhone using the Notes app or a third-party scanning app like Scanbot or Adobe Scan.
21.10. How do I share a file from my iPhone?
You can share a file from your iPhone by tapping the share icon (a square with an arrow pointing up) and selecting a sharing method, such as AirDrop, Mail, or Messages.
22. Call to Action
Ready to take control of your financial documents and achieve your financial goals? Visit savewhere.net today to explore our comprehensive guides, expert insights, and practical tools. Join our community of like-minded individuals and start your journey to financial independence.
Remember, managing your financial documents effectively is the first step towards building a brighter financial future. Let savewhere.net be your guide.
Address: 100 Peachtree St NW, Atlanta, GA 30303, United States
Phone: +1 (404) 656-2000
Website: savewhere.net
By following these tips and utilizing the resources available at savewhere.net, you can effectively manage your financial documents on your iPhone and achieve your financial goals. Start today and take control of your financial future.