
Printing documents from your Mac is a straightforward process, offering a range of options to suit your needs, whether you’re at home, in the office, or on the go. This guide will walk you through the essential steps of printing from your Mac, ensuring you get the best results every time you need to get a hard copy of your digital files.
-
Accessing the Print Dialog on Your Mac
To begin printing, the first step is to access the Print dialog. This is your control center for all printing operations on macOS.
- With the document you wish to print open on your Mac, navigate to the menu bar at the top of your screen.
- Click on “File.”
- From the dropdown menu, select “Print,” or simply use the keyboard shortcut Command-P.
This action will open the Print dialog box, presenting you with a preview of your document and various printing options.
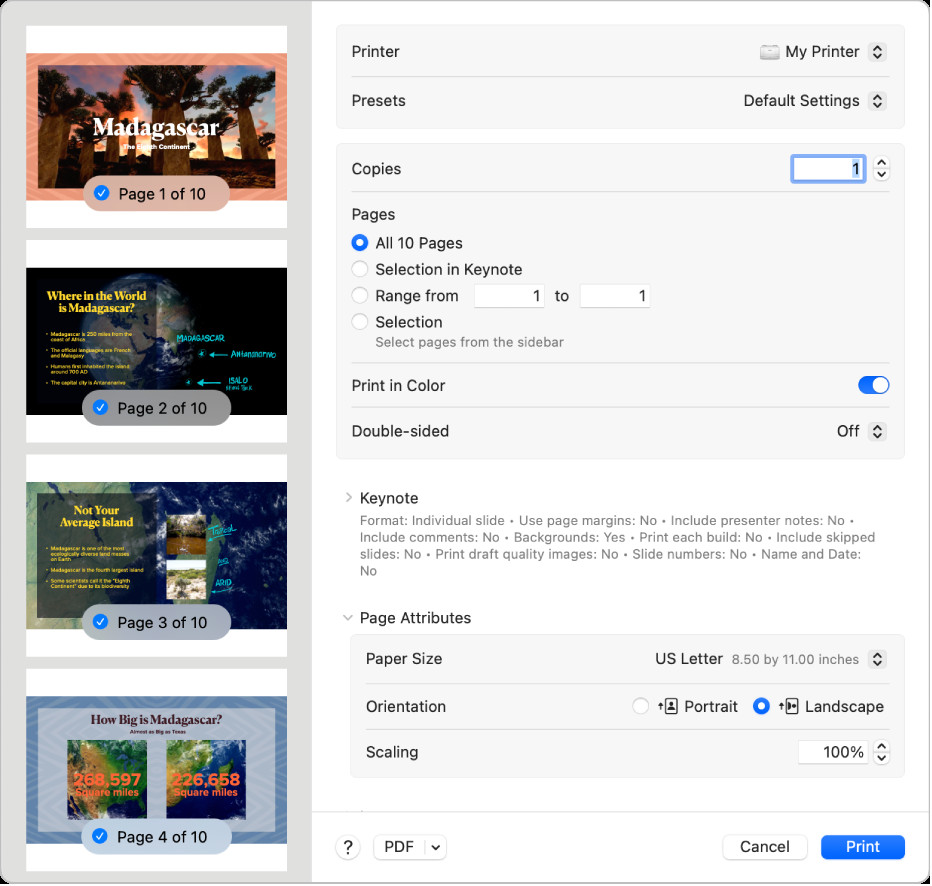 The Print dialog box on macOS, displaying print options such as printer selection, presets, copies, and page range, along with a document preview.
Tip: For a larger preview of your document before printing, click the “PDF” dropdown menu located in the bottom-left corner of the Print dialog, and choose “Open in Preview.” This allows you to review the document in detail within the Preview application before sending it to the printer.
-
Choosing Your Printing Destination: Selecting a Printer
The “Printer” option in the Print dialog is where you specify Where To Print Documents, selecting the physical printer you want to use.
- Click on the “Printer” dropdown menu.
- A list of available printers will appear. This list includes printers you’ve previously set up and, if you’re using macOS Sequoia, printers recently used across your Apple devices if you are logged into the same Apple ID.
- Select your desired printer from the list.
If your printer is not listed, you’ll need to add it to your Mac. You can do this by selecting “Add Printer…” and following the on-screen instructions. For detailed guidance on connecting a printer, refer to Add a printer to your printer list.
-
Customizing Your Print Job: Essential Print Settings
Once you’ve selected where to print documents in terms of the printer, you can customize how your document will be printed using various settings in the Print dialog.
-
Presets: If you have saved specific print settings for frequently used tasks (like “Draft Printing” or “High Quality Photos”), you can choose them from the “Presets” menu. Presets streamline your workflow by applying a group of saved settings instantly. To learn how to create and save presets, see Save frequently used print settings.
-
Copies: Specify the number of copies you need in the “Copies” field. For multi-page documents, if you require collated copies (complete sets printed before the next set begins), select “Paper Handling” from the dropdown menu below the Presets and Copies options and check “Collate Sheets.” More on collation can be found at Print pages in normal order.
-
Print Range: Define which pages to print. You can choose “All Pages” or specify a “Range” by entering the starting and ending page numbers. For printing non-consecutive pages, use the “Selection” option. Select pages directly in the Preview sidebar to create a custom print selection.
-
Color Options: If you have a color printer and wish to print in color, ensure the “Print in Color” option is selected. Deselecting it will print in black and white (grayscale).
-
Double-Sided Printing: To save paper by printing on both sides, choose “On” from the “Double-Sided” dropdown menu. “On (Short Edge)” is useful for documents intended for binding at the top. Double-sided printing, also known as duplex printing, depends on your printer’s capabilities.
-
Paper Size: Select the correct paper size from the “Paper Size” menu to match the paper loaded in your printer. Common sizes include US Letter (8.5 x 11 inches) and A4.
-
Orientation: Choose between “Portrait” (vertical) and “Landscape” (horizontal) orientation by clicking the respective buttons. The preview sidebar will update to reflect your chosen orientation.
-
Scaling: Adjust the size of the printed image relative to the paper size using the “Scaling” percentage. Increasing the percentage enlarges the print, while decreasing it shrinks it. Observe the preview to see the effect of scaling adjustments.
-
-
Finalizing and Printing Your Document
After configuring all your desired print settings, review your choices one last time. If everything looks correct in the preview and you’re satisfied with your settings, click the “Print” button to send your document to the selected printer.
Troubleshooting Common Printing Issues
Sometimes, printing may not go as smoothly as expected. Here’s a common issue and how to address it:
- Margin or Clipping Problems: If you notice unexpected margins or text being cut off at the edges of your printouts, it might be due to a conflict between the document’s margin settings in the application and the non-printable area defined for your chosen paper size by the printer driver. To resolve this, try setting the non-printable area to “0” (zero) in the custom paper size settings. For detailed steps, refer to Print on unusual sized paper by creating a custom paper size.
Related Resources for Printing on Mac:
- Choose a paper size for your printed document on Mac
- Add a printer to your printer list so you can use it on Mac
- Check on a printer or print job using the Dock on Mac
- Solve printing problems on Mac
By understanding these steps and options, you can confidently print documents from your Mac, tailoring the output to your specific requirements every time you need to know where to print documents – whether it’s to your home printer or an office device.