LED strip lights are a fantastic way to add ambiance, task lighting, or decorative flair to any space. Their flexibility and ease of installation make them a popular choice for DIY enthusiasts and homeowners alike. However, these versatile lights often come in standard lengths, which may not perfectly fit your specific project. This leads to a common question: Where To Cut Led Strip lights to achieve the ideal length without damaging them?
This guide will walk you through everything you need to know about safely and effectively cutting LED strip lights. We’ll cover identifying cut points, the tools you’ll need, step-by-step instructions, and what to do if you need to reconnect the cut sections. Whether you’re a beginner or experienced DIYer, this article will provide you with the expertise to customize your LED strip lights for any application.
 cut led strip lights
Part 1. Step-by-Step Guide: How to Cut LED Strip Lights
Before you grab your scissors, it’s crucial to understand that not all LED strip lights are designed to be cut. Attempting to cut non-cuttable strips can damage the circuitry and render them useless. Always verify if your specific LED strip lights are designed for cutting before proceeding. Safety first: Always disconnect the power supply before you begin any cutting process. Working on a live circuit is extremely dangerous and can lead to electric shock.
Step 1. Precise Measurement is Key
Accuracy is paramount when customizing your LED strip lights. Before making any cuts, carefully measure the exact length you need for your project. It’s always better to measure twice and cut once. Cutting too short is a mistake that can’t be easily undone, potentially wasting the strip.
Step 2. Locate the Designated Cut Points
The key to successfully cutting LED strip lights lies in identifying the designated cut points. Manufacturers thoughtfully mark these points to ensure you cut in a safe zone without disrupting the circuit. Look closely at your LED strip; you’ll typically find a scissors icon or a cut line printed directly on the strip. These markings are usually found between sets of LED chips, often after every third LED.
 how to cut led strip lights
Step 3. Cutting with Precision Tools
Once you’ve located the cut point, use a sharp pair of scissors to make a clean, straight cut directly on the marked line. For even greater precision, especially with thicker or waterproof strips, you can use a utility knife or precision knife. Ensure your cut is perpendicular to the strip and follows the cut line exactly. A diagonal or uneven cut can damage the circuit and prevent the lights from working correctly.
Part 2. Reconnecting Cut LED Strip Lights: Options and Methods
Many users wonder if the remaining portion of a cut LED strip light can still be used. The good news is, yes! If you’ve cut your LED strip at a designated cut point, both the main section and the cut-off piece can be used independently. However, to reuse the cut-off portion or reconnect two cut sections, you’ll need to use LED strip light connectors.
Question: Can I reuse the cut-off piece of LED strip lights?
Answer: Absolutely! Cutting your LED strip at the designated marks essentially creates two functional LED strips. To use the cut-off piece, or to join two cut sections together, you will need to employ specific connectors designed for LED strip lights. Attempting to directly solder or wire them without connectors is generally not recommended for beginners and can be more complex and less reliable.
Step 1. Choosing the Right LED Strip Light Connector
To reconnect or reuse cut LED strip sections, you’ll need LED strip light connectors. These come in various types, but the most common for standard RGB or single-color LED strips are 4-pin connectors. It’s essential to choose connectors that are compatible with the width of your LED strip. Common widths are 8mm and 10mm. Using the wrong size connector will result in a poor connection or no connection at all.
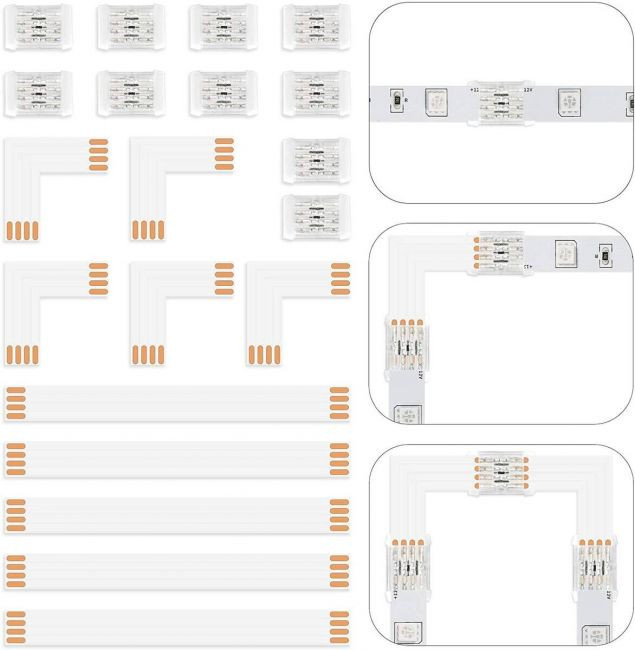
Lepro offers a versatile 4-Pin LED strip light connector pack that includes both L-shape and straight (line shape) connectors. L-shape connectors are ideal for creating 90-degree corner connections, while straight connectors are perfect for extending strips in a continuous line. This pack provides flexibility for various installation scenarios.
 Lepro 10 Packs 4-Pin LED Strip Lights Connectors
Lepro 4-Pin LED Strip Lights Connectors provide a reliable and easy way to reconnect or extend LED strip lights.
Step 2. Using Solderless Connectors for Easy Reconnection
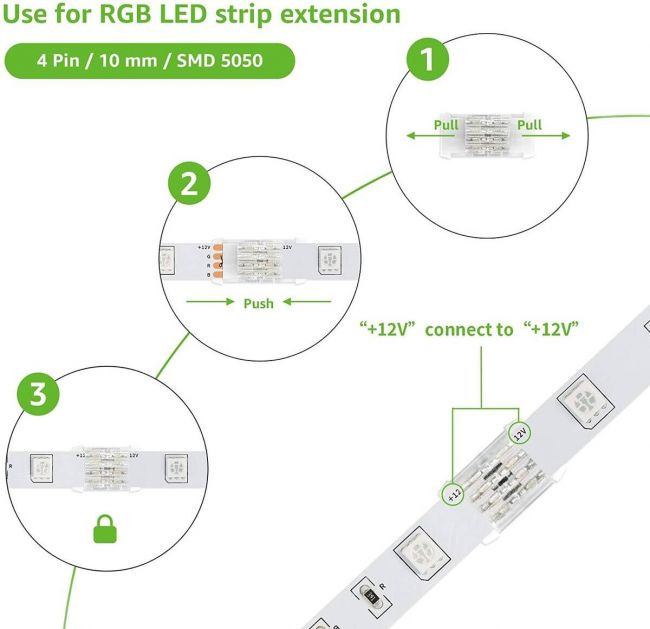
Solderless connectors offer a user-friendly way to reconnect LED strip lights without the need for soldering equipment or skills. Here’s how to use them:
- Open the Connector: Most solderless connectors have a small clip or cover that needs to be opened to insert the LED strip.
 How to Connect LED Strip Light?
Solderless LED strip light connectors simplify the process of joining cut sections.
-
Insert the LED Strips: Carefully slide the cut ends of your LED strips into the connector’s channels. Ensure the copper pads on the LED strip align with the connector’s pins. Pay attention to the polarity markings (+ and -) on both the strip and connector to ensure correct orientation.
-
Close the Connector: Once the strips are properly inserted, close the connector’s clip or cover to secure the connection. A click or snap sound often indicates a secure connection.
-
Test the Connection: After connecting, power on your LED strip lights to test the connection. If the lights don’t illuminate, gently adjust the strips within the connector to ensure proper contact.
While reconnecting cut strips is possible, it’s worth noting that it adds extra connection points, which could potentially be points of failure over time. It’s always best to plan your measurements carefully to minimize the need for cutting and reconnecting.
Part 3. Installation Tips: Using Your Cut LED Strip Lights Effectively
Once you’ve successfully cut and potentially reconnected your LED strip lights, the next step is installation. Here’s how to ensure your customized LED lighting setup looks great and functions perfectly.
Question: Will my cut LED strip light still function correctly?
Answer: Yes, if you’ve cut your LED strip lights at the designated cut points, they will continue to function properly. The circuit is designed to be broken and remain functional at these points. Always adhere to the cut line markings to guarantee continued operation.
Follow these steps for a smooth installation, using Lepro LED strip lights as an example:
Step 1. Surface Preparation: Clean and Dry
Proper surface preparation is crucial for ensuring the adhesive backing of your LED strip lights sticks effectively. Whether you’re mounting them on a wall, cabinet, or another surface, make sure it’s clean, dry, and free of dust, grease, and debris. Use a clean cloth and isopropyl alcohol to clean the surface and allow it to dry completely before applying the LED strip.
 how to cut and use led strip lights
Step 2. Adhering the LED Strip Lights
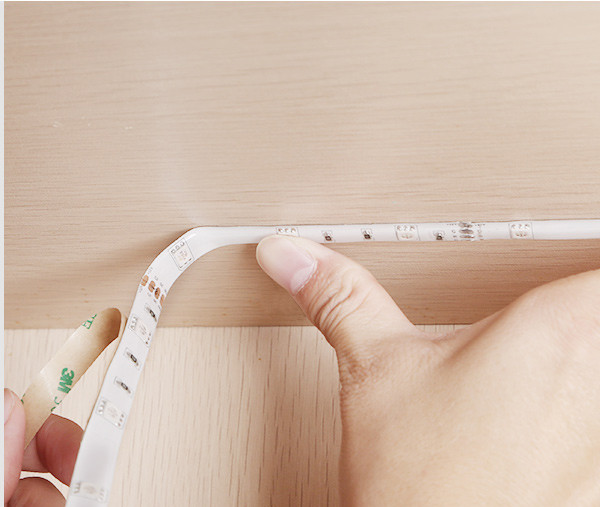
Most LED strip lights come with a 3M adhesive backing. Peel off the protective layer to expose the adhesive. Carefully position the strip in your desired location and press firmly along its length to ensure good adhesion. Avoid repositioning the strip multiple times, as this can weaken the adhesive.
 how to use led strip lights after cutting
Step 3. Connecting to Power and Controller
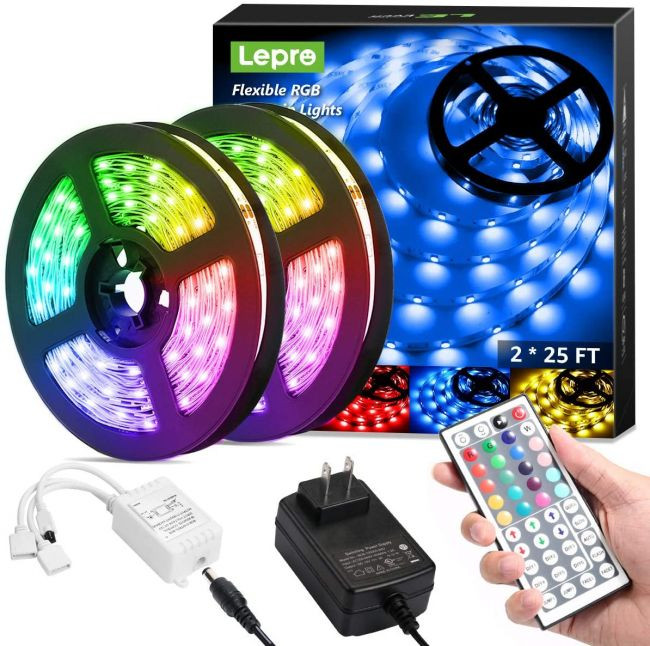
If you purchased an LED strip light kit, it typically includes a connector and a controller. Use the connector to link your LED strip to the controller. Pay close attention to the orientation of the connector and the LED strip – they usually have arrows or markings to indicate the correct alignment. Incorrect connection can prevent the lights from working.
 can u cut led light strips
Step 4. Powering On and Testing
The final step is to connect the controller to the power adapter and plug it into a power outlet. Turn on the LED strip lights using the controller or remote. If they don’t light up, double-check all connections and ensure the power adapter is working correctly.
If your LED strip lights still don’t illuminate after checking connections, it’s possible they were damaged during the cutting or reconnection process. Always handle LED strip lights with care and follow the guidelines provided to minimize any issues. Cutting LED strip lights is a straightforward process when done correctly. By understanding where to cut, how to reconnect, and proper installation techniques, you can confidently customize your LED lighting to perfectly suit any project.
 rgb led strip lights
Explore Lepro’s range of RGB LED strip lights for your next lighting project.
