
Saving your documents as PDF files in Word is a great way to preserve formatting and ensure they can be viewed on any device. Are you seeking straightforward methods to save your Word documents as PDFs to share or archive them efficiently? At savewhere.net, we provide clear, step-by-step instructions to help you master this essential skill and improve your financial document management. Discover easy techniques for converting your Word files to PDFs and start saving time and money today.
1. Why Save as PDF File in Word?
Saving a Word document as a PDF (Portable Document Format) file offers several significant advantages. PDFs ensure consistent formatting across different devices and operating systems, making them ideal for sharing and archiving. Are you wondering why saving your Word documents as PDFs is such a smart move? Let’s explore the benefits, including maintaining formatting, universal accessibility, and enhanced security, to help you save money and streamline your document management.
Consistent Formatting
PDFs preserve the original formatting of your document, regardless of the device or software used to open it. This is particularly important for documents with complex layouts, images, and fonts.
Universal Accessibility
PDFs can be opened on virtually any device, including computers, tablets, and smartphones, ensuring that your document can be viewed by anyone, regardless of their operating system or software.
Enhanced Security
PDFs can be password-protected to restrict access and prevent unauthorized editing or copying, adding an extra layer of security to your sensitive documents.
Smaller File Size
PDFs often have smaller file sizes compared to Word documents, making them easier to share via email or upload to websites.
Archival Purposes
PDF/A is a specific type of PDF designed for long-term archiving. It ensures that the document will remain accessible and viewable in the future, regardless of software or hardware changes. According to the U.S. National Archives and Records Administration, using PDF/A for archiving electronic records helps ensure their long-term preservation and accessibility.
Professional Presentation
PDFs provide a professional look and feel, making them suitable for sharing resumes, reports, and other business documents.
2. How to Save a Word Document as a PDF on Windows
Saving a Word document as a PDF on Windows is a simple process that can be accomplished in a few steps. Do you need a quick guide to saving your Word documents as PDFs on Windows? Follow these easy steps to preserve formatting and ensure your files are universally accessible, helping you save time and present your documents professionally.
Step-by-Step Instructions
-
Open Your Word Document: Launch Microsoft Word and open the document you wish to save as a PDF.
-
Go to the File Menu: Click on the “File” tab located in the top-left corner of the Word window.
-
Select “Save As”: In the File menu, click on “Save As.” This will open the Save As dialog box.
-
Choose a Save Location: Select the folder where you want to save the PDF file.
-
Name Your File: In the “File name” field, enter a name for your PDF file.
-
Select “PDF” as the File Type: Click on the dropdown menu labeled “Save as type” and choose “PDF (*.pdf).”
-
Optimize for Print Quality or File Size:
- If high print quality is important, select “Standard (publishing online and printing).”
- If file size is more important, select “Minimum size (publishing online).”
-
Click “Save”: Click the “Save” button to convert your Word document to a PDF.
Additional Options
- Open file after publishing: Check this box if you want the PDF to open automatically after it is saved.
- Options: Click the “Options” button to customize the PDF further. You can select specific pages to save, choose whether to include markup, and adjust output options.
Example Scenario
Imagine you have created a detailed report in Word with charts, images, and specific formatting. By saving it as a PDF, you ensure that anyone who opens the file, regardless of their software or device, will see the report exactly as you intended.
3. How to Save a Word Document as a PDF on Mac
Saving a Word document as a PDF on a Mac is just as straightforward as on Windows. Need a simple guide to saving your Word documents as PDFs on your Mac? Follow these steps to maintain formatting and ensure your files are easily shareable, which can help you save money on printing and distribution costs.
Step-by-Step Instructions
-
Open Your Word Document: Launch Microsoft Word on your Mac and open the document you want to save as a PDF.
-
Go to the File Menu: Click on the “File” menu in the top-left corner of your screen.
-
Select “Save As”: In the File menu, click on “Save As.”
-
Name Your File: In the “Save As” dialog box, enter a name for your PDF file in the “Save As” field.
-
Choose a Save Location: Select the folder where you want to save the PDF file.
-
Select “PDF” as the File Format: Click on the “File Format” dropdown menu and choose “PDF.”
-
Optimize for Printing: Choose “Best for Printing” for high-quality output or “Best for electronic distribution” for smaller file sizes.
-
Click “Export”: Click the “Export” button to convert your Word document to a PDF.
Additional Tips
- Preview: Before exporting, you can preview the PDF to ensure everything looks correct.
- Password Protection: You can add password protection to your PDF by clicking the “Security Options” button in the Save As dialog box.
Example Scenario
Suppose you’ve created a visually appealing resume in Word with specific fonts and formatting. Saving it as a PDF ensures that recruiters and hiring managers will see your resume exactly as you designed it, regardless of the operating system or software they use.
4. Saving Specific Pages as PDF in Word
Sometimes, you may only need to save specific pages of a Word document as a PDF. Do you want to know how to save only certain pages of your Word document as a PDF? These instructions will help you extract only the necessary information, saving you storage space and making it easier to share specific content, which can ultimately help you save money on resources.
Step-by-Step Instructions
-
Open Your Word Document: Open the Word document containing the pages you want to save as a PDF.
-
Go to the File Menu: Click on the “File” tab (Windows) or “File” menu (Mac) in the top-left corner.
-
Select “Save As”: Click on “Save As” to open the Save As dialog box.
-
Choose a Save Location: Select the folder where you want to save the PDF file.
-
Name Your File: Enter a name for your PDF file in the “File name” field.
-
Select “PDF” as the File Type: Choose “PDF (*.pdf)” from the “Save as type” dropdown menu.
-
Click “Options”: Click the “Options” button in the Save As dialog box.
-
Specify Page Range: In the Options dialog box, under the “Page range” section, select “Pages” and enter the page numbers you want to save (e.g., 1, 3, 5-7).
-
Click “OK”: Click “OK” to close the Options dialog box.
-
Click “Save”: Click “Save” in the Save As dialog box to create the PDF containing only the specified pages.
Example Scenario
Suppose you have a 20-page report in Word, but you only need to share pages 5 through 10 with a colleague. By saving only those pages as a PDF, you can quickly provide the relevant information without sending the entire document.
5. Saving as PDF in Different Microsoft Office Applications
The process of saving as a PDF is similar across different Microsoft Office applications, but there are some slight variations. Are you looking for instructions on how to save as PDF in various Microsoft Office apps like Excel, PowerPoint, and OneNote? These guides will ensure you can create universally compatible documents regardless of the application, saving you time and ensuring seamless sharing.
Microsoft Excel
- Open Your Excel Workbook: Launch Microsoft Excel and open the workbook you want to save as a PDF.
- Go to the File Menu: Click on the “File” tab.
- Select “Save As”: Click on “Save As” to open the Save As dialog box.
- Choose a Save Location: Select the folder where you want to save the PDF file.
- Name Your File: Enter a name for your PDF file in the “File name” field.
- Select “PDF” as the File Type: Choose “PDF (*.pdf)” from the “Save as type” dropdown menu.
- Optimize for Print Quality or File Size:
- If high print quality is important, select “Standard (publishing online and printing).”
- If file size is more important, select “Minimum size (publishing online).”
- Click “Options”: Click the “Options” button to customize the PDF further. You can select specific sheets to save and adjust output options.
- Click “Save”: Click the “Save” button to convert your Excel workbook to a PDF.
Microsoft PowerPoint
- Open Your PowerPoint Presentation: Launch Microsoft PowerPoint and open the presentation you want to save as a PDF.
- Go to the File Menu: Click on the “File” tab.
- Select “Save As”: Click on “Save As” to open the Save As dialog box.
- Choose a Save Location: Select the folder where you want to save the PDF file.
- Name Your File: Enter a name for your PDF file in the “File name” field.
- Select “PDF” as the File Type: Choose “PDF (*.pdf)” from the “Save as type” dropdown menu.
- Optimize for Print Quality or File Size:
- If high print quality is important, select “Standard (publishing online and printing).”
- If file size is more important, select “Minimum size (publishing online).”
- Click “Options”: Click the “Options” button to customize the PDF. You can select specific slides to save, include comments, and adjust output options.
- Click “Save”: Click the “Save” button to convert your PowerPoint presentation to a PDF.
Microsoft OneNote
- Open Your OneNote Notebook: Launch Microsoft OneNote and open the notebook you want to save as a PDF.
- Go to the File Menu: Click on the “File” tab.
- Select “Print”: Click on “Print” to open the Print dialog box.
- Select “Microsoft Print to PDF”: In the Printer dropdown menu, choose “Microsoft Print to PDF.”
- Adjust Settings: Customize the print settings as needed, such as page orientation and margins.
- Click “Print”: Click the “Print” button to start the PDF conversion process.
- Choose a Save Location: In the Save As dialog box, select the folder where you want to save the PDF file.
- Name Your File: Enter a name for your PDF file in the “File name” field.
- Click “Save”: Click the “Save” button to convert your OneNote notebook to a PDF.
Microsoft Publisher
- Open Your Publisher Document: Launch Microsoft Publisher and open the document you wish to save as a PDF.
- Go to the File Menu: Click on the “File” tab.
- Select “Save As”: Click on “Save As” to open the Save As dialog box.
- Choose a Save Location: Select the folder where you want to save the PDF file.
- Name Your File: Enter a name for your PDF file in the “File name” field.
- Select “PDF” as the File Type: Choose “PDF (*.pdf)” from the “Save as type” dropdown menu.
- Optimize and Change: If you want to change how the document is optimized, select “Change.” (Select “Options” in Publisher 2013 or Publisher 2016.)
- Make any changes you want to the picture resolution and non-printing information.
- Select “Print Options” to make changes to the printing options for the document.
- Select “OK” when finished.
- Click “Save”: Click the “Save” button to convert your Publisher document to a PDF.
Microsoft Visio
- Open Your Visio Diagram: Launch Microsoft Visio and open the diagram you want to save as a PDF.
- Go to the File Menu: Click on the “File” tab.
- Select “Save As”: Click on “Save As” to open the Save As dialog box.
- Choose a Save Location: Select the folder where you want to save the PDF file.
- Name Your File: Enter a name for your PDF file in the “File name” field.
- Select “PDF” as the File Type: Choose “PDF (*.pdf)” from the “Save as type” dropdown menu.
- Set Options:
- If you want the file to open in the selected format after saving, select the “Automatically view file after saving” check box.
- If the document requires high print quality, select “Standard (publishing online and printing).”
- If file size is more important than print quality, select “Minimum size (publishing online).”
- Click “Options”: Select “Options” to set the page to be printed, to choose whether markup should be printed, and to select output options. Select “OK.”
- Click “Save”: Click the “Save” button to convert your Visio diagram to a PDF.
Microsoft Project
- Open Your Project File: Launch Microsoft Project and open the file you want to save as a PDF.
- Go to the File Menu: Click on the “File” tab.
- Select “Save As”: Click on “Save As” to open the Save As dialog box.
- Choose a Save Location: Select the folder where you want to save the PDF file.
- Name Your File: Enter a name for your PDF file in the “File name” field.
- Select “PDF” as the File Type: Choose “PDF Files (*.pdf)” from the “Save as type” dropdown menu.
- Set Document Export Options: In the “Document Export Options” dialog box, select a “Publish Range,” whether to “Include Non-printing Information,” and “ISO 19500-1 compliance” (PDF only).
- Click “Save”: Click the “Save” button to convert your Project file to a PDF.
By following these steps, you can easily save documents as PDFs across various Microsoft Office applications, ensuring compatibility and professional presentation.
6. Optimizing PDF Settings for Different Needs
Optimizing PDF settings can significantly impact the quality and file size of your converted documents. Are you trying to optimize your PDF settings for different purposes like printing, online sharing, or archiving? These instructions will guide you through selecting the best settings to balance quality and file size, saving you storage and bandwidth.
For High-Quality Printing
- Choose “Standard (publishing online and printing)”: This option ensures the highest possible print quality, preserving all details and images in your document.
- Embed Fonts: Embedding fonts ensures that the PDF will display correctly even if the recipient doesn’t have the same fonts installed on their computer.
For Online Sharing
- Choose “Minimum size (publishing online)”: This option reduces the file size of the PDF, making it easier to share via email or upload to websites.
- Optimize Images: Reducing the resolution of images can further decrease the file size without significantly impacting the visual quality for online viewing.
For Archiving
- Use PDF/A: PDF/A is an ISO-standardized version of PDF designed for long-term archiving. It ensures that the document will remain accessible and viewable in the future.
- Embed All Fonts: Embedding all fonts is crucial for archival purposes to ensure that the document will display correctly in the future.
Password Protection
- Add a Password: To restrict access to your PDF, you can add a password. This prevents unauthorized users from opening or editing the document.
- Set Permissions: You can also set permissions to control what users can do with the PDF, such as printing, copying, or editing.
Example Scenario
If you are creating a PDF for professional printing, such as a brochure or a poster, you should choose the “Standard” option to ensure the highest possible quality. If you are creating a PDF to email to a colleague, you can choose the “Minimum size” option to reduce the file size and make it easier to send.
7. Troubleshooting Common PDF Conversion Issues
Even with straightforward instructions, you might encounter issues when saving Word documents as PDFs. Encountering problems when saving your Word documents as PDFs? This section provides troubleshooting tips for common issues like formatting errors, missing fonts, and large file sizes, helping you resolve problems quickly and save time.
Formatting Errors
- Problem: The PDF doesn’t look like the original Word document.
- Solution:
- Ensure you are using the “Standard” option for print quality.
- Check that all fonts are embedded in the PDF.
- Review the document for compatibility issues between Word and PDF formats.
Missing Fonts
- Problem: Some fonts are not displaying correctly in the PDF.
- Solution:
- Embed all fonts in the PDF to ensure they display correctly on any device.
- Use common fonts that are widely available to avoid font substitution issues.
Large File Size
- Problem: The PDF file size is too large for sharing or uploading.
- Solution:
- Use the “Minimum size” option to reduce the file size.
- Compress images in the Word document before saving as a PDF.
- Remove unnecessary elements from the document.
Hyperlinks Not Working
- Problem: Hyperlinks in the Word document are not working in the PDF.
- Solution:
- Ensure that the hyperlinks are correctly formatted in the Word document.
- Check the PDF settings to ensure that hyperlinks are enabled.
Accessibility Issues
- Problem: The PDF is not accessible to users with disabilities.
- Solution:
- Enable accessibility features in Word before saving as a PDF.
- Add alternative text to images and other non-text elements.
- Use a logical reading order for the document.
Example Scenario
If you notice that the formatting of your PDF is incorrect, double-check your save settings and ensure that you have selected the appropriate options for print quality and font embedding.
8. Using Online Tools to Convert Word to PDF
In addition to using Microsoft Word, several online tools can convert Word documents to PDFs. Are you searching for alternative ways to convert Word documents to PDF using online tools? This section introduces several reliable online converters and highlights their advantages and disadvantages, helping you choose the best option and save money on software costs.
Advantages of Online Tools
- Convenience: Online tools can be accessed from any device with an internet connection.
- Cost-Effective: Most online tools are free to use or offer a free trial.
- No Software Installation: You don’t need to install any software on your computer.
Disadvantages of Online Tools
- Security Concerns: Uploading sensitive documents to online tools may pose security risks.
- Limited Features: Online tools may offer fewer customization options compared to desktop software.
- Internet Dependency: You need a stable internet connection to use online tools.
Popular Online Tools
- Smallpdf: Offers a variety of PDF tools, including Word to PDF conversion.
- iLovePDF: Provides a simple and easy-to-use interface for converting Word to PDF.
- Online2PDF: Allows you to convert multiple Word documents to PDF at once.
- Zamzar: Supports a wide range of file formats for conversion, including Word to PDF.
Example Scenario
If you need to quickly convert a Word document to PDF while traveling and don’t have access to Microsoft Word, you can use an online tool like Smallpdf or iLovePDF to get the job done.
9. The Importance of PDF/A for Long-Term Archiving
PDF/A is an ISO-standardized version of PDF designed for long-term archiving. Are you looking to archive important documents for the long term? Discover why PDF/A is the best format for ensuring your documents remain accessible and readable in the future, which can save you from costly data recovery or format conversion fees.
Key Features of PDF/A
- Self-Contained: PDF/A files must be self-contained, meaning they include all necessary information for displaying the document, such as fonts and images.
- No External Dependencies: PDF/A files cannot rely on external resources, such as linked files or dynamic content.
- Standardized Format: PDF/A ensures that the document will be displayed consistently across different devices and software versions.
Benefits of Using PDF/A
- Long-Term Accessibility: PDF/A ensures that the document will remain accessible and viewable in the future.
- Preservation of Content: PDF/A preserves the content and formatting of the document, ensuring that it remains intact over time.
- Compliance: Using PDF/A can help organizations comply with regulatory requirements for long-term document retention. According to the U.S. National Archives and Records Administration, using PDF/A for archiving electronic records helps ensure their long-term preservation and accessibility.
Example Scenario
If you are archiving important legal documents or financial records, saving them as PDF/A ensures that they will remain accessible and readable for years to come, regardless of changes in software or technology.
10. How to Reduce PDF File Size
Large PDF file sizes can be problematic when sharing or storing documents. Do you need to reduce the file size of your PDFs for easier sharing and storage? These strategies, including compression, image optimization, and removing unnecessary elements, will help you manage your files more efficiently and save on storage costs.
Compression Techniques
- Use PDF Compression Tools: Many PDF editors and online tools offer compression features that can reduce file size without significantly impacting quality.
- Optimize Images: Compressing images within the PDF can significantly reduce file size.
Image Optimization
- Reduce Image Resolution: Lowering the resolution of images can decrease file size, especially for high-resolution images.
- Use Appropriate Image Formats: Using JPEG for photographs and PNG for graphics can help optimize file size.
Remove Unnecessary Elements
- Remove Unused Fonts: Removing fonts that are not used in the document can reduce file size.
- Delete Comments and Annotations: Removing comments and annotations can also decrease file size.
Save as Optimized PDF
- Use the “Minimum size” Option: When saving as a PDF, choose the “Minimum size (publishing online)” option to reduce the file size.
Example Scenario
If you have a PDF with high-resolution images that is too large to email, you can use a PDF compression tool or optimize the images to reduce the file size and make it easier to share.
11. Saving Word Documents as PDFs on Mobile Devices
Saving Word documents as PDFs on mobile devices is convenient for on-the-go sharing and archiving. Are you trying to save Word documents as PDFs directly from your mobile device? This guide provides instructions for both iOS and Android devices, helping you manage your documents efficiently and save time while on the move.
On iOS Devices
-
Open Your Word Document: Launch the Microsoft Word app on your iOS device and open the document you want to save as a PDF.
-
Tap the “File” Button: Tap the “File” button at the top left corner of the screen.
-
Choose “Export”: In the File menu, choose “Export.”
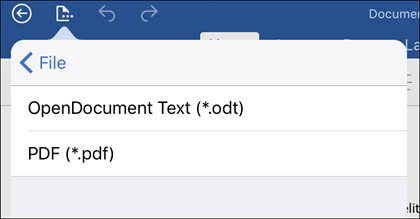 Export option in Word on iOS
 -
Select “PDF”: Choose “PDF” as the export format.
-
Save Your PDF: Save the PDF to your desired location on your device or share it directly via email or other apps.
On Android Devices
- Open Your Word Document: Launch the Microsoft Word app on your Android device and open the document you want to save as a PDF.
- Tap the “File” Icon: Tap the “File” icon (usually three horizontal lines or dots) in the top-left or top-right corner of the screen.
- Choose “Print”: In the File menu, choose “Print.”
- Select “Save as PDF”: In the Printer dropdown menu, choose “Save as PDF.”
- Tap the “Save” Button: Tap the “Save” button to save the PDF to your device.
Example Scenario
Suppose you need to quickly share a Word document with a client while you are away from your computer. You can easily save the document as a PDF on your mobile device and email it to the client.
12. Utilizing Accessibility Features When Saving as PDF
Creating accessible PDFs is essential to ensure that your documents are usable by people with disabilities. Do you want to make sure your PDFs are accessible to everyone, including users with disabilities? This section provides tips on using accessibility features in Word when saving as PDF, helping you create inclusive documents and comply with accessibility standards.
Enable Accessibility Features in Word
- Use Headings: Use proper heading styles (Heading 1, Heading 2, etc.) to create a logical document structure.
- Add Alternative Text to Images: Provide alternative text descriptions for all images and non-text elements.
- Use Tables Correctly: Ensure that tables have clear row and column headers.
- Check Reading Order: Verify that the reading order of the document is logical.
Save as Tagged PDF
- Enable Tagged PDF Option: When saving as a PDF, enable the “Document structure tags for accessibility” option to create a tagged PDF.
- Run Accessibility Checker: Use Word’s built-in accessibility checker to identify and fix any accessibility issues before saving as a PDF.
Example Scenario
If you are creating a report that will be distributed to a wide audience, including people with disabilities, you should use Word’s accessibility features to ensure that the PDF is accessible to everyone.
13. Saving Documents with Tracked Changes as PDF
Saving documents with tracked changes as PDFs can be useful for reviewing and collaborating on documents. Do you need to save a Word document as a PDF while showing all the tracked changes and comments? This guide explains how to include tracked changes and comments in your PDF, making it easier to collaborate and review edits.
Step-by-Step Instructions
-
Open Your Word Document: Launch Microsoft Word and open the document with tracked changes.
-
Go to the File Menu: Click on the “File” tab.
-
Select “Save As”: Click on “Save As” to open the Save As dialog box.
-
Choose a Save Location: Select the folder where you want to save the PDF file.
-
Name Your File: Enter a name for your PDF file in the “File name” field.
-
Select “PDF” as the File Type: Choose “PDF (*.pdf)” from the “Save as type” dropdown menu.
-
Click “Options”: Click the “Options” button in the Save As dialog box.
-
Under “Publish what,” select “Document showing markup”: This will ensure that the PDF includes all tracked changes and comments.
-
Click “OK”: Click “OK” to close the Options dialog box.
-
Click “Save”: Click “Save” in the Save As dialog box to create the PDF with tracked changes.
Example Scenario
If you are collaborating on a document with a colleague and want to share the latest version with all tracked changes and comments, you can save the document as a PDF with markup to ensure that everyone is on the same page.
14. Automating the Word to PDF Conversion Process
For users who frequently convert Word documents to PDFs, automating the process can save significant time. Are you looking for ways to automate the conversion of Word documents to PDF for efficiency? This section explores methods to automate this process using macros and scripts, helping you save time and streamline your workflow.
Using Macros
- Create a Macro: You can create a macro in Word to automate the PDF conversion process.
- Assign a Shortcut Key: Assign a shortcut key to the macro for quick access.
Using Scripts
- Use PowerShell: You can use PowerShell scripts to automate the conversion of Word documents to PDFs.
- Use Python: You can use Python scripts with the
comtypeslibrary to automate the conversion process.
Example Scenario
If you regularly convert multiple Word documents to PDFs, you can create a macro or script to automate the process and save time.
15. Understanding PDF Security Options
PDF security options allow you to protect your documents from unauthorized access and modification. Are you concerned about the security of your PDF documents? This section explains the various security options available when saving as PDF, such as password protection and permission settings, helping you protect sensitive information and ensure document integrity.
Password Protection
- Require a Password to Open: You can require a password to open the PDF, preventing unauthorized users from viewing the document.
- Restrict Printing and Editing: You can restrict printing and editing of the PDF, preventing unauthorized modifications.
Permissions Settings
- Set Permissions for Copying and Pasting: You can set permissions to control whether users can copy and paste content from the PDF.
- Disable Form Filling: You can disable form filling to prevent users from modifying form fields in the PDF.
Digital Signatures
- Add a Digital Signature: You can add a digital signature to the PDF to verify the authenticity and integrity of the document.
Example Scenario
If you are sharing a confidential report with a limited audience, you can add password protection to the PDF to prevent unauthorized access.
16. How to Save Word Documents as Searchable PDFs
Creating searchable PDFs is important for making your documents easily searchable and indexable. Do you want to ensure your PDFs are searchable so you can quickly find the information you need? This guide explains how to save Word documents as searchable PDFs, making your documents more accessible and easier to manage.
Optical Character Recognition (OCR)
- Use OCR Software: OCR software can convert scanned documents and images into searchable text.
- Enable OCR in Word: Some versions of Word have built-in OCR capabilities.
Save as Searchable PDF
- Enable “Document structure tags for accessibility”: When saving as a PDF, enable this option to create a searchable PDF.
- Use Clear Text: Ensure that the text in your Word document is clear and legible for accurate OCR conversion.
Example Scenario
If you have a scanned document that you want to make searchable, you can use OCR software to convert it into a searchable PDF.
17. Exploring Third-Party PDF Editors
While Microsoft Word offers basic PDF saving capabilities, third-party PDF editors provide more advanced features. Are you looking for advanced PDF editing capabilities beyond what Word offers? This section reviews several popular third-party PDF editors, highlighting their features and benefits, helping you choose the right tool for your needs and potentially save on costs by optimizing your workflow.
Popular PDF Editors
- Adobe Acrobat Pro: Offers a wide range of features for creating, editing, and managing PDFs.
- PDFelement: Provides a user-friendly interface and a variety of PDF editing tools.
- Nitro PDF: Offers advanced PDF editing and collaboration features.
- Foxit PDF Editor: Provides a cost-effective alternative to Adobe Acrobat Pro.
Features to Consider
- PDF Editing: Ability to edit text, images, and other elements in the PDF.
- OCR: Optical Character Recognition for converting scanned documents into searchable text.
- Annotation: Tools for adding comments, highlights, and other annotations to the PDF.
- Security: Features for password-protecting and restricting access to the PDF.
Example Scenario
If you need to edit text or images in a PDF, add annotations, or perform advanced OCR, you may want to consider using a third-party PDF editor like Adobe Acrobat Pro or PDFelement.
18. Best Practices for Managing PDF Files
Managing PDF files effectively is essential for maintaining organization and productivity. Are you looking for tips on how to manage your PDF files effectively? These best practices, including naming conventions, folder structures, and backup strategies, will help you stay organized and save time searching for documents.
Naming Conventions
- Use Descriptive Names: Use descriptive names that clearly indicate the content of the PDF.
- Include Dates: Include dates in the file name to track different versions of the PDF.
Folder Structure
- Create a Logical Folder Structure: Create a logical folder structure to organize your PDF files.
- Use Subfolders: Use subfolders to categorize PDFs by project, client, or topic.
Backup Strategy
- Back Up Your PDFs Regularly: Back up your PDFs regularly to prevent data loss.
- Use Cloud Storage: Use cloud storage services like Google Drive or Dropbox to store and back up your PDFs.
Metadata
- Add Metadata to Your PDFs: Add metadata such as title, author, and keywords to make your PDFs more searchable.
Example Scenario
If you have a large collection of PDF files, following these best practices can help you stay organized and quickly find the documents you need.
19. Future Trends in PDF Technology
PDF technology continues to evolve, with new features and capabilities being developed. Are you curious about the future of PDF technology and how it will impact document management? This section explores emerging trends such as AI-powered PDF tools, enhanced security features, and improved accessibility, helping you stay ahead of the curve and prepare for future innovations.
AI-Powered PDF Tools
- AI-Powered OCR: AI-powered OCR can improve the accuracy and speed of text recognition in PDFs.
- Intelligent Document Analysis: AI can be used to analyze the content of PDFs and extract key information.
Enhanced Security Features
- Blockchain Integration: Blockchain technology can be used to secure and verify the authenticity of PDFs.
- Advanced Encryption: Advanced encryption algorithms can provide stronger protection for sensitive PDF documents.