Saving an Excel graph as a high-quality image is essential for presentations, reports, and sharing data visually. This article on savewhere.net provides comprehensive methods to preserve your graph’s clarity and impact, ensuring your data shines. Learn effective strategies for creating impactful visuals, managing your budget wisely and achieving your financial goals.
1. Why Should You Save Excel Graphs as Images?
Saving Excel graphs as images offers several advantages, making them versatile for various uses. Understanding these benefits can help you optimize your data presentation.
1.1. Enhancing Portability and Compatibility
- Cross-Platform Compatibility: Images can be viewed on any device or operating system without needing Excel.
- Ease of Sharing: Images are easier to share via email, social media, or messaging apps compared to Excel files.
- Integration with Other Software: Images can be seamlessly inserted into documents, presentations, and websites.
1.2. Preserving Formatting and Design
- Consistent Appearance: Ensures the graph looks the same regardless of the viewer’s Excel version or settings.
- Avoiding Data Alteration: Prevents accidental changes to the graph’s data or design.
- Maintaining Visual Quality: High-resolution images retain the graph’s details and clarity.
1.3. Improving Presentation Quality
- Professional Look: High-quality images enhance the visual appeal of reports and presentations.
- Customization: Allows for further editing and enhancement using image editing software.
- Accessibility: Images can be made more accessible with alt text for viewers with disabilities.
1.4. Archiving and Documentation
- Long-Term Storage: Images are a stable format for archiving data visualizations over time.
- Historical Record: Captures a snapshot of the data and its interpretation at a specific point in time.
- Compliance: Useful for regulatory submissions where specific data visualizations are required.
1.5. Boosting Engagement
- Visual Appeal: Graphs presented as images can be more engaging than raw data.
- Social Media Sharing: Easily shareable images can drive traffic and engagement on social platforms.
- Marketing Materials: Enhances the visual content in marketing materials, making them more attractive.
2. What Are the Methods to Save an Excel Graph as an Image?
There are several methods to save an Excel graph as an image, each with its own advantages and disadvantages.
2.1. Using Copy-Paste
Copy-pasting is a quick and straightforward method for saving an Excel graph as an image. Here’s how you can do it:
- Select the Graph: Click on the graph in Excel to select it.
- Copy the Graph: Press
Ctrl + C(orCmd + Con Mac) to copy the graph to your clipboard. - Open Image Editor: Open an image editing software like Microsoft Paint (Windows) or Preview (Mac).
- Paste the Graph: Paste the graph into the image editor by pressing
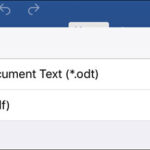
Ctrl + V(orCmd + Von Mac). - Save the Image: Go to
File > Save Asand choose the desired image format (e.g., PNG, JPEG).
Advantages:
- Quick and easy to use.
- Requires no additional software.
Disadvantages:
- May lose some image quality.
- Limited control over resolution and file size.
2.2. Saving as a Picture Directly from Excel
Excel offers a built-in feature to save a graph directly as an image. Here are the steps:
- Select the Graph: Click on the graph you want to save.
- Copy as Picture: Right-click on the graph and select “Copy as Picture.”
- Choose Appearance: A dialog box will appear, asking how you want the picture to appear. Select “As shown on screen” or “As shown when printed.”
- Choose Format: Select “Picture” for a bitmap image or “Bitmap” for a vector image.
- Paste into Image Editor: Open an image editor (like Paint or Photoshop) and paste the copied image (
Ctrl + VorCmd + V). - Save the Image: Save the image in your desired format (e.g., PNG, JPEG).
Advantages:
- Preserves better image quality compared to simple copy-paste.
- Offers options for appearance and format.
Disadvantages:
- Requires an additional image editor to save the final image.
- May still lose some quality depending on the chosen format.
2.3. Using Snipping Tool (Windows) or Screenshot (Mac)
The Snipping Tool (Windows) or Screenshot (Mac) is a convenient way to capture any part of your screen, including Excel graphs.
- Open the Graph: Display the graph in Excel.
- Open Snipping Tool/Screenshot:
- Windows: Open the Snipping Tool from the Start Menu.
- Mac: Press
Shift + Cmd + 4to activate the screenshot tool.
- Capture the Graph:
- Windows: Click “New” in the Snipping Tool and drag the cursor around the graph to select it.
- Mac: Drag the cursor around the graph to select it. The screenshot will be saved to your desktop.
- Save the Image:
- Windows: Save the snip from the Snipping Tool in your preferred format.
- Mac: Open the screenshot from your desktop in Preview and save it in your desired format.
Advantages:
- Simple and quick.
- No need for additional software beyond the built-in tools.
Disadvantages:
- Image quality may not be as high as other methods.
- Requires manual cropping and adjustments.
2.4. Saving as PDF and Converting to Image
Saving the Excel sheet containing the graph as a PDF and then converting it to an image can preserve the quality and detail of the graph.
- Save as PDF: In Excel, go to
File > Save Asand choose PDF as the file format. - Open PDF in Adobe Acrobat: Open the saved PDF file in Adobe Acrobat Reader or a similar PDF viewer.
- Export to Image: In Adobe Acrobat, go to
File > Export To > Imageand choose your desired image format (e.g., PNG, JPEG). - Save the Image: Save the exported image to your desired location.
Advantages:
- Maintains high image quality.
- Useful for preserving vector graphics.
Disadvantages:
- Requires Adobe Acrobat or a similar PDF viewer.
- Involves multiple steps.
2.5. Using Online Conversion Tools
Numerous online tools can convert Excel files or PDFs to images. Here’s how to use them:
- Choose an Online Converter: Search for “Excel to Image converter” or “PDF to Image converter” on Google and select a reputable tool.
- Upload Your File: Upload your Excel file (saved as PDF) to the online converter.
- Select Image Format: Choose your desired image format (e.g., PNG, JPEG).
- Convert and Download: Click the “Convert” button and download the converted image.
Advantages:
- Convenient and accessible from any device with internet.
- No need to install additional software.
Disadvantages:
- Security concerns when uploading sensitive data to online tools.
- Image quality may vary depending on the tool.
3. What Are the Best Image Formats for Saving Excel Graphs?
Choosing the right image format is crucial for maintaining the quality and clarity of your Excel graphs. Here’s a comparison of popular image formats:
3.1. PNG (Portable Network Graphics)
- Best For: Graphs, charts, and images with text and sharp lines.
- Advantages:
- Lossless compression, meaning no quality is lost during compression.
- Supports transparency.
- Excellent for web graphics.
- Disadvantages:
- Larger file sizes compared to JPEG.
- Not ideal for photographs.
3.2. JPEG (Joint Photographic Experts Group)
- Best For: Photographs and images with many colors.
- Advantages:
- Small file sizes due to lossy compression.
- Widely supported by most devices and platforms.
- Disadvantages:
- Lossy compression can reduce image quality, especially with repeated saves.
- Not ideal for graphs with sharp lines and text.
3.3. GIF (Graphics Interchange Format)
- Best For: Simple animations and images with few colors.
- Advantages:
- Supports animation.
- Lossless compression for images with up to 256 colors.
- Disadvantages:
- Limited color palette.
- Not suitable for complex images or photographs.
3.4. TIFF (Tagged Image File Format)
- Best For: Archiving and professional printing.
- Advantages:
- Lossless compression.
- High image quality.
- Disadvantages:
- Large file sizes.
- Not widely supported for web use.
3.5. BMP (Bitmap)
- Best For: Uncompressed image storage.
- Advantages:
- No compression, preserving all image data.
- Disadvantages:
- Very large file sizes.
- Not practical for most uses.
| File Format | Best Use Cases | Advantages | Disadvantages |
|---|---|---|---|
| PNG (Portable Network Graphics) | Graphs, charts, images with text, web graphics | Lossless compression, supports transparency, excellent for web | Larger file sizes, not ideal for photographs |
| JPEG (Joint Photographic Experts Group) | Photographs, images with many colors | Small file sizes, widely supported | Lossy compression reduces quality, not ideal for graphs with sharp lines |
| GIF (Graphics Interchange Format) | Simple animations, images with few colors | Supports animation, lossless compression for up to 256 colors | Limited color palette, not suitable for complex images |
| TIFF (Tagged Image File Format) | Archiving, professional printing | Lossless compression, high image quality | Large file sizes, not widely supported for web |
| BMP (Bitmap) | Uncompressed image storage | No compression, preserves all image data | Very large file sizes, not practical for most uses |
4. How to Optimize Image Quality and Resolution?
Optimizing the image quality and resolution is vital to ensure your Excel graphs look their best in various applications.
4.1. Setting the Right Resolution
- For Web Use: 72 DPI (dots per inch) is generally sufficient.
- For Printing: 300 DPI is recommended for high-quality prints.
- Adjust in Image Editor: Use image editing software to adjust the resolution before saving.
4.2. Choosing the Right Image Size
- Consider the Usage: Determine where the image will be used (e.g., website, presentation, report) and size it accordingly.
- Maintain Aspect Ratio: Ensure the aspect ratio of the graph is maintained to prevent distortion.
- Resize in Image Editor: Use image editing software to resize the image while maintaining quality.
4.3. Enhancing Clarity and Sharpness
- Use Vector Graphics: When possible, use vector graphics formats like PDF, which can be scaled without losing quality.
- Adjust Sharpness: Use image editing software to subtly increase the sharpness of the image.
- Reduce Noise: If the image appears grainy, use noise reduction tools in image editing software.
4.4. Optimizing Colors and Contrast
- Adjust Color Balance: Ensure the colors in the graph are accurate and visually appealing.
- Increase Contrast: Enhance the contrast to make the data more readable.
- Use Appropriate Color Profiles: Use color profiles like sRGB for web use and CMYK for printing.
4.5. Reducing File Size Without Sacrificing Quality
- Use Compression: Compress the image using appropriate compression settings in your image editor.
- Optimize Color Palette: Reduce the number of colors in the image if possible.
- Crop Unnecessary Areas: Crop any unnecessary whitespace around the graph to reduce file size.
5. What Are the Common Issues and Solutions?
While saving Excel graphs as images, you may encounter some common issues. Here’s how to troubleshoot them:
5.1. Blurry or Pixelated Images
- Issue: The image appears blurry or pixelated, especially when zoomed in.
- Solution:
- Increase the resolution of the image.
- Save the graph as a vector graphic (e.g., PDF) and convert it to an image.
- Use a lossless image format like PNG or TIFF.
5.2. Loss of Image Quality
- Issue: The image loses quality after saving, especially with repeated edits.
- Solution:
- Use a lossless image format like PNG.
- Avoid saving the image multiple times in a lossy format like JPEG.
- Adjust the compression settings to minimize quality loss.
5.3. Incorrect Colors
- Issue: The colors in the image appear different from the original graph.
- Solution:
- Use the correct color profile (e.g., sRGB for web, CMYK for print).
- Adjust the color balance in your image editor.
- Ensure your monitor is calibrated correctly.
5.4. Large File Sizes
- Issue: The image file size is too large, making it difficult to share or upload.
- Solution:
- Use compression to reduce the file size.
- Optimize the color palette by reducing the number of colors.
- Crop unnecessary areas around the graph.
5.5. Compatibility Issues
- Issue: The image format is not supported by the intended platform or software.
- Solution:
- Save the image in a widely supported format like JPEG or PNG.
- Convert the image to a compatible format using an image converter tool.
6. What Are the Advanced Tips for High-Quality Excel Graph Images?
For those looking to take their Excel graph images to the next level, here are some advanced tips:
6.1. Using Vector Graphics
- Advantages: Vector graphics can be scaled infinitely without losing quality.
- How to: Save the Excel sheet as a PDF and use a vector-based image editor like Adobe Illustrator to export the graph as a vector image.
- Best For: Graphs with intricate details and sharp lines.
6.2. Customizing Graph Styles
- Enhance Visual Appeal: Customize the graph styles in Excel to match your brand or presentation theme.
- Use Custom Color Palettes: Create custom color palettes that are visually appealing and consistent.
- Adjust Fonts and Labels: Use clear and readable fonts for labels and titles.
6.3. Adding Annotations and Callouts
- Highlight Key Data: Add annotations and callouts to highlight important data points or trends.
- Use Text Boxes and Arrows: Use text boxes and arrows to add explanations and context to the graph.
- Ensure Clarity: Keep annotations concise and easy to understand.
6.4. Creating Interactive Graphs
- Embed Graphs in Web Pages: Embed interactive Excel graphs in web pages using tools like Microsoft Power BI.
- Use Dynamic Charts: Create dynamic charts that update automatically when the data changes.
- Enhance User Engagement: Interactive graphs can enhance user engagement and provide a more immersive experience.
6.5. Automating the Process
- Use VBA Macros: Automate the process of saving Excel graphs as images using VBA macros.
- Batch Export: Use macros to export multiple graphs as images at once.
- Save Time and Effort: Automation can save significant time and effort, especially when dealing with large numbers of graphs.
7. How Can Savewhere.net Help You Save Money on Software and Tools?
Saving money is a key focus for many individuals and businesses. Savewhere.net offers valuable resources to help you save on software and tools needed for creating high-quality Excel graph images.
7.1. Finding Free Alternatives
- Free Image Editors: Savewhere.net can guide you to free image editing software like GIMP or Paint.NET, which offer similar features to paid software like Adobe Photoshop.
- Online Conversion Tools: Discover free online tools for converting Excel files to images without needing to purchase software.
- Open Source Software: Explore open-source software options that provide powerful features at no cost.
7.2. Discounted Software Licenses
- Educational Discounts: Savewhere.net provides information on educational discounts for software like Microsoft Office and Adobe Creative Suite.
- Subscription Bundles: Learn about subscription bundles that offer multiple software applications at a reduced price.
- Promotional Offers: Stay updated on promotional offers and discounts on software licenses from various vendors.
7.3. Cloud-Based Solutions
- Cost-Effective Options: Cloud-based solutions often offer more cost-effective options compared to traditional software licenses.
- Subscription Models: Explore subscription models for software that allow you to pay only for what you use.
- Scalability: Cloud-based solutions can easily scale to meet your changing needs without requiring large upfront investments.
7.4. Productivity Tips
- Efficient Workflows: Savewhere.net offers productivity tips to help you streamline your workflow and reduce the time spent on creating and editing images.
- Keyboard Shortcuts: Learn keyboard shortcuts to quickly perform common tasks in image editing software.
- Automation Techniques: Discover automation techniques to reduce manual effort and increase efficiency.
7.5. Community Support
- Forums and Communities: Connect with online forums and communities where you can get free advice and support from other users.
- Tutorials and Guides: Access tutorials and guides that provide step-by-step instructions on using various software tools.
- Peer Learning: Learn from the experiences of others and share your own tips and tricks.
8. How to Integrate Excel Graph Images into Presentations and Reports?
Integrating Excel graph images into presentations and reports effectively can enhance the visual appeal and clarity of your content.
8.1. Preparing Images for Integration
- Optimize Image Size: Ensure the image size is appropriate for the presentation or report to avoid slow loading times or excessive file sizes.
- Choose the Right Format: Use PNG for graphs with text and sharp lines, and JPEG for photographs.
- Remove Backgrounds: Remove any unnecessary backgrounds to make the graph blend seamlessly with the document.
8.2. Inserting Images into PowerPoint
- Insert Picture: In PowerPoint, go to
Insert > Pictureand select the image file. - Resize and Position: Resize and position the image as needed.
- Add Animations: Add animations to make the graph appear dynamically.
8.3. Inserting Images into Word Documents
- Insert Picture: In Word, go to
Insert > Pictures > This Deviceand select the image file. - Wrap Text: Use the “Wrap Text” options to control how text flows around the image.
- Add Captions: Add captions to provide context and explanation for the graph.
8.4. Using Consistent Design Elements
- Color Schemes: Use consistent color schemes throughout the presentation or report to create a cohesive look.
- Fonts: Use the same fonts for titles, labels, and captions.
- Layout: Maintain a consistent layout to improve readability and visual appeal.
8.5. Accessibility Considerations
- Alt Text: Add alt text to images for viewers with disabilities.
- High Contrast: Use high contrast colors to make the graph readable for people with visual impairments.
- Clear Descriptions: Provide clear descriptions of the graph in the surrounding text.
9. What Are the Legal and Ethical Considerations?
When working with Excel graphs and images, it’s important to consider legal and ethical aspects to ensure you are using data and visuals responsibly.
9.1. Data Privacy and Confidentiality
- Anonymize Data: Ensure that any sensitive data is anonymized before creating and sharing graphs.
- Secure Storage: Store data and images securely to prevent unauthorized access.
- Compliance: Comply with data privacy regulations such as GDPR and CCPA. According to research from the U.S. Bureau of Economic Analysis (BEA), in July 2025, P provides Y
9.2. Copyright and Licensing
- Original Content: Ensure that you have the right to use any data or images included in your graphs.
- Creative Commons: Use Creative Commons licenses when appropriate to allow others to use your work with attribution.
- Avoid Plagiarism: Do not copy or reproduce graphs or images without permission.
9.3. Accurate Representation of Data
- Avoid Misleading Visuals: Ensure that your graphs accurately represent the data and do not mislead viewers.
- Use Appropriate Scales: Use appropriate scales and axes to avoid distorting the data.
- Disclose Limitations: Disclose any limitations or biases in the data or analysis.
9.4. Transparency and Disclosure
- Sources: Cite your sources of data and images.
- Methods: Disclose the methods used to create the graphs and analyze the data.
- Assumptions: Disclose any assumptions that were made during the analysis.
9.5. Ethical Use of Visuals
- Avoid Stereotypes: Avoid using visuals that perpetuate stereotypes or biases.
- Respectful Imagery: Use respectful imagery that does not offend or harm any group or individual.
- Inclusive Design: Design your graphs and images to be inclusive and accessible to all viewers.
10. Frequently Asked Questions (FAQ) About Saving Excel Graphs as Images
10.1. How Do I Save an Excel Graph as a High-Resolution Image?
To save an Excel graph as a high-resolution image, copy the graph and paste it into an image editor like Photoshop. Then, save the image as a PNG or TIFF file with a resolution of 300 DPI for printing or 72 DPI for web use.
10.2. What Is the Best Image Format for Saving Excel Graphs?
The best image format for saving Excel graphs is PNG because it offers lossless compression, which preserves the quality of the image. JPEG is suitable for photographs but can reduce the quality of graphs with text and sharp lines.
10.3. How Can I Reduce the File Size of an Excel Graph Image?
To reduce the file size of an Excel graph image, use compression settings in your image editor, optimize the color palette by reducing the number of colors, and crop any unnecessary areas around the graph.
10.4. Why Is My Excel Graph Image Blurry?
Your Excel graph image may be blurry if the resolution is too low or if you are using a lossy image format like JPEG. Increase the resolution and use a lossless format like PNG to improve clarity.
10.5. Can I Save an Animated Excel Graph as an Image?
You can’t directly save an animated Excel graph as a single image, but you can save it as a GIF file, which supports animation. Alternatively, you can create a series of images and combine them into an animation using image editing software.
10.6. How Do I Save an Excel Graph as a Vector Image?
To save an Excel graph as a vector image, save the Excel sheet as a PDF and then use a vector-based image editor like Adobe Illustrator to export the graph as a vector image.
10.7. How Do I Ensure the Colors in My Excel Graph Image Are Accurate?
To ensure the colors in your Excel graph image are accurate, use the correct color profile (e.g., sRGB for web, CMYK for print), adjust the color balance in your image editor, and ensure your monitor is calibrated correctly.
10.8. How Do I Add Alt Text to an Excel Graph Image?
To add alt text to an Excel graph image, insert the image into a document or presentation, right-click on the image, select “Format Picture,” and then enter the alt text in the “Alt Text” field.
10.9. What Are the Legal Considerations When Using Excel Graph Images?
When using Excel graph images, ensure that you have the right to use any data or images included in your graphs, comply with data privacy regulations, and accurately represent the data without misleading viewers.
10.10. How Can Savewhere.net Help Me Save Money on Software for Creating Excel Graph Images?
Savewhere.net can help you save money on software for creating Excel graph images by providing information on free alternatives, discounted software licenses, cloud-based solutions, and productivity tips.
Unlock Your Savings Potential with Savewhere.net
Ready to take control of your finances and start saving more effectively? Visit savewhere.net today to discover a wealth of tips, tricks, and resources tailored to help you achieve your financial goals. Whether you’re looking to cut daily expenses, find the best deals, or explore long-term investment strategies, savewhere.net is your ultimate guide. Join our community of savvy savers in Atlanta and across the USA, and start building a brighter financial future today.
Address: 100 Peachtree St NW, Atlanta, GA 30303, United States
Phone: +1 (404) 656-2000
Website: savewhere.net
Alt text: Excel graph illustrating data trends, useful for financial analysis and budget planning.