
Saving your iPhone photos to your PC is essential, and at savewhere.net, we understand that. This safeguard keeps your treasured memories secure and provides an extra backup in case of device issues. Discover the easy methods to transfer your photos to your PC, ensuring they are always within reach with cloud storage solutions and local backups.
1. Why Should I Save iPhone Photos to My PC?
Saving your iPhone photos to your PC ensures their safety and accessibility. Here’s why it’s a smart move:
- Backup: PCs provide a reliable backup solution if your iPhone is lost, stolen, or damaged.
- Storage: PCs offer ample storage, especially when your iPhone is running out of space.
- Accessibility: Easy access to your photos for editing, sharing, or printing.
According to a survey by Statista, 35% of smartphone users have experienced data loss, highlighting the importance of regular backups.
2. What Are the Best Methods to Save iPhone Photos to PC?
There are several effective ways to save your iPhone photos to your PC. Each method offers unique benefits, so choosing the best one depends on your specific needs and preferences. Let’s explore the top methods:
2.1 Using iCloud Photos
iCloud Photos automatically keeps your photos and videos safe, up to date, and available on all your Apple devices, on iCloud.com, and even your PC. When you use iCloud Photos, you don’t need to import photos from one iCloud device to another.
- Pros: Automatic syncing, accessibility across devices
- Cons: Requires sufficient iCloud storage, potential cost for upgrading storage
To use iCloud Photos:
- On your iPhone, go to Settings > [Your Name] > iCloud > Photos.
- Toggle iCloud Photos to “On.”
- Download iCloud for Windows on your PC and sign in with your Apple ID.
- Select Photos and click Apply. Your photos will automatically sync to your PC.
 iCloud Photos settings on iPhone showing the option to sync photos
2.2 Transferring Photos via USB Cable
Connecting your iPhone to your PC with a USB cable is a straightforward method for transferring photos.
- Pros: Fast transfer speed, no internet required
- Cons: Requires physical connection, manual transfer
To transfer photos via USB:
- Connect your iPhone to your PC using a USB cable.
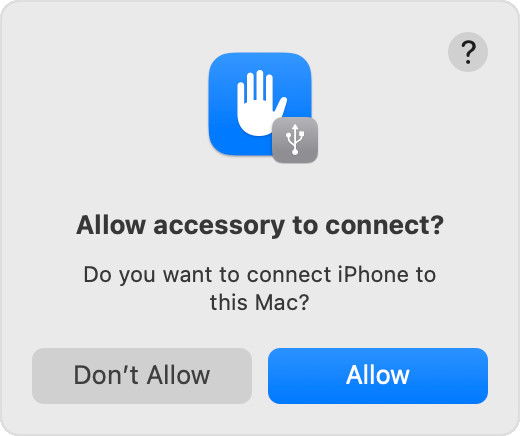
- If prompted on your iPhone, tap “Trust This Computer.”
- On your PC, open File Explorer and locate your iPhone under “Devices and drives.”
- Navigate to the “Internal Storage” > “DCIM” folder.
- Copy the photos and videos you want to save to a folder on your PC.
2.3 Utilizing Third-Party Apps
Several third-party apps can help you transfer photos from your iPhone to your PC. These apps often offer additional features and flexibility.
- Pros: Additional features, easy navigation
- Cons: Potential cost, security concerns
Popular third-party apps include:
- iMazing: Offers advanced file management and backup options.
- CopyTrans: Specializes in transferring various types of data between your iPhone and PC.
- AnyTrans: Provides comprehensive iPhone data management tools.
2.4 Importing Photos Using the Photos App in Windows
Windows has a built-in Photos app that makes importing photos from your iPhone easy.
- Pros: Simple interface, direct import to Photos app
- Cons: Basic features, may require updates
To import photos using the Photos app:
- Connect your iPhone to your PC with a USB cable.
- Open the Photos app on your PC.
- Click “Import” in the top right corner, then select your iPhone.
- Choose the photos you want to import and click “Import Selected.”
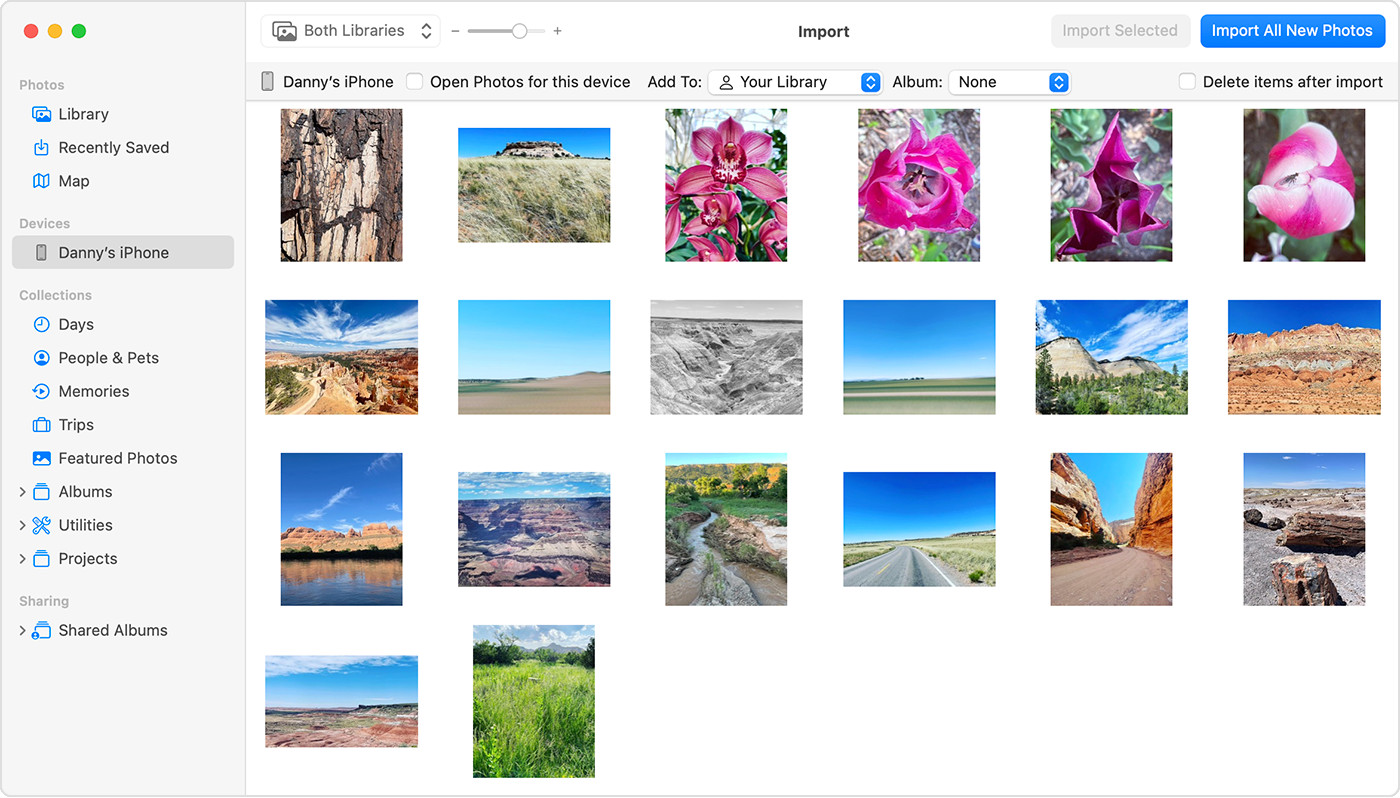 Mac screen showing the photos available for import
2.5 Using Cloud Storage Services (Google Photos, Dropbox, etc.)
Cloud storage services like Google Photos and Dropbox offer a convenient way to back up and access your photos on your PC.
- Pros: Automatic backup, accessibility from anywhere
- Cons: Requires internet connection, potential cost for storage
To use cloud storage:
- Download and install the Google Photos or Dropbox app on your iPhone.
- Enable automatic backup in the app settings.
- Install the corresponding app on your PC and sign in with your account.
- Your photos will automatically sync to your PC.
3. What Are the Steps to Transfer Photos from iPhone to PC via USB Cable?
Transferring photos via USB cable is a reliable and quick method. Here’s a detailed guide:
- Connect Your iPhone to Your PC: Use a USB cable to connect your iPhone to your PC. Make sure the cable is securely connected to both devices.
- Trust This Computer: When prompted on your iPhone, tap “Trust This Computer.” This allows your PC to access your iPhone’s files.
- Open File Explorer: On your PC, open File Explorer (Windows Explorer). You can do this by pressing the Windows key + E.
- Locate Your iPhone: In File Explorer, look for your iPhone listed under “Devices and drives.” It may appear as “Apple iPhone” or the name you’ve given your device.
- Navigate to the DCIM Folder: Double-click on your iPhone’s name, then navigate to the “Internal Storage” folder. Inside, you’ll find a folder named “DCIM” (Digital Camera Images).
- Copy Photos to Your PC: Open the DCIM folder. You may see multiple subfolders (e.g., 100APPLE, 101APPLE, etc.). These contain your photos and videos. Copy the files you want to transfer to a folder on your PC. You can create a new folder specifically for your iPhone photos.
- Safely Disconnect Your iPhone: Once the transfer is complete, safely disconnect your iPhone from your PC.
4. How To Save Iphone Photos To Pc Using iCloud for Windows?
iCloud for Windows provides a seamless way to sync your photos between your iPhone and PC. Here’s how to set it up:
- Download iCloud for Windows: Visit the Apple website to download iCloud for Windows.
- Install iCloud for Windows: Run the downloaded file and follow the on-screen instructions to install iCloud for Windows on your PC.
- Sign In with Your Apple ID: Once installed, open iCloud for Windows and sign in with the same Apple ID you use on your iPhone.
- Select Photos: In the iCloud for Windows interface, make sure the “Photos” option is selected.
- Apply Settings: Click the “Apply” button to save your settings. iCloud will now begin syncing your photos to your PC.
- Access Your Photos: Your photos will be stored in a folder named “iCloud Photos” in File Explorer. You can also access them through the Photos app on Windows.
5. Can I Use Google Photos to Save iPhone Photos to PC?
Yes, Google Photos is an excellent option for saving your iPhone photos to your PC. Here’s how to use it:
- Download Google Photos App: Download and install the Google Photos app on your iPhone from the App Store.
- Sign In to Your Google Account: Open the Google Photos app and sign in with your Google account. If you don’t have one, you can create one for free.
- Enable Backup & Sync: In the app settings, enable the “Backup & sync” feature. This will automatically back up your photos and videos to Google Photos.
- Choose Upload Size: Select your preferred upload size. “High quality” offers unlimited storage with slight compression, while “Original quality” preserves the original resolution but counts towards your Google account storage limit.
- Access Photos on Your PC: On your PC, open a web browser and go to the Google Photos website. Sign in with the same Google account you used on your iPhone. Your photos and videos will be available for viewing and downloading.
6. What Are the Benefits of Using Cloud Storage for iPhone Photos?
Using cloud storage services like iCloud, Google Photos, or Dropbox offers several advantages:
- Automatic Backup: Your photos are automatically backed up to the cloud, ensuring they are safe even if your iPhone is lost or damaged.
- Accessibility: Access your photos from any device with an internet connection, including your PC, tablet, or other smartphones.
- Storage Management: Offload photos from your iPhone to free up storage space.
- Sharing: Easily share photos with friends and family via links or shared albums.
- Organization: Many cloud services offer features like facial recognition and automatic organization to help you manage your photos.
7. How Do I Delete Photos from My iPhone After Saving Them to My PC?
After successfully saving your photos to your PC, you might want to delete them from your iPhone to free up space. Here’s how to do it safely:
- Verify the Transfer: Before deleting any photos, ensure that all the photos you want to save have been successfully transferred to your PC.
- Open the Photos App: On your iPhone, open the Photos app.
- Select Photos: Tap “Select” in the top right corner, then select the photos you want to delete.
- Delete Photos: Tap the trash can icon in the bottom right corner, then confirm that you want to delete the selected photos.
- Delete from Recently Deleted: To permanently remove the photos, go to the “Albums” tab, scroll down to “Recently Deleted,” and tap “Select.” Choose “Delete All” to permanently delete the photos.
8. What If My iPhone Photos Are Not Showing Up on My PC?
If your iPhone photos are not appearing on your PC when connected via USB, try these troubleshooting steps:
- Trust This Computer: Make sure you have tapped “Trust This Computer” on your iPhone when prompted.
- Check USB Connection: Ensure the USB cable is securely connected to both your iPhone and PC. Try using a different USB port or cable.
- Update iTunes: Ensure you have the latest version of iTunes installed on your PC.
- Restart Devices: Restart both your iPhone and PC.
- Update Drivers: Update the Apple Mobile Device USB driver on your PC. You can do this through Device Manager.
- Check iCloud Settings: If you use iCloud Photos, ensure that the photos are downloaded to your iPhone and not just stored in the cloud.
9. How Can I Save iPhone Photos to an External Hard Drive via PC?
Saving your iPhone photos to an external hard drive via your PC is an excellent way to create an additional backup. Here’s how:
- Connect Your iPhone to Your PC: Use a USB cable to connect your iPhone to your PC.
- Trust This Computer: If prompted, tap “Trust This Computer” on your iPhone.
- Connect the External Hard Drive to Your PC: Connect your external hard drive to your PC using its USB cable.
- Open File Explorer: Open File Explorer (Windows Explorer) on your PC.
- Locate Your iPhone: Find your iPhone listed under “Devices and drives.”
- Navigate to the DCIM Folder: Double-click on your iPhone’s name, then navigate to the “Internal Storage” folder and open the “DCIM” folder.
- Copy Photos to Your External Hard Drive: Open a new File Explorer window and locate your external hard drive. Create a new folder on the external hard drive for your iPhone photos.
- Transfer Photos: Copy the photos and videos from the DCIM folder on your iPhone to the folder on your external hard drive.
- Safely Disconnect Devices: Once the transfer is complete, safely disconnect both your iPhone and external hard drive from your PC.
10. What Are Common Issues When Saving iPhone Photos to PC and How to Fix Them?
Here are some common issues you might encounter and how to resolve them:
- Issue: Photos not showing up on PC.
- Solution: Ensure “Trust This Computer” is enabled, check USB connection, update iTunes, restart devices, and update drivers.
- Issue: Slow transfer speeds.
- Solution: Use a USB 3.0 port, close unnecessary programs, and transfer smaller batches of photos.
- Issue: Photos are rotated incorrectly.
- Solution: Use a photo editing app to rotate the photos, or adjust settings on your iPhone to use the “Most Compatible” format.
- Issue: Not enough storage on iCloud.
- Solution: Upgrade your iCloud storage plan or use another cloud storage service like Google Photos or Dropbox.
- Issue: HEIC format incompatibility.
- Solution: Change your iPhone camera settings to “Most Compatible” or use a HEIC converter tool on your PC.
11. How to Ensure Photos are Saved in the Best Quality When Transferring to PC?
To ensure your photos are saved in the best quality when transferring from your iPhone to your PC, follow these tips:
- Use Original Quality Settings: When using iCloud Photos or Google Photos, choose the “Original Quality” setting to preserve the original resolution of your photos.
- Avoid Compression: When transferring via USB, avoid using any compression tools or settings that might reduce the quality of your photos.
- Check iPhone Camera Settings: Ensure your iPhone camera settings are set to capture photos in the highest possible resolution and quality.
- Use High-Quality USB Cable: Use a high-quality USB cable to ensure a stable and fast connection during the transfer process.
- Transfer Directly: Transfer photos directly from your iPhone to your PC without using intermediate devices or platforms that might compress or alter the images.
12. What Security Measures Should I Take When Saving iPhone Photos to My PC?
Protecting your photos is crucial. Here are some security measures to consider:
- Use Strong Passwords: Use strong, unique passwords for your Apple ID, Google account, and any other cloud storage services you use.
- Enable Two-Factor Authentication: Enable two-factor authentication for your Apple ID and Google account to add an extra layer of security.
- Encrypt Your PC: Encrypt your PC’s hard drive to protect your photos in case your computer is lost or stolen.
- Use Antivirus Software: Install and regularly update antivirus software to protect your PC from malware and viruses.
- Secure Your Network: Use a secure Wi-Fi network and avoid connecting to public Wi-Fi networks when transferring sensitive data.
- Regular Backups: Create regular backups of your photos on an external hard drive or another secure location.
13. How to Convert HEIC Photos to JPEG When Transferring to PC?
HEIC (High Efficiency Image Container) is the default image format on iPhones. However, it may not be compatible with all PCs. Here’s how to convert HEIC photos to JPEG when transferring to your PC:
- Change iPhone Camera Settings:
- On your iPhone, go to Settings > Camera > Formats.
- Select “Most Compatible.” This will capture new photos in JPEG format.
- Use a HEIC Converter:
- There are many free HEIC converter tools available online.
- Transfer the HEIC photos to your PC, then use the converter to convert them to JPEG.
- Use CopyTrans HEIC for Windows:
- Download and install CopyTrans HEIC for Windows.
- This allows you to open HEIC files directly in Windows Photos and convert them to JPEG.
14. Are There Any Apps That Automatically Save iPhone Photos to PC?
Yes, several apps can automatically save your iPhone photos to your PC:
- iCloud for Windows: As mentioned earlier, iCloud for Windows automatically syncs your photos between your iPhone and PC.
- Google Photos: The Google Photos app automatically backs up your photos and videos to your Google account.
- Dropbox: Dropbox can automatically upload photos and videos from your iPhone to your Dropbox account.
- Microsoft OneDrive: OneDrive can automatically back up your photos to the cloud, making them accessible on your PC.
15. How to Troubleshoot Common iPhone to PC Photo Transfer Errors?
Here are some common errors and troubleshooting steps:
- Error: “A device attached to the system is not functioning.”
- Solution: Try a different USB port or cable, restart your PC and iPhone, and update the Apple Mobile Device USB driver.
- Error: “The required component is not installed.”
- Solution: Reinstall iTunes or the Apple Devices app from the Microsoft Store.
- Error: Photos app not recognizing iPhone.
- Solution: Ensure “Trust This Computer” is enabled, restart your iPhone, and update the Photos app.
- Error: iCloud Photos not syncing.
- Solution: Check your iCloud storage, ensure iCloud Photos is enabled on both your iPhone and PC, and restart both devices.
16. What Are the Privacy Implications of Saving iPhone Photos to My PC?
Saving your iPhone photos to your PC can raise privacy concerns. Here are some factors to consider:
- Data Security: Ensure your PC is protected with a strong password and antivirus software to prevent unauthorized access.
- Encryption: Encrypt your PC’s hard drive to protect your photos if your computer is lost or stolen.
- Cloud Storage Privacy: Review the privacy policies of any cloud storage services you use to understand how your data is stored and protected.
- Physical Security: Store your PC in a secure location to prevent physical access by unauthorized individuals.
- Regular Audits: Regularly review your security settings and update your software to protect against new threats.
17. How Often Should I Save My iPhone Photos to My PC?
The frequency of saving your iPhone photos to your PC depends on your usage and how important your photos are to you. Here are some guidelines:
- Regularly (Weekly or Bi-Weekly): If you take photos frequently, saving them weekly or bi-weekly is a good practice.
- After Major Events: After significant events like vacations, parties, or family gatherings, save your photos to your PC to ensure they are backed up.
- Before Software Updates: Before updating your iPhone’s operating system, save your photos to your PC as a precaution.
- When iPhone Storage is Full: If your iPhone is running out of storage, transfer photos to your PC to free up space.
- Periodically (Monthly): At a minimum, save your photos to your PC monthly to maintain a consistent backup.
According to a survey by Backblaze, 25% of people have lost data due to accidental deletion, emphasizing the importance of regular backups.
18. What Are the Alternatives to Saving iPhone Photos to a PC?
If saving your iPhone photos to a PC doesn’t suit your needs, here are some alternatives:
- External Hard Drive: Directly connect your iPhone to an external hard drive using a Lightning to USB adapter.
- Cloud Storage Services: Use cloud storage services like iCloud, Google Photos, Dropbox, or Microsoft OneDrive.
- Network-Attached Storage (NAS): Use a NAS device to create a private cloud storage solution for your photos.
- Professional Photo Backup Services: Use professional photo backup services that specialize in securely storing and managing your photos.
- Printing Photos: Print your photos and store them in physical albums or scrapbooks.
19. How Does Saving iPhone Photos to PC Affect iCloud Storage?
Saving your iPhone photos to your PC can affect your iCloud storage in several ways:
- Freeing Up iCloud Storage: If you delete photos from your iPhone after saving them to your PC, you can free up iCloud storage space.
- iCloud Photos Syncing: If you use iCloud Photos, saving photos to your PC doesn’t directly affect your iCloud storage, as the photos are already stored in the cloud.
- Managing iCloud Storage: If you are running out of iCloud storage, saving photos to your PC and then deleting them from iCloud can help you manage your storage usage.
- Optimizing iPhone Storage: You can enable the “Optimize iPhone Storage” setting in iCloud Photos, which stores smaller, optimized versions of your photos on your iPhone while keeping the full-resolution originals in iCloud.
20. Can I Save Live Photos from iPhone to PC?
Yes, you can save Live Photos from your iPhone to your PC. Here’s how:
- Transfer via USB: When you transfer Live Photos via USB, they are saved as both a still image (JPEG) and a video file (MOV).
- iCloud for Windows: When you download Live Photos from iCloud for Windows, they are also saved as both a still image and a video file.
- Google Photos: Google Photos supports Live Photos and will save them as a short video clip.
- Third-Party Apps: Some third-party apps, like iMazing, can transfer Live Photos and preserve their animated format.
21. What is the Difference Between Copying and Moving Photos from iPhone to PC?
When transferring photos from your iPhone to your PC, you have the option to either copy or move the files:
- Copying Photos: Copying photos means that the original photos remain on your iPhone, and a duplicate is created on your PC. This is a safe option as it ensures you have a backup on your iPhone.
- Moving Photos: Moving photos means that the original photos are deleted from your iPhone after they are transferred to your PC. This frees up storage space on your iPhone but carries the risk of data loss if something goes wrong during the transfer.
It’s generally recommended to copy photos rather than move them to ensure you have a backup.
22. How Do I Choose the Best Method to Save My iPhone Photos to My PC?
Choosing the best method depends on your specific needs and preferences. Consider these factors:
- Ease of Use: How easy is the method to set up and use?
- Speed: How quickly can you transfer photos?
- Cost: Are there any costs associated with the method?
- Storage Capacity: Do you need additional storage space?
- Accessibility: How easily can you access your photos from other devices?
- Security: How secure is the method?
23. What is the Role of Savewhere.net in Helping Me Manage My Photos?
At savewhere.net, we help you discover the best ways to manage your photos and other digital assets. We offer resources, tips, and recommendations for various methods and tools to save, back up, and organize your photos efficiently. Whether you’re looking for cloud storage solutions, external hard drives, or software to manage your photos, savewhere.net provides valuable insights to help you make informed decisions. We also offer the latest deals and discounts on relevant products and services, helping you save money while ensuring your precious memories are safe and accessible.
24. How to Back Up iPhone Photos to PC Without iCloud?
If you prefer not to use iCloud, here are alternative methods to back up your iPhone photos to your PC:
- USB Cable: Connect your iPhone to your PC using a USB cable and copy the photos manually.
- Third-Party Apps: Use third-party apps like iMazing, CopyTrans, or AnyTrans.
- Google Photos: Use the Google Photos app to back up your photos to your Google account and access them on your PC.
- Dropbox: Use Dropbox to automatically upload photos from your iPhone to your Dropbox account and access them on your PC.
- Microsoft OneDrive: Use OneDrive to back up your photos to the cloud and access them on your PC.
25. How to Save Photos from iPhone to PC Wirelessly?
Saving photos from your iPhone to your PC wirelessly offers convenience and flexibility. Here are several methods:
- Using iCloud Photos: Enable iCloud Photos on both your iPhone and PC to automatically sync your photos.
- Google Photos: Use the Google Photos app on your iPhone and access your photos on your PC via the Google Photos website or app.
- Dropbox: Use the Dropbox app on your iPhone to automatically upload photos and access them on your PC.
- Microsoft OneDrive: Use the OneDrive app on your iPhone to back up your photos to the cloud and access them on your PC.
- AirDrop (for Macs): If you have a Mac, you can use AirDrop to wirelessly transfer photos from your iPhone to your Mac, then transfer them to your PC.
- Third-Party Apps: Use third-party apps like AnyTrans or iMazing that offer wireless transfer options.
By following these detailed steps and tips, you can ensure that your iPhone photos are safely and efficiently saved to your PC, giving you peace of mind and preserving your valuable memories.
FAQ: Saving iPhone Photos to PC
1. How do I transfer photos from my iPhone to my computer?
You can transfer photos using a USB cable, iCloud, Google Photos, or third-party apps like Dropbox or iMazing.
2. Can I use iCloud to save my iPhone photos to my PC?
Yes, download iCloud for Windows and sign in with your Apple ID to sync your photos.
3. What if my iPhone photos are not showing up on my PC?
Ensure you tap “Trust This Computer” on your iPhone, check the USB connection, and update iTunes.
4. How can I save Live Photos from my iPhone to my PC?
Live Photos are saved as both a still image (JPEG) and a video file (MOV) when transferred via USB or iCloud.
5. Is it better to copy or move photos from my iPhone to my PC?
Copying is safer because it keeps the original photos on your iPhone as a backup.
6. How often should I save my iPhone photos to my PC?
Weekly or bi-weekly if you take photos frequently, or at least monthly.
7. How can I save photos from my iPhone to my PC wirelessly?
Use iCloud Photos, Google Photos, Dropbox, or Microsoft OneDrive for wireless transfers.
8. What should I do if I run out of iCloud storage?
Consider upgrading your iCloud storage plan or using another cloud storage service like Google Photos.
9. How do I convert HEIC photos to JPEG when transferring to my PC?
Change your iPhone camera settings to “Most Compatible” or use a HEIC converter tool on your PC.
10. Are there any apps that automatically save iPhone photos to my PC?
Yes, iCloud for Windows, Google Photos, Dropbox, and Microsoft OneDrive offer automatic backup.
Visit savewhere.net today to discover more tips, tricks, and resources to help you manage and save your iPhone photos to your PC. Explore our guides, compare tools, and find the best deals on storage solutions to ensure your memories are safe and accessible. Join our community of savvy savers and start making the most of your digital life today.
Address: 100 Peachtree St NW, Atlanta, GA 30303, United States.
Phone: +1 (404) 656-2000.
Website: savewhere.net.
