
Saving your precious iPhone photos to your computer is essential for safekeeping and easy access. This comprehensive guide, brought to you by savewhere.net, will walk you through various methods to transfer your photos and videos, ensuring they’re backed up and readily available. You’ll discover different options for backing up your photos, including wireless transfers and file formats. Let’s dive in and discover how to safeguard your visual memories.
1. Why Should I Save My iPhone Pictures to My Computer?
There are numerous reasons why transferring your iPhone photos to your computer is a smart move. It’s not just about freeing up space on your device; it’s about safeguarding your memories and ensuring you have access to them regardless of what happens to your iPhone.
- Backup and Security: Computers provide a secure place to store your photos. If your iPhone is lost, stolen, or damaged, your photos are safe on your computer.
- Free Up iPhone Storage: Transferring photos clears up valuable storage on your iPhone, allowing you to take more photos and videos.
- Easy Access and Organization: Once on your computer, you can easily organize, edit, and share your photos.
- Long-Term Preservation: While cloud services are convenient, having a local backup on your computer ensures long-term preservation, regardless of internet access or service changes.
According to a survey by the Pew Research Center, approximately 85% of adults in the United States own a smartphone, and a significant portion of them use their phones as their primary camera. This highlights the importance of having reliable methods to back up these photos.
2. What Are the Different Ways to Save iPhone Pictures to a Computer?
There are several methods to transfer photos from your iPhone to your computer, each with its own advantages. Here’s an overview:
- Using iCloud Photos: This method automatically syncs your photos and videos to all your Apple devices and iCloud.
- Using a USB Cable: Direct transfer via USB is a reliable and fast option.
- Using iTunes: While less common now, iTunes can still be used to sync photos.
- Using Third-Party Software: Various apps offer additional features like wireless transfer and automatic organization.
- Using Email or Cloud Services: For a few photos, emailing or using cloud services like Google Photos or Dropbox can be quick solutions.
3. How Do I Use iCloud Photos to Transfer Pictures?
iCloud Photos is a seamless way to keep your photos and videos synced across all your Apple devices. Here’s how to set it up and use it effectively:
Answer: iCloud Photos automatically uploads and stores your original, full-resolution photos, keeping them updated and accessible on all your Apple devices and iCloud.com. To set up iCloud Photos, go to Settings on your iPhone, tap on your name, then select iCloud > Photos and toggle iCloud Photos to on.
Setting Up iCloud Photos
- Enable iCloud Photos: Go to Settings > [Your Name] > iCloud > Photos. Toggle the iCloud Photos option to on.
- Optimize Storage: Choose whether to “Optimize iPhone Storage” to save space on your device by storing smaller versions of your photos, or “Download and Keep Originals” to keep full-resolution versions.
- Access on Computer: On your computer, you can access your photos through iCloud.com or by downloading iCloud for Windows.
Advantages of iCloud Photos
- Automatic Syncing: Photos and videos are automatically uploaded to iCloud, making them accessible on all your devices.
- Storage Optimization: iCloud can help manage your device’s storage by storing optimized versions on your iPhone.
- Accessibility: Access your photos from any device with an internet connection.
Disadvantages of iCloud Photos
- Storage Limitations: iCloud provides only 5GB of free storage; you may need to purchase more.
- Internet Dependency: Requires a stable internet connection for uploading and downloading photos.
- Privacy Concerns: Some users have concerns about storing personal photos in the cloud.
4. How Do I Transfer Photos Using a USB Cable?
Using a USB cable is a straightforward and reliable method to transfer photos from your iPhone to your computer.
Answer: Connect your iPhone to your computer using a USB cable, unlock your device, and trust the computer if prompted. Then, open the Photos app on your computer to import your photos.
Steps for Transferring Photos via USB
-
Connect iPhone to Computer: Use a USB cable to connect your iPhone to your computer.
-
Unlock iPhone: Unlock your iPhone and, if prompted, tap “Trust This Computer.”
-
Open Photos App (Mac): On a Mac, the Photos app should automatically open. If not, open it manually.
-
Open File Explorer (Windows): On a Windows PC, open File Explorer and locate your iPhone under “This PC.”
-
Import Photos:
- Mac: In the Photos app, select the photos you want to import and click “Import Selected” or “Import All New Photos.”
- Windows: In File Explorer, navigate to the DCIM folder, copy the photos you want, and paste them into a folder on your computer.
-
Disconnect iPhone: Once the transfer is complete, safely disconnect your iPhone.
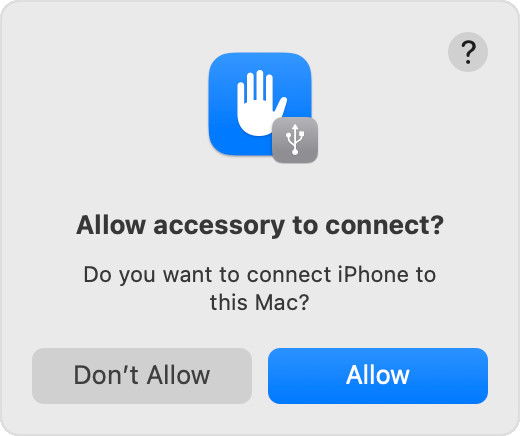 Accessory prompt to allow or don’t allow accessory to connect
Advantages of Using a USB Cable
- Reliability: Direct connection ensures a stable transfer.
- Speed: Generally faster than wireless methods.
- No Internet Required: Works without an internet connection.
Disadvantages of Using a USB Cable
- Requires a Cable: Needs a physical cable and a compatible port on your computer.
- Manual Process: Requires manual selection and transfer of photos.
5. Can I Use iTunes to Save My Photos?
While iCloud and USB transfers are more common, iTunes can still be used to sync photos from your computer to your iPhone. However, it does not transfer photos from your iPhone to your computer.
Answer: iTunes is primarily used to sync photos from your computer to your iPhone, not the other way around. To use iTunes for photo syncing, connect your iPhone to your computer, select your device in iTunes, click on “Photos,” and choose the folders you want to sync.
Steps for Syncing Photos with iTunes
- Connect iPhone to Computer: Connect your iPhone to your computer using a USB cable.
- Open iTunes: Open the iTunes application on your computer.
- Select Device: Click on the iPhone icon when it appears in iTunes.
- Go to Photos: In the sidebar, click on “Photos.”
- Sync Photos: Check the box next to “Sync Photos” and choose the folder on your computer that contains the photos you want to sync.
- Apply Changes: Click “Apply” to start the syncing process.
- Disconnect iPhone: Once syncing is complete, safely disconnect your iPhone.
Advantages of Using iTunes
- Organized Syncing: Allows you to sync specific folders of photos from your computer to your iPhone.
- Offline Access: Photos are stored locally on your iPhone, allowing offline access.
Disadvantages of Using iTunes
- One-Way Sync: Primarily for syncing photos from your computer to your iPhone, not the other way around.
- Overwrites Existing Photos: Syncing can overwrite existing photos on your iPhone.
- Complex Process: Can be more complex compared to other methods.
6. What Third-Party Software Can I Use to Transfer Photos?
Several third-party software options are available for transferring photos from your iPhone to your computer, often providing additional features and flexibility.
Answer: Popular third-party software for transferring photos includes AnyTrans, iMazing, and DearMob iPhone Manager. These tools often offer wireless transfer, automatic organization, and support for various file formats.
Popular Third-Party Software
- AnyTrans: Offers comprehensive iPhone management, including photo transfer, backup, and organization.
- iMazing: Provides advanced features like wireless transfer, backup, and the ability to extract photos from backups.
- DearMob iPhone Manager: Known for its user-friendly interface and fast transfer speeds, supporting various file formats and encryption.
| Software | Features | Pros | Cons |
|---|---|---|---|
| AnyTrans | Photo transfer, backup, organization, wireless transfer, support for various file formats | Comprehensive features, user-friendly interface, fast transfer speeds | Paid software, some features require a subscription |
| iMazing | Wireless transfer, backup, extract photos from backups, manage apps, transfer files | Advanced features, wireless transfer, backup options | Paid software, can be expensive for full functionality |
| DearMob iPhone Manager | Photo transfer, fast transfer speeds, support for various file formats, encryption, user-friendly interface | User-friendly, fast transfer speeds, supports encryption | Limited free version, full features require purchase |
| CopyTrans Photo | Designed specifically for photo transfer, allows drag-and-drop transfer, supports various file formats, integrates with Windows Explorer | Simple and easy to use, supports drag-and-drop, integrates with Windows Explorer | Limited features compared to more comprehensive software |
| iExplorer | Allows accessing and transferring files from iPhone, including photos, music, messages, and more, can access iPhone’s file system | Allows accessing iPhone’s file system, can transfer various types of files | Primarily focused on file management, may not be as user-friendly for photo transfer as dedicated photo transfer software |
| Syncios Manager | Provides comprehensive iPhone management, including photo transfer, backup, restore, and more, supports both USB and Wi-Fi transfer | Comprehensive features, supports both USB and Wi-Fi transfer, offers backup and restore options | Can be overwhelming due to the abundance of features, some features require a subscription |
| Apowersoft Phone Manager | Allows transferring photos, videos, music, contacts, and more, supports both USB and Wi-Fi transfer, offers a user-friendly interface | User-friendly interface, supports both USB and Wi-Fi transfer, offers a wide range of features | Some features may require a subscription, can be resource-intensive |
| Dr.Fone – Phone Manager | Part of the Dr.Fone toolkit, allows transferring photos, music, videos, and more, supports both USB and Wi-Fi transfer, offers advanced features like HEIC conversion and photo compression | Advanced features like HEIC conversion and photo compression, supports both USB and Wi-Fi transfer, part of a comprehensive toolkit | Can be expensive as part of the Dr.Fone toolkit, some features may require a subscription |
| EaseUS MobiMover | Allows transferring photos, videos, music, contacts, and more, supports both USB and Wi-Fi transfer, offers additional features like iOS data backup and restore | Supports both USB and Wi-Fi transfer, offers iOS data backup and restore, user-friendly interface | Some features may require a subscription, can be slower compared to USB transfer |
| Tenorshare iCareFone | Provides iPhone management, including photo transfer, backup, restore, and more, supports various file formats, offers advanced features like iOS system repair and cleaning | Offers advanced features like iOS system repair and cleaning, supports various file formats, provides iPhone management | Some features may require a subscription, can be more complex compared to simpler photo transfer tools |
Steps for Using Third-Party Software
- Download and Install: Download and install the software on your computer.
- Connect iPhone: Connect your iPhone to your computer using a USB cable or follow the software’s instructions for wireless connection.
- Launch Software: Open the software and follow the prompts to recognize your iPhone.
- Select Photos: Choose the photos you want to transfer.
- Transfer Photos: Click the transfer button and select the destination folder on your computer.
- Disconnect iPhone: Once the transfer is complete, safely disconnect your iPhone.
Advantages of Using Third-Party Software
- Additional Features: Often includes features like wireless transfer, automatic organization, and support for various file formats.
- User-Friendly Interfaces: Many offer more intuitive interfaces compared to iTunes.
Disadvantages of Using Third-Party Software
- Cost: Many software options are paid.
- Security Concerns: Ensure the software is from a reputable source to avoid security risks.
7. How Can I Transfer Photos Using Email or Cloud Services?
For transferring a small number of photos, email or cloud services like Google Photos or Dropbox can be a convenient option.
Answer: To transfer photos using email, simply attach the photos to an email and send it to yourself. For cloud services, upload the photos to the cloud service of your choice and then download them to your computer.
Steps for Transferring Photos via Email
- Select Photos: On your iPhone, select the photos you want to transfer.
- Share via Email: Tap the share icon and choose the email option.
- Send Email: Enter your own email address and send the email.
- Download Photos: On your computer, open the email and download the attached photos.
Steps for Transferring Photos via Cloud Services
- Install Cloud Service App: Download and install a cloud service app like Google Photos or Dropbox on your iPhone.
- Upload Photos: Open the app and upload the photos you want to transfer.
- Download Photos: On your computer, access the cloud service through a web browser or desktop app and download the photos.
Advantages of Using Email or Cloud Services
- Convenience: Quick and easy for transferring a few photos.
- Accessibility: Photos can be accessed from any device with an internet connection.
Disadvantages of Using Email or Cloud Services
- Limited for Large Transfers: Not practical for transferring a large number of photos.
- Compression: Email and some cloud services may compress photos, reducing quality.
- Storage Limitations: Cloud services offer limited free storage; you may need to purchase more.
8. How Do I Deal With HEIC Files When Transferring Photos?
HEIC (High Efficiency Image Container) is the default image format for iPhones. However, it may not be compatible with all computers.
Answer: To deal with HEIC files, you can either change your iPhone’s camera settings to capture photos in JPEG format or use a converter to convert HEIC files to JPEG on your computer.
Changing iPhone Camera Settings
- Go to Settings: On your iPhone, open the Settings app.
- Tap Camera: Scroll down and tap “Camera.”
- Tap Formats: Tap “Formats.”
- Choose Most Compatible: Select “Most Compatible” to capture photos in JPEG format.
Converting HEIC Files on Your Computer
- Use Online Converters: Numerous online converters can convert HEIC files to JPEG.
- Use Software: Software like iMazing HEIC Converter can convert HEIC files in bulk.
Advantages of Converting to JPEG
- Compatibility: JPEG is compatible with most devices and software.
- Ease of Use: JPEG files are easy to open and edit on any computer.
Disadvantages of Converting to JPEG
- Loss of Efficiency: JPEG files are larger than HEIC files, taking up more storage space.
- Potential Quality Loss: Converting from HEIC to JPEG may result in some loss of image quality.
9. How to troubleshoot common issues during photo transfer?
Encountering issues while transferring photos from your iPhone to your computer can be frustrating. Here are common problems and their solutions:
Answer: Common issues include the computer not recognizing the iPhone, transfer errors, and incorrect photo orientation. Solutions involve checking the USB connection, updating software, and adjusting camera settings.
Troubleshooting Steps
-
iPhone Not Recognized:
- Check USB Connection: Ensure the USB cable is properly connected to both the iPhone and the computer. Try a different USB port or cable.
- Trust This Computer: Make sure you have tapped “Trust This Computer” on your iPhone when prompted.
- Update Software: Ensure both your iPhone and computer have the latest software updates.
- Restart Devices: Restart both your iPhone and computer.
-
Transfer Errors:
- Check Storage Space: Ensure your computer has enough storage space for the photos.
- Close Other Applications: Close any unnecessary applications on your computer to free up resources.
- Transfer in Batches: Try transferring photos in smaller batches.
-
Incorrect Photo Orientation:
- Adjust Settings: On your iPhone, go to Settings > Camera > Preserve Settings and enable “Camera Mode.” This helps retain the correct orientation.
- Edit on Computer: Rotate the photos on your computer using a photo editing program.
Additional Tips
- Disable iCloud Photos Temporarily: Sometimes, disabling iCloud Photos during the transfer can resolve issues.
- Use Safe Mode: Boot your computer in safe mode to rule out any software conflicts.
10. How Can Savewhere.net Help Me Manage My Photos and Finances?
Savewhere.net is your go-to resource for managing your photos, finances, and overall digital life.
Answer: Savewhere.net offers tips, resources, and tools to help you save money, manage your digital assets, and protect your valuable memories.
How Savewhere.net Can Help
- Financial Tips: Discover strategies to save money on digital storage, software, and other tools related to photo management.
- Resource Recommendations: Access reviews and recommendations for the best software, cloud services, and hardware for managing your photos.
- Community Support: Connect with a community of like-minded individuals to share tips, ask questions, and get support.
Save Money on Photo Management
- Cloud Storage Deals: Find deals and discounts on cloud storage services like iCloud, Google Photos, and Dropbox.
- Software Discounts: Get access to discounted prices on photo editing and management software.
- DIY Solutions: Learn how to create your own cost-effective photo management solutions using free or open-source tools.
By leveraging the resources at savewhere.net, you can optimize your photo management practices while saving money. Whether you’re looking to back up your photos, organize your collection, or find the best software for editing, Savewhere.net is here to help.
FAQ Section
1. How much does iCloud storage cost?
iCloud offers 5GB of free storage, but you can upgrade to 50GB for $0.99 per month, 200GB for $2.99 per month, or 2TB for $9.99 per month.
2. Can I transfer photos from my iPhone to an Android computer?
Yes, you can transfer photos from your iPhone to an Android computer using a USB cable. Connect your iPhone, unlock it, and trust the computer. Then, access the DCIM folder in File Explorer and copy the photos to your computer.
3. What if my iPhone doesn’t show up on my computer?
Ensure your iPhone is unlocked and that you have tapped “Trust This Computer.” Also, check the USB connection and update your computer’s drivers.
4. How do I convert HEIC files to JPEG on my computer?
You can use online converters, software like iMazing HEIC Converter, or change your iPhone’s camera settings to capture photos in JPEG format.
5. Can I wirelessly transfer photos from my iPhone to my computer?
Yes, you can use iCloud Photos, third-party software like AnyTrans or iMazing, or cloud services like Google Photos or Dropbox to wirelessly transfer photos.
6. Is it safe to use third-party software to transfer photos?
Ensure the software is from a reputable source to avoid security risks. Read reviews and check the software’s reputation before downloading.
7. How do I free up space on my iPhone after transferring photos?
After transferring photos, delete them from your iPhone to free up space. If you’re using iCloud Photos, make sure “Optimize iPhone Storage” is enabled.
8. What are the best practices for organizing photos on my computer?
Create folders by date, event, or category. Use descriptive filenames and consider using photo management software to tag and organize your photos.
9. Can I transfer Live Photos from my iPhone to my computer?
Yes, when transferring Live Photos, make sure to transfer both the image and the associated video file. Some software may automatically recognize and transfer Live Photos correctly.
10. How do I back up my iPhone photos to an external hard drive?
Connect your iPhone to your computer, transfer the photos to your computer, and then copy them to an external hard drive. You can also use backup software to automate this process.
Address: 100 Peachtree St NW, Atlanta, GA 30303, United States.
Phone: +1 (404) 656-2000.
Website: savewhere.net.
Saving your iPhone photos to your computer is a critical step in preserving your memories. Whether you choose iCloud Photos, a USB cable, third-party software, or another method, the key is to find a solution that works best for you. At savewhere.net, we’re dedicated to providing you with the resources and tips you need to manage your digital life effectively. Remember that the information provided here is intended to give you a general understanding of how to safely back up your personal memories. For more complex questions, you should consult with a qualified expert. Don’t wait, start saving your precious photos today!