
Are you tired of taking screenshots on your Windows machine only to lose them in the digital abyss? You’re not alone. The question “Where do my screenshots go?” is a common frustration for many Windows users, especially when you’re in a hurry or working with a new computer.
It’s happened to the best of us: you press the Print Screen key, capture that crucial information, and then… poof! Where does it vanish to? This guide is here to demystify the screenshot saving process on Windows and show you exactly where to find your precious captures. We’ll also explore how to take control of your screenshots and even introduce a tool to make your screenshot workflow smoother and more efficient.
Uncovering the Default Location: Where Do Windows Screenshots Go?
Let’s get straight to the point. When you take a screenshot on Windows, its destination depends on the method you use. The quickest and most common way is by pressing the Print Screen (PrtScn) key, usually located in the upper-right area of your keyboard.
When you use just the Print Screen key, Windows cleverly saves the screenshot to your clipboard. This means it’s not saved as a file in a folder right away. Instead, it’s temporarily stored, ready for you to paste it into an application like Paint, Word, or even directly into an email.
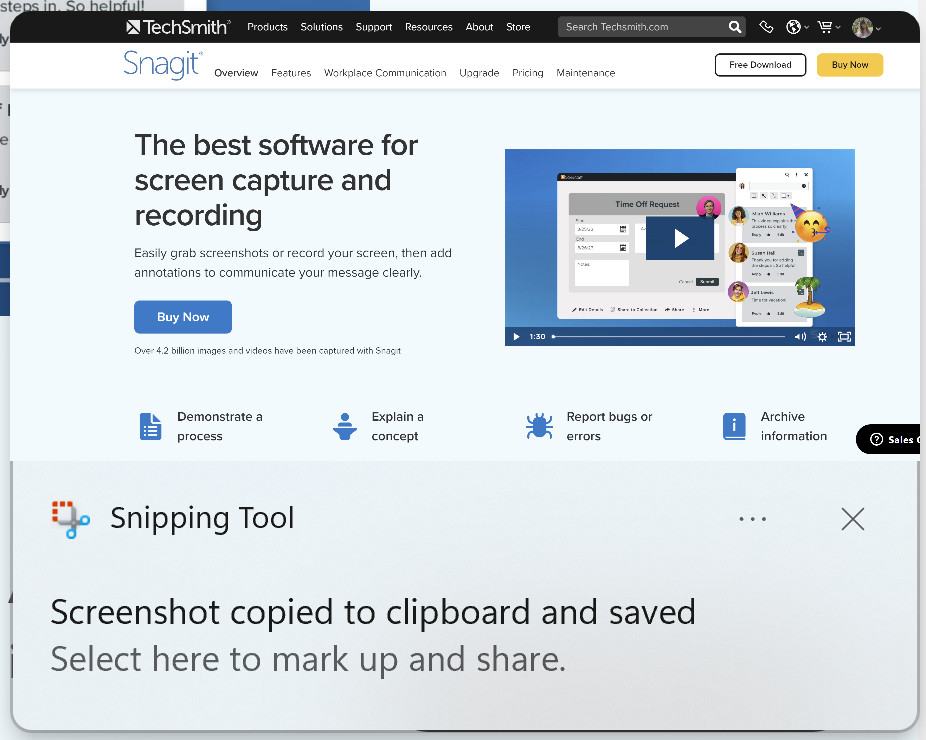 Snipping Tool pop up window that describes the screenshot being copied to clipboard and saved.
However, if you’re looking for saved screenshot files, Windows does have a default folder. If you use the Windows key + Print Screen shortcut, your screenshot will be automatically saved as a file. To find these saved screenshots, you need to navigate through File Explorer. Here’s the file path:
File Explorer → This PC → Local Disk (C:) → Users → Your Username → OneDrive → Pictures → Screenshots
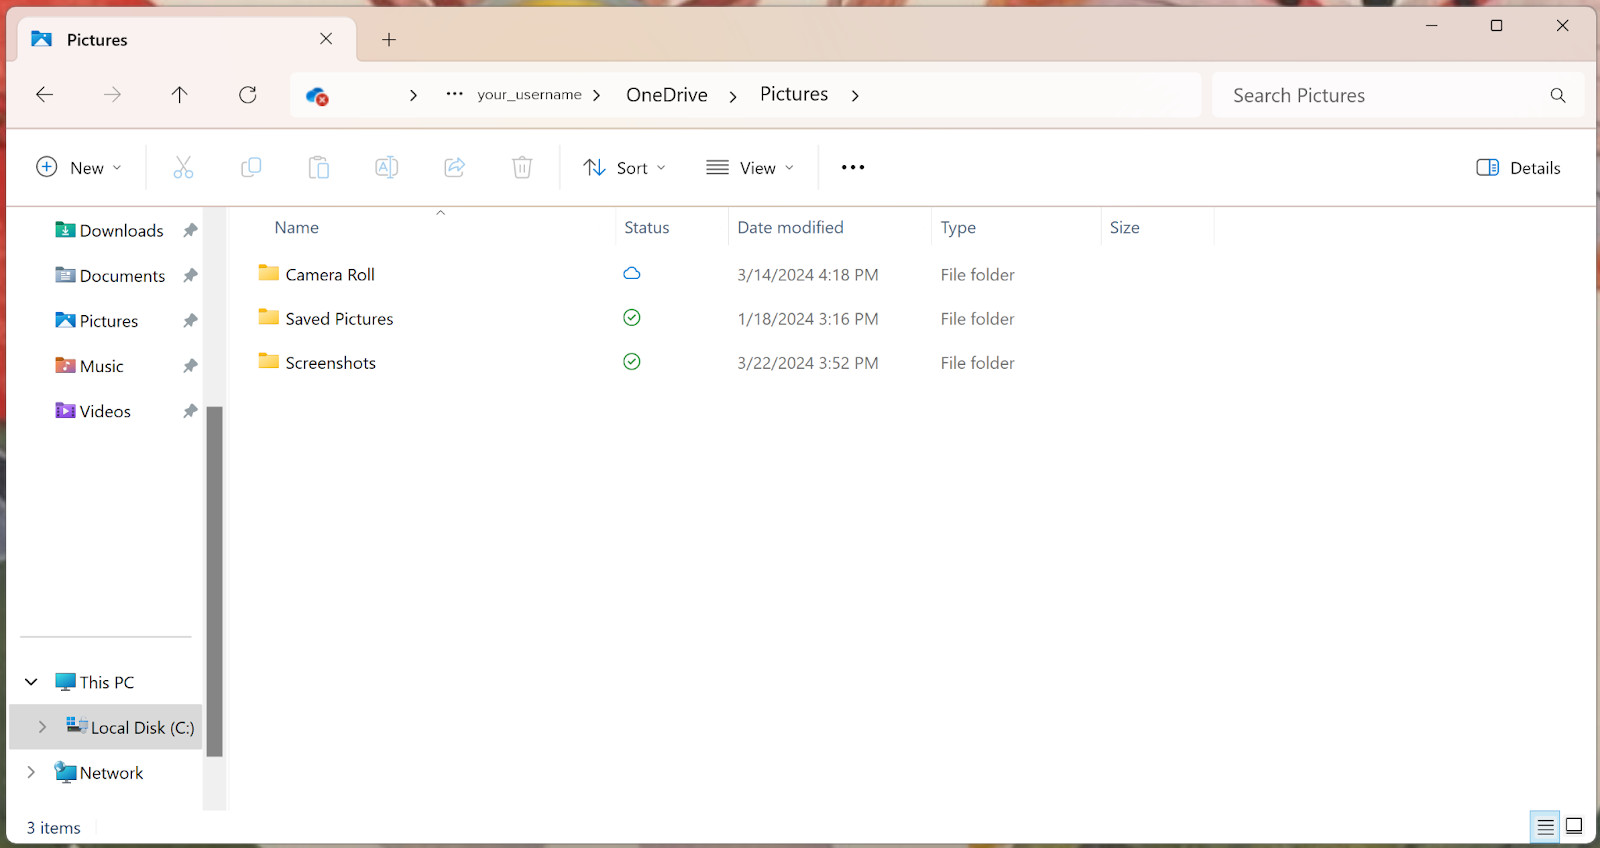 Window
Yes, it’s a bit of a trek! Many users find this default location buried within OneDrive a little inconvenient. It’s not the most intuitive place to quickly grab your screenshots, especially if you don’t actively use OneDrive for picture storage.
Taking Control: Customizing Your Windows Screenshot Location
The good news is you’re not stuck with the default location. Windows offers a couple of simple ways to customize where your screenshots are saved.
1. Using Paint for Custom Saving:
If you want to choose a specific location immediately after taking a screenshot with the Print Screen key (and it’s on your clipboard), Paint is your built-in friend.
- Press the Print Screen key to capture your screen.
- Open Paint (search for “Paint” in the Windows search bar).
- Press Ctrl + V to paste your screenshot into Paint.
- Click File in the top left corner, then select Save As.
- Choose your desired location and file name, and click Save.
This method gives you immediate control over where each screenshot is saved.
2. Creating a Dedicated Screenshot Folder:
For better organization, consider creating a dedicated folder specifically for your screenshots. You can create this folder anywhere you like – on your Desktop, in your Documents, or directly on your Local Disk. Once you’ve created your folder, you can use the Paint “Save As” method mentioned above and quickly navigate to your custom folder each time.
Having a dedicated folder makes it much easier to find and manage your screenshots in the long run.
Why Default Locations Can Be a Hassle
While Windows provides default screenshot locations, they aren’t always ideal for efficient workflows. The OneDrive path can be deeply nested, making quick access cumbersome. Relying solely on the clipboard means screenshots are temporary and require extra steps to save permanently.
This is where dedicated screenshot tools come into play. Just like Mac users often benefit from customizing their screenshot saving locations, Windows users can also gain significant time and organizational advantages by using more powerful screenshot utilities.
Streamline Your Workflow: Consider a Dedicated Screenshot Tool Like Snagit
If you find yourself frequently taking screenshots, wrestling with default locations, and wishing for more organization, it might be time to explore a third-party screenshot tool like Snagit.
Snagit is designed to simplify and enhance your entire screenshot process, from capture to organization and sharing. Here’s how it can make a difference:
- Customizable Capture Options: Snagit offers a variety of capture modes beyond just full-screen captures. You can capture specific regions, scrolling windows, and even record video.
- Direct Saving to Custom Locations: Snagit lets you pre-define where your screenshots are saved. You can set up custom folders and naming conventions to keep everything organized from the moment you capture.
- Built-in Editor for Annotations: Snagit includes a powerful image editor, allowing you to quickly annotate your screenshots with arrows, text, callouts, and more. This is perfect for adding context and clarity to your visuals.
- Organized Library with Tagging: Snagit’s library is a game-changer for screenshot management. It automatically catalogs your captures, allowing you to search by date, application, or website. You can also add custom tags for even more granular organization, creating a visual database of your screenshots.
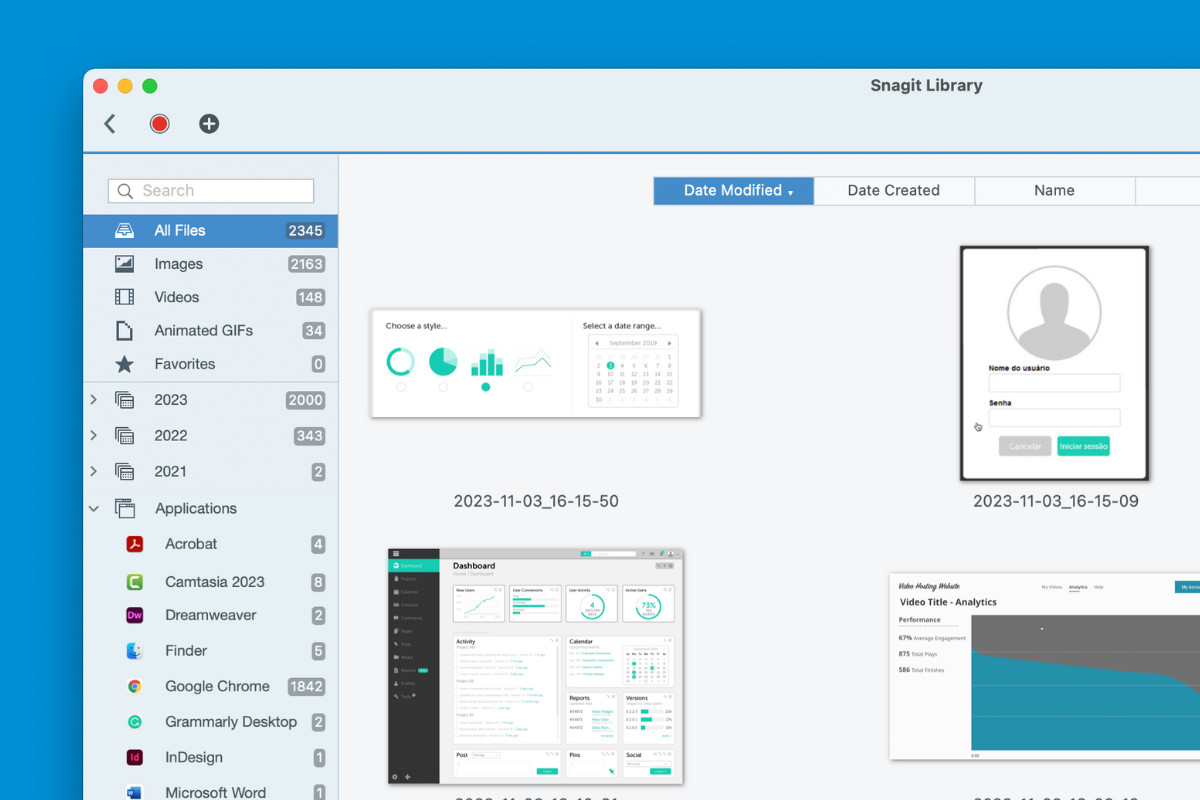 Snagit
Imagine never having to ask “Where did my screenshot go?” again. With Snagit, you can take control of your screenshot workflow, save time, and keep your visual information organized and readily accessible.
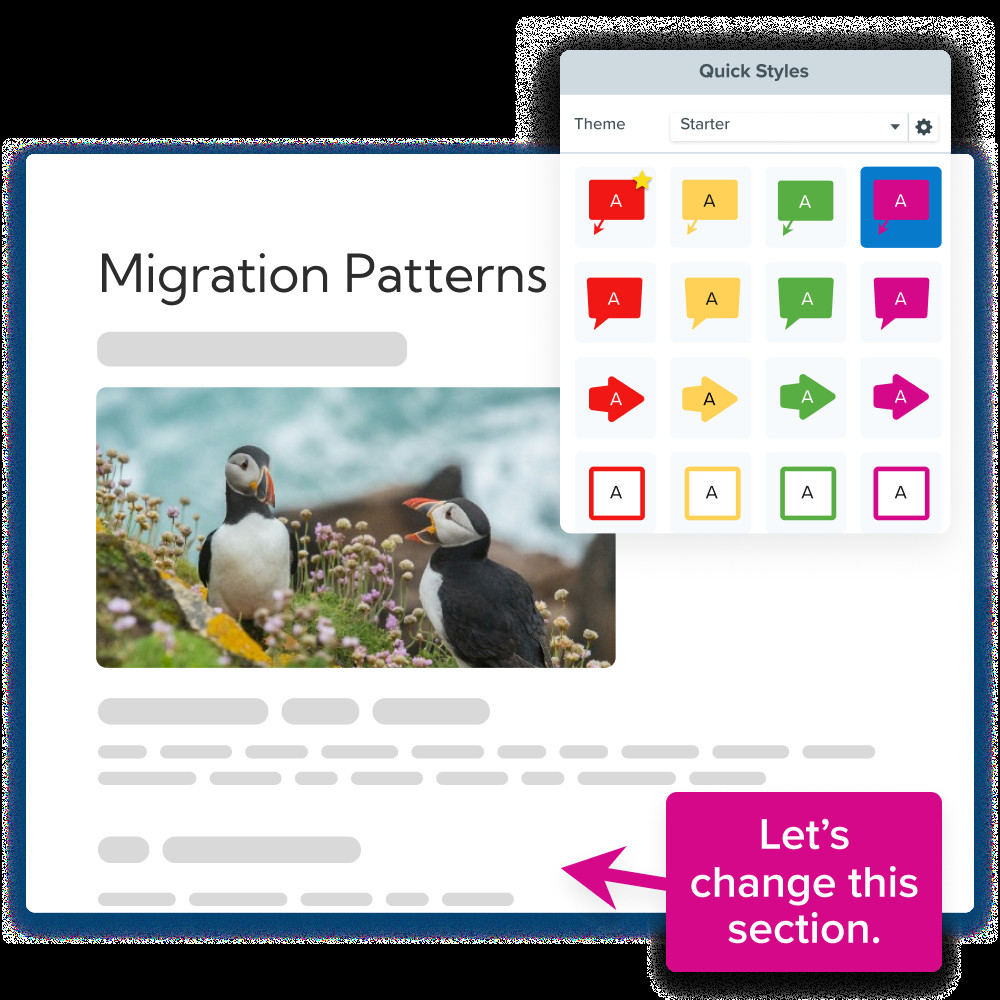 Screenshot of a document about puffin migration patterns with a section for changing styles highlighted.
Say Goodbye to Lost Screenshots
Finding your Windows screenshots doesn’t have to be a scavenger hunt. By understanding the default locations and exploring customization options, you can take control of your captures. And for those seeking a truly efficient and organized screenshot workflow, tools like Snagit offer a powerful solution to eliminate the frustration of lost screenshots forever. Stop wasting time searching and start capturing and organizing your visuals like a pro.