
Accurate body measurements are the cornerstone of successful sewing projects. Choosing the right sewing pattern size hinges on precise measurements, and missteps here can lead to ill-fitting garments. It’s wise to remeasure before each new project, as body dimensions can subtly change. Always wear the undergarments you intend to wear with your finished piece when measuring. For waist and hip measurements, take them while seated as well as standing. This is especially important for those with curves, as these areas can expand when sitting, and comfort on the couch is just as important as standing elegance.
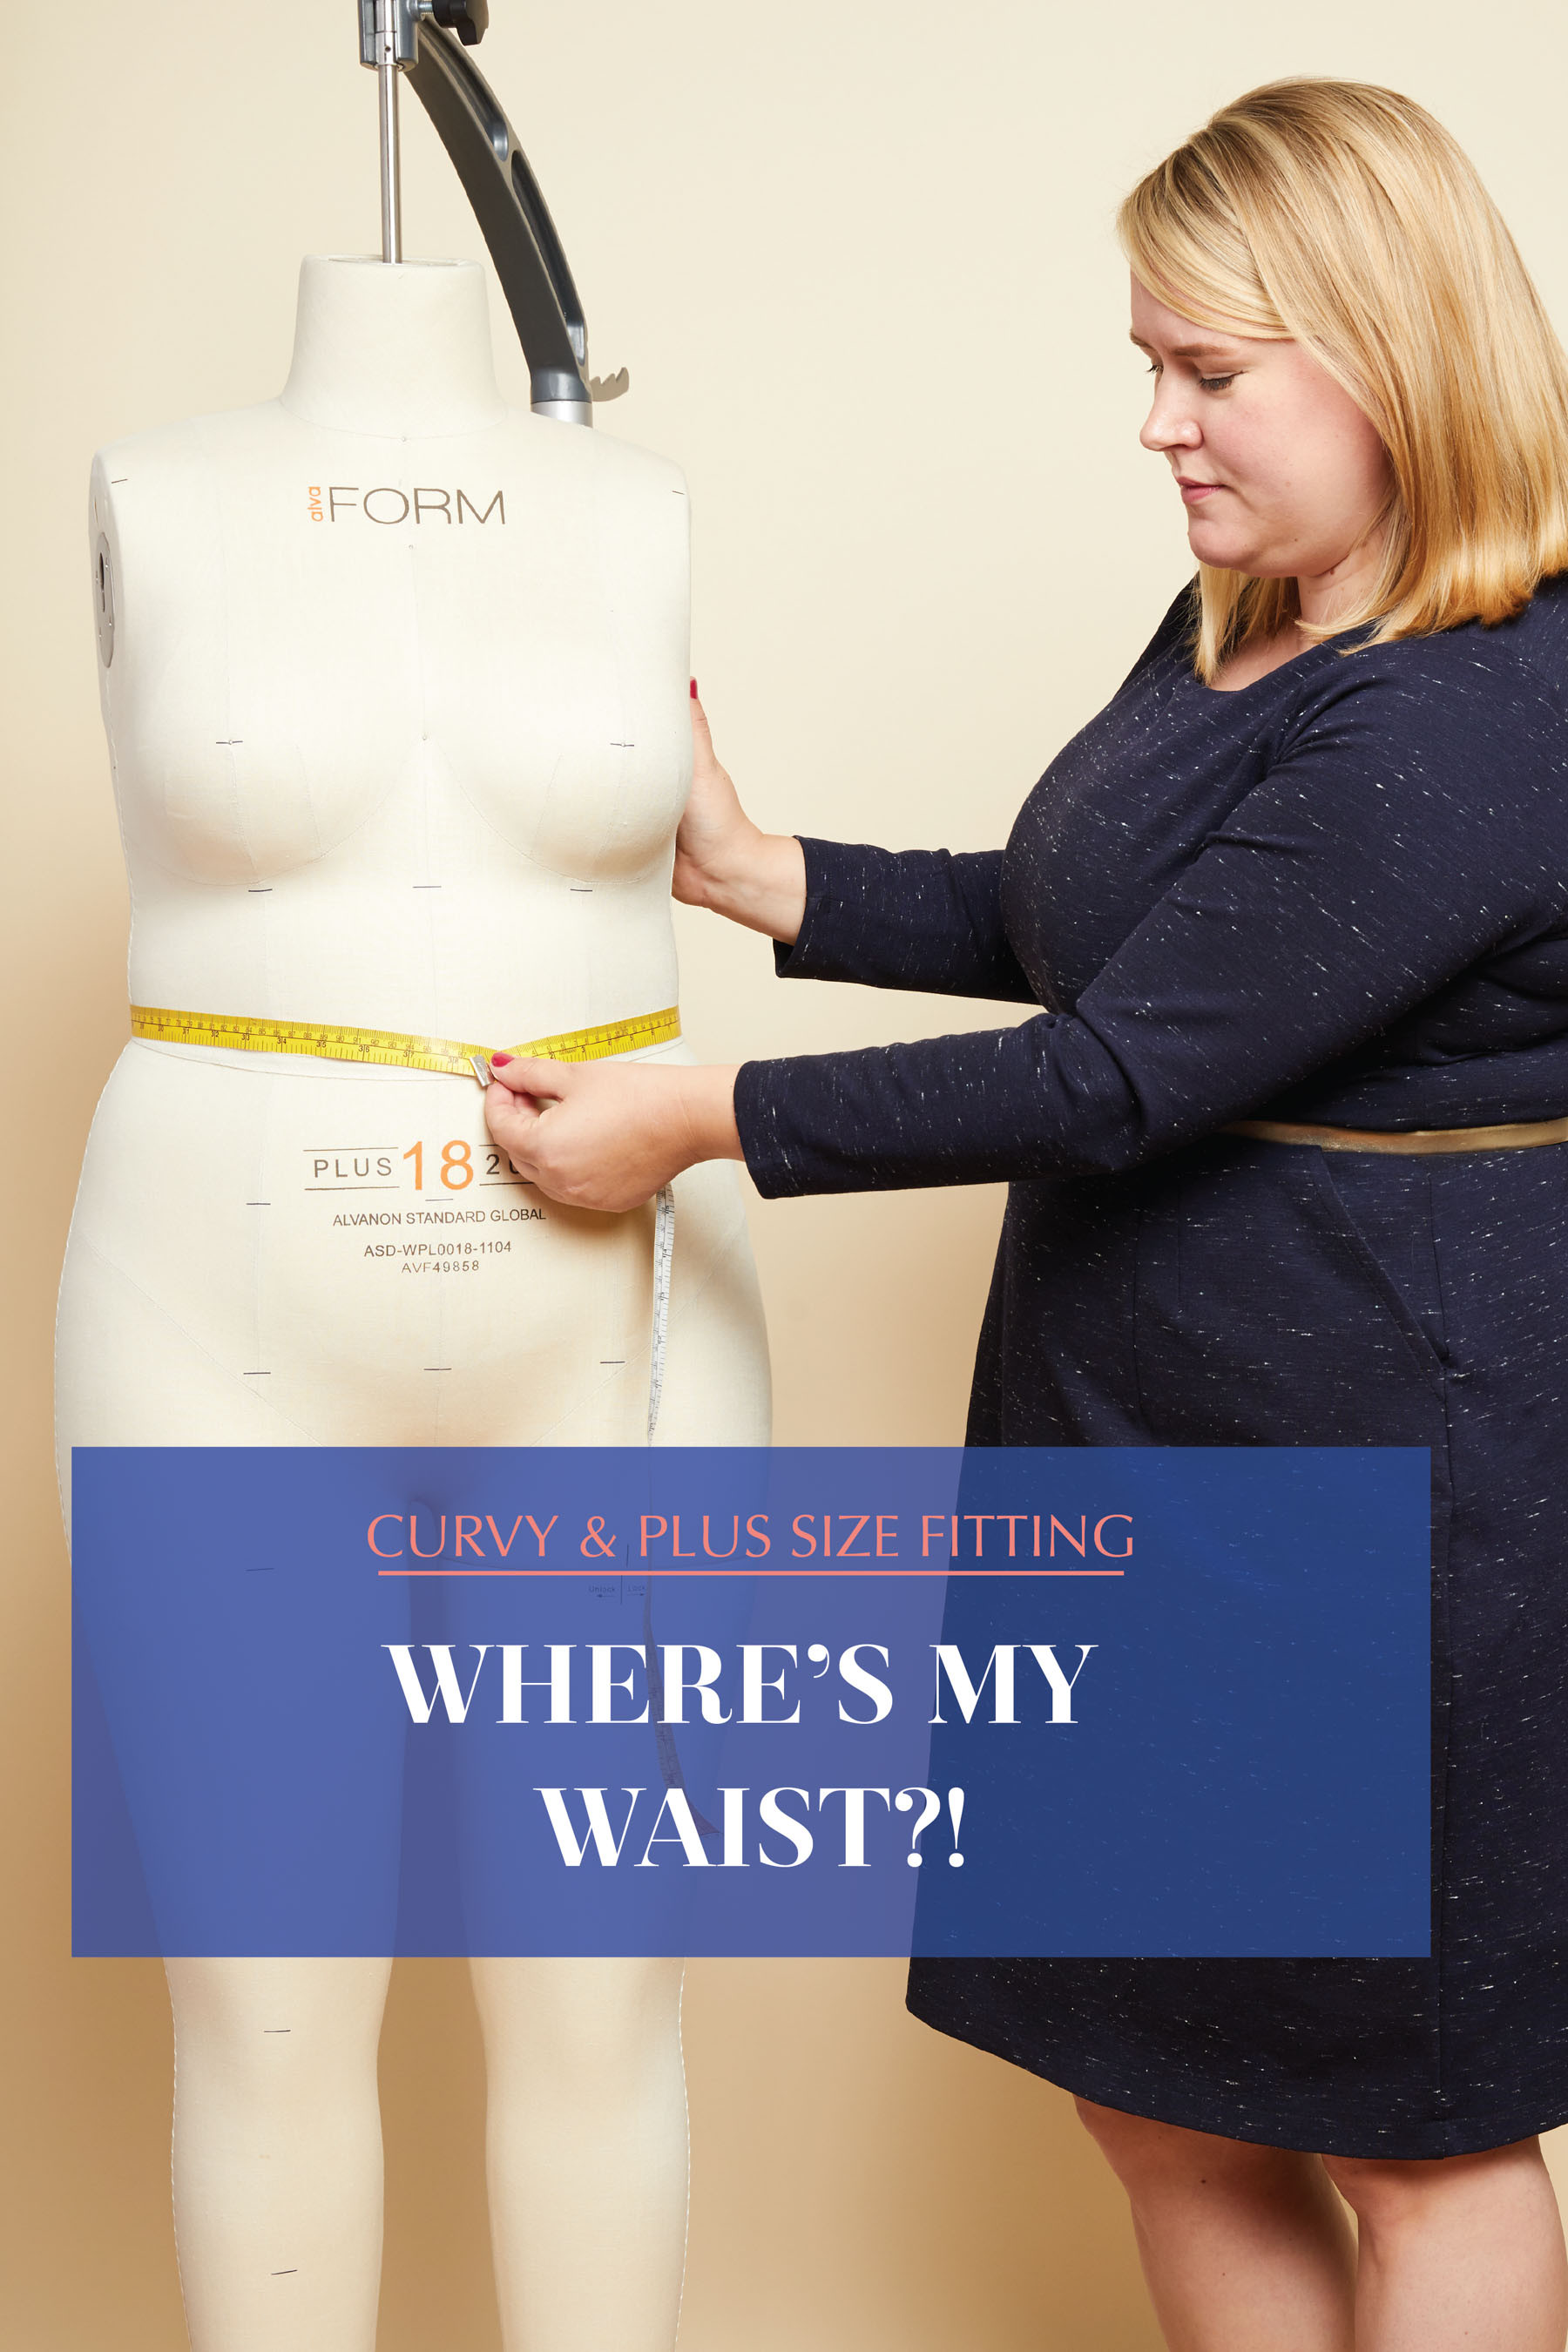 Alt text: Woman demonstrating how to measure her waist with a soft measuring tape, ensuring it is parallel to the floor and snug but not tight around her torso.
However, pinpointing exactly where to measure can be perplexing, particularly for the waist. While bust and hip measurements are generally straightforward – taken at their fullest points – the waist can be more elusive. For the bust, measure around the apex, the most prominent point, which may or may not be the nipple, especially for larger busts. Hip measurements should encompass the widest circumference of your hips and buttocks, which may vary in height depending on your body proportions. Pattern adjustments might be necessary, but that’s a topic for another time.
Determining the waist for sewing purposes can be particularly challenging if you are plus-size or don’t have a classic hourglass figure with a distinctly defined waist. Many believe in a singular “correct” waist location that must be discovered, but in reality, this isn’t necessarily true.
Are you eager to design and visualize your sewing projects on a body sketch that mirrors your own shape? Explore your complimentary MyBodyModel preview »
Guidance on this subject is abundant, yet my perspective diverges from much of the conventional advice found in fitting guides. These guides, while intended for all body types, often cater to slimmer, conventionally proportioned figures. My approach, honed through years of designing and fitting for plus-size bodies, has proven effective for myself and my students. However, sewing is rarely absolute, so consider this approach and adapt what resonates with you. If another method works better, embrace it!
Here’s a deeper dive into the Cashmerette approach to finding your waist for sewing:
1. The Myth of the Universal Waistline
You may have encountered various rules for locating your waist: where your body creases when bending sideways, at belly button level, where your hips begin to curve outwards, or a specific number of inches above your navel. However, the truth is, there’s no single, universally applicable rule.
Human bodies are wonderfully diverse in proportion and dimension, rendering a one-size-fits-all approach impractical. Personally, bending sideways reveals more of a gentle curve than a sharp angle indicating a defined waist. Therefore, the critical question shifts from “where is my waist?” to “where do I want the waist of my garment to sit?” Forget the quest for your “true” waistline. It’s a myth, and irrelevant for sewing because pattern alterations will tailor the garment to your chosen waist position.
2. The Slimming Secret: Embrace Your Narrowest Point
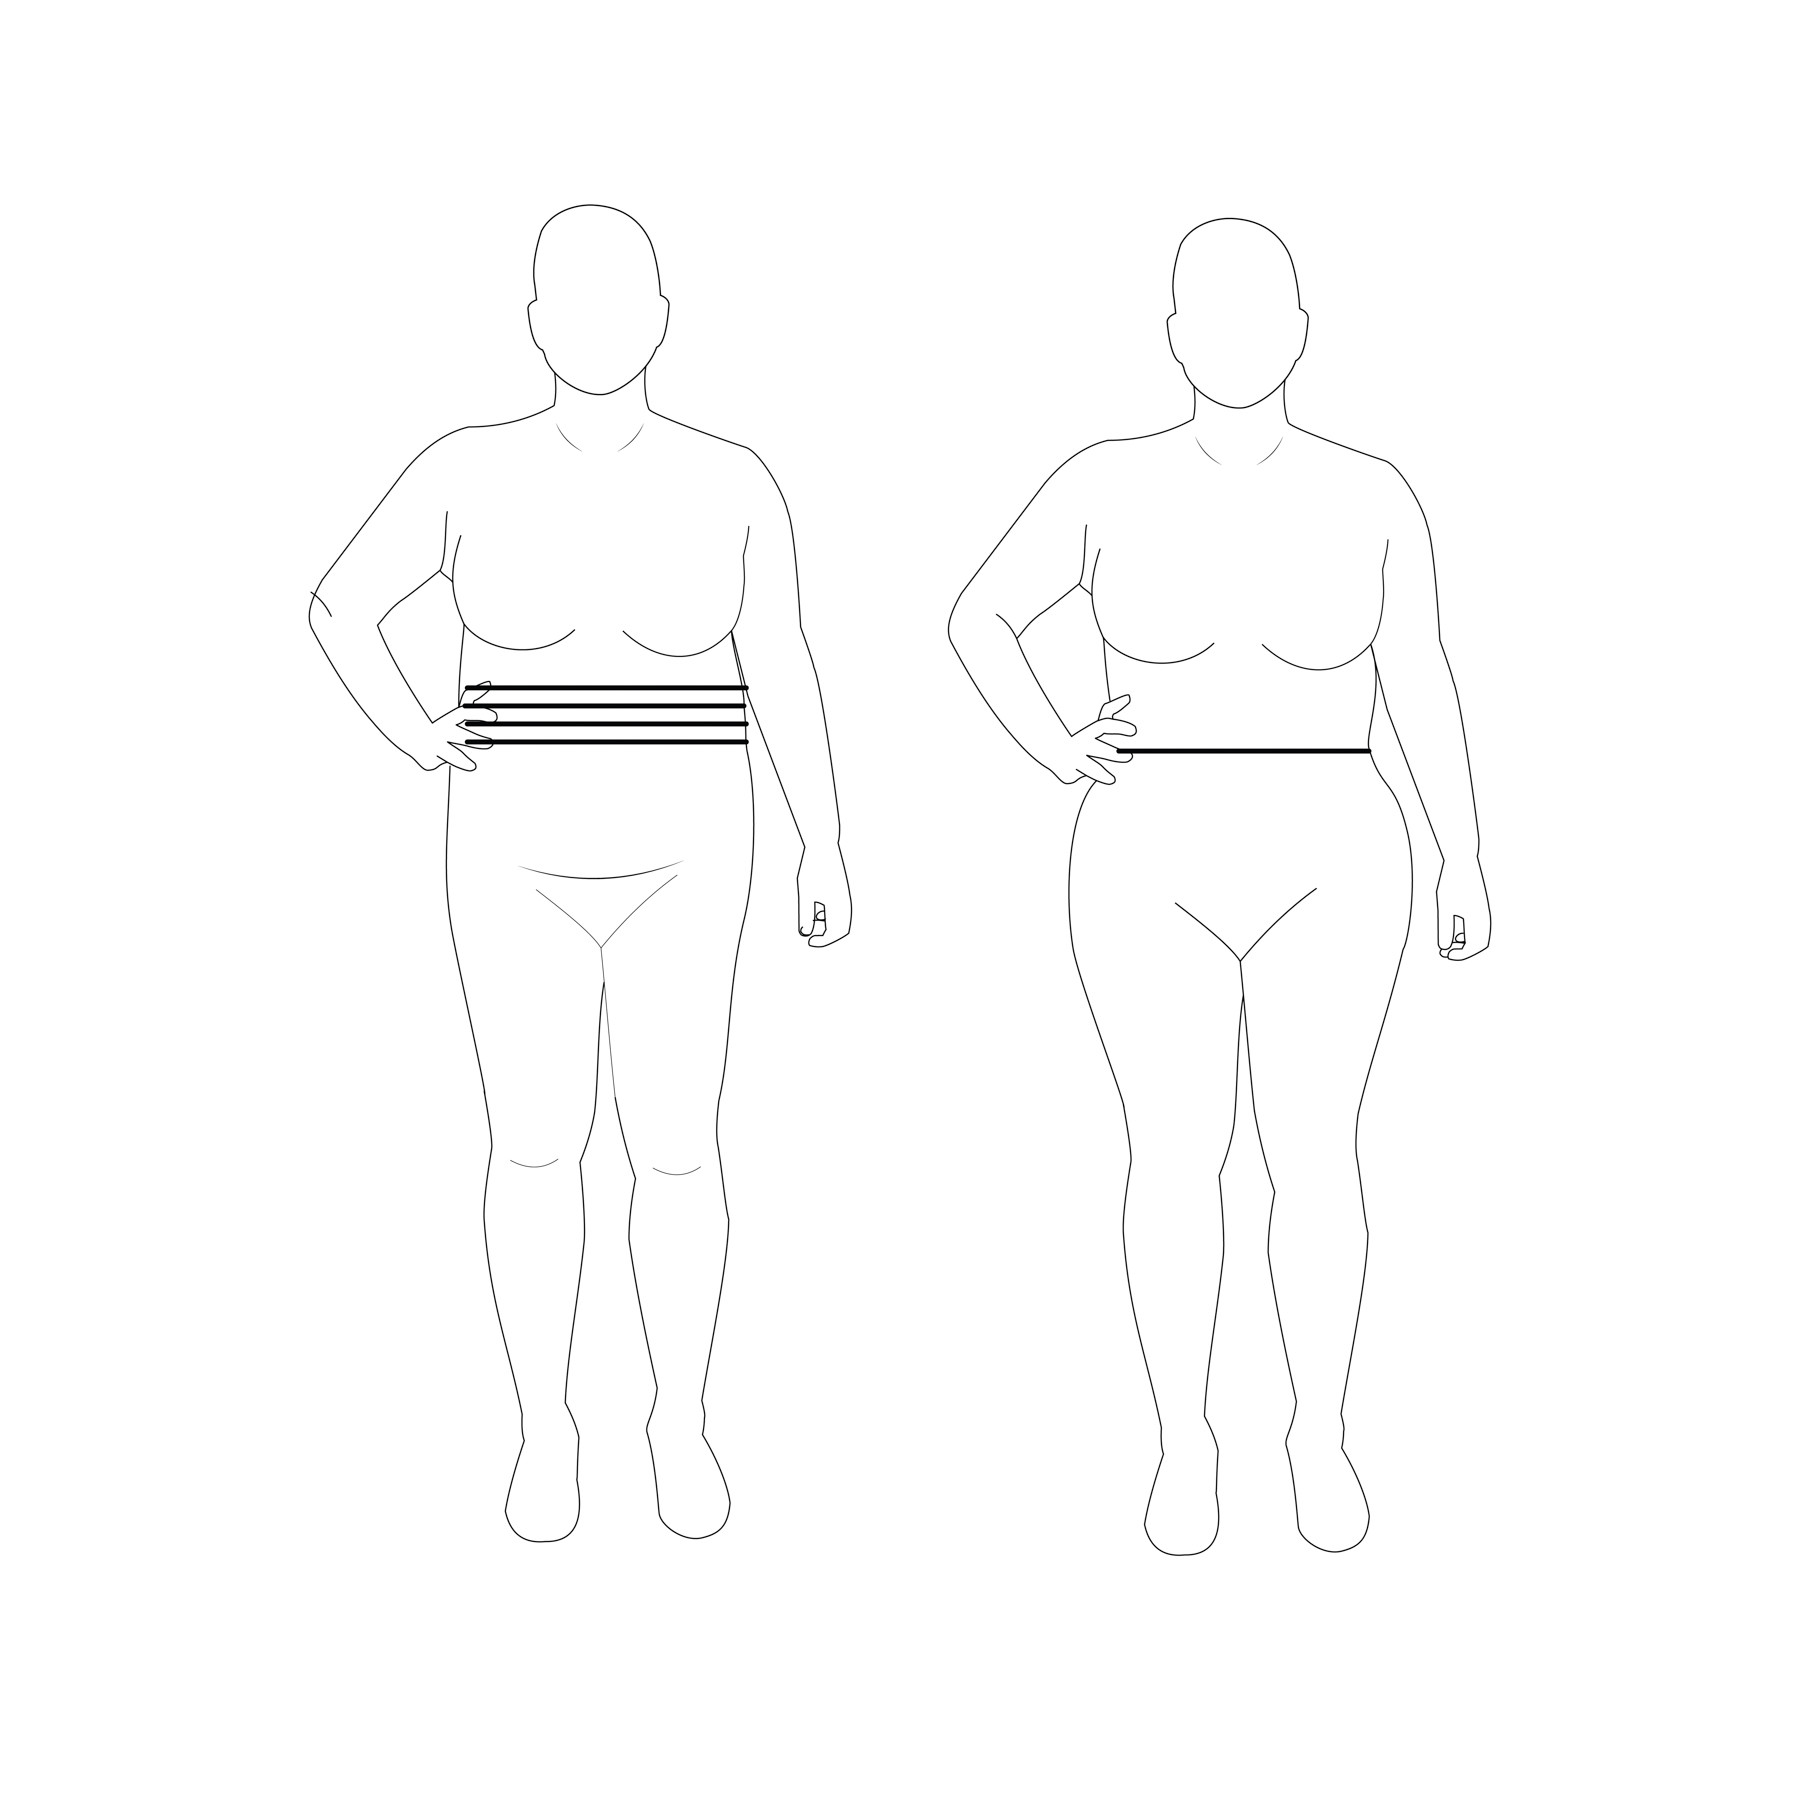
Now that we understand the waist for sewing is a matter of choice for garment creation, you have options. If your goal is a more slender silhouette (entirely optional, of course!), selecting your narrowest point is key. Based on my experience, this point typically resides around the mid-rib cage for most women – significantly higher than conventionally taught. For me, it’s approximately 4 inches below my bra band.
Interestingly, the croquis featured in our Curvy Sketchbooks is modeled after my own body (surprise!). As you can see, my narrowest point is indeed higher on my torso (the belly button is added for reference, not part of the sketchbook!). I include the belly button comparison because many women instinctively measure there, but it’s almost always too low.
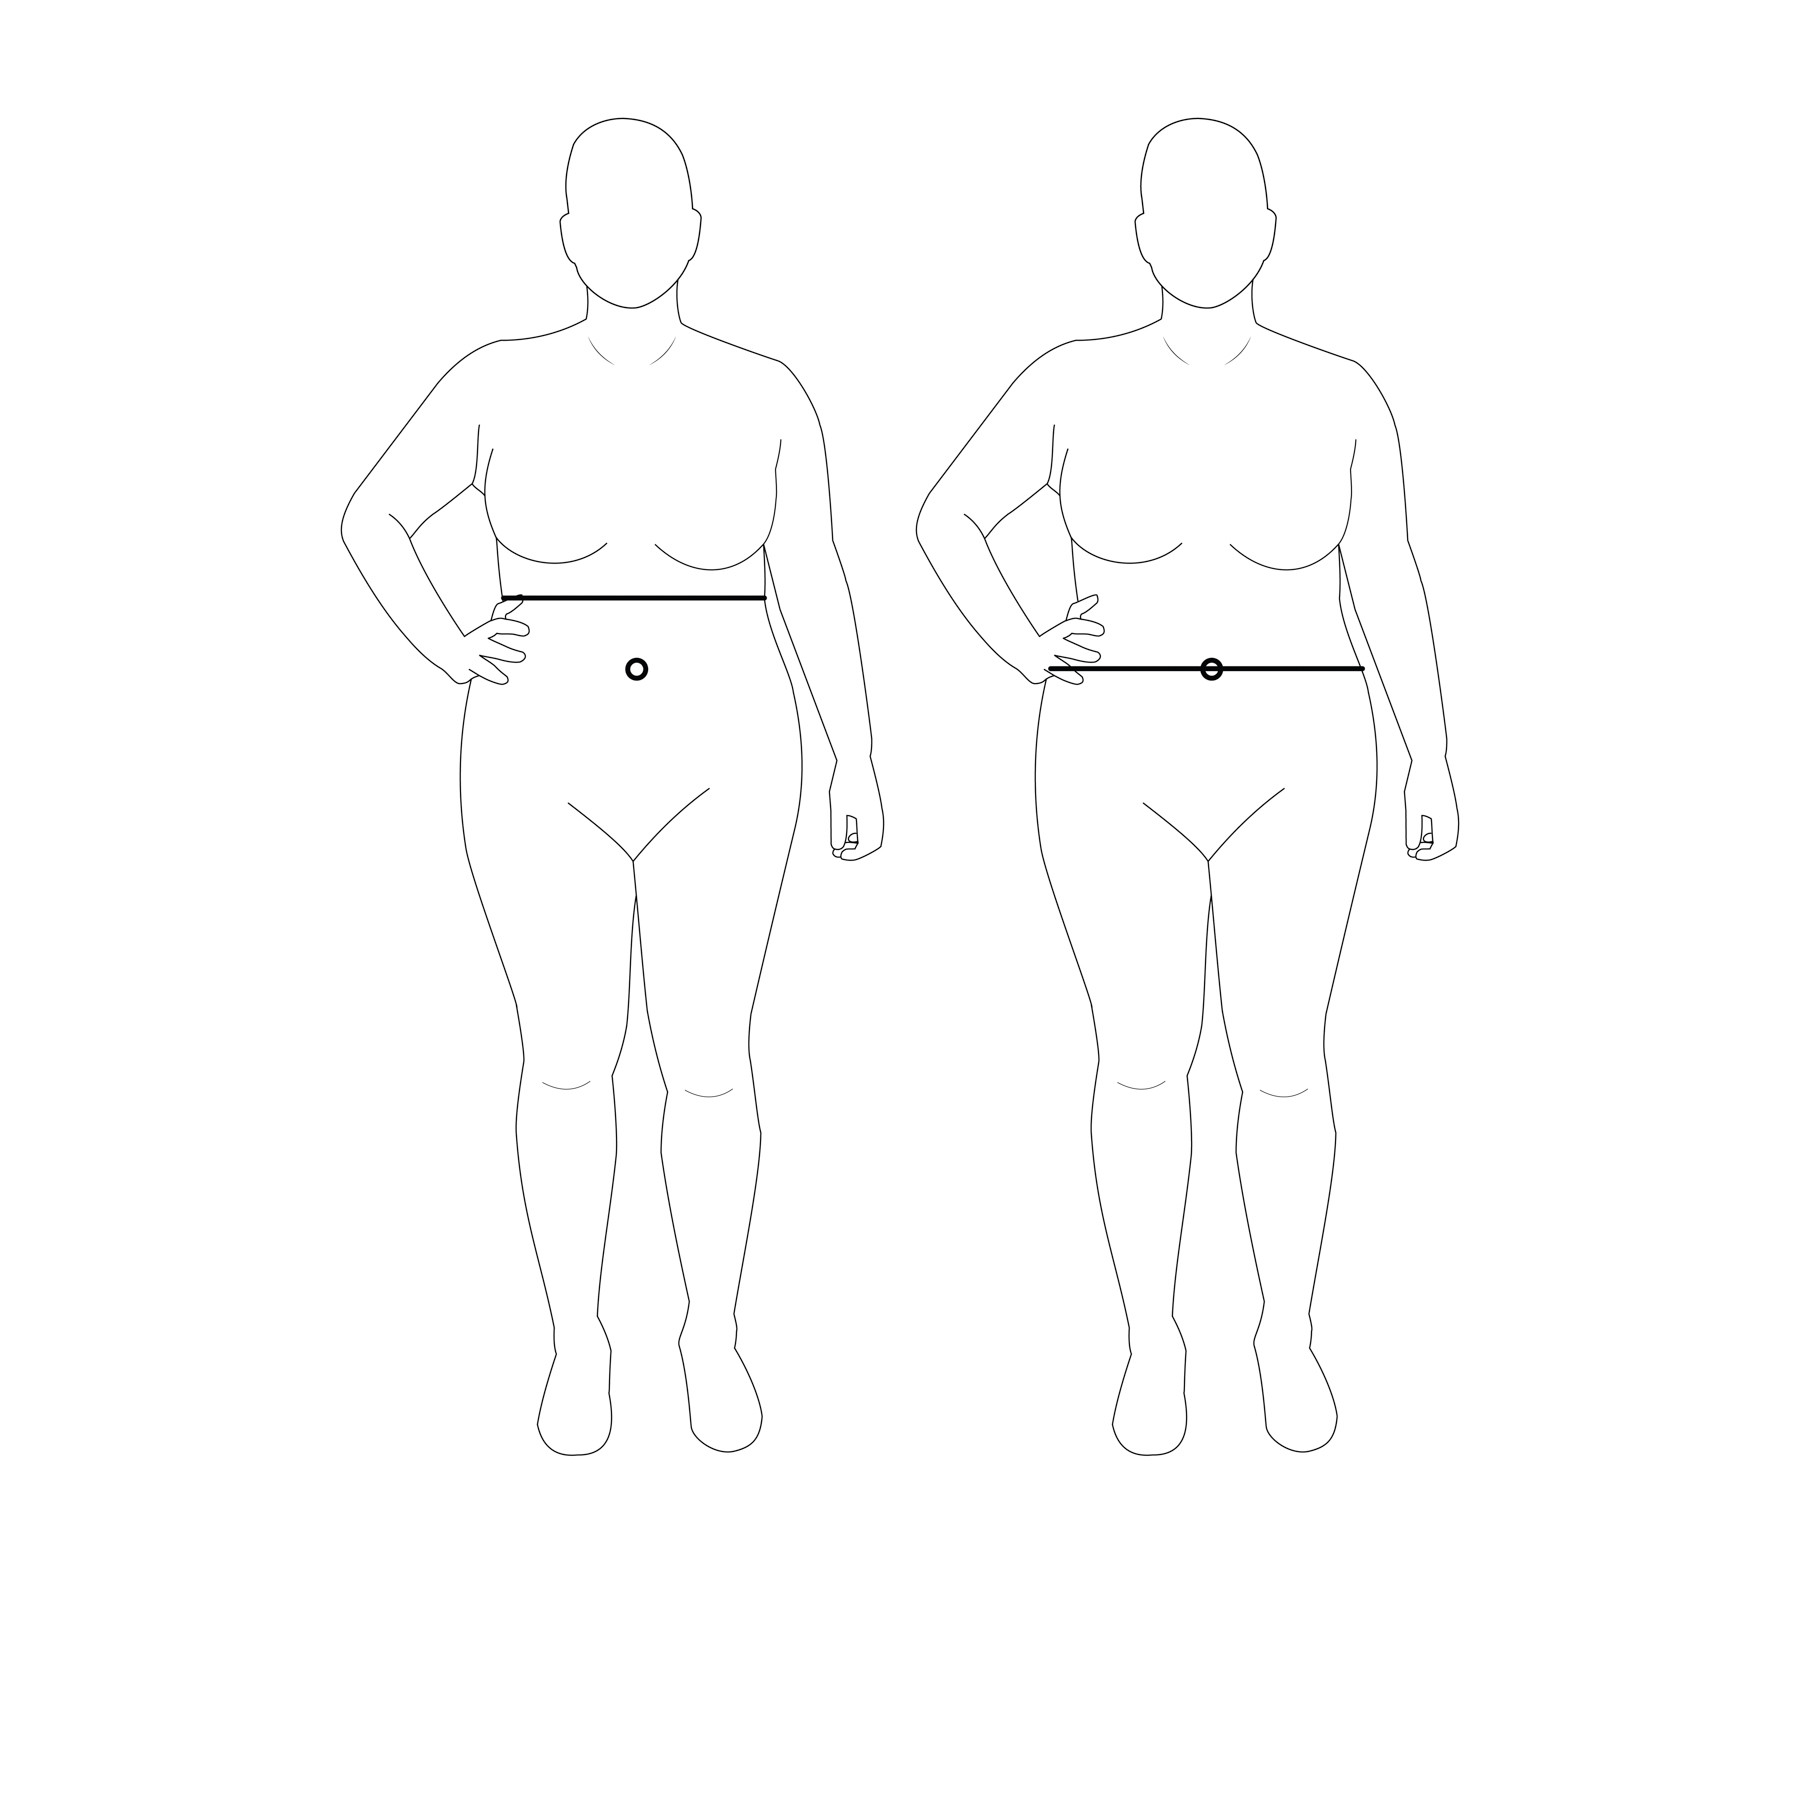 Alt text: Illustration of a woman’s torso highlighting a high waistline position above the belly button, contrasted with a lower, traditional waistline at the belly button level.
Here’s how this high waist placement looks on me:
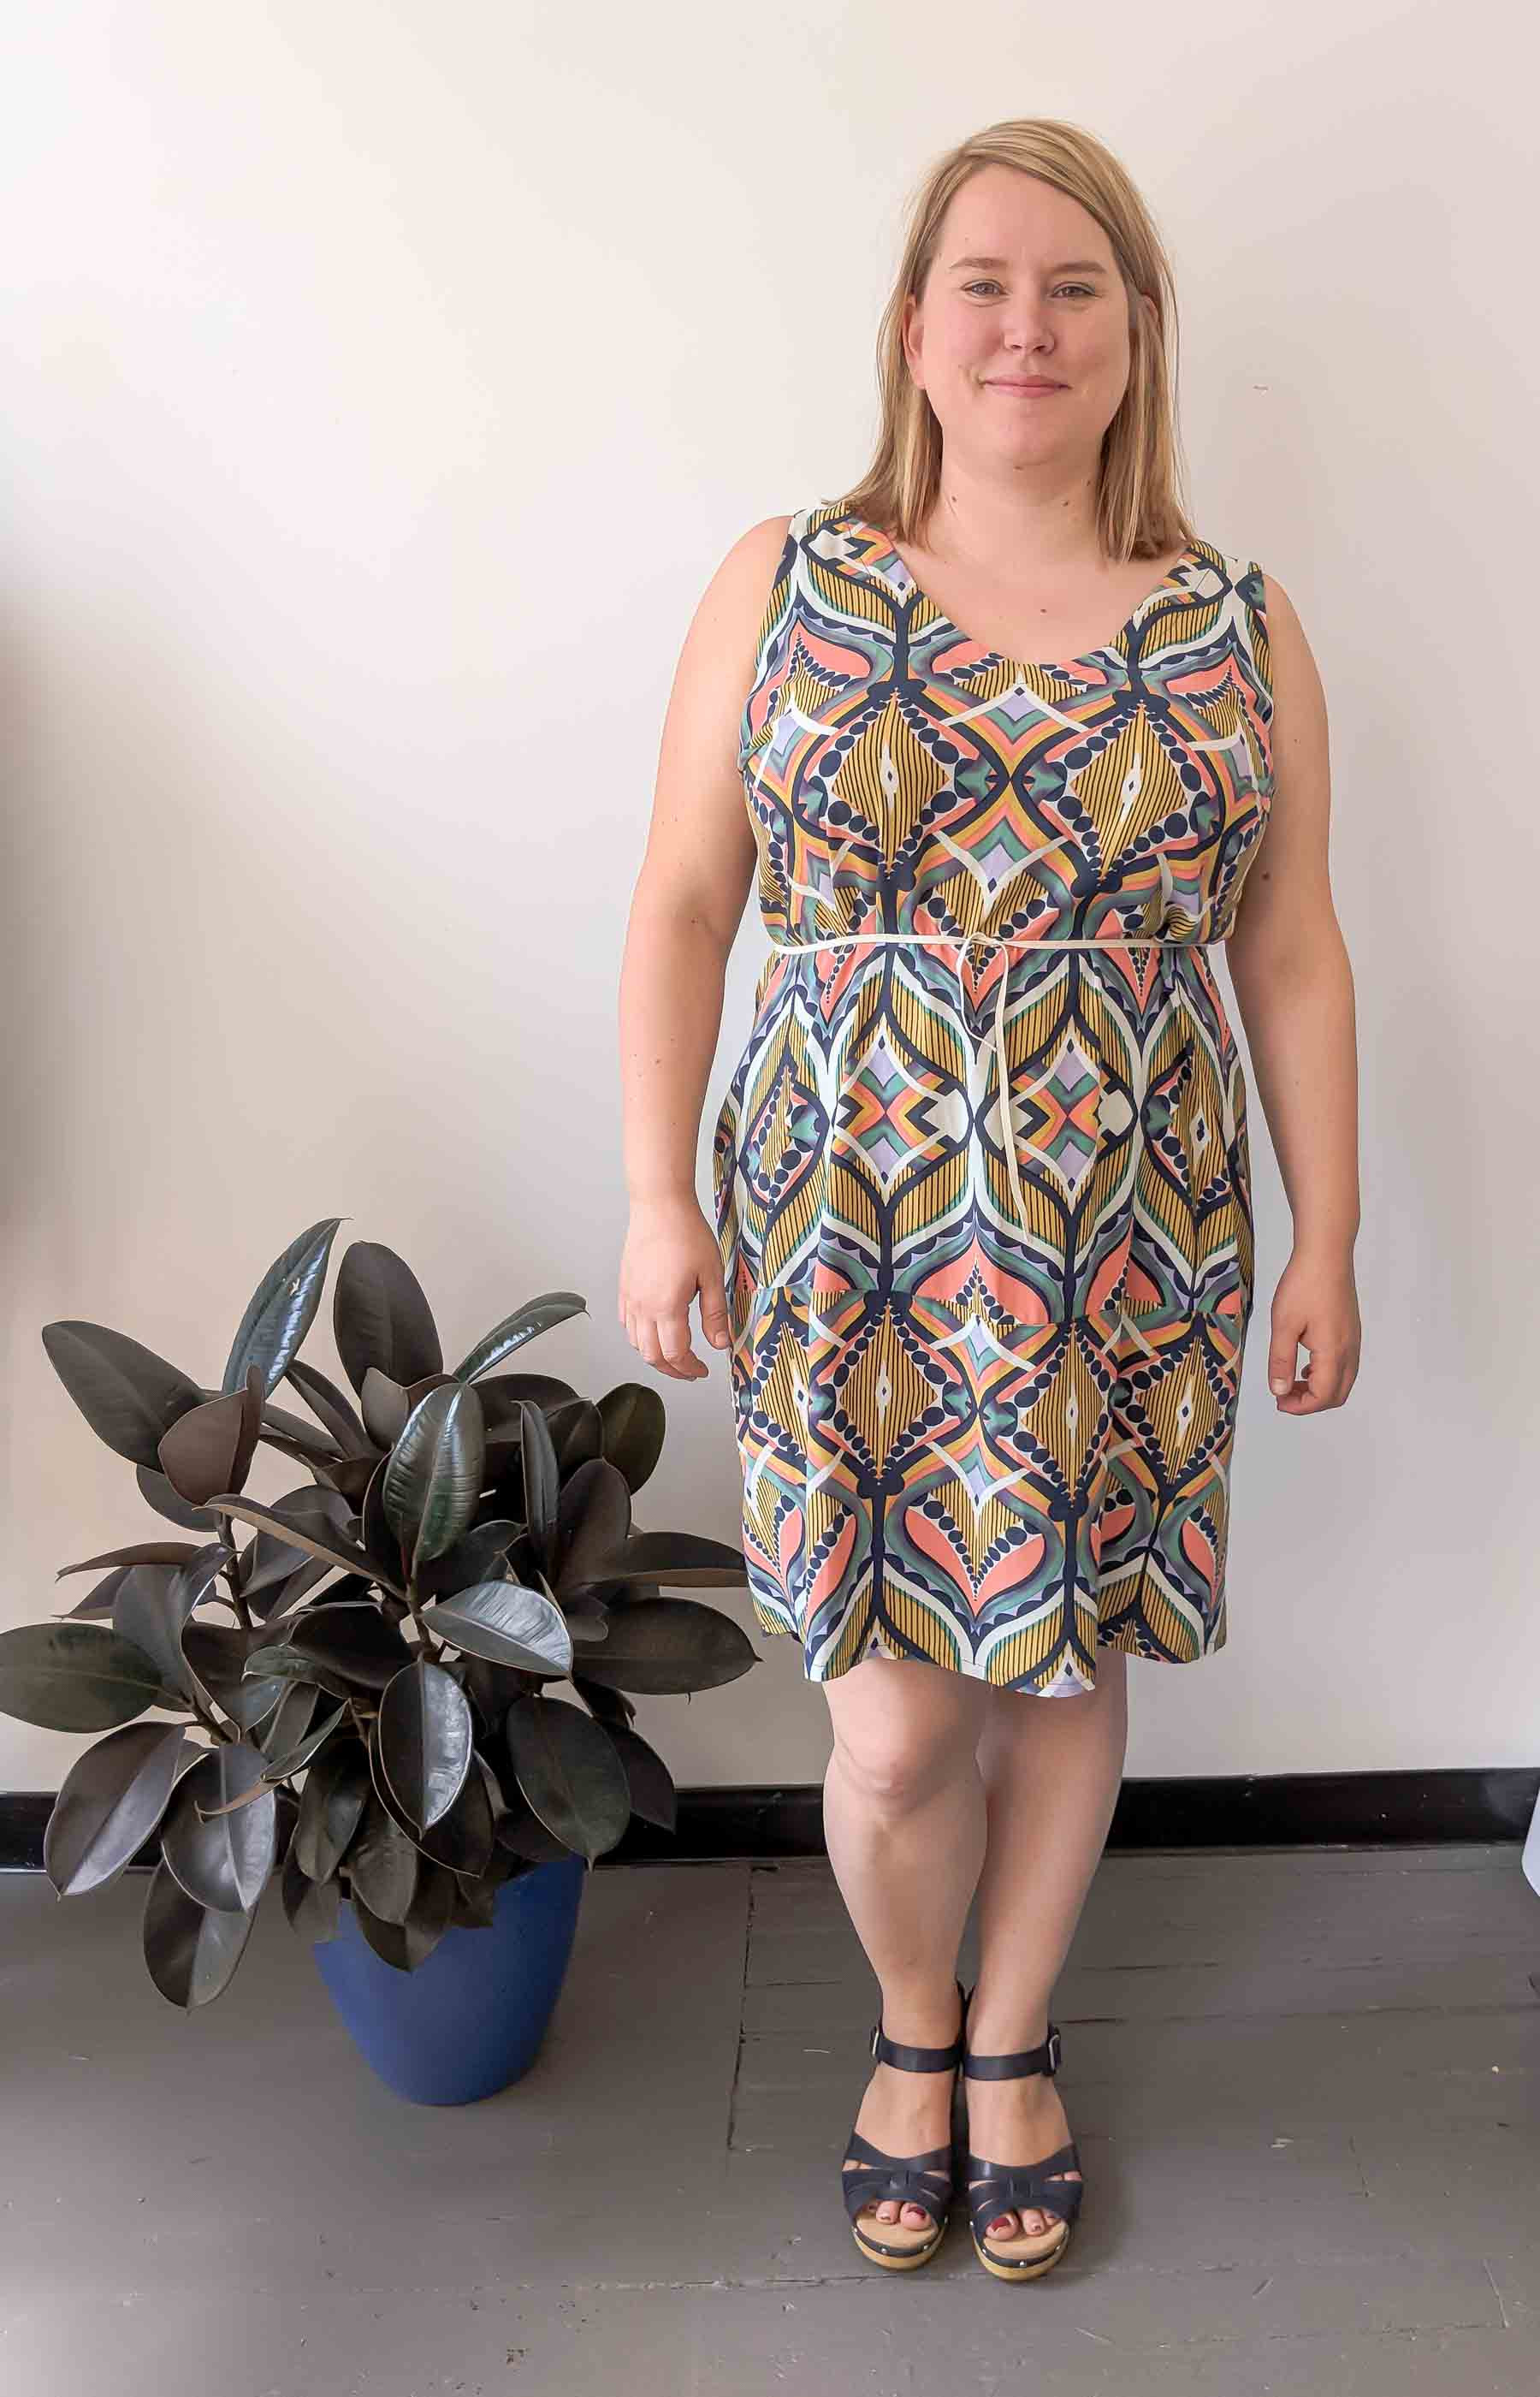 Alt text: A woman wearing a fitted black top and skirt, demonstrating a flattering high waistline that accentuates her narrowest point just below the rib cage.
Conversely, observe the effect of using a more “traditional,” lower waist height (spoiler alert: less flattering).
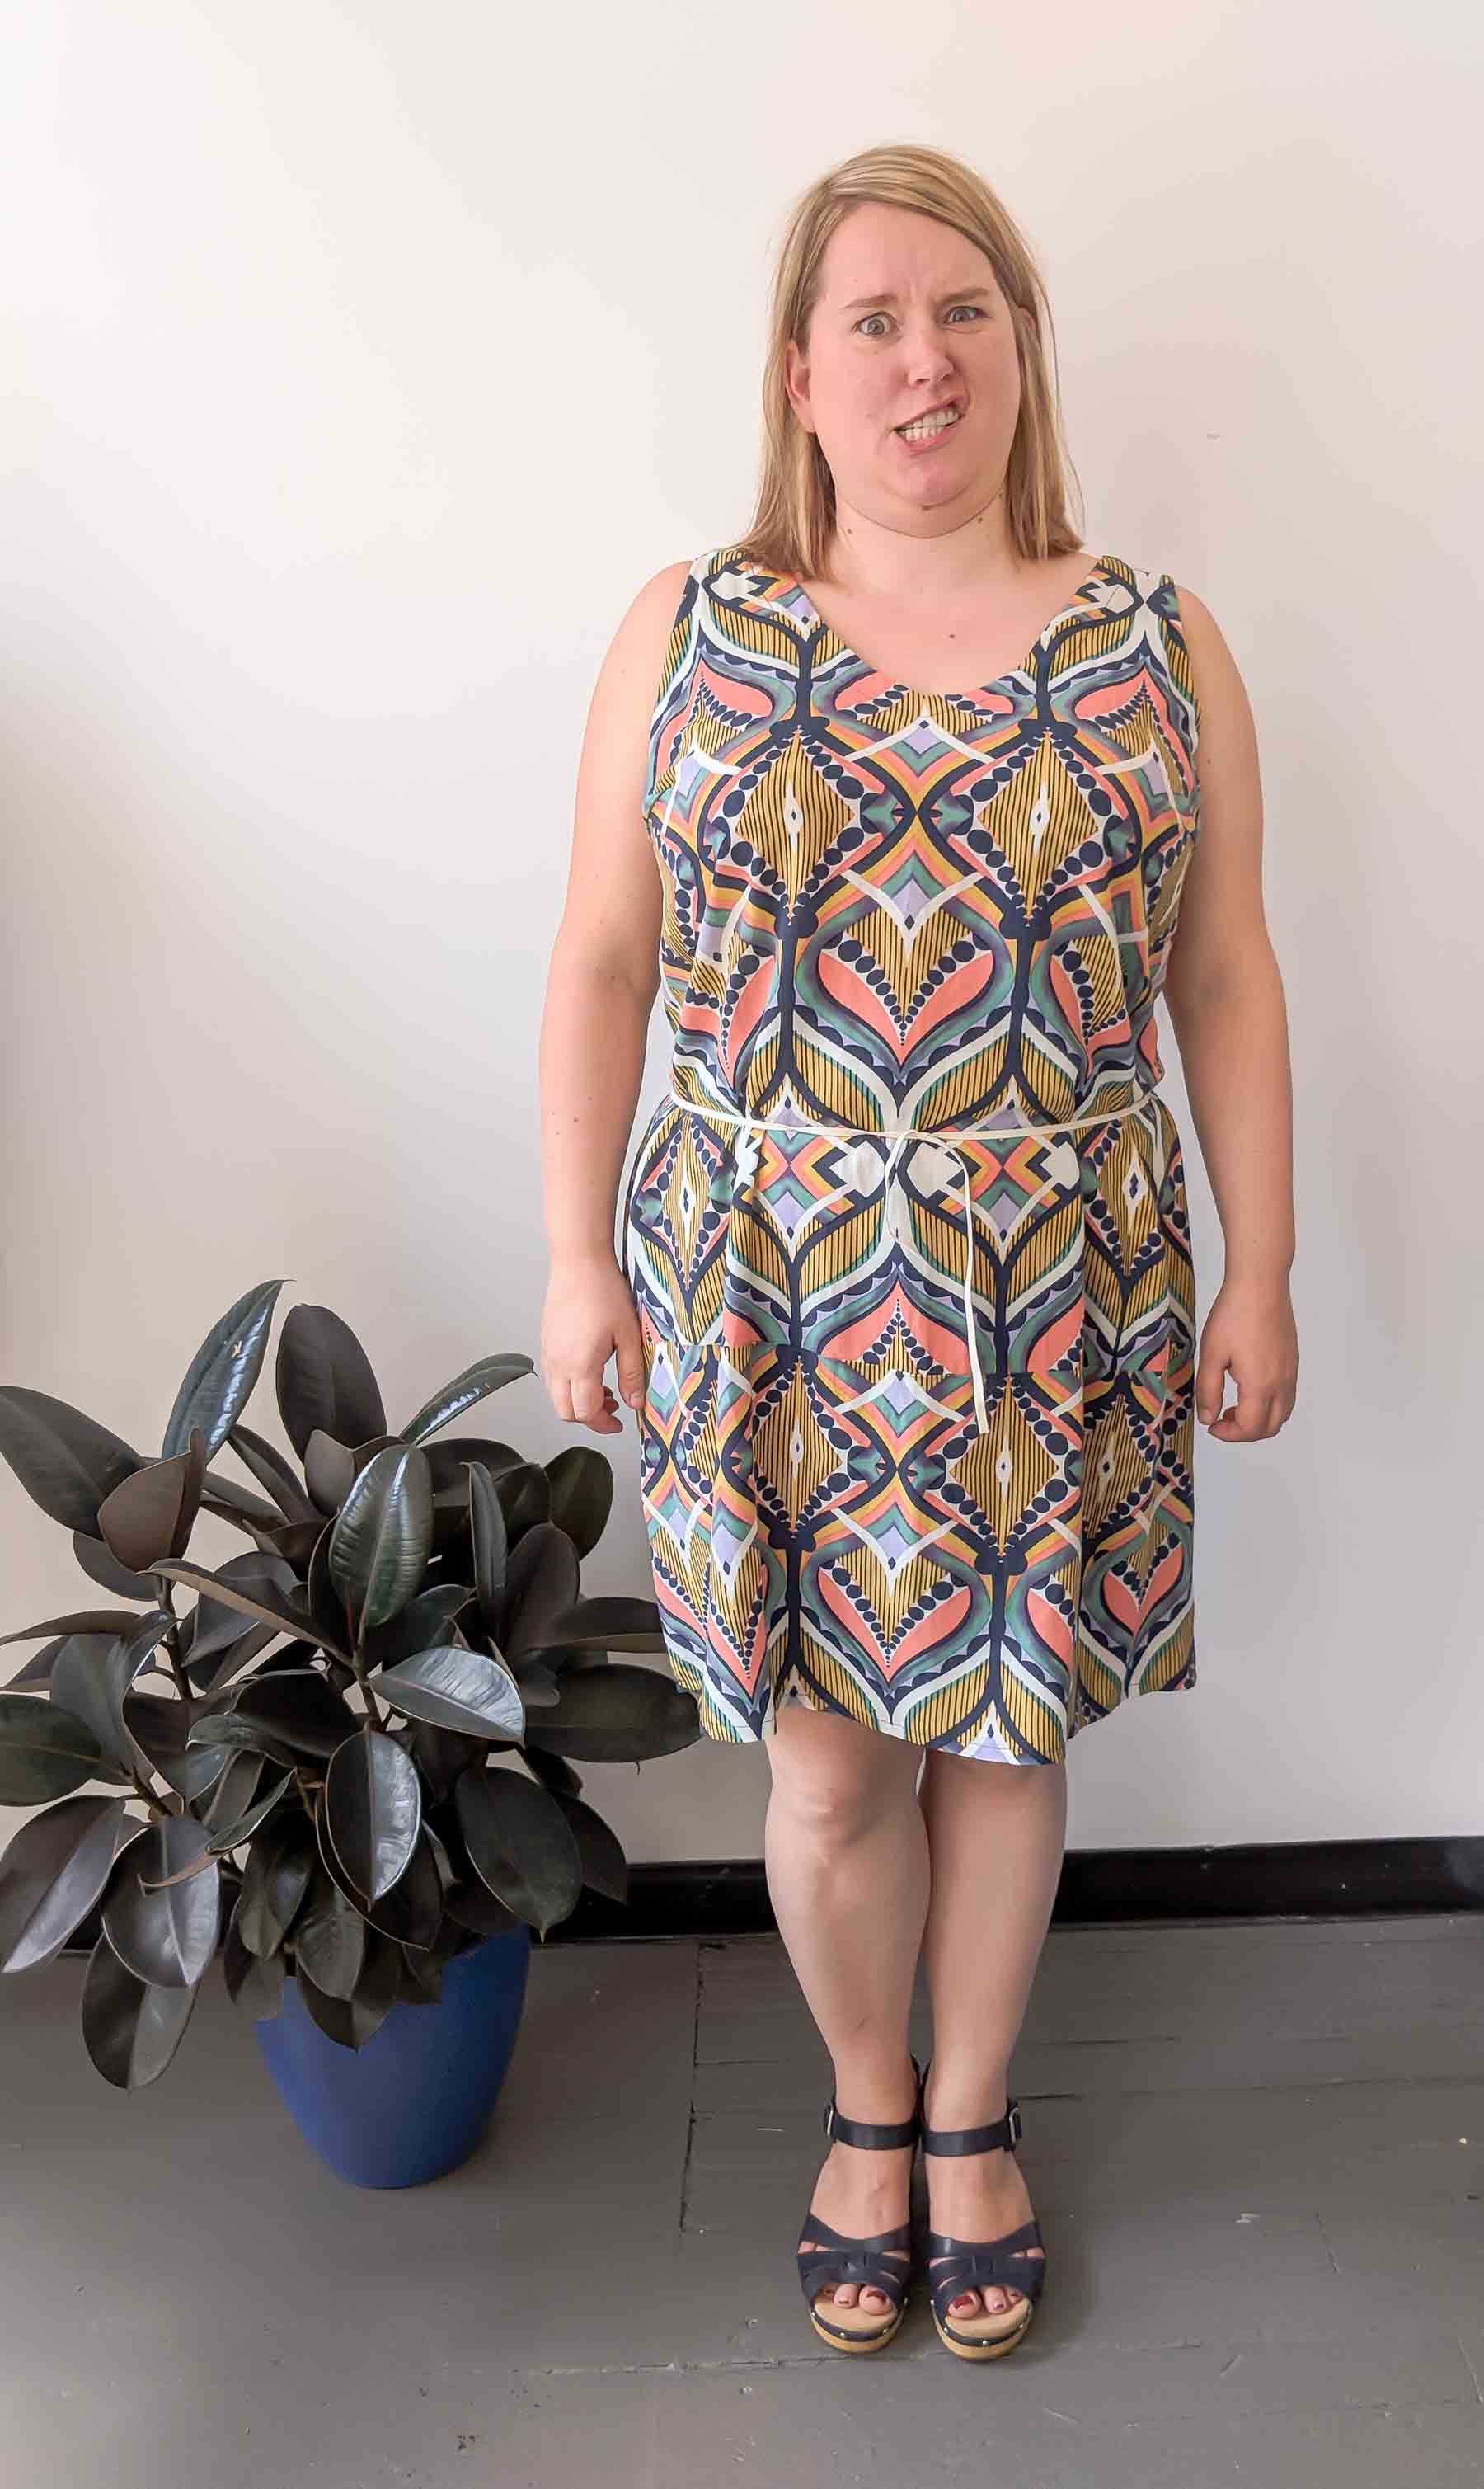 Alt text: The same woman as in the previous image, now wearing a similar outfit but with the waistline positioned lower at her natural waist, showing a less defined and less flattering silhouette.
This commonly found high narrow point is why many Cashmerette Patterns feature a “high” waist. We often hear from customers who initially lengthen our bodices, only to realize the fit is actually superior at the original, higher waist placement!
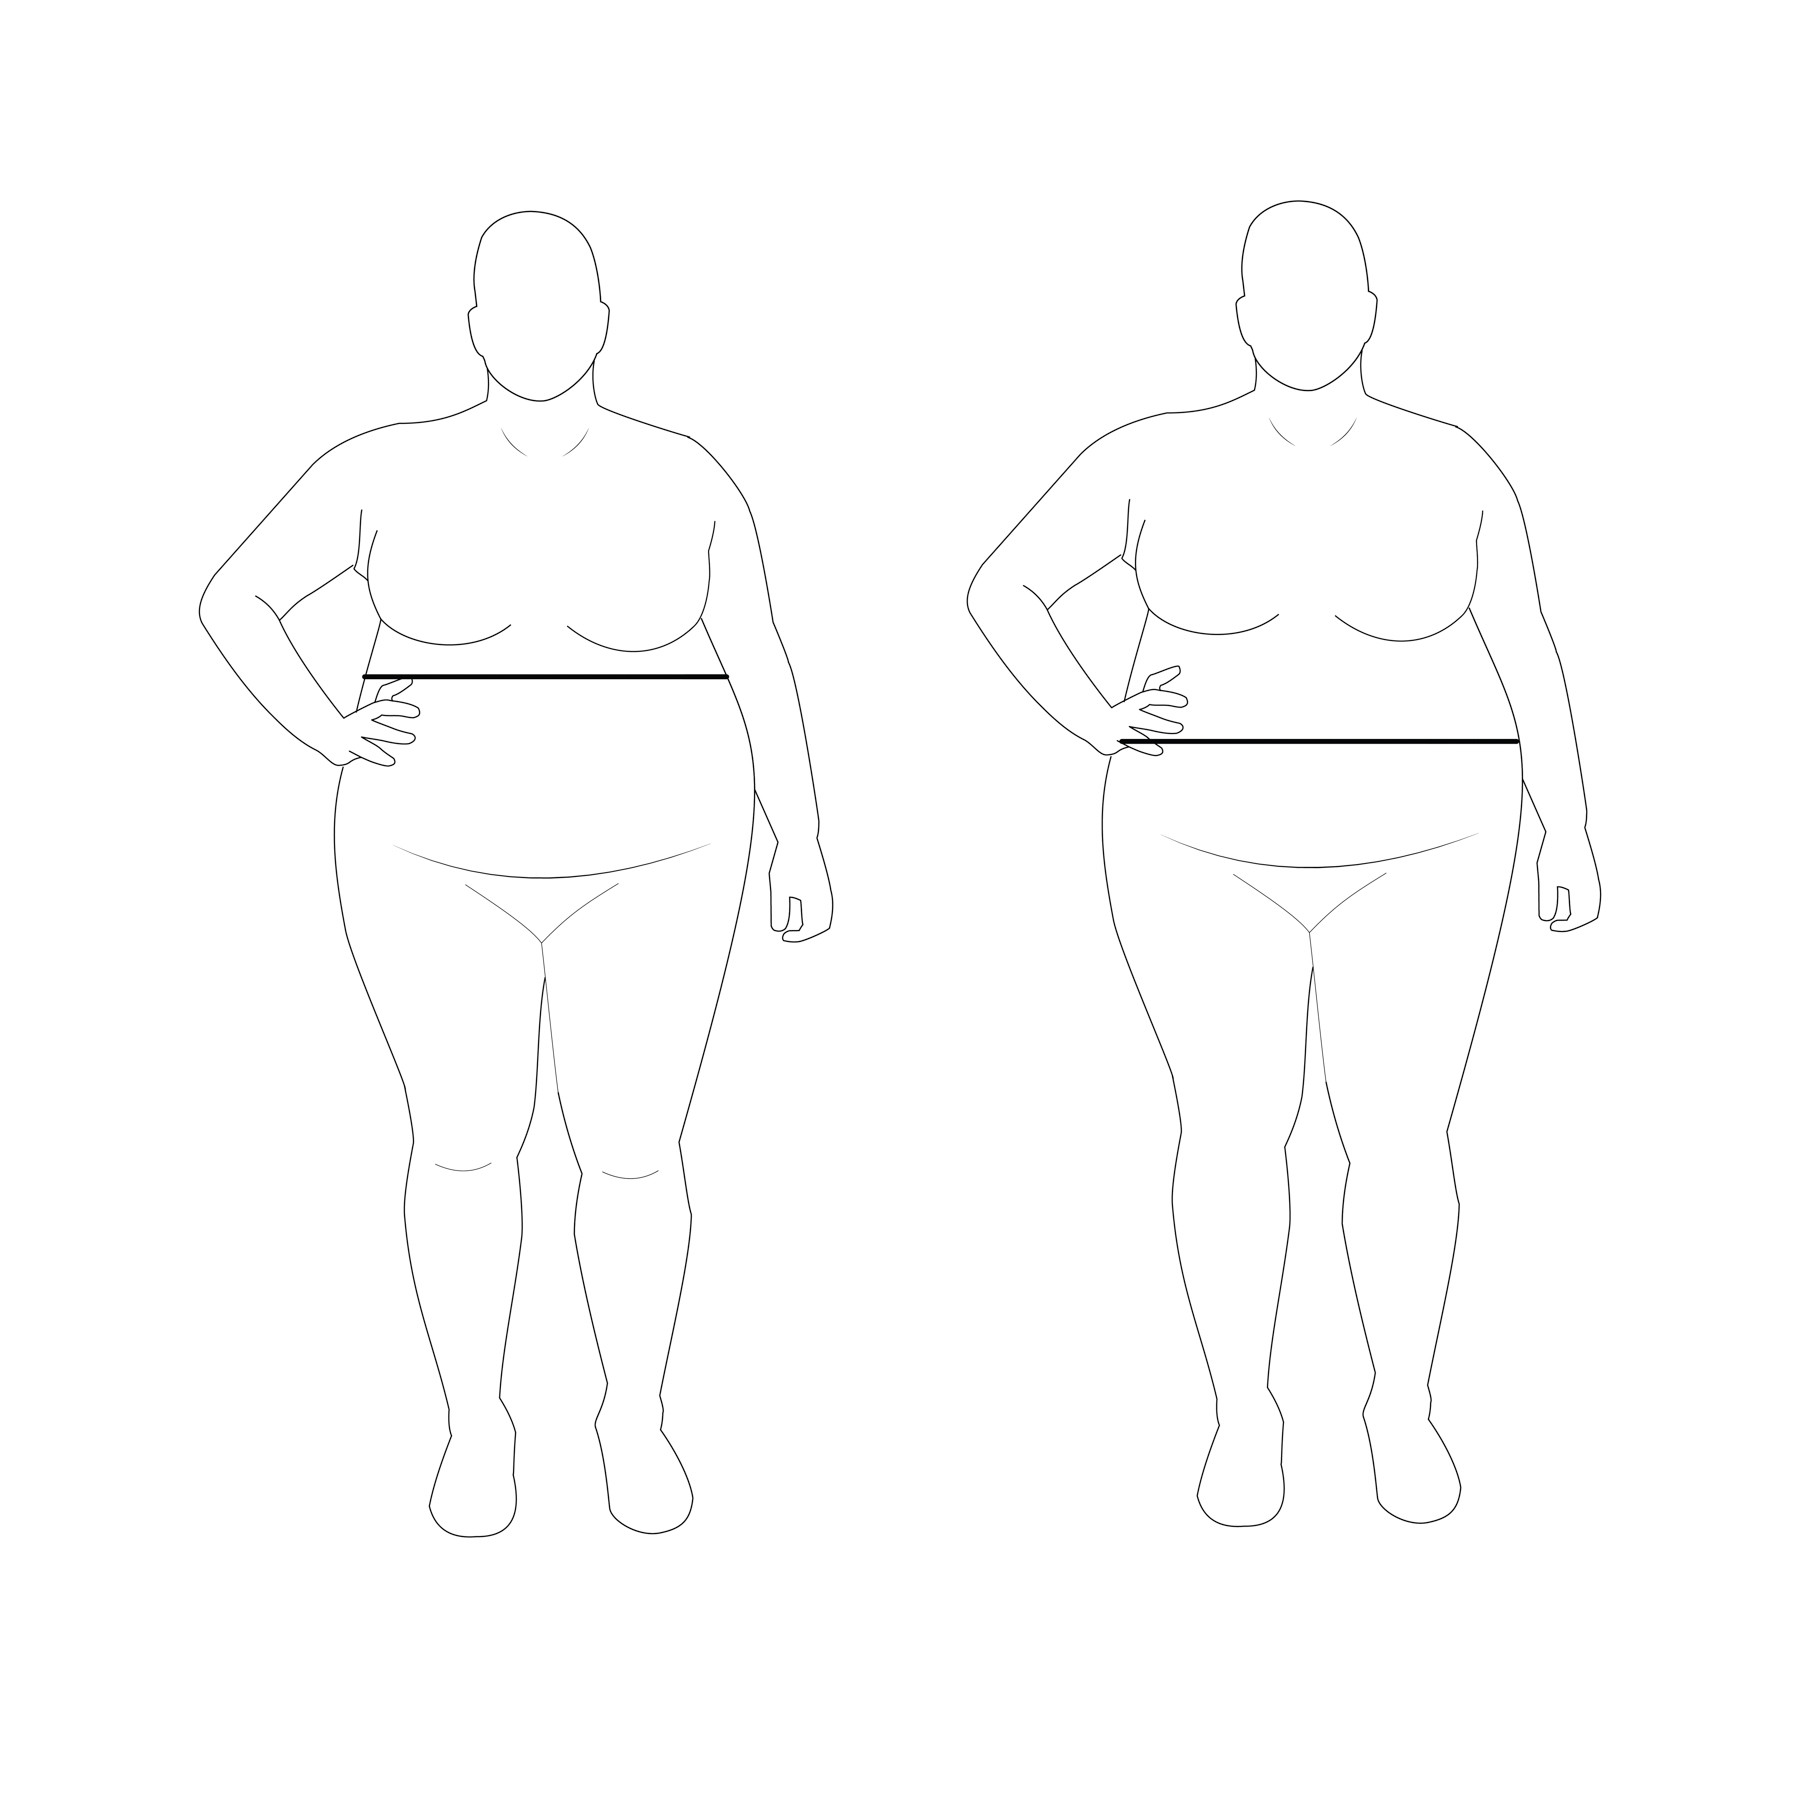
Let’s examine waist placement across different body shapes:
-
Straight Up and Down (Rectangular) Shape (left): The design world is your oyster! Waist placement is entirely your preference, focusing more on achieving your desired upper-to-lower body proportion within the garment.
-
Defined Waist (Hourglass) Shape (right): Feel free to embrace your naturally defined waist! (Though finding it probably wasn’t your initial challenge).
 Alt text: Illustration comparing two body shapes: a rectangular shape on the left with minimal waist definition and an hourglass shape on the right with a clearly defined waistline.
- Apple Shape (left): If your waist is similar in size to or larger than your bust or hips, positioning the waist a few inches below your bra band often yields the most flattering results. Don’t feel obligated to choose the widest point of your tummy as your waist (right image).
 Alt text: Illustration contrasting waistline placement on an apple-shaped body: a flattering higher waistline a few inches below the bust on the left, and a less flattering lower waistline at the widest part of the midsection on the right.
- Waistline Height Comparison in a Dress: Observe how a dress with a waistline seam appears at both a higher and lower waist position. The higher waistline allows the garment to cinch in at the waist, creating definition. Conversely, the lower waistline alters the silhouette, eliminating waist definition. Personally, I find the lower proportions can also appear somewhat dated, but that’s a matter of individual taste.
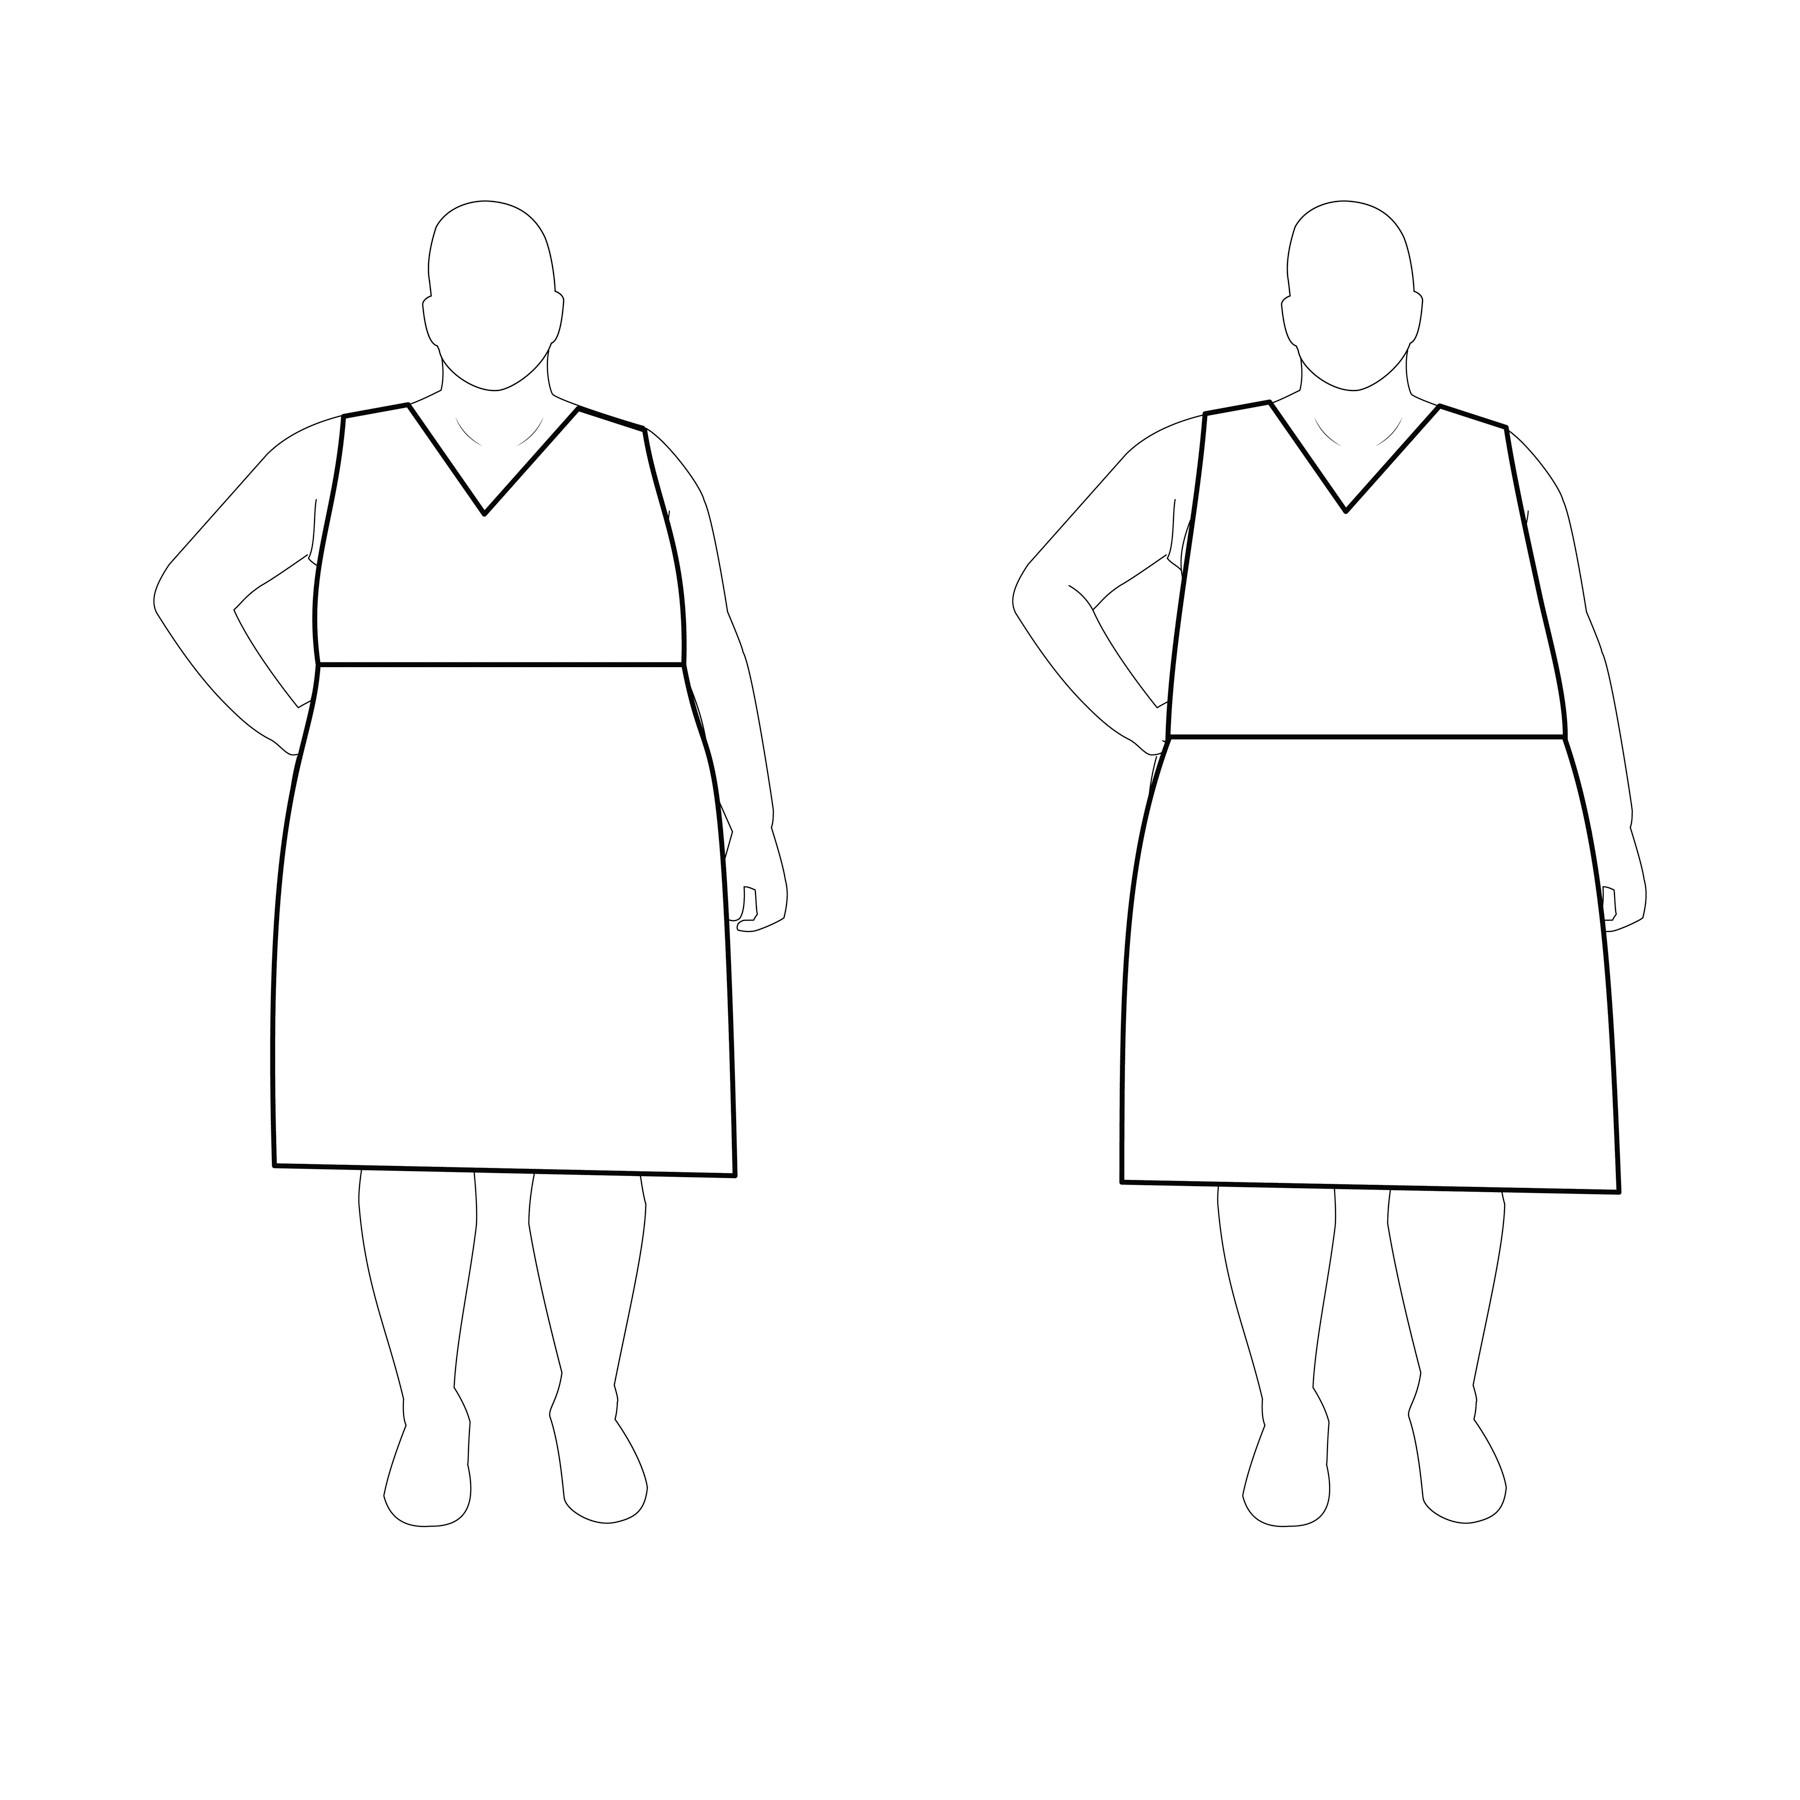 Alt text: Comparison image showing the same dress on a woman, styled with a high waistline on the left creating a defined waist, and with a lower waistline on the right resulting in a less defined silhouette.
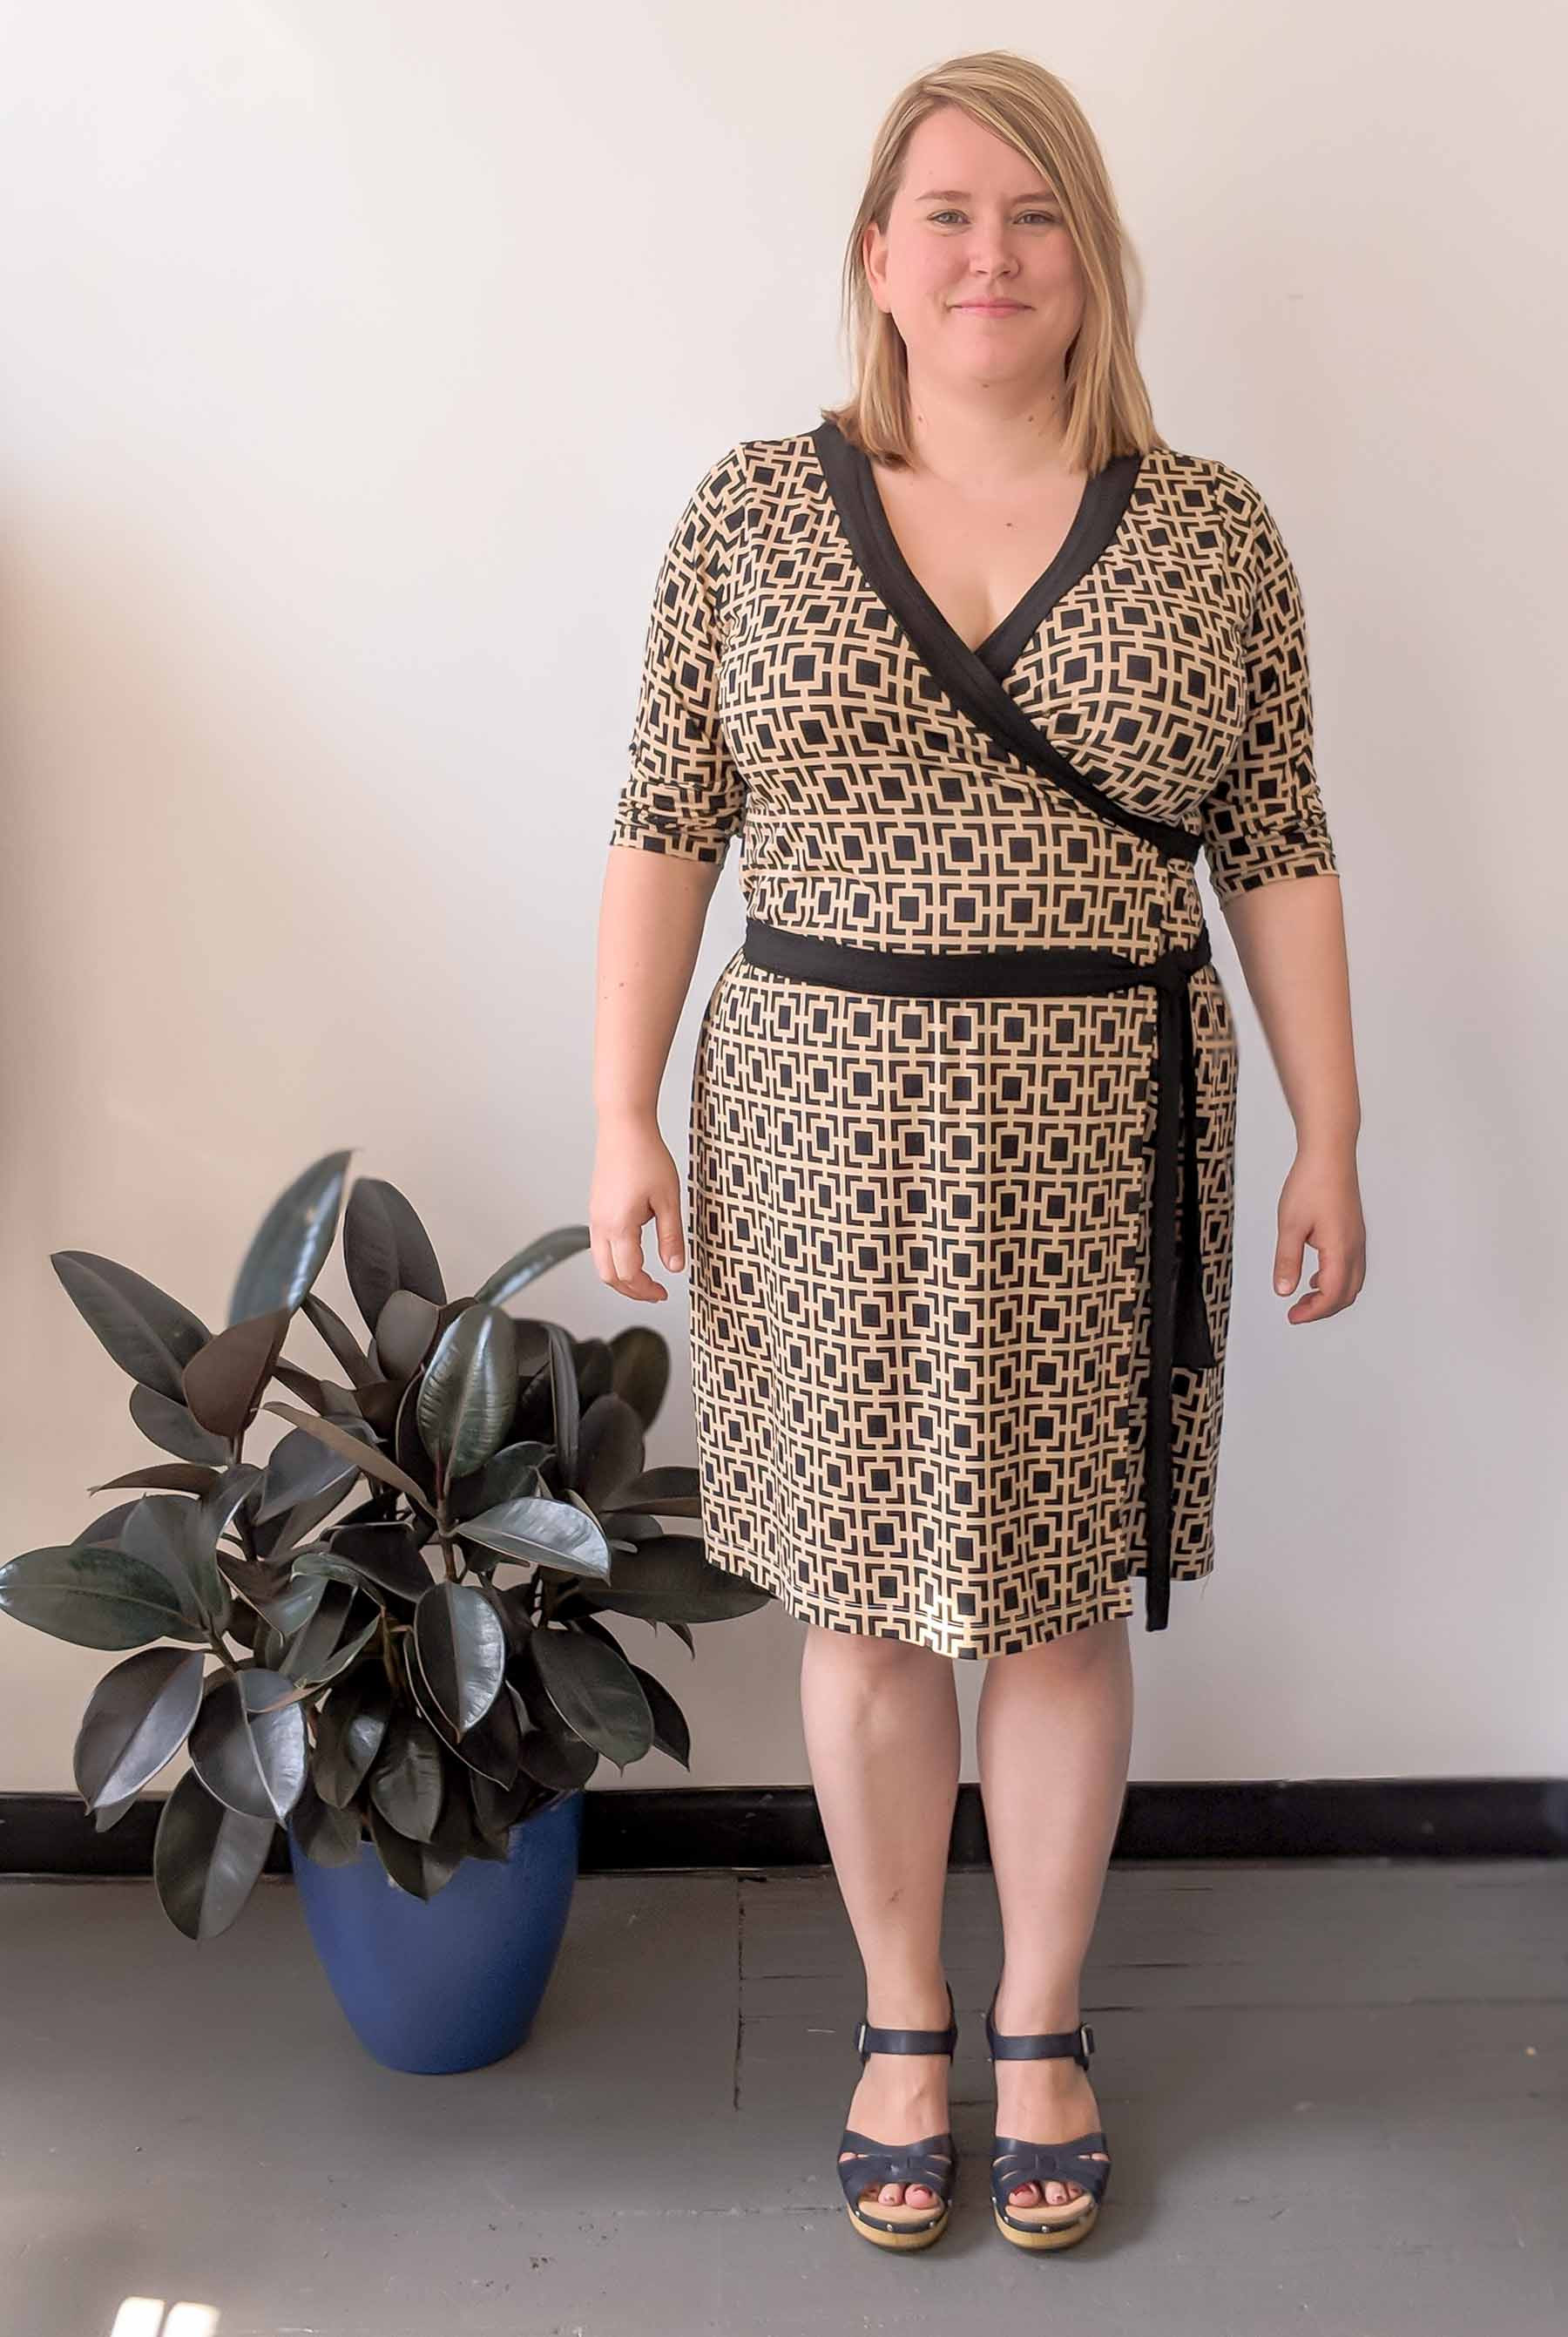
Here’s the visual comparison on the Appleton Dress as an example:
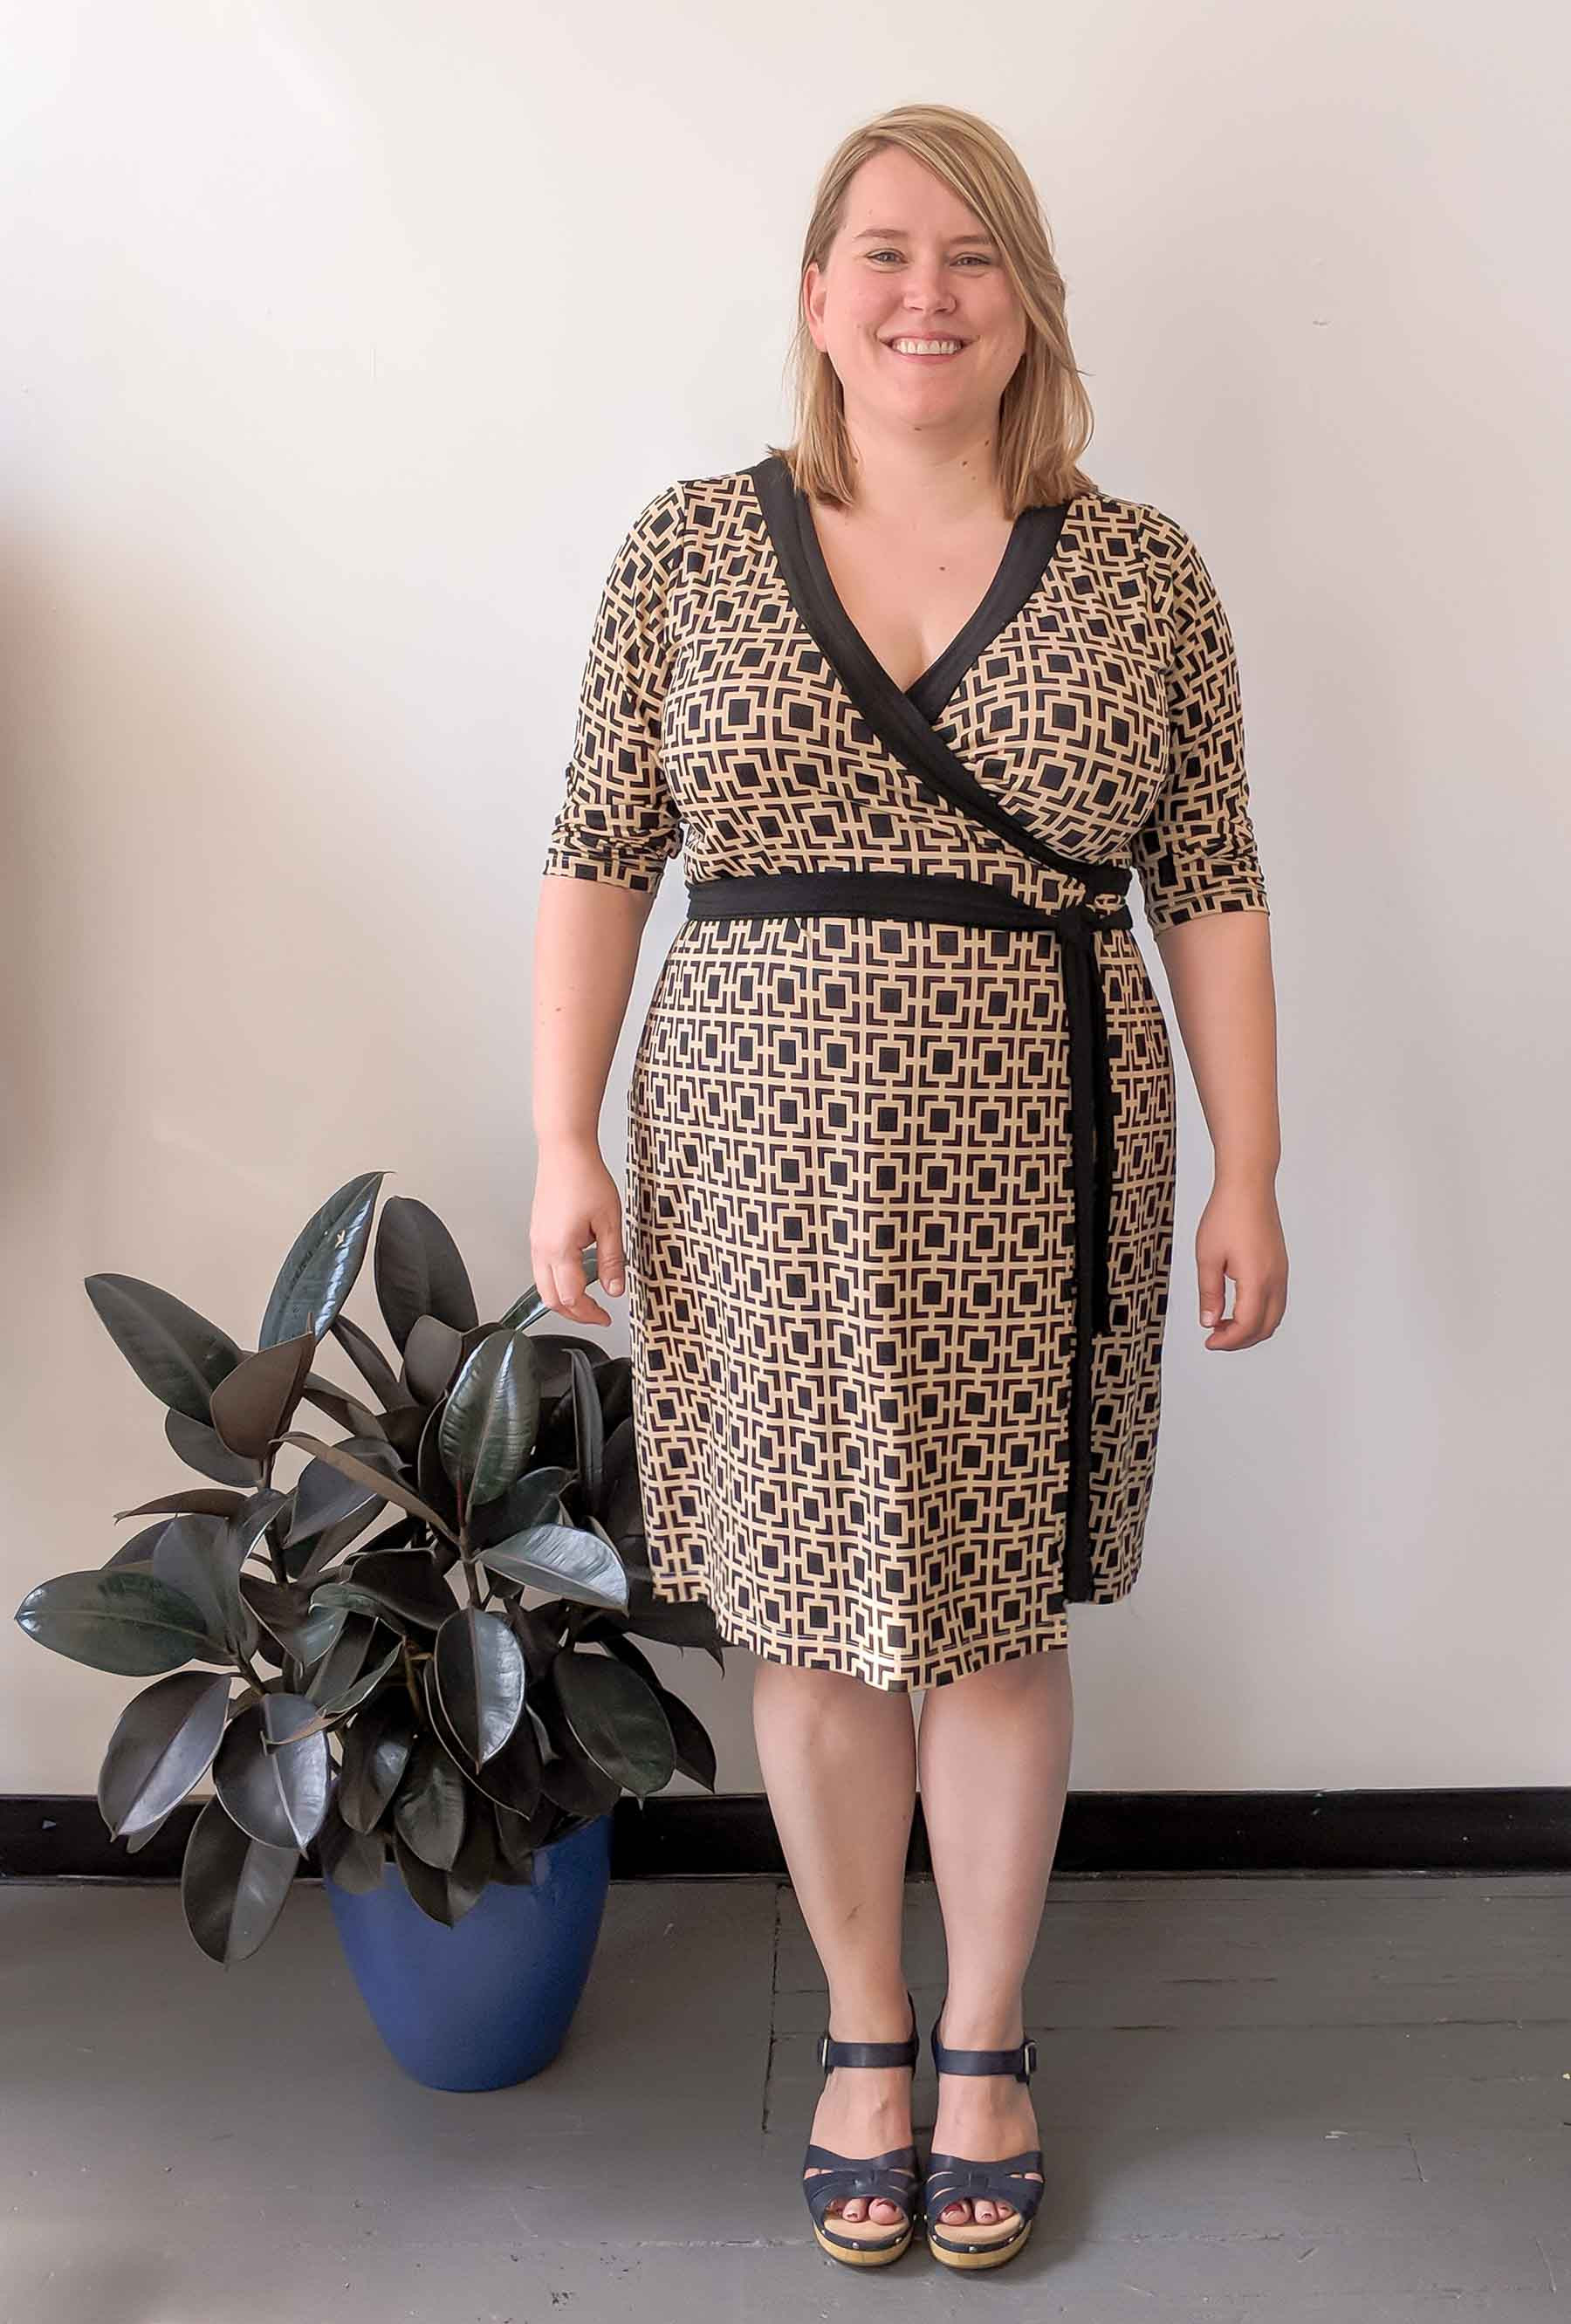 Alt text: Woman wearing the Appleton Dress with a high waistline, showcasing a flattering fit that accentuates her shape.
 Alt text: Woman wearing the Appleton Dress with a lower, more traditional waistline, demonstrating how it changes the dress’s silhouette and fit compared to the high waist version.
Finally, a significant advantage of a higher waistline is its ability to create a smoother skirt drape that skims over the tummy area. Lower waistlines often result in fabric protruding outwards more quickly from the body.
3. Skirt Waist Placement: Your Choice, Your Length
For skirts, waist placement is simply deciding where you want the skirt to begin on your body. The main consideration is that if you choose to wear the skirt a few inches higher than the pattern’s intended waist, you may need to lengthen the skirt to maintain the original hem length and proportions. Again, notice how a higher waist placement often achieves a more balanced and pleasing proportional look.
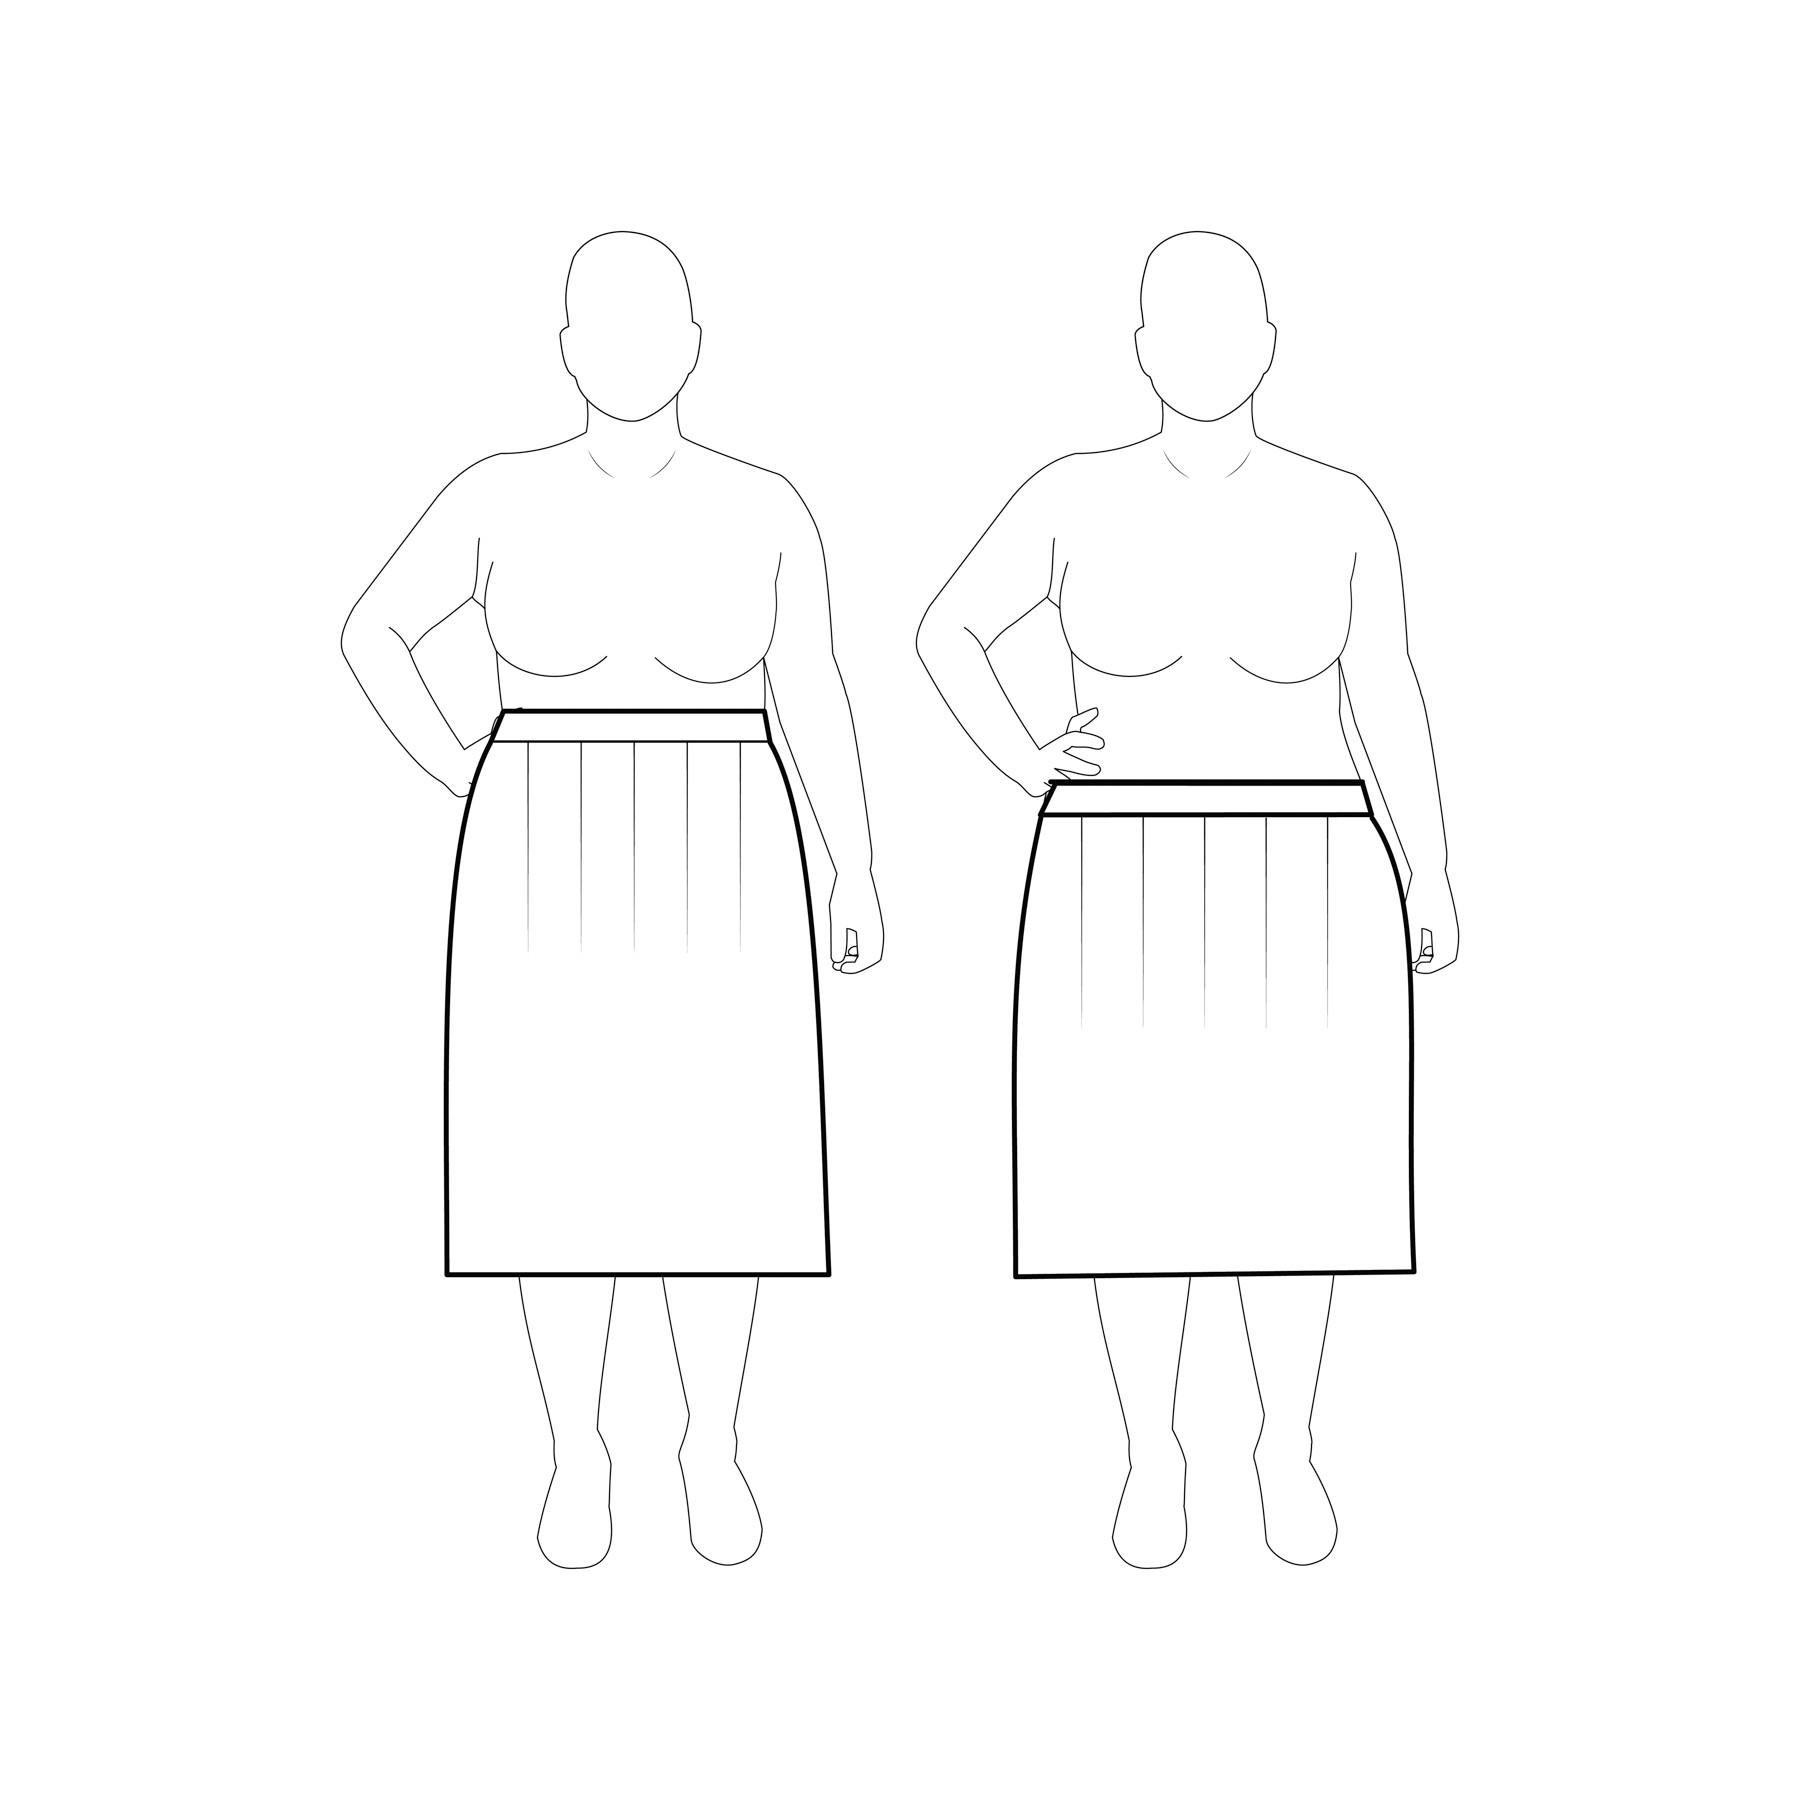 Alt text: Image demonstrating skirt waistline placement: a higher waistline on the left showing better proportions and a more elongated leg line, compared to a lower waistline on the right which can shorten the legs and alter the overall balance.
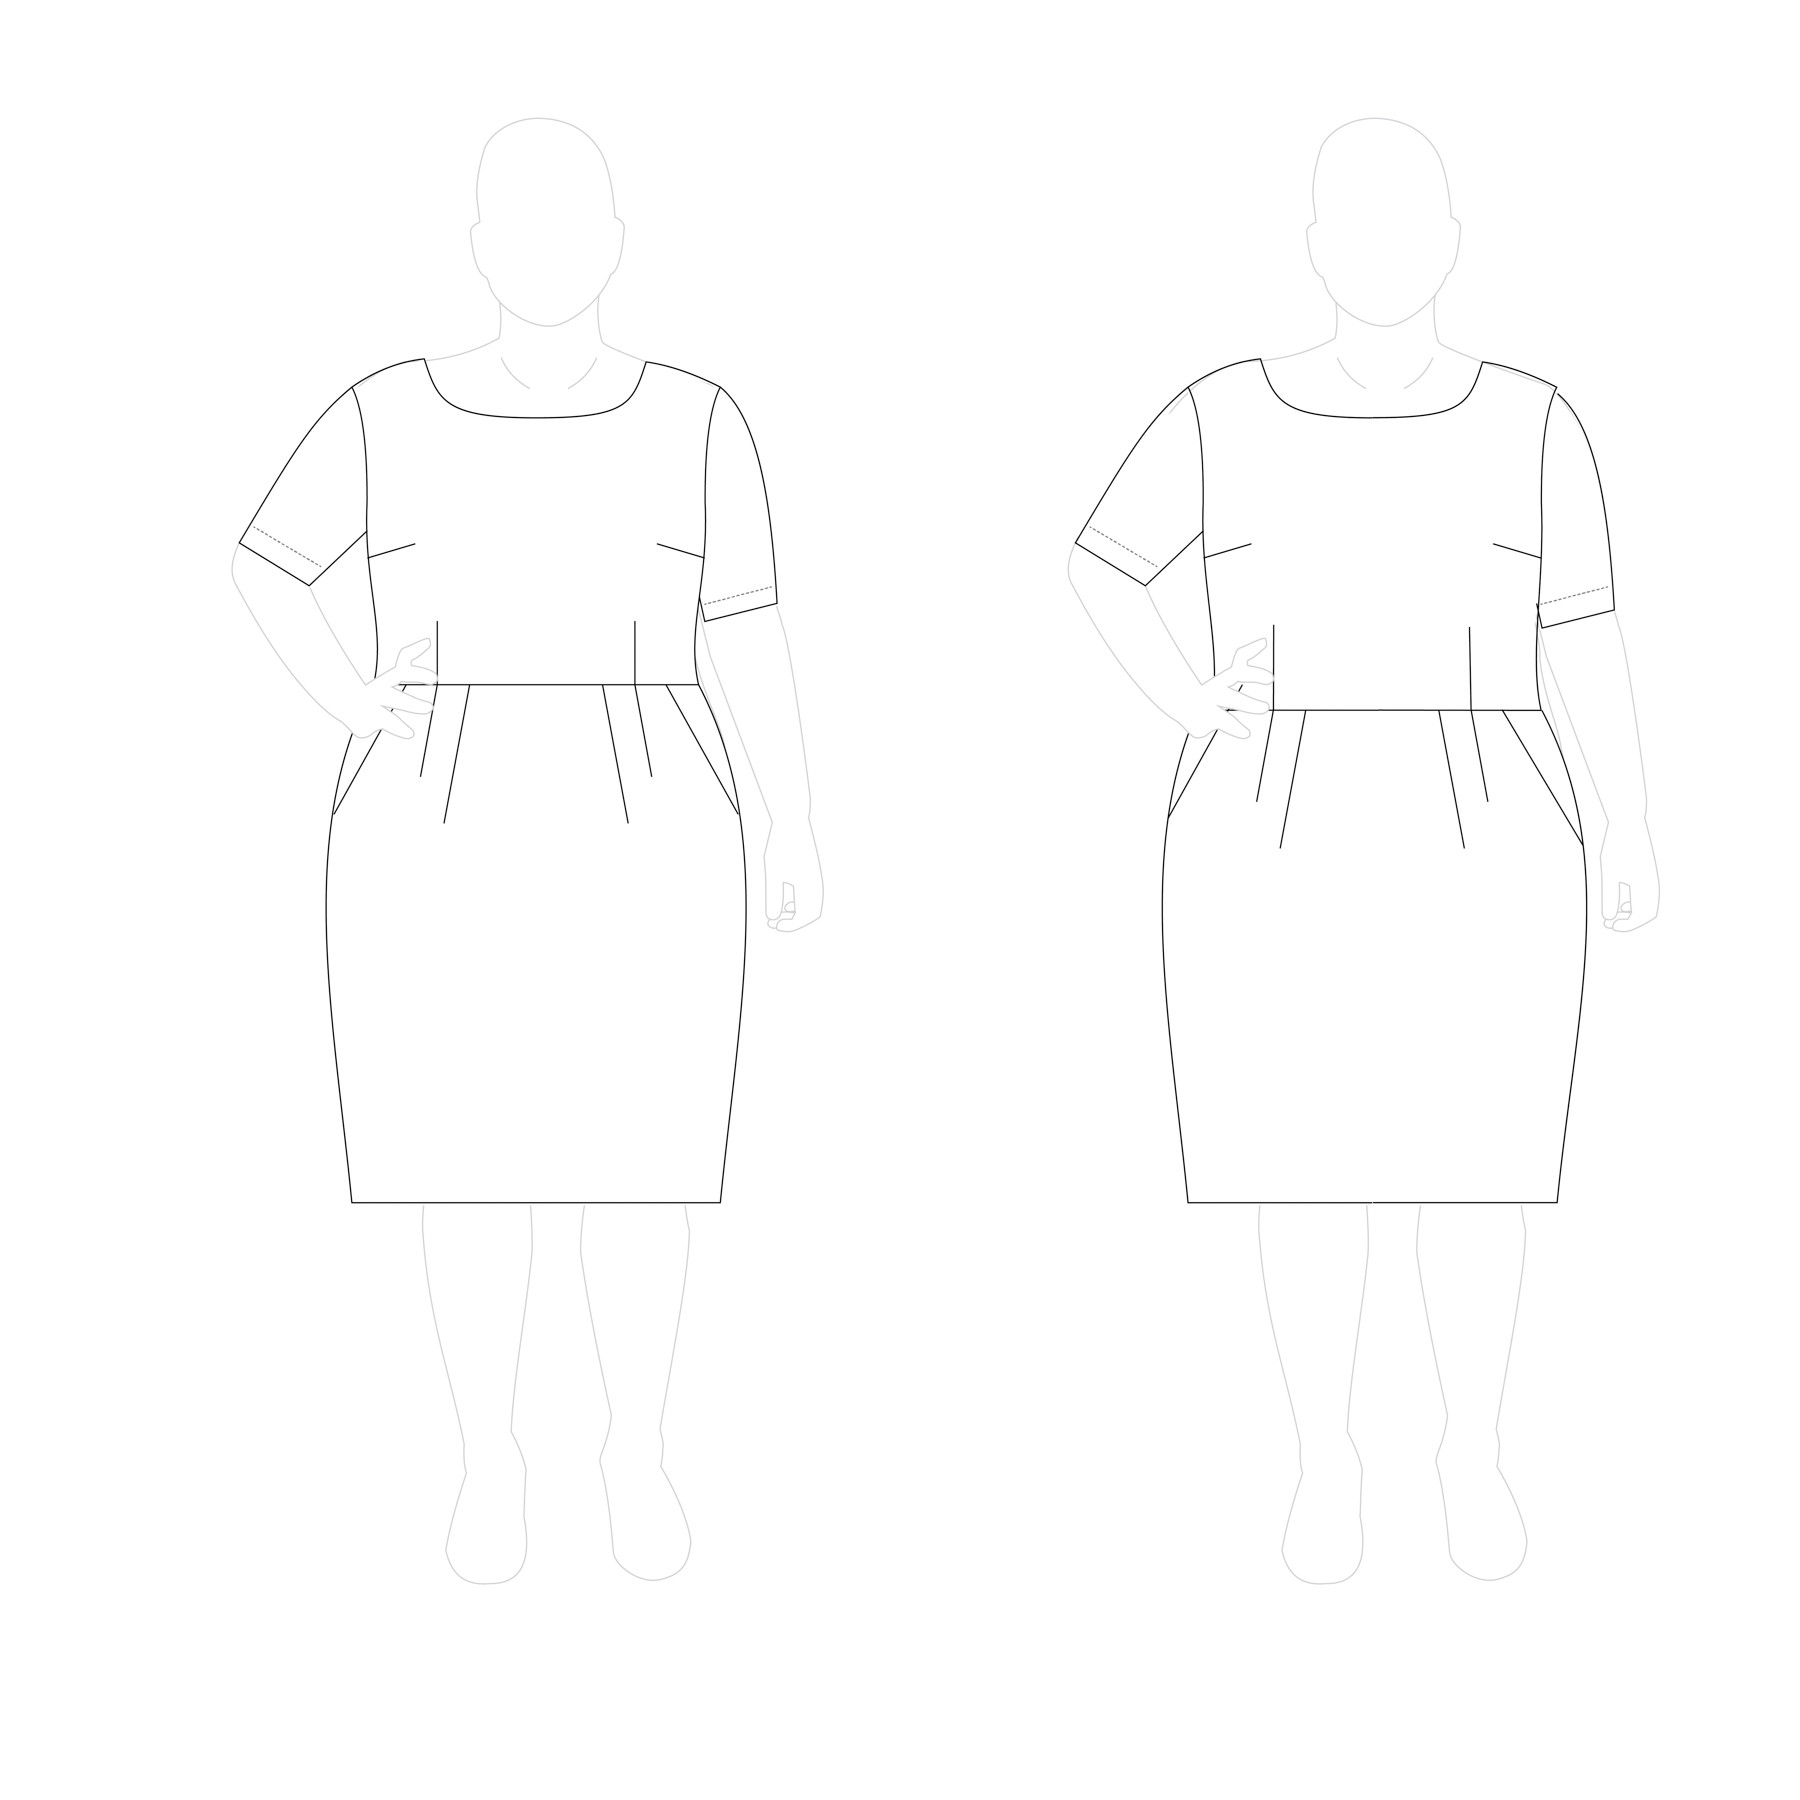
4. Dresses and Fitted Garments: Waistline Alterations are Key
Unlike skirts, dresses and fitted garments with defined waistline seams will almost certainly require alterations to achieve a perfect fit, depending on your chosen waist location.
Firstly, remember that waistline adjustments are common for everyone, regardless of size or shape. A designer’s standard waist height, measured from the shoulder, is unlikely to match every individual’s unique proportions.
Secondly, altering waist height is usually a straightforward adjustment, particularly if the pattern includes lengthen/shorten lines (as all Cashmerette Patterns do!). To raise a waistline, cut along the designated line, overlap the pattern pieces to remove the desired length, tape them together, and smooth out the side seams. To lengthen, repeat the process but spread the pieces apart and fill the gap with tissue paper. Keep in mind that adjusting the waistline will also impact the lower portion of the garment, potentially requiring corresponding adjustments to the skirt or lower bodice length.
Here’s an illustration of lowering the waistline on the Rivermont Dress. This adjustment would necessitate lengthening the bodice and shortening the skirt portion.
 Alt text: Diagram illustrating how to alter a dress pattern to lower the waistline, showing the sections where the pattern needs to be cut, overlapped or spread, and adjusted to achieve the desired waist position.
I hope this guide clarifies the process of finding your waist for sewing! Are there any other measuring or fitting topics you’d like me to address on the blog?